How I Made $228K Trading Only 30 Minutes a Day (Full Strategy)
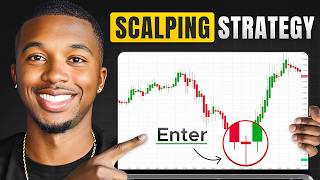
Trader Josiah Stewart shares his Squeeze Breakout Strategy, which he says made $228,000 in a year trading 30 minutes daily. The method uses a triangle pattern on 1-hour charts, trendline alerts, and entries on 1-minute breakouts with 2.5-3.5:1 risk-to-reward ratios, demonstrated live on NQ, ES, Ethereum, and Palantir.
Chapters
This strategy made me over $228,000 this year so far, and the crazy part is it doesn't take me more than 30 minutes a day to use. This strategy does not need a huge account, years of experience, and I don't need to stare at the charts all day. That's one of the reasons why I love it. So in this video, I'm going to walk you step by step through the exact checklist that I use to execute this strategy every single day, which allows me to catch these high probability breakout moves. I'm also going to show you real trade examples that'll make sure that you know the between A+ setups versus when it is not an A+ setup. So without further ado, let's get right into this. All right, so here we are on the charts. Now, this strategy is called the Squeeze Breakout Strategy. It is a breakout strategy that relies on momentum, volume, and following the overall trend. Now, it's a simple 6-step checklist that I use to personally trade this strategy, and it has allowed me to print money. And it doesn't matter what markets I'm trading in. I could be trading Forex, crypto, stocks, uh, futures, really anything. This strategy absolutely kills it for me. And I'm going to go over a bunch of examples of them on a bunch of different markets just to prove that to you guys. And these are actual trades that I have taken. We're going to go over those examples a little bit later on inside of this video, but I'm going to run through this checklist really quickly. We're going to go through it, then I'm going to show you exactly what all this looks like and means on the actual chart. Then I'm going to go through all the examples to make sure that you guys fully understand exactly what it is that I do to catch these squeeze breakout strategy setups. So the first step is I start on the 1-hour time frame. Now I can personally use regular candlesticks or Heikin-Ashi candlesticks. Now if I'm being honest with you, it's a lot easier to find these trends using Heikin-Ashi candlesticks, but if you're not familiar with Heikin-Ashi candlesticks, then using regular candlesticks is fine as well. But we're going to be on the 1-hour time frame. And basically all we're looking for is we're looking for price to form lower highs and higher lows at the same exact time. And what that ends up doing is forming a squeeze or a triangle type pattern. So what we're looking for, as I just mentioned, is we're looking for price to create lower highs. So imagine this is price, price comes up here, we're creating lower highs, right? So this high right here is going to be lower than this previous high. We're also looking for it to be creating higher lows. So this is the first low. Price could create a higher low here, then another lower high, then another higher low here. And then ultimately this keeps happening and price ends up breaking to the upside. This is what we're looking for. This right here is our high. This is another high. This high right here is lower than this high, which means we are making lower highs. Same thing right here. This is a low right here. This is another low. So this low right here is creating a low, a higher low than this low. That's what we want to see. And if you look right here, you can easily see if we draw trend lines and connect the dots, basically, that when we connect the dots on the top and when we connect the dots on the bottom, we're forming a triangle. That's what I want to see. That is that squeeze, because what ends up happening is price gets closer and closer inside of this triangle or inside this squeeze. And when it breaks out of here, it usually has very, very strong breakouts., and that's the moves that I am catching, and that's what's allowing me to print money with this strategy. So that's step 1. Step 2 is to draw your trend lines. Remember, step 1 is just to go on the 1-hour time frame and look for those lower highs and those higher lows to be formed. Next, you're going to want to draw those trend lines, basically connecting the higher highs with one line and also connecting the higher lows with another, which is the same exact thing that I did here. I connected the lower highs with this upper trend line, and I connected the, higher lows with this lower trend line right here, this white trend line. That is step 2, basically just connecting the dots at that point. Now the next thing, and this is one of the most important things that allows me to be able to trade this strategy with less than 30 minutes a day, is we set alerts here on TradingView. If you use TradingView, you have the option, which is one of my favorite things to do and use on TradingView, that is to set alerts. Now what I usually do is on the trend line, once you've connected dots, you can actually right-click on this trend line and press Add Alert. And what that'll do is you can actually set this up if you go to Notifications to notify you in app and to play a sound. So play a sound on my computer, it just makes a noise and I know, okay, price is at my trend line, so I should probably start looking at my charts. You can also check this here to notify you in app. So if you have the TradingView app on your phone, it'll actually send you a post notification straight to your phone. And that's what I use, that way if I'm out and about, if I'm hanging with my family, if I'm um, swimming in the pool, if I'm doing anything, I can get notified to my phone to be like, okay, now price is getting close to my trend line. Now it's going to be close to the time to start taking action and actually start taking trades. This is what allows me to be able to trade this strategy in less than 30 minutes a day. So that's step 3. Step 4 is we have to wait for at least 2 rejections on both the top and the bottom trend lines. And basically all that means is that we see candles moving away with force, and we'll go over some real examples of what that looks like so you guys know exactly what, uh, that is, what, what you're looking for. But in simple, you see how we drew this trend line to the downside where we had multiple touch points? So this is a touch point on this trend line, this is another touch point, this is another touch point, this is another touch point. Same thing on the bottom one, we have a touch point here, a touch point here, and a touch point here. Now basically these are all touch points. We need to see at least 2 of these touch points on the top and then 2 on the bottom trend line. That's what gives us a valid squeeze. If we just have— we have 3 touches on the upper trend line, but if we only have 1 touch on the bottom trend line, that's not a squeeze and that's not a setup that I would personally take. So we need to see at least 2 strong rejections on both the top and the bottom trend lines that we drew. Now step 5 is we're actually going down to the 1-minute time frame to look for our entries. Remember, this whole time we're drawing our trend lines, looking for our touch points, and adding our alerts on the hourly time frame. When we're entering, we're entering on the 1-minute time frame. So entry setup, we're waiting for a trend line break and a break of the most recent swing high slash swing low that touched the line, and we're entering immediately when both conditions are met. Now simply all that means is, remember, we're waiting for price to break out of our trend line but we're also waiting for it to break above a recent swing high, which would be right here, or a recent swing low, which would be right here. We're not entering the trade just when price breaks the trend line. Let's say we're looking for buys here. We wouldn't enter a trade as soon as price breaks above this trend line. It would have to break outside this trend line, and it would have to break above the most recent high that touched the trend line. So our entry would be above here., and we'll get into where we place our stop loss in a second. But you can place your take profit at recent highs and recent lows. But that's where we're looking for entries. And then vice versa for sells, we don't enter just because price broke below our trend line, right? We wouldn't enter right here. We have to wait for it to break below our trend line and below the most recent point that touched the trend line. So that would be right here. So then once it breaks outside the trend line, and below the most recent low test the trend line, we can enter for a sell opportunity here and target wherever we want to target and put our stop loss wherever we want to put our stop loss. But that is the entry criteria. Remember, we're going down to the 1-minute time frame for that. Now step 6 is for our stops, our stop losses, and our take profits or our targets. We're placing our stop loss just beyond the most recent swing high slash swing low before entry, and we're placing our take profit at the most recent 1-hour swing high or low. That's usually what I do when it comes to this strategy. Now I'll show you guys exactly what that looks like as far as where to place your stop loss. Remember, we're doing all that on the 1-minute time frame, and then for our entries, looking at the 1-hour time frame. So that's in simple my 6-step strategy that has allowed me to print money in any market conditions, in any markets, no matter if I'm trading crypto forex, stocks, options, no matter what it is, this strategy absolutely kills it for me. Now let's hop into some real examples so you guys can see what this looks like in motion and in the real world. All right, so here we are on NQ, which is a futures pair. We're just going to do this example on NQ. We're going to have examples on ES as well, on Ethereum, and we're also going to have examples on a stock called Palantir. So as you see, we're already on the 1-hour time frame. I mentioned to you guys that you can do this on the regular candlesticks, or you can do this on Heiken Ashi candlesticks. Right now I'm on regular candlesticks. I'll show you guys an example on Heiken Ashi candlesticks in the next example. But what I want you guys to see here is, you see, we have price trending to the downside. We're creating lower highs. We have multiple touch points. First high was here, lower high right here, lower high right here, lower high right here, another one, another one, and another one. So this is 1, 2, 3, 4, 5, 6, 7 touches on this upper trend line here, right? That's one step that we want. We need to see price creating lower highs on the hourly time frame, but then we also need price to be creating higher lows at the same exact time. And if you see here, we have one touch point right here, another touch point right here, another touch point right here, and another touch point right here. We have 4 touch points on this lower trend line right here. That is showing us that price is also at the same time creating higher lows. So we have our higher— our lower highs being created here, and then on the bottom trend line, we have our higher lows being created. And as you see, I already drew this trend line. Now, I told you guys that this strategy takes about 30 minutes for me to do, and that's because in the mornings, all I'm doing is looking for these trend lines to be formed. I'll draw out my trend lines, I'll connect the dots, I'll right-click on my trend line, set my alerts, and I'm walking away. All I'm waiting for price to do at that point is to touch either of these trend lines, because I know that no matter what price does inside of my trend lines, I'm not taking any trades. I'm not looking for anything. I don't care about any of the price action that price is making in between these— inside of my triangle basically that I made, or inside of these trend lines that I made. I only care because I'm only looking for entries when price breaks outside of my trend lines and breaks the most recent swing low or most recent, uh, swing high if I'm looking for buys. So I'll set my alerts, I'll walk away. Now let's say I get my alert to go off. So let's say we fast forward just a little bit, right? Let's say we skip forward. Price is still inside of my triangle, so I'm not looking for anything right here. I would— my alert would have went off. I would have gotten notified that price touched my trend line. So now I can come back to my computer, or I can check on my phone and be like, okay, we now potentially might have an entry. But as you see here, price broke out of my trend line here, but I didn't enter because we have to wait for price to break below a most recent swing low as well as outside of my trend line. In this instance, it would have to break below this most recent swing low because it's the most recent swing low that tapped our trend line. So this most recent swing low tapped our trend line. We put a— I usually put another line right here that lets me know that I'd be looking for sales as soon as price breaks below this area. And then once I have that, now it's a waiting game. I go down to my 1-minute time frame. I'm waiting for price to then come break below this white line. I'm setting my entry point right below that white line. Let's see as price moves forward. We still haven't got a break of that white line yet., and then price, price finally breaks that white line right here at 8:31 in the morning. Now for my entry, I told you guys this is where I entered at. Now the stop loss, if you guys remember from the checklist, is always above— if I'm in sells, it's always above the most recent swing high before I entered my trade. Now it's vice versa if I'm looking for buys. My stop loss is going to be below the most recent swing low if I'm looking for buys. In this instance, we're looking for sells. So the most recent swing low is right up here— sorry, the most recent swing high is right up there. So what I'm going to do is I'd have my entry here, I'd have my stop loss above this recent swing high up here, and then I'm targeting recent swing lows on the hourly time frame. So if I go to my hourly time frame, I could be targeting the swing lows that are right down here. I could be targeting this swing low, this one right here, or this one right here. Let's just say that I target the swing low that's right here, which is the most recent one on the hourly time frame. Let's go back to my 1-minute time frame. As you see, this is about a 3 to 2— 7, uh, 3.27 risk-to-reward ratio, which simply means that for every dollar I risk, I'm gonna make $3.27 on that trade. So let's say I risked $1,000 on this trade. If this trade hits my full take profit, I would make $3,027. And if I risk $10,000, I'd make $30,027. If I risk $100, I'd make $327. That's simply all risk-to-reward ratio means. But let's see how this plays out. Price sold down, continued to sell down, bought up a little bit. We can fast forward this., and we see price ultimately ended up hitting our full take profit here. And this is a winning trade. And that's all by following the simple 6-step checklist that I just pointed out for you guys and just went over for you guys. Now, this exact trade right here is a trade that I actually took live just a few days ago with my inner circle. Now, if you don't know what my inner circle is, you get to trade live with me every single morning, trading these strategies and trading any other strategies that I trade. You also get notified every single time that I enter a trade so that you could take the exact same trade that I had taken, the exact same stop loss, the exact same take profit. You get notified of all that. You don't only just get access to my trades, but you also get access to all of the information that I have learned over the past 8 years of day trading. That includes all of my strategies, all of my psychology tips, every single piece that has allowed me to become a profitable trader. In my inner circle, you get access to— you also get access to multiple other profitable traders. In there. We have 4 other extremely profitable coaches who are full-time traders who absolutely kill it in the markets, and you can follow along with their trades as well. We also have a dedicated trading psychologist, which, if you've been trading for a while or if you did not know, psychology is the hardest part of trading. And that's why for my Inner Circle, I know I needed to have somebody in there that would help my students and the members inside of my Inner Circle be able to master their psychology to ultimately beat the game of trading. So with access to the Inner Circle, you also get access to that trading psychologist that is inside of our Inner Circle. It's a bunch of things inside of my Inner Circle, and that's why the Inner Circle is always so full, and most of the time spots are not open. But if you're a serious trader that actually wants to be consistently profitable and generating 4, 5, sometimes even 6 figures a month with trading, my Inner Circle helps you get there as fast as possible. Being able to get mentored and helped one-on-one by profitable traders. So if that's something that interests you, and if you actually want to take your trading serious, to be able to trade live with us every day, get access to all this information, and get access to all the support in the world to become a profitable trader as fast as possible, click the link inside the description down below. Spots are always literally full. You can go to any of my YouTube comments and you'll see people complaining about spots being full. This is not a gimmick, this is not a game. I'm only taking on people who are actually serious about trading. And if that's you, if you actually want to become a profitable trader hit the link inside the description down below to have the opportunity to join my inner circle. I'll see you in there. Now, as I mentioned, this is the exact trade that we are taking inside of the inner circle on Tuesday morning. Now, this is all following the same exact checklist that we just went over. But let me give you guys a couple more examples of trades that I have taken so you guys can be sure to understand exactly what I did and how it's been able to generate me consistent profits. All right. So here we are on ES. We see the exact same thing. We're on the 1-hour timeframe. We have a rejection right here, a rejection right here, and another rejection right here actually, where you see we're creating lower highs. And then on the bottom, you see we're creating higher lows. So we have a low here, we have a higher low right here, we have a higher low right here, and we actually have a higher low right here. So we met the criteria of creating lower highs and higher lows at the same time. We have at least 2 rejections on both the upper trend line and the bottom trend line. As you see, our next step is to go down to the 1 minute time frame. Let's just hit this replay feature so we can go back and see exactly what it is that I was looking at. So we see price had rejected off of here, so now we have our entry point. So we know we're not just entering when price breaks below a trend line, but it also needs to break the most recent swing low that touched the trend line first, and then we'll get an entry. And that most recent swing low is right here, right? So once it breaks below the trend line and this most recent swing low, we'd enter ourself into the trade. So let's see here, we just got an entry right on this candlestick. You see this one that wick down? Our stop loss is always going to go above the most recent swing high if we're going for sells. In this instance, we are going for sells, so this stop loss goes above here because that's the most recent swing high on the 1-hour time frame— on the 1-minute time frame. But then we're going to go to the 1-hour time frame and look for our most recent swing low, which is right down here. That's what we're targeting. As you see, that's where my take profit is. This is a 2.6 to 1 risk to reward ratio. Now we can see how this plays out. Price continues to drop down, sell down, and you'll see that price ultimately ended up hitting our full take profit right here on ES, following the same exact 6-step checklist that we just went over. And this is on a completely different pair. Now let's go over another example. So here we are on Ethereum, which is crypto. I told you guys that I use this regardless of what market I'm trading—stocks, crypto, futures, anything, right? And here on Ethereum, on the 1-hour time frame, and we can see that price is trending to the downside and it's also trading to the upside. So we're creating lower highs and we're also creating higher lows at the same exact time. Now next, what we're looking for is an entry. We're looking for price to break above the trend line to the upside or below the trend to the downside. Now I want you guys to notice here, if we go to the 1-minute time frame, price already broke out of the trend line here. But the reason that we did not enter this specific trade is because price never broke the most recent swing low that tapped our trend line. If we look right here, I'll use a horizontal line. This is the most recent swing low right here. Price never broke that. Even though we broke out of the trend line, we still didn't take sales simply for the reason that price did not break below the trend line. So if you are trading this strategy, you cannot skip any of the rules. You can't just enter as soon as price breaks outside of the trend line. That does not work. We have to wait for it to break outside the trend line as well as below the most recent swing low. So let's just fast forward just a little bit because right now we're still waiting for price to break below this trendline to the downside. I was waiting for price to break towards this trendline to the downside so I can enter for sells, but then price actually ended up start— starting to buy up. So then I was looking for buys at this point. And remember, I have to wait for not only price to break above the most recent trendline but also above the most recent swing high. So this is the most recent swing high at this point. So I'm looking for buy opportunities when it breaks above this white line right here. So let's see what price ends up doing. So here, as you see on this candlestick, price broke above both of these lines, the trend line and the most recent swing high, which is that upper white trend line for me. So I would have entered right here. Stop— what, why did enter right there? Stop loss is below this swing low right down here. And then we're going to the hourly time frame and we're targeting some recent swing highs. So recent swing high is right up here. This is a 2.6 to 1 risk reward ratio, and as you see, this trade ended up hitting full take profit very, very simply. Now I mentioned to you guys in the beginning of this video that the reason why this strategy works so great for me is because when price is squeezing inside of this triangle or making this squeeze pattern, the closer it gets inside of the squeeze pattern, the further out it's going to break. As you see, we were in this triangle, in this squeeze pattern. And when it broke out of here, look how strongly it broke out of here. Look how big these candlesticks are to the upside in comparison to the candlesticks that were inside of this trend line. That just goes to show you that trading in the direction of the trend and using momentum and volume combined with breakouts is absolutely overpowered. And that's why this strategy has been able to print me money consistently. And this is trading crypto. Now let's go into another example just to truly solidify that you guys fully understand exactly what you're looking for, when to enter it, and when not to enter it. All right, now here we are on Palantir, which is a stock. Now this is the exact same setup that we just took on NQ, ES, and Ethereum. This is a trade that I had taken in July here on Palantir, exact same 6-step checklist, right? So we have multiple taps on our upper trend line, we're creating higher lows— sorry, lower highs on our upper trend line. Right here, right here, right here. We're also creating higher lows on our lower trend line. Well, a tap right here. Actually, the trend line starts right here, so we have a tap here, tap here, uh, tap right here, and a tap right here. Now next thing is I put my alerts. So I put my alerts on the trend line just so I can get notified when price is getting close to my trend line so I can start looking for entries. Now as price goes on, as you see right here at this 8 o'clock candlestick, we had a huge bullish candlestick, but we were on the 1-minute time frame. Well, I was on the 1-minute time frame looking for entries here. Now basically, we didn't just enter as soon as price broke above this trend line, but we entered as soon as it broke above the trend line and the most recent swing high, which was right here. So our entry was right here, our stop loss was below the most recent swing low, which is right here. And at this point, this is a little different example because we were kind of at all-time highs with Palantir, and it was targeting— the most recent swing high was all the way up here. This is the most recent swing high. But I figured that this stock specifically, that I didn't mind holding it longer, and I thought that it would kind of go much past its all-time highs. So I kind of ended up trailing my take profit. But in this instance, according to the checklist, we would target this high up here, and that's perfectly fine. We can go with this example. We were on our 1-minute time frame, entered the trade here, was holding this trade. We can see exactly how this played out. Now, as you can see, price ultimately ended up hitting full take profit here, and it actually ended up going up much further. Um, and I held it— I'm— I forget exactly where I'd gotten out for this specific setup that I had, um, but I held it a little bit longer. But this strategy hit TP fairly quickly and fairly smoothly using the exact same squeeze strategy that we just went over on all the other pairs. So now you've got the full squeeze strategy checklist. Just keep it simple, follow the rules. You can see exactly how powerful this can be, even if you only have 30 minutes a day. And if you really want to speed this up, inside of my inner circle, as I mentioned to you guys, you get live trading with me every single morning, and you also get to learn and follow 4 other profitable trading coaches. And you even get to work with our trading psychologist to fix your mindset. It's literally everything that you would need to become a consistent trader all in one place.. Now you can find the link for that inside the description down below. Now here's the thing, a good strategy is really only half the battle. The real question is, how do you turn this into multiple 5 figures a month, even if you're just starting with a couple hundred bucks? And that's where prop firms come in. And I put together this full video right here, walking you step by step through exactly how I use only $500 and scale up with prop firms to build serious income. So click this video right here. It's the perfect next step to help you take this strategy that we just went over and actually scale it into huge profits. I'll see you in this video.