I Made $10,000 Day Trading Today And Here's How You Can Do It Too
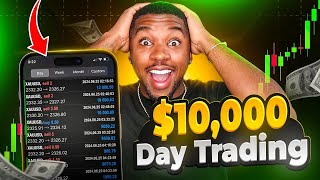
Josiah Stewart made $10,000 day trading Dow futures using a break-and-retest strategy on Heiken Ashi charts. He watches for volume slowdown and doji candles at support and resistance zones, then sizes positions with tiered take-profits and stop-losses placed below the retest.
Chapters
So today I was able to make a little bit over $9,900. So in this video, I'm going to break down exactly how I did it, show you guys the exact trade, my exact thought process during the trades, that you could have copied this exact trade. Because if you had copied this exact trade, you would have made at least $990 on this trade, which is obviously some pretty great money. So let's hop right into this video so I can break down this trade in depth, show you guys the exact strategy that I use, and the same strategy I use literally every single day to do the same exact thing. Every single day, and we're just gonna have a good time. If you're excited, smash the like button. Let's hop right into this, man. So bada boom bada bing, today we traded YM. Now I'm big on NQ, right? I trade NQ a lot, which is NASDAQ 100, and I'm big on NG. Those are my two top pairs. But today NQ ran off without me. Actually, NQ didn't give me a setup, and NG ran off without me, so I was left to deal with YM. I'll trade YM sometimes, but she has really— it's like a love-hate relationship I have with YM, and I'll show you guys exactly why. So if we're looking at the charts right here, right, so obviously I knew we were trying to catch buys on this. Um, keep in mind, like I mentioned before, like, I was able to make around $9,000, almost $10,000 on this trade right here. But if you guys use just one contract, which is the least amount of contracts you could use, you would have made at least, um, $990 on this same exact trade, which is super, super dope. Um, that's why I wanted to make this video and kind of just show you guys exactly what it was so that you guys can, after watching this video, go tomorrow, look for the same exact setup, and do the same exact thing over so you can make yourself $900 just from watching a YouTube video. But, um, the reason I said I have a love-hate relationship with YM is because every single morning, if you guys did not know, inside my inner circle I have a live call, um, and I go over my setups. We'll trade live, we'll hop into trades live together. And every single time I mark up my charts for YM, because like I said, I tell everybody, said inner circle, exactly what I want price to do and what I'll do when it does it. I wanted price to come right down here into this zone right here. So we had a nice support zone literally right down here. I said, chat, right, keep in mind, let me rewind this, right? So this is all we saw, right? I'm saying, guys, if price comes down into here, I know it's going to reject off here and we'll be able to catch a beautiful buy to the upside. But on the other hand, you guys know at 8:30 Central Standard Time that's when the stock market opens. So that's when indices go crazy. So if we kind of do this forward a little bit, this is that 8:30 candlestick. I don't allow myself to trade the 8:30 candlestick because, to be honest with you guys, it's freaking scary and it does whatever the heck it wants to do. Um, and it just— it's super, super— it's a lot of volume. A lot of times you can get wicked out. But the reason I have a love-hate relationship with YM is because it literally always does exactly what I want it to do right at 8:30. And if you're in my Inner Circle, every single day when I mark up YM, it does this over and over and over again. But my trading plan and my trading rules don't allow me to trade it, even though I know YM is going to do this every single freaking morning. My Inner Circle is still able to like make money on it and stuff like that, which is cool, but me, I can never trade it, and it just basically laughs in my face. That's exactly what it did today. It literally tapped and freaking kissed the zone right here. Kissed it perfectly, wicked off of it drastically, a huge push to the upside here, and blasted up. Now this right here could have made me even more money than I actually made on my actual trade if it had given me an entry here, but it never gave me an entry and I couldn't trade it because it was at 8:30, as I mentioned before. Now I keep mentioning my Inner Circle. If you guys want to get access to my Inner Circle, I'll leave a link for inside description down below. Spots have literally been full up and it's been— actually, the Inner Circle has been closed for the past couple weeks. But at this, the beginning of this video, or at the start of this video, when I upload this video, I will open up spots just for y'all to be able to get in. So click the link inside the description down below. In the Inner Circle, you get access to, like I said, daily live calls. I also send out every single one of my trades so that you guys can hop inside the trades with me. That includes all my crypto trades as well. We've been absolutely killing it on the crypto side. We have 3 other coaches in there who are extremely profitable, real traders. These are not like some gurus and like that. These are people who I actually take their trades. They're all in there. We have coaches, we have a dedicated trading psychologist, we We have a bunch of stuff. You get all my courses, obviously. You get my Golden Arrow indicator. You get literally every single thing you need to become a profitable trader. Um, and that's why literally the spots are always full in the Inner Circle. But if you're fast enough, click the link inside description down below right now to try and secure your spot inside the Inner Circle and join us so that you guys catch all these trades. But nonetheless, having back onto these charts right here, YM does this literally all the time. So once I saw this, I knew that it broke this London high session right here, which is another strategy that I talk about a lot. Um, it broke this London high right here. Let me actually do this really quickly so you guys can see it, what, how I'm seeing it on Heiken Ashi, because you guys know I only trade Heiken Ashi. So we see it broke through here, and I knew if price came above here and came back down to retest this previous resistance zone, that that would turn into a support zone, because that's what happens. Resistance, when it's broken through, price comes back down to it and it turns into a support zone. Vice versa with um, support zones. When price breaks through support zones, price comes back up into it, and most of the time it turns into a resistance zone. So price is able to sell off of it, and we're able to capitalize on that. Now, the reason I was looking for buys is because if we zoom out, we can see YM was in an uptrend here, right? We see YM was going to the upside. I knew all the other indices were going to the upside as well. We've actually been making, um, record highs. Like, we're at all-time highs on NQ and ES, which is super, super cool. Um, YM has been lagging behind a little bit, but but I still knew we were in for a nice bullish day, especially the way it was holding this support zone down here and how it rejected off this support zone. So I just wanted a chance to hop on the wave, and I knew this would be a perfect opportunity to hop into the wave once it broke above this zone here. So it broke above the zone here, went to the 15-minute time frame, it broke above it, um, it kept going up, and then it came back down to retest the zone. We finally get our retest. So once we get our retest and tap to our zone, now I need to wait for an entry candlestick. Now I don't enter as soon as it taps the box. If I enter as soon as it taps the box, I can easily be wicked out. Price could have literally just came all the way down here randomly. That's why I like to wait for my entry signal. And my personal entry signal is I like to see volume slow down. So we see how we have 2 candlesticks that have now touched the box. I like to see that. That's volume slowing down. Then we have a 3rd candle that's wicked just slightly outside the box, which I'm perfectly fine with, especially on these break and retest zones. Now I'm a little bit more strict when it's actual like resistance zones or support zones, but when it's actually— when it's break and retest of those zones, I'm a little more lenient as far as it coming out here to retest or breaking out the box just a little bit. So here we still see it's not breaking out too much. We have an even smaller candlestick, which means volume is slowing down even more, which is what I love to see. And then we got a doji candlestick. Now I usually hop in right on these doji candlesticks. Sticks. But I just wanted extra confirmation just to be sure that it actually was going to reverse then and that it wasn't going to wick down just a little bit more. So I didn't end up hopping on this— hopping in on this first doji candlestick. But that's usually when I see a doji candlestick at any of my zones. If you see, um, if you notice any single one of my trades, if I see a doji candlestick on a reversal zone, on a change of direction zone, on a resistance zone, on a support zone, that's usually where I enter in because that shows uncertainty. It gives me a nice early entry, but it also makes me confident enough to know that there is uncertainty at that zone, which means I can be confident knowing it probably is going to reject at that area. But I didn't end up taking that. It ended up wicking down just a little bit more. It didn't, it didn't make a lower low or anything, which is also cool. Um, and then as soon as it started coming, I really wanted to just hop into it as soon as it broke this doji candlestick. So as soon as price broke this doji candlestick, I was going to hop into the trade. But what ended up happening is that price had started moving very, very fast. If you see in the next candlestick, started moving very, very fast. So I hopped into the trade and I actually was able to get filled and actually in the trade a lot earlier. Well, not a lot earlier, but a couple ticks earlier, which paid off a little bit more, earning me a little bit more money on the top end. And obviously, as I always do, I just put my stop loss right below that low point right here. Um, and then I have my, my, uh, TP levels. So most of the time at these TP levels, I'm not taking any take profits, I'm not moving my stop loss to my stop loss to break even most of the time. Sometimes I will be doing that, but for this trade, I was confident holding it throughout it without moving my stop loss to break even. Plus, I was out and about, so I wasn't actually really monitoring the trade that much. But I still wouldn't have moved it to break even realistically, just that I trusted this trade for the most part. And it actually paid off in the end because it actually consolidated for a little bit here right before touching TP1. It looked like I was actually going to lose this trade. I was starting to sweat a little bit. I was like, dang, I'm actually about to lose this money I risked around $3,000 on this trade here. Um, it came down, it was just consolidating in there. Then we finally got a nice push to the upside, still was consolidating. Um, and then we finally got some volume right here and it broke through, hit our TP1 very nicely, instantly pushed up again to hit our TP2, then came back down just to retest this low point right here as you see, and then rejected off of it. Going back up to the upside here and absolutely blasting off, hitting our full take profit. Now our full take profit was around 99 ticks, um, so that's— I just targeted the last high right here. Now pro tip, I never target the complete high, so I never match it up perfectly. And the reason I don't do that is because sometimes price can reject just slightly off of the last high. So I always put it a little bit lower than that last high. And this is why I try to explain to you guys, it's okay doing that because sometimes it's better than price coming all the way up here, stopping right before your TP, and reversing that back down. Um, that's how I like to trade. That's how I always set my take profits, and it works out and pays off for me because there's been so many times where it's hit my take profit, then completely reversed. And if I had it at the complete top tip of the recent high, I would have not made any money on the trade. Um, so that's just a pro tip that I like. Now, um, the end of the day, if I held this trade realistically, I'm not gonna lie, I would have made a ridiculous amount of money here on, um, YM. But I'm okay with my basically $10,000 day. No complaints with that, literally at all. Now, a couple things to note on this specific trade, and things for you guys to take into your own trading, is when you are— when you do see a lot of volume coming into your zones, whether it's a support zone or resistance zone, you see a lot of volume coming down into it, don't be shy or nervous to wait a little bit longer for the volume to slow down. I told you guys I almost always enter on this doji candlestick right here, but I saw it was coming down pretty strong on this zone here. I wanted to make sure that it actually will respect it, so I didn't want to hop in here on the first type of uncertainty candlestick. Instead, I waited a couple more candlesticks, and then I waited to see if it was going to break this first candlestick, initial candlestick that I was actually going to enter on. Once I saw I was going to do that, hop into the trade., and I was feeling a lot more confident about it actually rejecting here. That saved me so many different times. I just wanted to kind of share that tip with you guys because a lot of people come to me and say, um, I have my zones, it gives me that candlestick, and then I hop into it and I instantly lose the trade. And that's because most of the times it might be a lot of volume going to the zone. Now I don't really do that too much if it wasn't a straight shot down into my thing, if it was more like a stair ladder stair ladder— it's crazy, it was more like a staircase down into it, something like that— then I would take that first doji. But if it's just a straight down arrow into my zone, sometimes I'll wait for that little bit of consolidation before hopping in. That'll help you save a lot of money and help you not lose as much or get wicked out as much inside of your trades. But anyways, that is the end of the video. Hope you guys enjoyed this breakdown here. This was an absolutely fire trade, super, super smooth trade, no complaints at all. Like I said, I sent this same exact trade out. If y'all don't believe me, I'm sure there are some people watching this that are in the Inner Circle. They'll comment down below and say, yeah, I caught that trade, made $100 million freaking dollars, um, or however much money they made. But I literally sent this same exact trade out after telling my Inner Circle exactly what I wanted it to do, which is super dope. And that's literally what I more so do every single morning. Um, but if you guys want to get access to the Inner Circle, click the link inside the description down below. Check to see if there are spots. Sometimes spots will be closed and then they'll open back up. So you can periodically check inside the, um, that link to see if there will be spots. But if you guys enjoyed this video and got value out of it, I'd appreciate if you guys smash the like button. If you guys are not subscribed, I don't know what the heck is wrong with you. Personally, I wouldn't do that. I would highly suggest that you subscribe and turn the post notifications on so that you don't miss out on bangers like this. And if you enjoyed this video but you're struggling to draw your support and resistance zones, I made a video specifically for you. It's right here. I highly suggest you watch this video right here. I'll show you how to draw the perfect support and resistance zones so you never really miss out. You never draw the wrong ones. You never end up losing trades because you don't know how to draw the right support and resistance zones. I'll see you in this video.