Creating a Makerspace at Home with Joshua Manley Modulo app
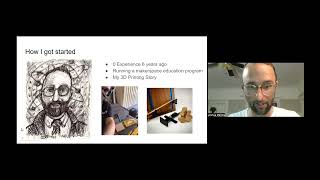
Joshua Manley walks through setting up a home 3D printing makerspace on a budget. Start with a Creality Ender 3, filament, and free software like Cura and Fusion360. Short feedback loops at home accelerate learning faster than classroom access alone.
Questions this video answers
Creality Ender 3 — about $189 on Amazon
$18.99 for 1 kg filament (Amazon listing referenced)
Autodesk Fusion 360 — free for hobbyists and students for the first year
Cura — open-source and free
$189 off coupon for the course; valid for 72 hours (time-limited)
Chapters
Hello, everyone. It's so great to see you here today. I am Manisha and I am the co founder and director of Modulo. Our company makes learning at home easy. So we help families find really great curriculum and apps and other resources to support their child learning at home. We match them with teachers for any subject they would want to learn, whether it's robotics or French or math or. What would be another fun subject to learn? How to make a 3D printer. Minecraft. Yeah. And we. What did you say, Russell? Exactly. Education. Minecraft, education, coding. And we really search the whole world to find the nicest teachers we possibly can who are really great asking questions instead of giving answers, and can help kids reach their full potential. So we are so excited today to introduce Joshua Manley, who has just started a new company to help people start makerspaces in their home. And I am just so excited about this idea because not only can I imagine people starting a makerspace in their home, but starting a makerspace and inviting friends to join them and come over to their house and make cool stuff. So I just really didn't know very much about how to start a makerspace. And so I thought, let's invite Joshua and he can tell us all how to do it. So, Joshua, would you like to share a little bit more about your new company and then tell us how to create a makerspace, a home?
Yeah, absolutely. Thanks so much for having me, Manisha. I'm really excited to be on this training session. So I'm going to. I'm going to go through an actual presentation. I've got it. But for starters, you could just see my face here on the screen. Yeah. So I'm Josh. I was. For the past six years, I was the director of education at Urban Workshop. It's a. It's a large do it yourself makerspace in Southern California, teaching everything from woodworking to metal working to welding to laser cutting to 3D printing. Hence the transition here. And I recently moved up north from there, and so I'm really excited and have been excited for quite some time about the possibility of bringing 3D printers home. There was a big movement in libraries. There's a big movement in schools to actually bring that technology and make it more accessible for everybody. But what a lot of people don't realize is, is that there's a massive opportunity to bring the printers home, primarily because they're very inexpensive and the resources to use them are abundant. So I identified this. This kind of hole in the market here a couple of years ago. My company's called Sliceform. We teach students everything they need to know to build their printer correctly, to calibrate it, to level the bed, to do all the little tips and tricks and things that make it super dead simple to use through CAD modeling, which is a 3D modeling and 3D design software used by professional engineers, hobbyists, kids. Right? I taught kids as young as nine how to use this software. And I'm thinking, I'm thinking that realistically, kids that are 5, 6, 7 could already be tinkering around on some of this equipment because it's all visual, right? It's like, you don't have to. It's not like coding where you have to go, oh, what am I doing right here? The language of three dimensional modeling is in 3D, so. So you can kind of get a sense of it on the computer screen at a much younger age. So I'm really excited to teach this stuff. I'm really excited to introduce the concept of Makerspace and bring that idea home to people. And I think it really has the power to transform the learning, enjoyment, fun. It almost feels like going on a major walk when you're making something. It's got a magical feel to it. So I'm excited to bring that home and show how it can unlock, like, success in the home in science, math, engineering and just tinkering, having fun, building stuff. So let's see here. I'll just take it away. I'm going to share my screen here in a second. What's that?
Six? I'm six.
You're six, so that's perfect. You know, you can tinker around right now I'm going to, I'm going to walk you guys through. Well, let me just open this presentation up. Let's do that. Alrighty.
So.
So first I will not share it. I will put it in a slideshow. I'm going to share my screen here if I can. Screen share, come on. And I'm going to share screen number two, I suppose. Alrighty. Can you guys sort of see this presentation? You can see that we're all good. All right, good. So who's this training for? This training is for beginners. This is for future engineers, future scientists, future makers, people who love to tinker. People that have that like, you know, I want to figure this out. This is kind of a neat thing. When I, when I originally designed this course, I was thinking I had a specific idea in mind. It was like people who like to bring learning into their homes. And the reason I talk about those people the most is because there's all these creative ways that you can work with a 3D printer which I'm going to talk about through this entire presentation, which bring learning into the home and make it fun, exciting, interesting and kind of addicting, which is really cool because, you know, TikTok's pretty addicting. So if you can compete with that, you're in a good spot. All right, so what am I going to give you in this presentation? I'm going to try to give you the exact blueprint for getting that 3D printer set up, knowing which one to purchase, and then walking you through various ways to actually use it in your home. So I'm going to be getting fairly, I say technical, it's not technical terms that I'll be using, but I'm going to give you the step by step blueprint. If I can do it here. What I, what I aim to do is take you from. I have no idea what I'm doing. I don't really know. 3D printing is to subject matter expert. Not quite. That's a bit of a joke if you guys know the reference. But I'm not going to take you to subject matter expert. But I think I can get you from, from not knowing anything to understanding enough to know what you need to do to make this a reality in your house. All right, hopefully you guys like that dog photo. I see some laughing and giggling. I love it. Okay, so one important thing, this training is only going to work if it's something you're willing to take action. Right? So a lot of times when I was teaching in the maker space, it was really easy to get kids to take action on things because you're in the shop and you have the tools and you're kind of passing them along. That's is not going to look good over there. I'm looking away from the screen, so I'm dragging that back over. Pardon that. So it's only going to work if you take action. So I'm going to give you guys the blueprint. I'm going to tell you guys what you need to do to succeed. I'm going to give my best recommendation for what printers you should buy. I'm going to basically walk you through exactly how to set it up starting today. But like I said, it's only going to work if you go out and actually do it. Couple of the objections I get right from the beginning. One of them is, but I don't have a lot of money. And here in the next couple of slides, I'm going to show you that actually not a problem. There is some money involved in buying the original equipment, but it's not nearly as much as you think, or at least as much as the common public thinks. You're not going to need a science or engineering background. This isn't so technical that you can't figure it out on your own. There's a lot of excellent, high quality resources available now. You can utilize those. You do not need a fancy background of any sort. As long as you're the type of person that likes to tinker and can figure things out as you go, which I assume most of you are, then you can figure this out and you're not going to need a full time effort. This isn't going to, this is not going to be something that takes forever to figure out and forever to get set up only to end up in a trash pile on the side. So, overview. So a little bit about myself. I told you guys in the beginning, I'm Josh. My co founder Jake isn't here. He's flying back to the UK right now. He's actually the face of a lot of these videos. He and I worked together for six years at the makerspace before branching off and starting this company. So like I said, I'm Josh. I was the education director and workshop where I taught thousands and thousands of students as young as 10 how to use a table saw and I like to say as old as 91. Our oldest student was 91. So from 10 to 91 how to use table saws, miter saws, welding equipment, build, get their hands on stuff and do it. I also have a background in science. I studied pharmacy and I have a couple of publications in that world. Studied pharmacy and then I went to New York City. So I was in New York City for a number of years running a science education business. So this, this is really my opportunity to give back in from, from all of those worlds. So you're going to learn a little bit about the sciencey side of things. You're going to learn a little bit about the makery side of things, right? And then we're going to go from there. So what is a makerspace is going to be the next portion of this? I'm going to talk very briefly about what that even means. I'm going to talk a little bit about what 3D printing is. There's a lot of high quality resources online. I'm not going to beat it too much. I'm just going to say a little bit about it and I'm going to give You a walkthrough of how the makerspace and 3D printing come together to work in your home to get you guys learning really cool stuff and printing right away. And then in the end, I'm going to give you some tools and tips and tricks and a couple of free giveaways to make it even easier. So how I got started. So I had no experience. I was running a science tutoring company in New York, and then I followed my significant other out west, and I closed my science tutoring business down. For some reason, I had an itch, a desire to work with my hands. So six years ago, I didn't have any experience in this world at all. And I tell you that so that you know that this doesn't require expertise of somebody that's been doing this for their entire life, right? So I started from nothing. I. I figured it out as I went. I bought the printer. I'm going to talk through with you guys, and. And I just kind of tinkered around until I got it. So I was running that education program. And then 3D printing was interesting. So how I actually got into 3D printing was I had a problem. That problem was when I was working in the wood shop with kids. The dust that comes off of the table saw is pretty bad. For some reason, there's no connector that fit my specific table saw. So there's a vacuum that you can hook up to the back of the table saw, and you plug the connector into the vacuum and you pull the dust out. There wasn't a connector for it. I searched everywhere. I bought something on Amazon. I bought something else on Google. I asked around locally. I went to the wood stores. Nobody had the adapter. I thought, this is crazy. How can the adapter not exist to plug a vacuum into my table saw to make this dust problem go away? I struggled with the problem for three years. Three years into working at the makerspace, I said, enough is enough. I'm buying a 3D printer and I'm making my own part. So I bought a 3D printer. And again, I'm going to walk you guys through kind of how I did exactly what I did in detail. But I bought a 3D printer, and I made a connector that fit the hose and the table saw, put them together, and it worked brilliantly. I threw those up for sale on ebay, and they sold really well, right? So I sold these connectors that probably cost me five or ten cents to make on eBay for 20 bucks. And that was kind of the light bulb for me. Like this is not a technology that's just fun. This is a technology that has the opportunity to solve real world problems right now in your house, in your business, in your lives. That was like, that was, that was it for me. I was hooked. So what is a makerspace? So makerspace is a community centered workshop, right? Everybody comes together, learning and tools, kind of all housed in one spot. At Urban Workshop, we used to say people come for the tools, but they stay for the people, right? Because when you're digging into these things and you get stuck on a problem, it's nice to have the Internet, but it's really nice to have somebody next to you who says, hey, I know that problem. I have that problem that you have right there. So makerspaces bring those two things together. They bring tools and people together, and that can be in a variety of different ways. Right? I took this photo from the Internet. That's actually a pretty cool, fun looking, collaborative makerspace they got going on right there. But I, you know, wanted to go from there. So what's a 3D printer? So I know a lot of people have heard of 3D printers. I'm only going to talk about one type of 3D printer and I'm not going to get technical about it because that's not the goal of this presentation. But essentially all a 3D printer is, is, it is a metal. If you guys can see there's a metal, there's obviously the yellow plastic piece there. There is a little piece of metal above it and a heater. The heater melts the plastic and puts it down in layers and builds a three dimensional model up in layers. So this is a process known as additive manufacturing. You start from nothing and you add and you build up in layers to it. There's, there are many, many other types of, of 3D printing. This specific type of 3D printing is the one we're going to talk about today again, because I don't want to confuse anybody and I want to make it as simple as possible. But know that that's a whole rabbit hole that you could go down. But I don't recommend it, for starters. So this type of printing is called FDM filament deposition. Like I said, it just builds it up. And that's unlike something like sculpting, right? If you took a rock and you're a sculptor and you wanted to turn the rock into something else, you would chisel pieces of the rock away. That's a process called subtractive manufacturing. So this is a type of additive manufacturing. There's a major. I kind of targeted this to homeschoolers. But really what I want to say is this is for any beginner who wants to bring a 3D printer into their house and. Or teach other people how to do it as well. There's this major opportunity in homeschool, and I kind of hinted at it in the beginning, right? So homeschooling is this model where integrating 3D printing actually makes a lot of sense. For one, when you have a 3D printer at a school, a number of problems arise. You have tragedy of the commons problems, right? So somebody comes in, they break their printer, it doesn't work anymore, and nobody knows how to fix it, right? Because whoever set the printer up is long gone, and the machine techs are impossible to get. Nobody knows who's in charge, right? So you end up with this problem where in schools or libraries, you have 3D printers that either don't work or that people don't fully understand how to work. So I thought that's kind of a strange thing. So one. One thing about having a 3 printer in your house is it's exactly like having a paper printer in your house. If you're printing a piece of paper in your house. Participants can now see my screen. Could they not before. Hope you guys. Could you guys see my screen? All right. Zoom's just making stuff up here. I don't know what's going on. It was like, participants can now see your screen. It's like, okay, okay, good. So you have 100% access to your machine. So you. If you guys had to print a piece of paper, if you had to walk to the library every time you wanted to print a piece of paper, it gets pretty annoying pretty fast. So people decided, how about I just buy a printer for my house so I can print pieces of paper right away, right? Printer on demand is a big deal. The same thing applies for 3D printing. Having a printer on demand, when the ideas come to you, right? When the modeling idea comes to you, when you want to make that thing right now is a huge deal. The second thing is tinkering on demand gets you ahead of people who only have access to these things in local makerspaces, libraries, and schools, you've got access to yours all the time. That means you're learning all the time. You're figuring this stuff out constantly. So it's a. It's a real game changer if you can tinker on demand. And I found. And I'm sure any. Any other teachers in here know the same Thing that the best way to learn is through feedback. The quicker the feedback loop, the quickest quick you can understand whether or not your idea was any good, whether or not your prototype made sense, whether or not your object is workable, right? The quicker you can figure that out, the quicker you can adjust and the faster you learn. It's why when you're going golfing, you know right away if you're a bad golfer, right, you take one swing at the ball, doesn't go where you want it to go, that's instant feedback. You know, you know for sure you're not a good golfer, or you or what you need to fix with golfing, it's the same exact thing when it comes to learning. If you can shorten that feedback loop for learning, if you can get the object in front of you in minutes instead of days or months, I would argue the same thing is true in businesses, where businesses. This substantially decreases the amount of prototyping time in businesses. But the quicker you can learn from that feedback, the quicker you learn in life and the further ahead you're going to get. And this compounds over time. Another idea I really like is compound interest, right? So if you focus on things that get better over time, that you learn over time, and you're constantly dedicated to those, you get a heck of a lot better over a long period of time than somebody else. And the last thing is portfolio. This is all stuff you can put in. You can take really nice photos of this stuff. You can put them up on your Instagram page, you can put them up online, you can show them to your friends, and at the end of the day you have a portfolio. So if it's college you're trying to get into, if it's a product design job you're trying to get, if it's maybe it's even a competitive school of some sort, I don't know what it might be. But you have real tangible things that you've made yourself. You can build a portfolio out of those things in a matter of minutes. That's going to set you apart from the crowd. So those are the real reasons. I think there's a big opportunity in homeschooling to get this going. So how do you actually recreate a makerspace at home? There's really only three components. There's the tools, right? There's the education and there's the people. Does that make sense? Tools, education, and people. It's really not a lot here. So the big thing I want to emphasize here, when it comes to the tools Education in people is that the three of them are coming together for the aha moment. The aha moment. I saw it many times in person. When a student makes a part on a 3D printer, you cannot take their eyes away from the printer. It's like magic. You stare at it and I'll tell you the phrase. If you guys haven't 3D printed anything, when you first do, I want you to note that moment, you're going to look at the printer, and it feels like magic. That magic moment is the moment that unlocks the rest of it, right? So everything that we're talking about today, this is the biggest secret, right? Just giving it away right away. So the biggest secret is the quicker you can get to the aha moment, the quicker you can get to learning this stuff and building it and growing and getting better over time, right? And it happens the moment you see that print. So for starters, what are we going to do here? So we're going to talk about the tools, the education, and the people. So the most important thing, obviously in the beginning here for you all, is going to be tools. Now, when you Google 3D printing and you start to go down the rabbit hole of 3D printing, you enter the world of pain, because there's a lot of different 3D printers. There's a lot of different options. There's so many choices, it becomes almost impossible to narrow it down. So I'm going to make a recommendation on a printer today that is the best place to start tools. And this is what it actually costs. The 3D printer there on your left is called the Ender 3. It's got the largest community of makers using it in the world. It's $189 on Amazon, right? It's almost exactly the price of an inkjet printer. As a matter of fact, my inkjet printer, which I really like, is an Epson Ecotank. You can fill up the liquid in it. It was $200 more than this. So that's just a printer, right? The filament itself. So filament, I haven't really talked a lot of filament. So filament is just plastic. It's a fancy way to say plastic. That's 1kg of filament, and it's $18.99 on Amazon. That is enough to make a lot of 3D prints. So for $207, I don't know if you can see the bottom of the slide here. I think it's 2. Yeah, 207. 99 today, right? You can buy everything that you need to start 3D printing at home. The software that I use is called Fusion360. Again, I'm going to walk you through each of these slides. I'm also going to share the slides with all of you who come. I'm going to, I'm going to share all this, the whole slideshow presentation with you. So if you missed some notes and you can't remember, I think we're also recording it. So if you miss notes, it'll be recorded and I'll also give you the slideshow. So all this will be there. But the software that I recommend is actually a professional CAD modeling software. CAD just stands for Computer Assisted Design. It's how you make three dimensional objects on the computer. The software is called Fusion360. Fusion 360 is free for the first year for hobbyists and for students. So if you're a student in a school and you can prove that you go to that school, they'll give the software to you for free. If you're a hobbyist, they'll just take your word for it. So either of those licenses are completely free for one year. This, like I said, it's important. What I see a lot of people doing is they go for a slightly lower level CAD software. One of the big ones is called TinkerCAD. TinkerCAD is really neat for getting started, but anybody who's ever done anything with programming knows it's kind of like scratch. It's good for the first month, it's good for getting some initial ideas, but you have some diminishing returns later. So if you ever want to make really cool, more complicated stuff or transition and do stuff that's, you know, more like other types of machining that isn't just 3D printing, it's going to be on a software called Fusion360. So I really highly recommend that you start on a professional software. Take a little bit of extra time to learn it and it'll pay dividends down the line. And the last bit of software that you need is a slicing software. So you've got the 3D printer, you have the filament, which is the plastic, you've got the CAD software, which is how you actually make a model. And you've got the Cura slicing software, which takes the three dimensional model that you've made and cuts it up into layers. It slices it, hence the name slicing software. Right? So it cuts it up into layers so that your computer knows how to read those layers and actually make them because your 3D printers on a coordinate system and it will just kind of go around following the coordinates it's given. So that's everything that you need to get started right there. Like I said. 207. 99 on Amazon. I think I just had this on there yesterday. And You've got a 3D printer at your house. This is a kit build. So I'm going to get into the details of how to actually build this kit in this presentation as well. Looking good so far. How we doing? Yay. Liking it. All right, so hopefully I've already convinced you it's cheaper than you think. Right? That's the biggest objection I get. But isn't 3D printing really expensive? No, it's not. What else do you need? PC or Mac? You need a computer with a little bit of computing power if possible. Now I have not a Chromebook. When I originally did this presentation, Chromebooks were no good for using Fusion 360. However, Fusion 360 now has a model of their software that's compatible with a Chromebook. So it's browser based. You don't have to download any software and they're kind of entering that market. But if you've got a more powerful PC or Mac. I run this design software on a 2011 MacBook Air. It doesn't run great. Oh, I heard somebody, I don't know who I heard it doesn't run great, but it will run. So you're going to have to kind of test that over time. So hopefully you've got a computer of some sort. You're all, I think probably watching on a computer and that'll be good. This is the actual link to the page. Again, I wanted to prove to you guys that it's not so expensive. Right. So this is. This is the link to the page. This is exactly the printer I would buy today. This is a matter of fact, I have it right behind me. I'll show you guys here in just a second.
Second.
But. 180 bucks. 7,000 reviews. This is. This is the one to start. And this is on Amazon. Now. It might be different. I know. Armando, you mentioned Mexico. I don't know about the difficulties of shipping them to Mexico, but I guarantee they are. It is possible to get them there as well. This is the filament that I recommend. It's got a nice. It's got a nice cardboard packaging here. So it's a little bit recyclable. It's 1 kg of filament, about 2.2 pounds, which is a lot of filament you'll get. You'll be printing for probably a couple of months at least before you run out of your first spool of filament. And when you do run out of first spool, it's pretty exciting because it means you're making some really cool stuff. This is the Fusion360 software. You're not going to be making any models that complicated to start, but you might be making them down the line, especially if you're like Russell and you're starting at 6. And the last bit of it, this is what the CURA software actually looks like. Right. So this is. And I'll go into more detail about each of these things, about how to download them and where to find them and things like that as the presentation goes. But I just wanted to give you guys a visual, intuitive sense of what the heck we're actually talking about here. So this is the software that you pull your three dimensional model into, slice it up again, slicing software and turn it into something that's. That's makeable. Other tools that are nice but not needed. I come from a manufacturing background now and so getting things. This is a kit build. This ender 3 printer does not come fully assembled. It's something you have to build. So it's kind of like Legos. I think that's a huge benefit because it teaches you about all of the individual components and how they actually go together. By getting your hands on this, it's almost like you're maintaining the machine before you even started using it. So I think I would not start 3D printing with a printer that just works out of the box. Instead, I would highly recommend that you build this. It's really simple, but we've got some video tutorials on it. There are tons of tutorials on YouTube as well. But a couple of things that you might find useful when you're making this the first time, something called a framing square, to make sure that the two pieces that you put together are actually square can be a big deal. Some digital calibers, if you guys are going to want to make things that have very precise measurement options. These digital calibers are also only about 10 bucks online, maybe 12. They're not super expensive, they're very accurate and they're the best friend of every 3D printer I know. And then you get squeeze clamps down there to hold everything in place as you're screwing in some nuts and bolts. So that's kind of like an extra set of hands. You can use the framing square. You can really keep everything there. All right, so to recap. Not too much, right? Just a couple of things that you need. You need a 3D printer. You need the filament, you need the software to make the three dimensional models, and you need the software to turn those models into something that you actually hold in your hands. Any questions about that so far? Good, good. We'll have more. I'll go through the details of this stuff as we go here too. So the next big piece of the puzzle is education. So how do you actually do it? Right, so the first question is how do you assemble and operate your printer? The second one is how do you, how do you actually make a model? The third one is how do you turn that model into something that can actually be printed? And the final one is how do you make everything from scratch? So there's a big open source community of people who have pre made stuff online. So if you're trying to solve a problem, somebody else may have solved it, you might just have to download their model and make it. But at some point in your 3D printing lives, you are definitely going to want to make your own models. So education, how to assemble and operate your printer. I'm going to give you a couple tips and tricks. Again, I'll share this presentation so you'll have these. One, the top review on this, or maybe it's the number two review is exactly right. So this top review of the Ender 3 3D printer is take your time, build it, don't just assemble it. Make the build quality right and your prints will turn out. So the single biggest frustration people have with 3D printer or with 3D printing is that it, you know, fails. It doesn't work in some way. So what I'm going to talk you through are some of the strategies you can use to not make the mistake of assembling it wrong or assembling it incorrectly. And I'm also going to give you the biggest tip I can possibly give you to have the most success with your friends. So right here, so that you saw the squeeze clamps earlier and you saw the framing square earlier. That's how they actually come together. We've got a framing square between parts of the frame. We clamp it down there and then we tighten the bolts and we know for sure we've got a square frame. So starting with a square frame is a big deal. I actually have a video attached to this. This is part of our video assembly series and it should be playable. So when I share this with you, you guys should have full access to this playable video. At minute 7:14. We show you exactly how to do that. Right. So when you're setting up your printer, make sure everything's square. Well, I don't really want to play that right now, but there we go. But it is playable. And this one's going to play as well. But I'll pause that. Okay. Number two is these come with power supply units that work in Europe and anywhere that works on 220. And they work in the States. Anywhere that works on 110. Right. So on the back of the power supply unit, when you get this printer. Absolutely. Do not forget to switch that power supply unit to the correct power whether you're in US or Europe or wherever it happens to be. If you forget that and you plug it in, it will fry your printer. You will fry your printer. So that I have that minute 8:58 of the assembly of the base. We show that in detail as well of exactly how to do that. It's pretty simple. Take a screwdriver, you toggle it between one of the two, and you're good to go. When you. There's some belts and pulleys that keep things moving around. That's another area where I've given you a video as well as exactly when in that video it appears where we tighten some of those belts and pulleys. You got to make sure those are tight. Not too tight, but tight enough to make sure your prints are going to go well. And the final tip is the single most important thing when it comes to 3D printing. On the left, you can see the Spaghetti Monster, right? We do not want the Spaghetti Monster. You will get the Spaghetti Monster, I promise you, and it's totally fine. That's how we learn, right? Feedback. That's some pretty negative feedback right there, right? You get this part and you go, that's absolutely not what I wanted. What did I do? Right? So the single biggest tip that I can give you when you start to make this stuff at home yourselves is leveling your bed and making sure that the nozzle is exactly the right height away from the bed is critical. And it's the single most important factor for having successful print. If that nozzle is too far away, the plastic can't stick to the bed and it just falls off. If that nozzle is too close, it digs into the bed and you have a whole sort all sorts of other problems. Your part doesn't come out right. So that's the single biggest tip I can give you. And I gave you the entire video again as a part of this presentation for how to get your first layer of your 3D print. Right. That's it. Critical to success. I think it's about a 20 minute video. Guys are welcome to watch it on your own time and I won't play it, but we'll go on. All right, so how to assemble and operate your printer. Those were some quick tips and tricks. There's a lot of stuff online and obviously we have a full course on how to do that as well, but both of those are available. Next up is actually how to make your 3D model. Right. So this is where the Fusion 360 software comes into play. And again, in this presentation, I've given you kind of exactly where to find it online. So you go to Fusion360's website. You want to. This, this one right here is free for hobby users. But I also told you guys that there's a education version. So make sure that you're getting either the hobby version that's free for one year or you're getting the education version that's free for one year. And this is a big deal because this software is pretty expensive. It used to be tens of thousands of dollars a year when it was SolidWorks. Now it's about $500 a year for Fusion360. So it's, it's still a $500 value. So make sure that you get your free hobby license and or education license and that you don't mess this part up. I wouldn't want you guys spending $500 that you don't have to spend, especially the first year. So you sign up, there's this little thing. It's going to prompt you to sign in. Just below it, it's got a Create account thing. Again, I put this presentation together for you guys to be able to go back to it and actually click through it to do it yourself. So you're going to create an account, create a fresh account on here. And this, when you've got everything downloaded and working, you're not going to have that part on your screen, but everything else on that screen is going to be what the Fusion interface looks like. So you're going to see all kinds of little buttons, creates and modifies and assembles and sketches and things like that, which you're going to start to play around with. And that'll be your canvas. That'll be where you'll have all your fun on the computer before you actually make your model. There are tons of online resources, like I said so YouTube is always a good resource for any of these things. You can go on YouTube and you can, you can type in the specific problem you have. You can type in CAD modeling, you can type in Fusion360, you can type in any of these things. Reddit's got an awesome community on the ender 3 specifically. So if you've run into an issue, there's awesome information on that Reddit thread. People have gone in depth about exactly what that issue might be. So you're not completely stranded having to throw your hands up and wonder what's actually going on. And this is silly to me. I can't believe in the six years I was in the makerspace how many times people ask me how to do something that you can Google. Right. It's like, google it, Google it. It's an amazing resource. I can't believe it's not people's first line of defense in a lot of things. So in this case, when I say Google it, type your problem into Google. I can't do exactly this specific thing. And you'd be surprised about how many resources come up to fix your specific problem. I kind of like to do a two prong approach where I will Google it and I'll look for text resources and I'll go to YouTube and I'll look for video resources and I'll use the two in combination and I find that works best for my learning style. But that'll have to be unique to you. None are 100% comprehensive. And that's what I'm talking about there at the bottom. You're going to have to kind of piece that together and figure some of that out. So how to make your model again, that was step two. That's Fusion 360. That's an interface that you're going to have to spend some time playing around with. But step three, how to turn that model into something that can be printed. So as we talked about before, the way to do that is with slicing software. So you take your three dimensional model and you input it into some slicing software. And in this case we're going to use a program called Cura. Cura is open source, it's free, it's made by, I believe. Yeah, ultimately, who makes the Makerbot, which is a much more expensive 3D printer, but they make free open source software. And this is awesome. It's free forever, right? It's completely open source, it's completely free forever. You don't have to worry about paying for this in the future. And it's Amazing. It's really, really excellent software. So you go onto the Ultimaker website, you download CURA completely for free. Whatever version you download is totally fine. Right. When you open up Cura, you're going to have to tell it what 3D printer you're using. The 3D printer that we had that we were showing guys earlier is the Creality Ender 3. Right? So the Creality Ender 3. Just make sure you've selected the Creality Ender 3. And when you open Cura, all of the settings are preset for the creality ender 3. So you are ready to import your model into the whole thing. I think I did that. Yeah. So in the next one I'm going to show you here you go to open file, you bring your model in just like that, right? And now you scroll to the bottom here, which I have. I'm kind of blocked on my screen, but you scroll to the bottom, it says slice. You slice this thing up, you save it to a micro USB and you are ready to turn your printer on and print. That's it. So assemble your printer, CURA CAD software, and then you enter this little micro usb, you turn your printer on, you put the little micro USB into the tiny little slot that's on the front of the machine, and you press Go. And hopefully you remember to level your bed as we talked about before, right? So you don't get a spaghetti monster. And if you didn't, well, Spaghetti Monster it is. They're not so bad. All right. And that was just another touch there. Okay, so, and this is also a walkthrough. So you're gonna press the little light up button on the screen here that says print from tf and you're actually going to press go. And the printer will begin working its magic. So a lot of information really quickly. Do we feel we have a general handle on this? Feel like we can do it. Feel like this is something that's achievable? I hope so, because it's definitely achievable. And I believe in you guys to be able to make this happen at home. So the last bit of it is how to actually incorporate science, engineering, and math, your curriculum. And this, this part's really cool. So I. I learned best by getting my hands on stuff, right? So I never could sit in a lecture, just absorb information. I had to go. If I was studying chemistry, I had to make a chemistry model. I had to build it, I had to figure it, I had to put it in my hands. If it Wasn't tangible. I had a really hard time figuring it out. So this is where the real key to unlocking the success in education, I think, lies. So there's this website called Thingiverse. Thingiverse is the Internet of 3D printed things. It's a site that has thousands and thousands and thousands of pre made models for everything. You can imagine every, maybe not every problem you have, but a lot of the little problems and things that you have at home or things you didn't even realize were a problem, they're going to have it, right? But the big thing here for 3D printing at home is you can just type in, in the search bar in their top, right? Thingiverse.com, you type in chemistry and out pops a little 3D printed periodic table of the elements. You want to talk about the elements. What a cool way to do it, right? So type in chemistry into the top there and you'll find hundreds and hundreds and hundreds of models that people have made pertaining to chemistry. And so you can start to incorporate. You don't have to wonder what it is that you're going to make. You don't even have to make it from scratch. You don't have to do it yourselves. You, you can make it like your own Lego kit. I think that's pretty cool. Next up is physics, right? Who doesn't like drones? Every kid I've ever met wants to build a drone. Right? There it is. You can 3D print just about every part of that drone there on the left there's a couple of electronic components, right? So there's a little bit of electronics work you have to do, but not much. Most of it's plug and play and all of the directions are on there. In the middle you have a pulley. So when I studied physics, pulleys were a big part of it, right? You can make a little pulley, you can talk about lifting loads and doing real applications of stuff. And then on the right there you have a pencil top wind turbine, right? So that wind turbine moves around. It's just a little pencil holder. So it kind of serves a dual purpose. And those were just a couple of the projects that I pulled in when I typed in physics. And that was all of one minute of work there. This one is really cool too. So math, I kind of got a little deep into the math side of things and nerd it out a little bit. So these are three dimensional models of shapes that produce shadows you would not expect, right? So there's some mathematical terms for that. I'M not going to go in depth about exactly what they are, but you can see in the photo there, this guy wrote an entire book and has all of these models on Thingiverse, just like we said. Every single thing you see here is on thingiverse as well as a book to go along with it. And he'll shine light through his models and you can see that square pattern on this rounded light that I think is an awesome spot to start talking about why that's the case and what happens with interesting geometries and the way light hits and things like that. So engineering. This one's close to my heart. We took apart engines in a lot of the work I did in the past to teach students the four stroke engine process. On the left you've got a full model of an engine. So if you wanted to print an engine and talk about the cylinders and talk about compression, you can do that. And again, to me, I learn best when I get my hands on these things. If it's in a textbook, if it's on YouTube, it's kind of good. YouTube's a nice supplement. But if I can get my hands on the thing and I see that a piston goes into the cylinder and I know that gas enters at the bottom and the explosion happens and it pulls the piston out of the top. That to me is a game changer. And then you've got there on the right, watch escapement desk toy. So you've got this crazy watch assembly thing, which I'm not exactly sure what it is, but it looks really cool and fun. So kind of intricate little gears and moving parts that you can print. Again, starting to talk about mechanical principles. Hey, does this gear move as much as that gear? Why? Why not? How does it have more teeth than the other one? So you can get really, really deep into any of those principles by simply printing something and then talking about it. And the last one is obviously what I want all of you to do, and that is make your own. So when it comes to the making world, you know, somebody knows something when they can build it, right? You know, somebody understands how an engine works when they can build it. You know, somebody knows how woodworking joints are put together when they can actually do it themselves. The same applies to. This is your, your real learning, your real comprehension comes from when you do it yourself. So on the left there, one of the videos in our series is Walking students how to build Tesla turbine. Nikola Tesla back in the day had a whole model for a turbine. This is an entire CAD modeling series on how to make that turbine. So once you can convert your knowledge from, hey, this is cool, I printed stuff online. I'm talking about it now. Once you can take that knowledge and you can transition it to being able to make your own custom stuff from scratch, that's when the learning really happens. That's when the light bulb happens. Takes a little while to get going to get good enough. That's why I still recommend printing out models other people made as you learn this skill. But this, to me, is the most in demand of the engineering skills, CAD modeling. And it's also a really nice way to work visually. So make it your own is absolutely the way to go. So resources for this stuff, I pulled out a couple. There's a lot more. I didn't want to overwhelm you all with resources. 3dprintmath.com is that book that the guy has all of the 3D printed objects as well as the shadows they cast. Thingiverse is the website that has all of the 3D models. All you do is search the search bar on the top for what it is you're interested in doing. Whether or not it's DNA or turtles or space or whatever you want to talk about, you can find it on Thingiverse. Sliceform is my website, so that's where you go if you want to learn everything that I just talked about. I would love to teach you guys in depth exactly how to do this, but unfortunately I'm limited to one hour. So I try to squish this all into the fastest possible iteration of it. So if that is something you wanted to do and you wanted us to walk you through exactly how to do each of these things, including how to get good at CAD modeling, then we have videos for all of that stuff. And then there's this really cool. Just before the presentation, there's this really cool article I found in Nature, I'm a scientist, I'm a geek, where they talked about uses for 3D printing inside of science labs and science facilities. And I found it really interesting and really cool. There's a lot of stuff that you can make that you would actually have in a laboratory that you could 3D print. You're oftentimes waiting for parts from a company. We used to order from Thermoscientific and other big companies like that. Sometimes you'd wait two or three weeks for a part, and so your experiment would be delayed two or three weeks. So I found this article really neat to show ways that you could actually incorporate it into real academic Settings. So how do you recreate a makerspace at home? We talked about the first two, right? And do you guys remember what the reason was for these three? Like what? These all come together. What are we trying to get to? I thought maybe this. Okay, so we're trying to get to the aha moment. When is the aha moment? The moment you're making that first print. The moment you look at that 3D printer and it's making your first thing. I'm telling you, it's the aha moment. You go, okay, I get it. I know what this is. So this is the final step of the aha moment. So we said, we talked about tools. You know, exactly what tools you need. We talked about education. You know, where to find stuff. You kind of have a general sense of the ecosystem. The last bit of it. People. So people in makerspaces, that's the way. That's the reason they run. So a couple of suggestions for these things. So I have a homeschool group that I just created before this video, which you all are invited to and welcome to join, especially if you're just starting your 3D printing journey. I may actually do this not just for home schoolers. I may create a separate private group for anybody interested in doing this who's watched these presentations. So just let me know afterwards if that's something you're interested in. I'm happy to do that as well. Local libraries, with a caveat. Right? So community there. Those tend to be run by librarians. Not saying anything bad about librarians, but they're not 3D printing experts. And so those are hit or miss. Right? So those are. You can go. They. They often have 3D printers at local libraries, at least in the states. I don't know about internationally and abroad, but it's iffy. Local universities definitely have engineering programs and people tinkering around with 3D printers. Local makerspace. All you have to do is Google maker space. And you'd be surprised to know there are more than you think in the world. And you're probably closer to somebody using a 3D printer than you realize. Online groups and forums, meetups and events. I've used meetup.com to find people 3D printing. I've used Facebook groups to find people 3D printing and then other families. That last one to me is critical. If you can grab somebody else and say, hey, look, I'm going to go on this journey. I'm going to learn this 3D printing thing. I don't know what the heck I'm doing? Why don't you come along for the ride? Why don't we do it together? You run into a problem, I run into a problem. At least we can talk about it, and we got another person to bounce this off of. Right? The community aspect is probably the hardest to get right. If you don't have that local makerspace built in. And that's probably, I would say, the biggest barrier to making that maker space at home is how do you. How do you start to build a community? How do you start to get people interested? And you will get people interested. And if your kid is the one printing and he's taking 3D prints, or she's taking 3D prints to school and showing off stuff to friends, you're going to have parents knocking on your door very soon going, wait a minute, what is that? What are you doing? You know, let me get involved in this. And you might even before you know it, you might even have people over at your house and you're showing them off the printer, and you've got a little community, a little group of people doing that same thing. So to me, the single best resource you have is, is talking to other people. And to do it with you, that's just a QR code. I figured I'd make it easy. If you wanted to join that Facebook group, just hit the QR code right there. Again, I'll share this presentation with you all afterwards. So I'm going to move on from this slide relatively quickly. But again, it will be there. So. So just to recap, the tools, the learning community, they all come together to make that aha moment. Is this something we feel like we can do? Can we do this? Yeah, I think so. I think the real barriers originally for 3D printing were expertise. Now there's this huge robust community online cost. I showed you. It's way, way less expensive, at least than a lot of people have in their mind. Maybe not everybody, but most people, when I say, how much do you think a 3D printer costs that's high quality and works well, they'll say $1,000, $1,500. Right. Right in line with what a new computer or a new iPhone might cost. And they're almost always shocked to hear that it's way cheaper than they think. So cheaper than you think. It's easier to find the resources than you realize. It's almost all Googleable, and it's something you guys, I believe that you can do right away. So bring those tools, learning, and community together. Start that little makerspace in your home. And that's it. So if something, if, if slice, form, the. If, if it is something that you want to take, if my course is something that you like to take, Right. Cobbling together resources online, this can take some time, right. You don't know. It can lead to some burnout. You don't know exactly where to find it. It is there. You can find out all the information you need. But our course is just going to save you time. It's step by step, it's sequential. Right. I like to look at it almost as an alternative to engineering school. Right. We're teaching you high level principles. We're teaching high level principles and slicing and we're getting you actually making this makerspace at home really quickly. You save a lot of time, you shorten the learning curve and you just jump, jump start your success right away. If you guys do want to use it, I've got $189 off coupon right there. Homeschoolers. 1 89. It's only going to be up for 72 hours. So if you do want to build it and you want a little bit of guidance from our course, that coupon will be there for the next 72 hours. So go ahead and write that down. And you would just go onto our website and like I said, there's the course. Everything you need to know, you click buy, you click through to have a coupon. Yes, I do. Right. You enter that coupon code into the final thing and you are rocking questions. Yeah.
Yeah. Joshua, thank you so much for the presentation. It was so enlightening. And I am really excited about getting my first 3D printer.
Good, good.
I have a comment, a question which is. So first of all, I think that, you know, one thing that, you know, we might want to keep in mind is that for some people, Even, you know, 189 is really expensive for them. And so if you're in a position where you can't, you know, afford a 3D printer, one thing that you could do is ask a couple friends to share the cost. You know, posting in these groups, like the 3D printing group or local parenting groups, is a great way to connect with other people. 10 or 20 friends. Other thing you could do is ask your local library to invest in a 3D printer. Maybe they don't know that it only costs 189 if you tell them that it's a good resource for your child. And, you know, and I think it's. You'd be surprised when you start asking around people, be excited and, you know, if any of you want to get one and can't afford it. We have lots of organizations we work with too, so we want to make sure everyone has access to this. And I guess the other thing I was curious about, maybe is it okay if we stop screen sharing?
Yes, yes. Oh, yes. Pull that off.
Here, I think.
I don't need a new share. I need to cancel.
I gotcha.
There we go. Thank you.
Yeah. So my other question, I know this is about how to create a makerspace at home and it's probably a very long conversation, but I was wondering, are there other things you can do in a makerspace besides 3D print?
Oh, yes. Oh, yes. So good question. So first off, I also want to thank you. I know I thanked you in the beginning, but you've put together a really, really nice resource. So thanks again for hosting this.
Oh, my pleasure.
There's a lot that you can do. So I like as I mentioned in the beginning, I taught woodworking, welding, electronics, soldering, 3D printing, lasers, all kinds of stuff like that. So there's a. I had it in my head for a while. There's a handful of things that you can incorporate into your home that don't cost very much but are pretty effective. One of them is electronics and soldering. Right. So one of the neat things about 3D printing, printing is that you have to start to like you're going to plug a couple of electronic components in. So it starts to give you this sensation like, oh, this isn't rocket science, right. This is something I can do. I can plug a couple of wires in and this thing works. So what it starts to do is it starts to give you some confidence in some other arenas. So electronics and soldering. And there's a platform called Arduino that was my favorite small scale platform that you could simply a desk with a tiny space and a computer and some free software. And you're talking about $30 on Amazon for an Arduino. You can start to plug a bunch of different electronic devices into, into a machine and light up lights, light up LEDs, light up motor, spin motors, do all kinds of stuff like that. And it comes with a whole kit. So yes, there's a lot more that you can do with it. Another easy one to do at home. I think you mentioned sewing in the beginning, right. So a lot of people have sewing machines in their home. That's another way to get your hands on making stuff. When it comes to making, it's the discipline is usually the hand, eye coordination and getting a sense and a Feel for the materials you're working with. And I would almost say that it's the same no matter what it is that you're making. So if you're sewing something or you're cutting something in the wood shop, or you're welding something in the welding area, the discipline of selecting materials and choosing what it is that you're going to work with and then figuring out how to put those materials together is almost identical. Right? So with sewing, you're going to put them together with a couple of pieces of thread. With welding, you're going to put it together with a piece of wire. And with woodworking, you probably put it together with some joints or with some glue. But the concept of joining two pieces of material is still exactly the same. So that's, to me, what this unlocks is, hey, I can put different materials together. Hey, maybe that. That'll give me the confidence to tackle a different project. Right. So electronics is a great place to start. Leather working can be done at home. Sewing can be done at home. Obviously, 3D printing can be done at home relatively easily. And then if you wanted to scale and do something crazier and do wood shop or metal shop at home, you could do that. The safety risk is quite a bit higher, and so you end up really needing to solicit the help of somebody who knows what they're doing if you don't have a lot of experience in that arena. But those are just a couple of things I would suggest. Any other questions?
Excuse me, May I ask a question about 3D printer? Sure, yeah. So how big is a room? And if I set it somewhere, is there anything in the environment I should take care of? Like if it explodes and, you know, cleaning them or other things or it's better not on the carpet or something like that.
It's definitely better not on the carpet. So it's better on a hard surface. I think it's just probably behind me. That's my printer right there.
Ah.
So that's. It's. It's like two feet, two and a half feet by two and a half feet. It's not. It doesn't take up a big footprint.
I say.
So it takes up a relatively small space there. I tend to put it on a hard. Go ahead.
Mm. Okay.
So I tend to put it on a hard surface and these things. So the Ender three, the original. The only safety feature I would recommend you consider is there's the Ender 3 and then there's the Ender 3 Pro. I think the Pro is about 10 more dollars. But it has something called thermal Runway protection. And essentially what that means is if your board gets too hot and heats up, the machine will automatically shut itself off, preventing a fire. So your biggest. I would always keep a fire extinguisher near just in case. I've never seen them catch on fire. I've never really read of them catching on fire, but they can, I mean they're heating up electronic componen. So as long as you had a machine where it already had built in thermal Runway protection or you were in some precautions kind of keeping it out of the way of things that are highly flammable, you'd be good. But as far as messes, none. As far as smell, there is none. You're not going to, you're not going to have any chemically smells from a lot of these. This, this filament is made primarily from corn, actually corn oil. And it's biodegradable as well. So for people that are a little concerned about the environment and what happens to this stuff, it's completely biodegradable. So it doesn't last forever. It's not like Styrofoam. That really is a problem. So. So again, don't need a lot of space. It can heat up a little bit. So if you've got a room that's really hot, you probably don't want to add it to that room. It'll, it'll add a couple of degrees to it, but not a lot and just a little bit of space around it. It needs a surface. Ideally it sits on a surface that's strong enough that doesn't move a lot. The more the surface moves, the more the printer moves, the less high quality the final part will be. But in terms of fumes, in terms of mess, not much. Not much other than the occasional spaghetti monster.
Thank you.
You're welcome. Other questions? All right, thanks for joining.
Yeah, thank you so much everyone for coming. It has been so interesting hosting you, Joshua.
Thank you.
Modulo publishes a lot of different blogs about different resources for kids and we don't have any of these 3D printing resources up there. So I'm excited to get stuff there. For those of you who are joining now, Joshua Manley just recently founded Slice form and he has an incredible ongoing class that includes a 3D printer and lessons about how to use it with his amazing team. And Modulo is a resource for families who are learning at home as either as a supplement or replacement for school. We've reviewed hundreds of mastery based secular resources to support parents learning at home with kids adaptive learning apps and we also have highly trained teachers who you who we can match your child with for one on one tutoring online and eventually we hope to be doing in person and also are working on a friend matching tool. So if you are looking for playdates or people to connect with nearby or around the world we also have a curated community and and help connect parents for social emotional learning. So we are just so happy to have you Joshua. I think we posted the link for the class in the chat but if you have any questions please don't hesitate to reach out to me or Joshua. Our website is Modulo app. That's M O D U L O app and Joshua is@sliceform.net and sliceform.oh sliceform.thinkific.com.
I'll put it in there.
I'm so sorry, that was.
A bit of a mouth.
Yeah. Sliceform.fentific.com and I just put it in.
The chat there too. Yeah.
Okay, so you should.
And thanks for hosting me Manisha. This is great.
Sliceform.thinktific.com Think yeah, so go there.
It's a learning platform. I don't know how they came up with that name but it's kind of brutal. So sorry about that.
Oh, no worries. And also you the link and we'll put it also in the YouTube video description so people who are watching it can see it and we're just so happy to have you here. So thanks for coming and enjoy your evening everybody.
Yeah, thanks so much. Cheers.
More from Manisha

Contributing to Florida Prepaid Plans (2026–2027) | Step-by-Step Guide for FES-UA Families

Contribuyendo a los Planes Florida Prepago (2026–2027) | Guía Paso a Paso para Familias FES-UA

Finding Providers & Services in the Marketplace (Families) | Step Up For Students (2026–2027)

Encontrando Proveedores & Servicios en el Mercado (Familias) | Step Up For Students (2026–2027)