Fine hair clean low bun + face frame extensions
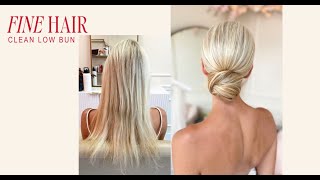
This content was created by Marissa Brennan. This content was uploaded by Marissa Brennan. This is a YouTube video titled "Fine hair clean low bun + face frame extensions" created in August 2025. The content is a detailed hairstyling tutorial focused on creating a clean low bun for fine hair, including the use of face frame extensions. The speaker provides step-by-step instructions on hair preparation, sectioning, crimping, teasing, securing the bun, and finishing touches to achieve a sleek and voluminous hairstyle. The video is instructional and presented by a single speaker without conversational elements.
To this clean low bun tutorial on fine hair and adding extensions to the face frame. First thing we're going to do is prep. I'm using the color wow, one minute transformation on her hair. She has super fine see through hair. I'm just taking about a quarter size amount and distributing it with my fingers all throughout all the sections of her hair to get it even more distributed. I'm going to take my cutting comb and really comb through those sections. The aim is to hydrate. I'd give this product about a 7 out of 10. Next, I'm taking a zigzag sectioning from the top of her head to the middle of her ear. And I'm sectioning out the front and the back. I'm clipping that out of the way. And first thing I want to do is to smooth out our hairline. So I'm crimping. I'm using my Sam Villa iron and I'm getting really tight to the root and I'm crimping all the way down to about the mid length area. I'm starting in the front. And make sure you go around her hairline because this is a very smooth, smooth style. Personally, for a clean style, this is one of the most important parts is to really get that hairline super clean. So I'm going around the hairline flat first and then I'll attack the crown area. For the root of the hair, I prefer crimping because it's going to add volume as well as smooth at the same time. If you're crimping your client's hair and you're seeing the crimps and they're super visible, you're pressing down too hard. So lighten up your grip and do light smooth taps. I skip this step. All of our natural wave would be visible in the bun, specifically on the side. So really make sure you're getting in on the root area and you're lifting. When I'm lifting up, each section should be see through. You should be able to see through your section. Think of like a highlight section. You want your sections to be super small when you're doing your crimping. And also over direct about like 90 degrees off the head. Taking small sections all the way down to the base of the crown. So the end of the crown. Because I need all this smooth and clean. For her bun prep, sectioning for the top is starting at the top of the crown to the bottom and my sections are not going to be larger than my iron. For the sides, I'm taking diagonal back Sections again, keeping them see through. And I'm going all the way down to clean up. The natural wave that is in hair hair prep that I told my bride, as well as that I tell all of my brides, is I had her wash her hair the day before, use a mousse in her hair around the crown, so that way it acts as almost like a makeup primer. That's how I like to describe it. That's how she sat in my chair. First, I smooth out the root. Next, I'm going to smooth out her length. So again, this is a clean bun. I need it to be clean. So I'm going in with my flat iron and I'm taking my flat iron on the mid lengths and the lengths of her hair to really get that smooth smoothness on the style. Again, I didn't do this throughout the entire style because I wanted volume at her root, which I'm going to be able to get achieved through crimping and not flat ironing. Flat iron I'm using is the GHD iron. I do love this iron. I've had it for about five years and she's really lasted the entire time with me using my cutting comb and my flat iron at the same time. And I'm taking small sections so that way I can get it super smooth and I'm not having any tangles when I'm flat ironing by using my comb and going through. Yeah, her mom really did stand in front of me like the entire time. Like. Like this for about an hour is great. Before I start securing the crown, I want to add the extension piece to her face frame. If you can see from her trial, one is fuller than the other on the sides of her face frame. So I literally just took a 2F extension piece and cut it in half. And I'm taking a diagonal back section right at the top of her part. And as you can see, what I'm doing right now is I'm seeing if it's visible. Once I see that it's not visible with the placement, I'm going to add texture, powder, a little bit of teas, and backcombing. So that way my extension has something to hold on to. And I want to make sure that this hair extension isn't visible. So I'm clipping it and I'm just testing it out to see what it looks like. So I cut that 2 inch weft piece into one and I can still see a little bit of it. So I go through and I take it out and I want to move it down a little bit further, as well as cut the extension piece. So I'm just cutting off the extension that goes out further than the clip. So it was a very small little piece. And making it shorter so that way it's less visible in the hair. And where I clipped it was right about her high recession. So that way it's still going to be a part of her face frame because that's where I pulled out the face frame for her. But it's also not going to be visible because it's further down on the hair. And that way a T section is going to cover it. Pulling back out my sections, doing the zigzag from the top of the head down to the ear on both sides, so that way I can just work in the crown. And now we're going to do the most important part, which is teasing. Use the Oasis dusted powder because I ran out of my tried and true design Puff Me powder. So that's what I'm using. And I'm spraying it before each section and then I'm back combing right afterwards, taking my teas about one to one and a half inches off the head because she really wanted a lot of volume. So if your client wants a lot of volume, you need to make sure your tease is really strong and is sitting higher off the head. My sectioning is going straight back from the top of the crown to the end of the crown. So the base of the crown right above the occipital right here. This is what your teasing should look like. If it doesn't go back in and try again for the sides. Doing two diagonal back teasing sections. And then when I am using my 4 comb, this is what I am visualizing. I am creating this shape where it's narrow by the sides by your ear and a half moon shape on the top. With all of your teasing, it's not really going to create a shape, just a big basketball. So I'm taking my four comb, that is my support hand. I'm taking my four comb on the top layer of the hair and I'm making it narrower by her ear and I'm creating a half moon shape at the top. Again, she wanted a lot of volume. So I'm not pressing into the hair with my forum, just laying on that top layer, taking my fork comb right at the back out any volume that I lost and going to the front to check that shape for the half moon. Next, I'm going to add my volume with my texture powder and teasing to the front face frame. I Prefer to do all of my steps at the same time. So if I'm teasing, I'm teasing the whole head. If I'm hydrating, I'm hydrating the whole head. Helps me to go a little bit faster when I'm styling the two sections of teasing for the front. And I'm going to do the same on the other side of her part. Just two sections back. Combing and adding the texture powder before I do my te, my index finger and my thumb and pushing that hair forward. As you can see, it's fluffing in it before I move forward. I wanted to make sure she approved the height that we were doing. So this is me getting her approval before I move forward and secure anything in the crown area. We want to work smarter, not harder. Using my Oasis Tame Wild before she was discontinued. Now you're going to want to use the Glow by Schwarzcroft texture powders. Dry the hair out. I want to add the hydration back in. So that's what I'm doing. And next I'm going to take my Thrill fiber gum by Schwarz Croft. Just about a nickel size amount and I'm going to rub it between my hands and then open up my hands in a clapping motion to see all the little fibers coming out onto the hair. Because what I want to do is add control as well as add shine. And that's why I love the Thrill product for that. My blonde girls have a lot of breakage so I needed to control the frizz in her hair a little bit better with the Thrill fiber gum and separating out her crown about two fingers above her ear and drawing my fingers back completely separate. Back of your hand is lifted off of her head like this. When you pin, your pins will not be secure and you'll lose your shape in the crown area. And right now what I'm doing is I'm just making sure all my flyaways pulling back out any volume that I lost when I was combing and starting to create the crown. Remember we need this to be really sleek. So taking these little detailed touch ups will preserve your clean crown area in the end. To take a small tooth comb to blend your sections together. We don't want any visible really texture. So I'm taking my hand, the back of my hand and I'm flipping over to my other hand doing a little pass off. And then I'm holding it with my thumb pressing my bobby pin up against the scalp. My pin closed. Next I'm taking my 4 comb to test to see if this is in A good position where my pin wouldn't fall out, but it was too loose. So I took the pin out and I redid the crown area. Because if it wasn't secure in the crown right now, my bun would lose its shape later. Meaning if my crown wasn't totally secured right now, when I go to do the bun and I put an elastic hole on that section, it's going to ruin the shape of my crown if my pin is insecure. So I'm just re securing that pin by taking out the crown for round two. My four comb where that pin was and just pulling out any texture for my shape. Checking the front to see if it flattened out any of the volume. And I'm just using my 4 comb, pressing it into the hair and pulling it back up again to get that half moon shape. Spraying my oasis tame while. Because I want to start to clean as I go. So that one area where I had my four comb, I'm just tucking it in. Keeping my four comb on the top layer of the hair. I'm not pressing it into the hair. And I'm going back over any sections that I need to clean before I can start my bun. I'll do the same with my silhouette spray. I'll spray the silhouette and then go immediately back over with my four comb and tucking in any hair. So spray the silhouette because it's a wet spray. And really tuck in any little frizzes that are sticking out to make the style super clean. Going back in with an extra pin for security in my crown area, I can connect and blend the sides in. So before I do that, I'm going to pull out my face frame with the extension piece. So I'm just pulling out right at her top part. And whatever is left out, I'm gonna use my tame wild. This section matches the crown area, and it's nice and smooth. And this is a tucked behind the ear look for the side. So she wanted it nice and sleek in the front. So I tuck it behind her ear, making sure that I'm cleaning up any frizz pulling back out any volume that I'm losing, which I can do because I added a really nice tea. Tucking behind her ear with my four comb, adding one little roll, and then I will secure it with a bobby pin. Keeping my bobby pin closed and just picking up a piece of the ha. Pressing it up against the scalp and pressing it in ching to release around the nape. I'm going to repeat these same steps on the other side. So tame wild. And get that nice and through my section, tucking it behind the ear, pulling out that face frame on the other side, giving it a light little twist. So one little roll and I'm cleaning up any frizz, pulling back out the volume, adding one little roll and pulling it over the middle of my section, Taking my bobby pin, keeping it closed and pressing it into this, the scalp, so it's secure. Now for the bun. So first thing I want to add is security for this bun. I want to make sure that I add a lot of width to the lengths of her hair because she doesn't have a lot. So I'm taking a lot of my dusted Oasis powder and I'm using the back of my fork comb to tease it up and give more width into this section because I need width for these lengths for when I'm putting it in the bun. This is like the concrete layer foundation for your house. So we really need to add a good structure for our bun. Next we're going to add our padding. This is just a cut up donut and I needed to create our shape since she doesn't have a lot of hair and I used a larger piece. With your donut, where you place it, your bum will sit with the top of her ear, will sit off her neck. We want it to sit at her nape. So I'm putting it in the middle of her ear line so right there. So that will sit on her nape and lower. Once I have my visual, I'm going to take my bobby pins and secure it on the outer edges of your padding using about two to three bobby pins for each side. Goal for this piece of padding was to make sure it was rounded from the sides because again, I really need this to reinforce my shape. Since she doesn't have a lot of hair, splitting her lengths into two and I will not be using an elastic. I'm adding the dusted powder for a little bit more purity. When I'm shaping, I'm not using elastic because it will take too much hair away and she doesn't have a lot. So I want to use all the hair that I have with an elastic. It would take about 1 to 2 inches off the lengths of her hair that I need for the bun. Taking my middle and index fingers, I am now twisting the bun up and over to the left. The visual you don't want to see. The lines are way too tight in this twist. So we're going to take it out and try it again. So I'm brushing out my section because I need this to be Be clean. I'm pulling the hair up and I'm using my wet spray to reclean the section with my 4 comb. So see how I'm holding this up? That's where I'm going to start my twist by pulling the hair up and twisting with my index and middle finger in that direction. Here's what to look for. When your lines are curved, you are good to go. That's the visual I'm looking for, for when I can take my big open upins and place them into the hair. I'm not pressing it in because what I'm going to be doing now is fixing it to go around the sponge. So I want to make sure that I'm covering my sponge. And when I feel good with a section, I will press a bobby pin into the hair, not on top because that will flatten out your sections. Here I'm blending that hole out with my pin and gently taking my 4 comb on top of the hair to blend out any frizz in the sections. Once I feel good, I'll take my open U pin out and I will press a bobby pin closed into the hair again. We don't want to flatten the hair, so we're. I'm not going to press on top and then I'll take my wet spray and I'm going to go back in and tuck away any frizz that I see sticking out. And what I'm doing is making sure that the top part of my sponge is covered. So that's why you'll see me pulling up on that top part of the bun, looking to close any gaps that are exposing your sponge with the hair. Next, I'm going to blend that section into my bottom section so you can see I'm blending those sections together. And now I'm going to work in one with this section, twisting it up and over to the right. So these are going in opposing direction. Section went up and over to the left. Bottom section goes up and over to the right. And again the twist that I'm looking for is making sure that your lines are are curved. And I did the same thing, but I forgot to film. Everything I did with the top section, I did with the bottom. And I am securing and pulling out those curved lines with my fort comb while dealing with the shraggy little lengths that are left over whenever you're finished. A clean bun. Again pressing your bobby pins in in note, you could see I am on my knees on the floor. I wanted to make sure that I was eye level with the bun and not over top of it. Because sometimes when I'm over top of it, it strucks my view and makes me pull the bun up higher than it should be, which I wanted to make sure that I was keeping it on her nape. So I wanted to make sure I was eye level with the bun there. Okay, back to these straggly lengths. Washing my section out with my fork comb. And I will tease them to make sure I add width to this section. And I want to cover the sponge underneath. So I'm pulling my section up to her nape, adding a clear elastic. And I'm going to pull it through a couple times. On my last pull, I'm going to make a little loop that you will see this little loop guy right there. And then I'm taking that and tucking it up and under, touching the sponge, being a bobby pin and pressing it into the loop that I created, making sure it's tucked. Now we're going to add shine. So I'm taking my Oasis volume up, giving it a little shake to activate it, spraying it on each section. Then I'm going to come back with my four comb and tuck in, going along direction that the twist is in. So you're not going to want to go in the opposite direction. That'll expose your frizz. Now we can deal with the face frame. So I took some and sprayed it on the lengths of her hair. Taking my 4 comb and spreading out that curl. So I'm going to connect, add width with my 4 cone by lightly backcombing that entire section. Your curl will pop out. Try, trust me. But this is going to add stay all day power by putting that texture powder in the length of your frame. And next I'm going to go to the front and make sure that everything I'm doing is looking okay and making sure that her extension piece is covered. And I'm doing the same thing on the other side. Look at that tight little curl compared to the other side. Please go back in and make sure that you brush out your face frames. Just gently brushing it through and the curl pops right back out. I promise, during this step, you lose any of the volume that you had at the root of our face frame. Just pick up your section and go back in with texture powder and add more teas in that section. That's what I'm doing. And I'm checking the front to make sure that everything is shaping out nicely. Now I can add shine with my Oasis spray. Spraying the volume up and then going back in and shaping it out and making it nice and clean with my fork comb, just shaping out my sectioning, pulling my face frame towards her face. And now I'll use my setting spray, which is the got to be glued. My setting spray that I like to use just only at the end, specifically on the face frame. I won't use this on the bun. It's too heavy for the hair. Building her face and lifting up the hair and spraying along her hairline to get underneath the face frame. So that way her sweat has a little bit of a barrier before it starts sweating through her hair. Standing in the front of my client, I'm going to check her volume, lifting back out because this girl wanted a lot of volume and showing her her beautiful hair. Getting the good feedback. And can you even tell she has extension there? Nope, you cannot. That's an extension piece there. Love it.
More from Marissa





7 Lessons I Wish I Knew In My First Wedding Season (I’ve Now Grossed $728,000)