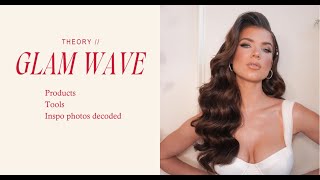
Marissa Brennan teaches the theory behind glam waves, covering client prep with mousse and extensions, how to identify three main wave types from inspiration photos, and the curl techniques using 1" and 3/4" barrels. She breaks down hairspray choice by styling stage: prep, shape, and finish, emphasizing that the right spray prevents frizz and disconnection.
Hey, guys. Welcome to today's first live. Like I asked you guys for feedback and thank you so much. I'm going to be breaking up today's class into three videos. So this is going to be part one. So I'm going to break down all of my theory first. That way it's more concise when you want to go back and re watch, which I really, really recommend. So I want to start off today's video by first thanking you all for being here. I'm extremely, extremely, extremely grateful for all. For all of you guys who have taken my classes in the past and are here today. And I'm so happy to share this with you. I'm gonna flip my screen because I believe that it is. Let me double check. Yes, it is backwards. So I'm gonna flip my screen really quick and I'm gonna break down today's theory for glamly. So give me one second. I'm gonna turn this around and I'm gonna double check. Oops. Oh, there we go. Perfect. Okay, bring that back a little bit. We're live, so we gotta, we gotta test it out. Okay, we're perfect. So what I want you guys to know first is a lot of you guys will ask me the prep, how I have my model come prepped, what products, what tools I use. So I want to break that down first with everything that applies with glamways. So first, what I want you guys to know is the outcome of your style is 50% you and 50 your client. So the 50% from your client is how you're going to tell them to prep their hair and how we need them to show up to their appointment. And so what I always tell my clients, and if you guys follow me on Instagram, you've probably heard this a million times, they need to come with clean hair when their hair is dirty. That oil is going to make the strands of the hair thicker and plumper. And we're not, we're going to need to use a lot more products. And it's heavy on the hair, so you need them to come with clean hair. I usually tell them to come with their hair washed either the night before or they can wash it morning out. But it needs to be dry and a smooth blow, blow dry. So actually how my hair is now, that's what I want their hair to look like. Smooth and blown dry. Even if they're a curly girl. If they're a curly girl and they're showing me a glam wave from my Instagram, they're gonna need to come with it smooth. Otherwise my prep is going to be a lot longer because I'm gonna have to go through with a flat iron or everything like that. So that's the 50% that we're gonna need from our client. I also do tell them to use a mousse in their hair, because what a mousse does, it's a. Is a lot of alcohol content. So. So with that alcohol, what it's going to do is remove a lot of the moisture from their scalp and from their hair. So it's going to be a better base for me to get volume in their hair. So I'll usually tell them a mousse and I will give them some mousses that they can get on, like Amazon, Ulta, Sephora. I'll give them product examples and things like that. Other than that, I let them do their normal products that they use in their hair, but always come with clean hair. Also, the other 50% that we need from our client is extensions. Glam waves need extensions. And you'll see it in my demo for the fullness on the bottom. Otherwise, the photo that they're showing me is super full and I'm not going to be able to get that outcome, their dream desired outcome, if they don't come with extensions, because it's going to get straggly on the ends. So I will be applying extensions today. So the 50% US is relaying that to our client. We need to be able to prep our client before they sit in our chair. That way they can get the best desired outcome that they want with their glam wave. So next, what I want to talk with you guys about is breaking down the inspiration photo. So what my goal is for this class and all my live classes in this membership is when you see a photo, you'll able to know what tool, what product, what sections are taken in that photo. So you can break it down. I think the. The saying is, teach a man how to fish any fishes for a lifetime versus giving the man the fish. I don't want to give you guys what to use without you knowing how to use it. And plug and play, apply it for yourself. So this is kind of a matrix that I created. So there's three main inspiration photos that I see that I feel like are really trending. Which is the one is like the middle part tucked behind the ear and the glam wave in the back. You'll hear me refer to this as like the Kim K remix. It's Kim Kardashian's wedding hair but it's remixed with the glam wave in the back. So that's inspiration photo number one you might be seeing number two is a soft wave. So when I say things like soft wave, I'm talking about the the amount of space in between each wave pattern, like each elevation. So when there's a lot of space, space in between, there it that's that I see that as like a soft wave. So if you see a photo like that where there's a lot of space in between, that's more of a soft wave and then a tighter wave where there's not so much space, that is a traditional old Hollywood wave. So those are the three inspiration photos you might be seeing. So when you see those, what kind of tool curl technique, ideal hair type and sections are you going to want to take? For each one, I'm going to start with the tucks behind the ear. KIM K. So for that, the tool that I'm going to want to use is a 1 inch iron. I wrote all the tools and products in another post of what I use for glam waves, so you guys can see that. But this is the tool that I'm going to be using today. I actually use it for most of my waves. It's a 1 inch long barrel Bio ionic and I can't wait to show you guys why I use it because it's longer. So this is a longer tip than your traditional. This is a GHJ like look how much longer that is. I think it's about 2 inches longer. So this is what I would use the tool that I'm going to choose for a tucked behind the ear and for a soft wave. It's going to give me more space in between each wave pattern. The curl technique that I'm going to use for tucked behind the ear is a twist wrap. And I'll show you the twist wrap when we get there. So a twist wrap, actually I can show you. We'll bring my girl out. So a twist wrap technique is where you take the hair and you're gonna hold it with tension. You're gonna take your iron like this and you're gonna twist around and you twist at the top, hold it with tension and around, twist at the top down so you're moving your wrist. So that is what the twist wrap is and that's the technique that I'm going to be using today. So I'll go over it a little bit more in depth in the demo portion. We'll keep her here. So then what I also do the curl Technique that I'm going to be doing for the tucked behind is I'm going to split the hair in half. When I'm in my sections, I'm going to split it in half. And the mistake that I see with the tucked behind the ear is it's all going in one direction, which makes sense when you're doing a glam wave. But when you're doing the tucked from the front, if it's all going in one direction, what happens is you're going to get a bulge here on one side because it's going towards the face, and this one is going to go away from the face. And so to avoid that, the technique that I do so that it's the same in the front on both sides is I'm gonna split the hair with each section I take. So it's gonna look something like that. And then I'm gonna work on this section and go away from the face. And then this section is also going to go away from the face. So I put here half and half. Gonna go back. You will have a separation here, but I'll show you how we're gonna blend it. In the demo, you are able to blend it, but then what's the best part is with that curl technique for the tuck, you're gonna have nice evenness on the sides and you're not going to have a bulge over here. So the ideal hair type for the tuck behind the ear is medium thickness. If it's finer extensions and mid back length, you want it to be a little bit longer, like probably at least here and longer. Because what's going to happen is if it's too short, like if it's here, the hair is naturally going to fall forward. So with something that's keeping tucked behind the ear, if they're moving up and down like that, the hair is naturally going to keep falling forward. So you want it to be a little bit longer. And if their hair is not longer, you can use extensions to make it longer so that way it stays in the back and gravity doesn't keep pulling it forward. For your bride, the partings and the sections that I take with the tucks behind the ear are tall. So I'm going to show you with the mannequin the tall sections that I take. So a traditional section I feel like people take with a glam wave are pretty short like this. So it's maybe like a 1 inch tall section. When I'm doing a tucked behind the ear, I. I take about a 2 inch tall section. So I'm going to show you what that looks like. So a 2 inch tall section is going to be like here, probably a little bit more hair. Let's show you. When this section is taller, you're going to get a lot more of a section softer wave versus when your sections are shorter, it's going to be tighter, more of like an old Hollywood wave. So what I'm looking for is 2 inches tall on each section. That's the sectioning that I'm going to take for my tucked behind the ear. The next inspiration photo that you probably see is the soft wave. Again, that's more actually like this kind of a wave. So when there's more space here and more space here, it's like three to four finger space versus like when they're tighter together like that. That's the old Hollywood wave. So the curl technique that I take for a soft wave to get that space and create softness is a vertical hold. And I also use the twist wrap technique. So the vertical hold when I say that, and this is probably the technique I'm going to do today is instead of curling this way, holding my iron horizontally. So instead of holding my iron horizontally like that, I'm going to make it all the way vertical so that it points to the floor. When it points to the floor, I'm going to be able to get more space base in between each twist wrap. So it's going to create more space when the wave comes out and it's going to look softer. The ideal hair type for a softer wave is more of like a coarse texture. Fine hair texture. Yes, we can do it. But my, these are my ideal hair types. If I wanted an ideal hair type for a soft wave, it would be coarser. Maybe somebody who has highlights blonde in their hair. Virgin hair doesn't hold as well on a soft wave because their hair that isn't colored is just honestly, it's too healthy. So if you want to roughen up that cuticle, their cuticle on the hair strand is just too closed. You need to roughen it up. That's why I like coarse, I like blondes highlight it for the softer wave because it's going to be able to hold that soft wave in place versus somebody who has finer texture. It's. It's going to fall out a little bit more. And then the parting and sectionings again is going to be tall. So it's going to be tall just how I showed you on the tucks behind the ear. So they're going to be about 2 inch sections all the way up the head versus like a 1 inch section. And the last one that you guys probably see is the tight wave. So to create a tighter wave where there's not so much space in between each ridge so it sits a little bit tighter. Like I'm going to try to do this for you guys. So you guys, I hope you guys are seeing this on the camera. So there's not so much space in between. So it's tighter. Like that old Hollywood, very like 2012. It's honestly not even in but some clients want it and it, it does have a place in time. I'm going to use a 3 quarter inch iron. A 3 quarter inch iron is going to create less space space in between each row. The twist wrap technique is what I'm going to use for that tighter wave. And I'm going to hold my iron horizontally. So to create a tighter wave, I'll hold my iron this way with a three quarter inch iron. I didn't pull that one out. This is my 1 inch, but I have it listed on the products and tools in the other post. So. So then the ideal hair type when I'm going to pull out my 3 quarter inch iron is if my client has shorter hair. So for moms who want to do a glam wave and they have shorter hair that's maybe right below their shoulder or sits right at their shoulder, what happens is if I take my 1 inch iron to that and I'm going up the head when I'm brushing it out, if their hair is shorter, they're only going to get like maybe one or two waves. So so with my 1 inch iron. But if I use a 3.4in iron, I'm able to get three rows of a wave. So it looks a lot nicer and it blends nicer in the hair. So the ideal hair type that I use the 34 inches for like shorter hair again like right at the shoulder, maybe above and they still want to do like that kind of a wave. You'll be able to get three rows in it. And then the sectioning that I'm going to take for that is probably like 1 inch tall. So when you're looking at the sides, it's going to be about one inch. So those are the ways that I dissect each one of these inspiration photos. So that way I know, okay, if my client sits in my chair and she has shorter hair and she still wants a glam wave, okay, I'm gonna pull out my three quarter inch iron and that's what I'm gonna use for her, or if somebody sits in my chair and she wants the tucked behind the ear glass glam wave. All right, the curl technique that I'm gonna do is a twist wrap, and I'm gonna split each section in half, and I'm gonna always curl away from the face to make sure it's nice and blended and looks really beautiful on their neckline for that style. And then for the soft wave, I'm gonna make sure that I take those taller sections, so that way I get more space in between each row. Okay, so next, when it comes to gland waves, something that's super important is our hairspray. I feel like we don't take our hairspray into account as much as we should. So the main products that I use for my glam waves are. Here, let me put my belt on for you guys. She's in the way. This is my up hair belt that I cannot live without. You guys probably see me in this all the time. I keep all my products in here and my combs. So actually, I'll go over my combs first. Where is my. So the combs that I use again, all listed. I'm going to be using my 4 comb. I'm going to be using my ys part carbon comb. A carbon comb versus a plastic comb. This is carbon. Carbon helps reduce static in the hair. So this is really great, especially for the drier months, like right now. And I use a rat tail combination, so I'm going to keep those all in here. But back to hairspray. Hairsprays that we use, there's four different types, so I use the session three, the concrete four. These are oasis. I use a got to be glued. Got to be glued and silhouette non aerosol. So you probably see these hairsprays in people's kits and use them, and you might not be getting the same result. And I want to tell you, you guys, why. And let's break that down a little bit more. So to break that down, we need to understand why we're using those. I don't want you guys to just pick up this hairspray because you see somebody else using it in a video, and then you're like, well, crap, I'm not getting the same result. So what exactly is hairspray, and how do we use it for our styling? Hairspray is a blend of polymers that provides structural support to the hair. Very scientific, I know. So what kind of structural support do I need during styling? I am so glad you asked. So I'm going to Break this down for you. So to understand when you're going to need which type of spray, we need to understand that there's three stages of creating a glam wave. Stage one is prep. Stage two is shape. Stage three is finish. So in my prep stage, how important is structural support for my glam wave? In the prep stage, on a scale of 1 to 5, I did these. On scale of 1 to 5, it's probably a 4. It's really important because that's the first initial wave we're putting into the hair. So we need a lot of support. So we need a strong spray. Correct. Stage two, in the shape, the structural support that we're going to need is probably on a 2, from a scale of 1 to 5. Because when I say shape, that's when we're shaping is. Anytime the curl is like, you just left the iron and now you're taking any kind of a brush to it. That's what I call the shaping stage. So we're not going to want something that's super strong hold, because we need to be able to manipulate that, that curl, that wave and shape it into place the way that we want. Right. So we're going to want something that's a little bit more flexible of a hold of a hairspray. So we're not going to use the same spray probably as we did in the prep stage. Then when we're finishing, when we're finishing, we're adding shine. We're kind of like gluing those little frizzes into place, and it's kind of like that finishing spray. Like, I feel like makeup artists, they use a very specific spray when they're finishing the face to make sure everything isn't moving, to make sure it all just kind of locks together in place. Right. So that's what I call the finishing stage. You're going to want to do, like, an overall spray, add shine, hold it in place. The structural support we're going to need is very strong. That's like a five. We don't want that moving. Again, you guys have said things like you don't want your waist disconnecting or falling apart when your client moves. That's. We're going to tackle that in the finishing stage. Right. Okay, so now that we understand this, which stage we're going to need, which kind of structural support of a hairspray, what kinds of sprays are we using? There's actually, there's 10 main types. For me, I only use these four, so that's why I'm covering these four for you guys. So the four spray types that I use, finishing, shaping, freeze, and non aerosol. So again, freeze well. Sorry. Freeze, non aerosol, shaping, finishing. This is a finishing. Okay, so those are the four sprays. So let's break them down. So I'm gonna break them down by the spray type. What's their purpose, examples, and when to use it? This is the most important. Knowing when to use your sprays can be the difference of your style. Holding all night or disconnecting. It can be the difference of your style looking frizzy and matte versus looking glossy and that, like, wet hair look. Okay, so a finishing spray. The purpose of a finishing spray is a finisher. I know, I know. Who would have thought? So they're meant to add shine and lock that style into place. So I'm not going to use at the end shaping hairspray that's meant to be brushed, or I'm not going to use something that's not going to lock it into place, like a flexible hairspray. I'm not going to use that at the end. I'm going to use a finisher. So Examples are the Oasis 4. This is concrete, so it's an ultimate HairSpray, and the Kenra 25. So I really hate to break this to you guys, but a lot of the classes that I do, everybody will break out their Kenra 25 and tell me if you've done this, because I've seen you guys do it, and I've been a victim as well. Kenra is a very Stronghold spray. So this is what you guys do. Take the hairspray, and this is your section that you're about to curl, and you do this, and then you just go in, and we start curling and waving. So let's back up. Why is that wrong? Because you'll probably notice you just created a mountain of Frizz. So the Kenra 25 is a finishing spray. I shouldn't be using it before and after curling. I should be using it when my style is all done and holding it into place. Right. So that that Stronghold spray is gonna. The Stronghold sprays dry instantly. That's why it's so strong. So as soon as I take this to the hair, it's dry. And that piece of hair is going to stay in place. So if frizz is present, that's going to be locked into place. So that Kenra25 no longer has a place in my kit. I use this one. But if it did have a place in my kit, I would want to be using it at the end, not before curling and not after curling. That's not its place. Okay. So that's going to help you dramatically reduce your frizz by changing the spray that you're using at the time. The next spray type that we have is shaping. So again, this is when this purpose of the shaping spray, it's slow drying, and it's meant to be brushed. It's meant to be manipulated. It's meant to be shaped. So a shaping spray is going to be used when this section is curled, and then I want to brush it out. So I'm going to take my comb and start brushing it. Then I'm going to take a shaping spray and spray that section and brush that. That's going to help manipulate and give structural hold to that shape that I'm creating, which is that s pattern. Right. Makes sense. So some examples of that are the Oasis 3, which I love to use this when shaping my glam waves, and the Kenra 21. Kenra 21 Kenra's products are all very strong hold. I'm not a fan of them, if you guys can tell. But if you have it, that's when you're going to want to be using the Kenra 21. Not. Not the 25, the 21. Okay. So when you're going to use your shaping sprays during a glam wave is when you're brushing it out. Not at the end, not before you're curling. When you're brushing out that wave, you're going to want to pull up a shaping hairspray. The next hairspray is a freeze. So freeze sprays are like your got to be glued. So free sprays are very fast drying on the hair. You spray it on the hair, and it immediately dries whatever you have created in place. So examples are the Got to be Oasis also has one. It's called a freeze spray, and you want to use these again at the end. I love using a freeze spray on a glam wave for that front piece that frames the face. So what I like to do is, let's just say we gave our gorgeous model Ashley here, like a beautiful height in the front of a glam wave, and we want it to stay all day. And maybe this piece is like, coming out more like, how the heck am I gonna get that to say? Take your freeze spray, hit it, and then what you're gonna do to activate it even more. And I'm gonna show you guys this little later to really activate your free spray to hold into place. You're going to take a blow dryer and hit some heat on top of that freeze spray. So that way it doesn't move. It's going to freeze everything into place. So free spray, we use that at the end. Now you guys are probably like, well, what spray do I use when I'm curling? Like, what do I spray on the hair before I start to curl? Curl? I'm so glad you asked. So you're going to want to use your non aerosol spray. Your non aerosol spray is really going to give you the most structural support because you can manipulate it. It's slow drying and it's meant to work or manipulate structure into the hair. So when is that? One of the most important times is in the beginning when we're first putting that curl structure into the hair. So once I do like to use are the Kenra 25 non aerosol. This is the only camera product I actually love, guys. And the silhouette, this is a beautiful, beautiful spray. This one. When you start brushing it out, it is a little sticky on the hair because again, it's heavier. It's more of a finishing style spray. But the silhouette is so brushable and flexible. When I'm moving from my prep stage into my shaping stage of the wave. So this is my go to and probably what I'll use today. So we're going to put it in the pocket for later and you're going to want to use that at the beginning. So my when I'm curling, you guys will see, I'm going to take my sections, I'm going to spray and what you're going to want to do is comb that into the hair so that way it evenly distributes on your entire length of the hair. Then I'll pick up my iron and then I'm going to go in and do my glam wave with my non aerosol. That's going to add the most structural support to this hair. So once you understand these sprays. So like I said, if you are seeing disconnection in your wave, you're probably picking up the wrong spray at the wrong time. To help with disconnecting and to help with blending, it's going to start with picking up the right tool and the right product of spray. So when you're shaping, you want something that has a stronger hold that's not going to add frizz into the hair. So this is a perfect one or the Kenra 21 shaping. So when you're brushing that wave and you want to start seeing it connect and come together, you need that. Those extra polymers. So what the polymers in the spray are doing is it's touching each one of those hair strands, and it's gonna pull them together versus, like, something like a finisher is just gonna hold on right there, and it's not gonna move after. So if you're disconnecting, try. The spray is getting in my throat, guys. I'm gonna. So you're probably using the wrong spray. And if you're worrying about frizz, you're probably also using the wrong spray. Let me get some gum. Okay, we're back. So I hope you guys understand the hairspray. So then you'll better be able to tell when to pick up one for each stage, and we'll go over it in the demo. So next, what I want to talk about is your sectioning for the glam wave. So there's five layers, Five sections of the glam wave and the three most important layers. We got the front, the back, and the profile. I'm gonna section out her hair how I section it out for a glam wave. So you guys can see those layers that I'm going to be taking once I have my model. So section one.
More from Marissa




7 Lessons I Wish I Knew In My First Wedding Season (I’ve Now Grossed $728,000)