HAIR PHOTOGRAPHY MASTERCLASS(photo editing with Lightroom + lighting set up)
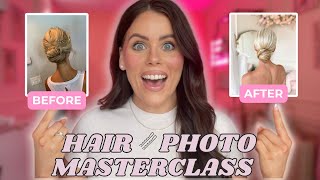
Marissa Brennan's YouTube masterclass (Oct 2023) teaches hairstylists and photographers how to improve bridal hair photos through lighting, camera/phone angles, posing, and Lightroom editing. Key points: prefer daylight/window light when possible; use handheld LEDs or panel LED panels on location or in-studio (ring lights discouraged); photograph clients standing with one shoulder toward the camera and chin tilted up for better hair display; iPhone Pro 12 (grid on, Smart HDR off, portrait mode) is sufficient although Sony A6400 yields a more professional look; edit in Lightroom using 4x5 crop for feed (9x16 for reels), adjust exposure/shadows/colors, use the healing/spot tool, and save/apply presets. Brennan also mentions her Academy opening enrollment in November 2023.
We want to take your photos from this to this. The number one skill you're going to want to focus on in order to book more brides is your hair photography skill. And not a lot of people are talking about it. The number one thing that's actually going to book you more brides, so we need a master class on it. In today's video, I'm going to be covering lighting, camera and setup angles, editing A to Z hair photography masterclass. So let's dive in. First up, the thing that you're going to want to focus on is lighting things. There are two kinds of lighting in hair photography and photography in general. We have studio lighting and we have natural lighting, AKA daylight. Right now, while I'm filming this video, I am actually shooting in studio lighting and not daylight. So what are the differences which is better and which is worse? You want to optimize your lighting as much as you can because lighting can absolutely change your hair photography game. There is so many different studio lights out there, so I want to cover the ones that I've personally been able to use. The first studio lighting is overhead lights. So if you guys can notice right above me, I have studio lights on. Is it giving doctor's office? Absolutely it is. But this is just what I have within my studio. This is not optimal for your hair photography. Here is a hair photo that I took in this studio with these lights on versus when I brought her out into sunlight, the hair actually changed, the color changes, everything changes, and it looks a lot better in natural light. Now let's go over the other studio light. The next kind of studio light is a handheld LED light. I have this one on a tripod right now, but it actually comes off and it is a handheld. And this is great. When I'm taking hair photos of my.
Clients from the front in order to.
Do my makeup girls work justice. So it actually comes off and you can hold it in your hand. And you'll likely see a lot of makeup artists using this on top of their clients. Here is me in studio lighting, no daylight. And you can probably tell that it is really dark and dingy on my skin and my hair really isn't showing any justice. Lighting is meant to add shine and show the dimension of the hair color in the photo. We want to add that contrast and we need great lighting to do that. So here is me without using a handheld LED light over me versus now I have the LED light right in front of my face.
And you can.
Probably see the dimension in my hair and my makeup. A Lot better and clearer. This can take your photos from amateur to pro simply with the click of a button on this light. So let's talk about my favorite handheld light. You can actually get these on Amazon. I have one linked in my bio below. I absolutely cannot pronounce this name. Different settings over here, so when you turn it on, you can adjust the settings. I usually like to keep it at 100. This battery pops out and you can actually recharge the battery. So that's really nice for this one. It can also go onto tripods. It can sit horizontally and it can actually sit vertically. So this one I love to use to keep in my bag because it's so easy to travel with. And also I just love to do my makeup girls work justice. Even if I am in front of a natural light window, I will still pop this bad boy on top to get the absolute best lighting for your photo. Now let me give you guys a little demonstration of how I actually hold this in front of my client's face. Turn the light on.
On.
I don't want to be super far away from my client within a arm's length distance holding it right on top of her. So the light is usually at her forehead. I don't have it here. I don't have it below because that's going to add all this weird shadowing on her chin directly in front because that's going to hit her eyes and it's going to be hard for her to see when we're taking photos. So I like to keep it above her, just right at her forehead. Now let's have studio light options. There's so many to choose from. And yes, I've tried them all. First up, we have our ring light. From a one to 10. I give her a zero. Am I a fan of a ring light? No. Let me show you why. The first reason is they are absolutely huge and you can't travel with them. But maybe you want to keep one in your studio because you have overhead lighting or no access to a window. But here's the difference with this light versus my other studio light. So this is likely your setup. You probably have your ring light and then you're going to be standing right here with your camera or your phone. Now here's what the hair looks like before. If we see what happened in the background over here and over here, it is creating a bunch of different shadows. And that's what I don't love about the ring light. Another thing is you'll likely probably get a lot closer with your Ring light, which for me, it just adds all of these weird tones onto the hair, and it's looking super frizzy. So it's actually highlighting the frizz in the hair while darkening the background of your photo. And that's just something that I'm not obsessed with. In hair photography. What we want to aim, aim for is for the entire photo to be light and bright. So that way your hair is standing out, but the frizz isn't visible. All this frizz is so visible in the photo, and then when we get even closer, it gets even worse. Light is meant to soften the hair, and it's meant to soften the frizz, and this just isn't doing it justice. Here we go again. This is a visual of it without the ring light, and this is with the ring light on. It's giving a very cool tone. You can't adjust the lighting, and I just don't love what it does to the background of your photos. I don't think this optimizes your hair work to a hot fire flame. Self, in order to sell your services, covered three different studio lighting. So we've covered the overhead studio light, which is never optimal for hair photos. And we've also covered the handheld LED light, which I love for on location when I'm working, and the ring light, which for me is a 0 out of 10, and it doesn't do your hair work justice. So now you're probably wondering, Marissa, but if I am working in my studio and I don't have optimal daylight, what can I use? Here's my personal favorite that a lot of my makeup artist friends use. It's the panel LED light. These are the newer LED lights. They come in a set of two, which I absolutely love, and they also come with these tripods. They are really great because they just plug right into the wall, and you can actually disassemble them and reassemble them. So they are great to travel with, which I love. Can keep them in your studio, or if you want, you can bring them on location. And they are also really great because you can change the tones. You can change it from cool, and you can change it to one warm, which is great. Now, if I was using these, this is exactly how I would set it up in front of my client. I would have one pointing at the side, and I would have one pointing at the back. Now, why am I doing that? That way I don't have any shadows on the hairstylist. So here's what the hairstyle looks with just one light on her shining from the side, and it's a much softer light. Your background is also illuminated. Here is also illuminated. But let's illuminate it a little bit more so that way we can get rid of all the darkness and the shadows that it's creating. This is our hairstyle with both lights on, it is a lot less shadows in the background, as you can see. So what I have is I have one pointing at the side of her and I have one pointing from behind her. The closer you get, the more illuminated your style will be and the less shadows. I have my phone, so I want to show you guys where I would stand. Actually take this photo and what it's going to look like when you take photos on your phone. So I have both of my LED lights set up. We have one pointing on the side of her and we have one pointing behind. So where I'm going to want to stand is in between these lights. So that way I get the best lighting on the hairstyle and the best lighting is currently on my lovely model and not my face. So I look not so great. But bear with me. This is my angle. As you can see, the lighting in this photo is very well distributed. We have a light background as well as light and illumination on her hair. What your hair photo will look like when you're using the LED lights and with this angle. Now that we know where we want to stand for our photos if we're using the LED lights and how we can get the best lighting and the best shot. Here's what I wouldn't do is put them too far back away from the hairstyle itself. Because what it's going to do is create more shadows when we want to illuminate the style, how it will look like if your light source is not close enough to your hairstyle, it is very far away. So we want to move it closer. I don't want to come to the front like this when the light source is behind her. So the our light source is over here. And I don't want to be in front of light source. You always want to be behind the light source in front of the light source versus behind the light source. Now, in terms of getting the best angle when you have these lights in front of you on your phone, what you want to be looking for on your phone is illumination of the entire background. The angle that I like to get is to have one shoulder pointing towards me. Don't want to be super close like this. It's going to look super frizzy. So I want to pull back a little bit, and this is going to be the angle that I get. Angle that you wouldn't want to do is to come behind the light like this. That's not going to do your hairstyle any justice. When I have my phone, I am not pointing my phone on top of her. That's not also not going to do your hairstyle any justice.
Okay.
Now that you can see the difference on the hair photos of what it's going to look like with those three different light source. Studio lighting is never going to be my first choice when I'm taking a photo of my clients. So here's what the styles look like in my studio when it's just those two LED lights versus when I took her out in daylight. These are a great option that you can use if you don't have access to daylight. The LED panel lights are the ones that I would use, and I have them linked in the description box below. But let's move on to my favorite light source, which is daylight K a window light.
Okay.
I've brought our model out into the natural daylight. How can we optimize the best lighting in your studio to get the best photos of your model? She's super chatty. Today I am looking for the absolute best lighting to take hair photos. What I am looking for is big, open windows. That's not going to produce any shadows, and it's going to illuminate my hairstyle as well as the background of the photo. So here's places that I wouldn't choose versus the places that I would choose. Let me turn you around and show you my studio, our light source. We have this beautiful, gorgeous, a large open window. Anywhere Directly in front of this is where I'm going to want to place my model. Having the light source on one side of her is really going to illuminate the hairstyle. I would have her stand here, and I would have her stand here. Okay, we've got her in front of the daylight. Now let's talk about where we actually want to stand ourselves, because that's going to matter when we're taking photos with our phone. Here's where you don't want to stand when you're taking a photo in front of your light source. You want to be behind your light source. The window always needs to be to your back, not you facing it. So standing here and taking a photo.
No, no.
You're gonna stand behind your back to your light source. The next thing I want you to pay attention to is any Overhead lighting. This is a big no, no. You want to make sure that you turn the overhead lighting off because it's going to cast a very, very warm orangey tone onto your hairstyle. And if you're doing a bombshell bride, you don't want her hair to look yellow. So these overhead lights are going off. Here's what it looks like on the hair with these overhead lights. And we also have this orangey yellow coming from inside my studio. So here's what the hairstyle looks like versus when I turn them off. Neutral tone. And we have no unwanted warm tones on the hair. Okay, you've got your model placed in front of the window and you're back is to it. You are not taking photos from the front like this. You are going to be directly behind like this. But what are some angles that we want to take to do your gorgeous work justice, my friend? Let me share with you my three favorite photo angles. Get the best photos. So some common photography mistakes that I see when I'm doing hair lessons with other stylists is they're taking their photos while their client is sitting down. Here's what your photos look like when your client is sitting down versus having.
To them stand up.
Number one, your background isn't going to be clear. You're likely taking your hair photos on location when you're working at a hotel. And your background is likely not going to be on brand versus up and you're moving her to a clear background. It's going to make your photos that much better angle. When you're taking photos with your client sitting down, look like this. So when your client is sitting down, you have your phone over top of that. Likely what it looks like. Either taking your photo with holding your phone straight like this or you're taking it above them because they're sitting down. Your hand is naturally going to want to go on top like that. These photos just aren't it. So if you feel like you're doing amazing work but your photos just aren't doing it justice, adjust your angle. Here's what you want to do instead. Always take your photos with your client standing. You're going to have more control of getting the angles. Unless she's super tall, then maybe you can have her sit. But we're never going to take our phone and angle it it over top. We are always going to take our phone and keep it down. I noticed some audio and video changes because I actually dropped my camera when I was filming this YouTube video. So now I'm on my iPhone so.
Here are my three favorite photo angles to get of your client.
The first one is of the side of the hairstyle and not just straight.
On from the side.
So why I love this angle is because instead of having your photos look look flat of just the hairstyle from the back, then your photos are going to look like this. I'm actually doing. And what I tell my clients is I'll have them stand with their back to me and then I'm going to take one of their shoulders and I lightly pull it towards me. When I'm doing that, it's gonna have your client look slightly off so you can see the side of them. Why this is so pretty in photos is because it's going to show style as well as some of your client client's face. So what you can do is you.
Take your client from the shoulder and.
You just pull that shoulder towards you. So it's going to showcase your style a lot nicer. Always going to want to shoot from the waist up to have them point one shoulder towards me and then look off to the wall. So then the back of their hairstyle is showcasing towards me. Those kinds of photos are going to look like this. And what I'm doing with my client is I have her point that that one shoulder towards me. I have her point her neck off. So it's going to look something like this. It's going to give you more of the back of your hairstyle and that's more ideal when you're doing something like a low bun for a high bun. Best way to take your photos for a high bun, a high ponytail for.
It to look the best, you always.
Want to take it from the side or glam waves or any kind of a down hairstyle. You usually want to get the best. So here's my favorite way to get the best. Something that I love to say to my clients when I'm taking taking photos of them from the back is to tilt their chin up. I had my hair in a low bun. Watch what happens to the bun when I have my chin straight like this versus when I pull my chin up. This is with my chin down. What it does is it exposes everything underneath the neck. You want to expose your hairstyle so you always want to have your clients.
Pull their chin up.
So I love to do that angle.
For low bun, low ponytails or a glam way. If I'm taking a photo of a glam wave from the back, the best angle that I love to do is.
To have my client look over their Shoulder. Instead of this, I have them do this. So then you can get the side of their feet, have them turn towards me so they're looking off the shoulder like this. It's always a great photo to showcase anything that's down while getting a visual from the front. Right now, let's talk about some video. My camera has broke, so I don't have my iPhone to show you this.
So I'm going to do my best here, you guys.
So one mistake that I see people do with video that makes them come out shaky is you're actually moving your entire body when you're taking the video. You just want to move one of your feet.
You actually want to stay still.
So let me show you the full body of that.
So here's what not to do.
When you're moving all around your client, your camera is shaking and it's not staying still. It's not not stabilizing. You want to stabilize your camera. So what you want to do is hold it with both hands and you keep one foot planet and you want to do what I call the 180. 180 is we are going to swing around, keeping our camera nice and still, and we are just going to swing around from side to side. I'm keeping all of my weight on.
One leg and then I'm using my.
Other leg and I'm just using my upper body to swing around. My client might be asking yourself, okay, so what do you actually take your photos with or. I take majority of my photos with my iPhone. I have an iPhone Pro 12. The settings that I usually use was have the grid on and I turn.
The smart HDR off. You might be wondering why I'm telling you to add the grid on your iPhone. When you add the grid, you can get the perfect angle every time. That top line of the grid, you want it to be in line with your client's eyes or the middle of her hairstyle. So here's what it's going to look like when you're actually taking photos. And you put that top line in line with her eyes. Seamless, perfect.
I do like to use portrait mode versus standard photos. So here's what a photo looks like with portrait mode and here's what a photo looks like without portrait mode. Portrait mode will always blur the background. However, it does make your photos appear darker. So in post editing, I will always make sure that I turn up the brightness more than I normally would for a portrait. The other tool that I like to use to get my photos is my Sony A6400 sadly died on me today.
RIP.
I love to use this one because I don't need to do as much post editing with this. I still will edit the photos. So here's what my photos look like on my Sony A6400 versus on my iPad. There is a little bit more of a professional touch when I am using my Sony A6400. Do I use it all the time? No. Majority of my photos I will take with my iPhone which I feel still gets a professional touch. You do not need to go out and spend hundreds of dollars on expensive cameras for iPhone. Phones can get really great quality. We were able to cover lighting, angles and phone settings. Now what I want you guys to see is how I edit the photos. Very crucial step in hair photography is editing. If you are not editing your photos, you are doing yourself a disservice. You could be doing amazing hair work and take a great photo with a great angle.
But then when you see it on.
Your phone, you want it to pop on the Instagram screen.
Right?
So let me show you my favorite ways to edit my photos within.
Okay, we're over on my computer and I want to show you guys how I edit my photos using Lightroom.
Lightroom has a free seven day trial.
That you can use and it's great because you can use it on your desktop as well as an app on your phone. So first thing I'm going to want to do is I'm going to airdrop my photos from my phone to my desktop. Okay, we are airdropping my photos and they should be here any minute. I'm going to go to add photos and I'm going to select the photos. I can drag and drop them or I can select them from my device. So here are my photos. I'm selecting them and I'm just going to drop them into light. Once the photos upload, they're going to show here in your all photos photos. So I'm going to select these photos and we're going to edit them together. So the first thing I do when I'm editing my photos is I'm going to crop it first. Here's all the editing tools over on the side. So let's go through them. There's presets. So you can make presets of things that you do all the time within your editor. The actual editing. This is going to be things like adding brightness, changing the color. You can add details, effects. That's all going to be in the edit tool. And then here's our Crop tool. So it has all different crops. It has ones that are already set, for instance, and you click this little band aid. This can actually any blemishes or take things out of your photo and remove it. Asking is where you can change the background or the subject of your photo. And down here is to undo whatever you lasted. So if you made an edit and you don't like it and you want to take it away, just hit this button. Okay, now back to our cropping distracted. Okay, so going into the crop tool, what I want to do is I actually want to crop it for Instagram. When you're posting a photo on Instagram, if you're posting it on the feed, you want it to be the 4 by 5 crop. Or if you were doing a reel, you want it to be a 9 by 16. So I'm going to hit this drop down arrow and I'm going to go to the 4x5 for the feed. And this is going to give you the perfect crop size to show up on Instagram. So what I'm going to do, remember I'm taking this top line and I'm putting the middle of her hairstyle in that top line. So when I'm thinking of cropping, this is obviously a mannequin, but I want to crop things out of the photo and I want to focus in on the hairstyle. Just going to drag and drop. I want to cut that out of the photo, but I want to keep this top line within the middle of this bun. So here's what I mean. When you want to keep that in the middle and that's going to be a great angle. Look at what it does. It goes up here. You have too much going on above the hairstyle and the eye isn't going to focus in on the hair or when it's also not cropped at all. And you have so much going on below the photo. So when I'm cropping, I'm going to take this 4 by 5 sit in the middle and get rid of anything unwanted in the hair photo, like all of this underneath. So when I feel like that's a good crop, we're good to go. Now let's move on to brightness and color editing. I'm going to go over here to the edit tool. And now I want to brighten up the photo and I want to make the hair stand out more. So typically what I like to do is I like to add some exposure and make it a little bit brighter and turn down the shadows. When you turn down the shadows in your hairstyle. I usually like to do this for blondes or turning down the shadows on blondes. It's going to make their hair contrast and stand out a little bit more. So as you can see, the brightness is going away from the hairstyle, making it stand out a little bit more. I'll usually go down to blacks. Depending on the color of the hair, I'll see what's standing out more, what's showing more contrast it versus what is showing too bright. So when I take the blacks away, it gets rid of all the shadows in the hairstyle and it's showing a little bit too much frizz. This is a mannequin, so her hair was really frizzy and I was just practicing. Let's be honest, when I turn the shadows down, the hair is looking much better. Now let's go down to color. So when I'm over on color. Wait, I just noticed in the photo, go. There I am. That's too funny. So you want to look at the colors in the background as well as your client. Is she looking warm or is she looking cool? I like to make them look neutral, so I like to have a little bit of warmth. She's looking pretty cool. So here's what it'll look like. If I turn the warmth up, can you see what it's doing to the hair? You don't want it too warm. What I'll do is I'll take the coolness down to about a three and then I'll bring the tint up or more of a romantic look and I'll just add about a 2 to a 5 of like a pink. You could turn the vibrance up so it's a little bit more colorful. And that is all I do for my editing with my photos. I do adjust this for their hair color, their hair style that we did. So for a blonde versus a brunette. For a brunette, what I like to focus on is turning the blacks or the shadows down a little bit to make it a little bit more in depth. Or if I took a photo and her hair is super dark and I want to show more texture in the style, I'm going to bring the shadows up, see how it brings the style out more, and you could see more texture. That's what I like to do for those. And if it's a blonde, typically what I like to do for blondes, sometimes they can shoot very yellow versus you want their hair to typically look more on the cooler side. So if their hair is looking a little bit too yellow or Orange based on maybe, like the overhead lighting or something. What you can actually do is color balance. So I'll come over here to this little dropper in the color, and when you tap that down below, the color mixer is going to show up. So I'll go over to either the orange or the yellow, and what you want to do is neutralize it. So if you want to take the orange out of the photo, you're going to go to luminance and you can take more of the orange out. When you take the luminance and on orange and you take it down, it's actually going to make your client appear tanner. And if their hair is appearing too yellow, I'll come over to the yellow and I'll take the saturation and bring that down until I see in the hair that the yellow is going. Another thing that I might do in Lightroom is I'll go over to the Band Aid the healing, and you can get rid of anything unwanted in your photo. So let's say I wanted to get rid of me. This might not work, but let's just say I wanted to do that. It's going to be a little brush. So you can actually use the brush size that you want. You can make it smaller. You can come in and do detailing with it, or you can make it larger if you want to get a big area. So let me see if I can get rid of myself in this mirror. And here's what it's going to look like. It's going to kind of blur it out and makes it not so much of a focal point. But what I typically like to use this for is around their hairline. If they have a lot of hair layers around their hairline, I'll go in and get rid of that. Just really go in with a fine tooth comb. If there was something like an electrical cord here, or if there was a fire alarm above her head or something like that, I would take this tool and I would erase it out of the photo. Once you feel good with your photo, you're going to go up here and you can share your edit. You can exit out, and it's going to be here. So this is your edited photo. And I'm sorry, you're actually going to want to download the photo if you're on the desktop. If you are on the app, what you can do is download it to your phone. Now, let's say you have a bunch of photos from one client and you love the edit you did, but you don't want to go in and manually do the same edits on every single photo. Here's a way that you can edit faster for your photos. So a little hair photo editing. What I'm going to do is here's my photo that I've edited. I'm going to go over and hit this preset button. When you hit this preset, you can actually take the edits that you just did and create a preset that you can then apply to every other photo. So what you're going to do is hit this little plus sign. When you hit that plus sign, I'm going to name it based off of her hair color. Color. So redhead. So I'm going to save that and it's going to save the crop, it's going to save the colors that I use, the brightness, the shadows, everything. You're going to hit save and it's going to show up here under user presets. So now what I can do is all the other photos that I have uploaded, when I hit this, I can just go over to presets, I can go under yours and then I'm going to find my preset and I can just apply with one click I'm going to hit the preset that I just made. So here's what it looks like without the preset and here's what it looks like with the preset preset. So then you can edit your photos with one click. This is on the desktop, which I don't typically use when I'm editing my photos. I usually just do it within their app on my iPhone and it actually does bring over crop. So I'm just going to go in and manually add the crop in that I did on the other one. So again I'm going to hit the drop down menu, going to go to the 4x5 and then I'm going to crop my photo. Happy Hair Photo Editing if you're feeling.
Like a hair photo master after this class. If you're looking for more in depth bridal hair business education, make sure you're.
Signed up to know when my course.
Academy opens for enrollment in November of 2023. Because if you're somebody who wants to take your content and your business to reach six figures, this is the course for you. Link in the description below.
Can't wait to see you inside.
Hope you guys enjoyed this video and I'll see you in the next one.
Bye.
More from Marissa



7 Lessons I Wish I Knew In My First Wedding Season (I’ve Now Grossed $728,000)