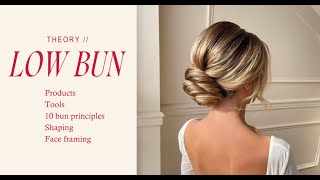
Marissa Brennan teaches ten foundational principles for secure updos: pins need product, volume goes in the Mohawk section, tension comes before fluffing. She walks through decoding client photos, choosing the right products and tools, and the three structural layers of an updo.
Welcome to today's class. So this is gonna be part one. We're gonna do theory for low buns. First, if you guys are here with me live, I'm so excited. You can ask any questions when I'm doing the demo portion. So this is going to be theory. Then I'm gonna stop the live. We'll do another class, and I'm gonna do the demonstration for the low bun, and then we'll do photos afterwards. So first things first. Thank you so much for being here today. I'm really excited for today's class. I actually have a surprise in store. I'm going to be doing two demonstrations. So I'm going to be doing a low bun as well as a mid high pony. I'm excited for it. Okay, so first thing I want to cover for theory is the ten bun principles. So for the ten bun principles, I have them right here. So I'm going to flip my screen so that way you guys are able to read it because it is backwards. So give me one second, and I'm going to flip my screen like that, and then do I do this? Okay, screen is flipped. You guys should be able to read that. Okay, so first things first. I want to start with is the ten bun principles. So when. So when you understand these ten bun principles, you're going to be able to plug and play your bun with anything. It really helps me to. When I know these things, then I know why I'm doing what I'm doing with the bun. Okay, so first one we're going to start with is your pins. Need something to grab. So pins, your bobby pins, they don't hold the style up. So that's the principle that I want you guys to think about when you're styling your bun with me today or if you're re watching it later live. So your pins don't hold the hair. Your product holds the hair. So when you understand that principle, when you're pinning, if the hair doesn't have product on it, the pin isn't what's going to hold the style in place. You need to have product underneath it. It needs to have a base to have something to grip and hold on to the hair. So what I use to be able to have grip and hold in my hair, anywhere that I'm placing a pin, I'm going to want to have texture powder and some teas under there as a foundation for my pen to hold into. So when I'm doing like a half, I call it like a half up base. When I'm Doing a low bun, if I'm doing something like this, if I'm just pinning that in the hair, it's not going to hold as well if there's nothing underneath there. So. So what I like to do is always make sure that I'm going to have, like, texture powder under there and a light little tease. So my bobby pin has a lot more to hold on to. Also, when you understand this principle, you're not going to be overloading the head or your styles with bobby pins, because you don't need as many. You just need to know that where you're pinning, you're going to want to put some product underneath. So the second principle that you're going to want to know is volume stays in the Mohawk section. This is going to create a really nice balance in the hair. So when I say Mohawk section, think of, like, when you're highlighting the hair. So when we were in highlighting section in cosmetology school, you would stay in line here. Hi, guys. So you would stay in line here in your client's Mohawk section. So I'm gonna draw that out so we can get that visual of where we want to keep our volume. When you know where the volume should be to create harmony, to create balance in your updo, then you're gonna know where not to pull it. So this is the Mohawk section, give or take an inch. So, all right, here is the Mohawk section. So when you're creating your style, anytime you're adding in teas, anytime you're pulling to air it out to make it look fuller or create more texture, you're going to want to keep it in this Mohawk section, because in this Mohawk section is going to create balance. When you start putting too much tease here on these sections, it's not necessary, and it's going to create a more round shape, which is not the goal. You want to keep it in line here. So that's where your tease is going to go, and that's where you're going to be pulling and airing things out within your bun, no matter where it's placed. And also here, you're never going to be pulling on the sides. The third principle, texture, needs to match balance the crown and the bun texture. So something you don't want to do if you're getting a picture from your client or if you're unsure of what the texture, like how to create the texture in the crown and how to do it in the bun, you just want to make sure that they match. If you're doing a curly texture here you want your bun to have curly texture. You don't want to create a curly texture in the crown, and then your bun to be so smooth it's not going to match. So it's not going to be a balanced, harmonious style. So if you have a smooth bun, you want to make sure that your crown is smooth. The fourth one where the crown is pinned, your bun is going to sit. This is a big one. So ideally, you want to pin proportionally with the brow and the cheekbones. So where you pin. So when you're doing your crown section, say you're doing your crown section, pull that out. I'm just going to show you on the mannequin where I pin this. I'm going to pull up my bun, and that's where it's going to sit. So you want to make sure you're pinning at somewhere that's proportional to your client's face. So that way you create proportion with your bun. And I'm telling you, when I show you this on the model in the demonstration, you're not going to be able to unsee it. So what do I mean? So if I unintentionally hold it too high and I pin this up super high on the crown, because maybe I want it more volume or something. So say I pin it up high there, then I'm probably going to pull all of this to meet that, and it's going to be really high and not proportional. See that? So you want to be aware and mindful of where you're pinning on the crown. So places that you're going to want to pin are within the crown area. So the crown starts here at the top of the head, and it rounds down until the occipital. When you're at the occipital, you can feel it on your own head. If you go down your head, where your head starts to dip, that's your occipital bone, and right there is where the crown ends. So the crown ends and it meets the occipital, and that's where it starts. So a proportional bun, keep it low, pin low. And then you're always going to bring your bun to go over top. So when you do that, when you pin at the low crown portion, it's going to be in line with your client's ear, or sometimes it'll be in line with your client's eye. So like that, you don't want to bring it up too high. It's going to be unproportional. You don't want to bring it down too low. The fifth principle, you want to do tension first. Always. Especially when you're doing your bun, you don't want to fluff your bun out first and then start pinning. So just like when you're braiding, when you get to the bun part, you don't want to do this. Like, if you want it to have an airy texture, you don't want to do that. And then go and pin. It's going to be too big. You always want to work super tight sections, keeping it super tight, and then you can go and air it out like that. So again, just like when you create a braid, you know how you do it so super tight first, and then you'll go back in and you fluff it out. That's what you want to do when it comes to your bun shape. Also, when you're creating your crown texture, you always keep it nice and tight first, and then I can go back in and pull it. I'm going to show you how I do this with pins throughout the demonstration for the crown area. But just definitely keep that in mind for your bun portion. Like, if you're finding your shape is off or if you're finding that it just looks a little funny, it's likely because you're probably pulling out your texture too soon and you're not working with tension first. So always keep this super tight when you're doing your twists and you're creating your bun section. The sixth principle shape is king. The shape of your bun is king. Texture is not. When your Tanya stylist taught me this at one of the classes I went to, and it just, like, blew my mind. So I want to share it with you guys. But she said, when your client at your. At the wedding is sitting down and you see her across the room, you're not going to notice the texture. You're not going to notice a curly texture, a clean texture. You're not going to notice any of that. What you're going to see and what everybody else sees is the shape. So you want to make sure that your shape is right, and then you can worry about texture later. So that kind of ties into tension, keeping that tension. So the reason why I keep it really tight is because. Because I'm focused on creating, let's just say, a circular bun shape. That's what my focus is. My focus isn't what does the texture look like? Is it going to show up in photos? Is the curly texture visible? That's not my goal. My goal is to create that beautiful circular shape that's within her neckline, and that doesn't look off. It looks super proportional and balanced on my client's face shape from all angles. That's my goal. The seventh bun principle. Your roots need volume. The lengths need hydration. So just like with your color clients, like, if you guys have ever done color, you know how you treat the roots and the lengths totally differently. You create a whole separate formula for the roots, then you do the lengths. So we need to take that into account when we're doing our buns or basically any hair styling. So the roots are on your client. They're virgin hair. Virgin hair is likely silkier and right at the root area. Your goal is always to add volume into the hair. So that's going to come into effect, and that's going to help you decide what products to use on the hair. And you're likely always going to be back combing at the root to create that volume. Right. So the lengths are typically like damage. You know, maybe your client hasn't gotten a haircut or anything. The winter, they're typically more dry. It could be damage from color, so you want to take that into account as well. So dry hair needs hydration. So the products you're going to be using are like your creams, oils, sometimes, if that's what's going to work for your client's hair type. I'm going to go over products in a second, but just keep that in mind, is to separate the roots from the lengths. Lengths, you need hydration, roots, you need volume. That's the goal. So the next one, always take zigzag sectioning. That's going to make your styles blend it. No matter what I'm doing in a low bun or an updo style, I'm typically always taking a zigzag section versus a straight section. So when it's a straight section, it's going to be visible, versus when it's a zigzag, it's going to be invisible. And you're going to be able to blend those lines in the sections. So let me show you. Right here on the mannequin. We always separate the front from the back. When you're taking a straight parting like this, you're not going to be able to blend the line as nicely when you connect the sections together. So instead, what you're going to want to do is take very small. I take a rat tail comb, take very small zigzag sections, because it's going to blend it really, really seamlessly. When I bring the front to the back. If I'm doing a textured style or a half up, half down, and I'm doing any kind of texture in the crown area, and I need to take more sections in the crown, I do the same thing. So I'm going to take zigzag sectioning versus straight sectioning. And then if I'm, like, blending these together, it's a zigzag thick hair. You want it to take more sections. More sections equals more texture. So if you want a really textured crown, I'll show you guys. So typically, for, like, the kind of styling that I do, I always take large sections. So when I'm working in the crown, I'm taking really large sections. But if the client has thicker hair, which my model does today, I'm going to take smaller sections. Not even, like, smaller sections, but, like, for me, smaller sections. As in, instead of one, I do two sections. So what I mean is, for the crown area, I'll take all this hair in one typically, and work like that. If my client has fine hair, if my client has thicker hair and I want to create maybe more 3D texture, then what I'm going to do is split this. I'm going to do a little zigzag so that it'll be blended, and then I'm going to do one like this, and then one over top like that. It's going to create more dimension to be able to have more 3D texture. So if your goal, if your client has thicker hair, your crown area, you're going to take two sections. The more sections you take in your crown area, the more texture you're going to have. Typically, in boho styling, they take a lot of sections. They usually start in smaller sections like this, and then you add in one over here, and then you add in one over here, and then you add in another, and then you add in another. If you can see it's created a lot of lines, it's created a lot of texture, so there's nothing wrong with that. However, if you want a clean crown area, you want to work in larger sections. So when you know that you're going to be able to have a cleaner section, smoother style, because you're not going to be creating lines unintentionally now you're going to be able to be intentional. So typically, the. The most that I'll take in the crown area is two sections, and that's the one I'm going to be showing you guys today. And then the last one, the last bun principle, ponytail, base is what I do 90 of the time for any updo style, whether that's a low bun, side bun, if they're even still a thing. The high bun, I always do a ponytail base, bobby pin base. I'll do that the other, like, 10% of the time if my client has short hair. So I'll show you what I mean when I always create my crown area first. So when I have my crown area, then what I do with my bun is I always tie it into a ponytail. When I tie it into a ponytail, I know it's super secure, and I know it's going to last throughout the night. Bobby pins. Sometimes if you're using all the bobby pins and your client has really thick hair, they're just gonna. Gravity is gonna pull those out. So instead of putting 15 bobby pins in her hair to hold all this hair together, I would rather just gather it all in a ponytail and know that it's gonna be super secure for the rest of the night. So then I have all these lengths to work with. However, the only time that I'm gonna use a bobby pin base, so say my crown area is all nice, and then I have these lengths. So I would push this all off to the side, put some bobby pins up like that. The only time I'm going to use this kind of a updo base is when my client has shorter hair. So if my client has shorter hair, she's going to have a lot less lengths to work with. So if I'm gathering it in a ponytail, it's going to shorten those lengths even more, and I want more to work with. So by using the bobby pin base, I'm still going to have some lengths, and then I can pull it over and start creating my bun shape. So those are the two. Bobby pin or bobby pin. Those are the two bases that I use for updos. Ponytails just hold hair longer. So when you have these principles in mind, it's going to be easier for you to plug and play various different, different kinds of bun styles. So next, what I want to talk about is the products and tools and how to kind of decode your hair photos that you're getting from clients. So that way it makes it easier for you to recreate the look that we're going to be doing today or kind of decode and figure out what hair prep am I going to do. What products does this style call for? So I'm going to talk about that. If you guys have taken my Instagram Live class last year, maybe you remember these. These Were the star of the show. I love these. Okay, so when you're decoding your hair photos, there's five things you're going to want to look at. So you're going to want to look at the lines in the style, the crown, the bun itself, the front, and the details. So you're going to want to look at the bun, the crown, Try to look at the front. If you. If any of the front is showing and then the detail. So details such as the texture, Are there any pieces coming down? Is there a swoop by the ear? You want to assess all of those things. When your client hands you this photo, it's going to make it easier for you to break down that style in any style you say. So let's go even more in depth. So to determine when you're looking at the lines, you can break them down into sections. And this is going to determine your sectioning for the style. So when I'm looking at this style, you can see where the lines are going and start getting your eye to get trained to look at the line. So then you can see how many sections are taken in this style. In this style, it looks like I took three. So we got one, two, three. And then in the bun, it looks like I took two sections. So if you guys can see the lines are going in opposing directions. So that's how I can tell that that's two sections. So great. So when I see this photo and I want to recreate that bun, I know that when I get that ponytail in place, I'm going to split it into two sections to get it to look like this. And then so when you want to determine the prep tool to use, you're going to want to look at the crown. Look at the crown. Is there any movement there? Is there any curl pattern there? That's going to help you determine what your tool is. When you're looking at the bun, what's its shape? Is it round, vertical, smooth, or airy? This is going to determine your bun method. When you're looking at the front, check the sides. Are there pieces out? Is it smooth by the ear? This is going to determine your face framing method, the details. That's going to determine, like, the overall vibe. Like, this is a very, like, chic, a clean bun, but we got a little bit of a romantic vibe with the pieces kind of hanging down. Oh, no, guys. I feel that tickle in my throat from the last. The last live class where I just started having a cough attack. Let's hope that doesn't Happen again. Okay, so further visual for how to determine your prep tool. The two prep tools that I use is I'm gonna grab a mint really quick so that. Because I feel that tackle, I feel that tickle comes comment. I don't want to cough on you guys. Okay. Okay, so the two. Actually three. I'm only ever going to use my curling iron, my crimper. Crimper, I use like 90% of the time for my updos or a flat iron. These are all linked in the Facebook group if you want to get any of these products, tools. Okay, so if you want to determine whether you're going to use a crimper or a flat iron, again, look at that crown area. What's happening in there? Is there movement? Is it smooth? If your client is sitting in your chair and they have naturally fine hair and she shows you a photo like this, I'm going to grab my crimper versus if they have coarse or curly natural texture and their root area is very wavy, then to make it easier on myself, I'm going to grab the flat iron. So thick hair, you're going to grab the flat iron to just kind of go through. What you want to do is just really smooth that out to make it smooth. Like this one. If you see something like this where there's movement in the crown area, I'm likely going to smooth it out and add volume with my crimper. But I'm also going to take a couple sections and do curling to get that movement in the hair. This is more of like an airier texture. So I'm going to curl a couple sections up at the top. I'll show you on my mannequin. So to get like an airy texture, you're not going to curl the whole head because that's going to be wasting time. But you just want to add a little bit of movement. So if you were to visualize this instead, instead sectioning out the front from the back, this layer, this top layer, I would curl that and have that lay over top. So it's not going to be a fully curled style, but it's going to have some movement on top. So I'm just taking like a half moon section. So imagine a half moon on her crown area. This section like that, that's the section that I would take on top. So this is like the frosting over top of your style. So this is like super important, right? This is that top layer that your client sees. So if I curled this whole section, what I would do is I would Curl it in, like, two or three sections. I'm just doing this as an example. And then I would pin it out of the way and work here. This is all going to be smooth. This goes over top. That's going to be a lot of movement, a lot of airy texture. So I'm going to use my curler and my crimper, so crimper curler. And that's if you get a style that looks similar to this one. So this one, as you can see, there's a lot of movement, a lot of texture. So with this style, I'm going to be using a curl. So that's when I would curl the whole head. So nine times out of 10, I get ones like this. I do get some curlier texture like this, but nine times out of ten, I'm not curling the whole head. And this is a better visual for you guys of what I meant with the bun principle of keeping the texture matching. So if it's a curly texture here, you want to match that throughout the bun. As you can see, all the buns kind of match smooth with smooth, airy with airy texture with texture. So that's going to determine your prep tool. When you're looking at your inspiration photo from your clients. Next you want to look at the bun shape. What kind of shape is it? Is it a circle? Is it horizontal? Is it going vertically? That's going to determine where you're placing your. Your base, your ponytail base. So the circle. And it's going to determine, like, the length of the hair, what is what bun shape is best for your client. So if the length is past their shoulders, you could do a ponytail base. And it's going to be a circle like this. That's the shape you're looking for. This is above shoulder. So this is what the shape looks like when I do the bobby pin base. And then above the shoulders, this is more of horizontal buns, so those are different bun styles. When it's a horizontal bun, I'm going to keep my base low on the nape of the neck versus when it's a ponytail, I'll bring it up a little bit higher because I'm going to be able to go around to cover the nape, if that makes sense. And then next, when you look at the front, questions you want to ask yourself and your client in your consultation is how much height do you want in the front of your hair? How much do you want to leave out? Do you want it swooped by your ear? Do you want to keep it tucked? You Want to ask those questions. So then you know beforehand going into your style exactly what they want so you can create exactly what they're looking for. And you can determine that if they have a side profile photo just by looking at what's going on. So if you can see like this style is a little bit swooped by the ear, so I know that I'm not going to tuck it super tight. I'm going to kind of leave it a little bit low and not go like super high because they're going to want their ears covered. If they're showing me a photo like this next, you want to look at the details of it. You want to make sure. I always like to have the conversation, especially with updos, with my clients. I always want them to show me a picture of their dress to make sure that the overall vibe is matching. I feel like we're the professional so we want to give them that added touch of like, you want to know what's going to match best. If your client typically if they have like an overly clean style dress, you can match that depending on what their overall vibe is. If they're going super clean, elegant for everything in their wedding, you're going to want to steer them away for some from something like this because a style like this is probably going to match better versus like if it's an airier texture, then maybe if they have like some kind of fun detail on their dress, I feel like that would match as well. If they have like a very lacy gown. That's typically when I'm like, you maybe want something more textured. You kind of want to like guide them in a way. Because I feel like they do kind of look to us for advice. So when you're looking at their inspiration photos and maybe if they are undecided and they're showing you literally all three different kinds of styles, then maybe you could say to them, well, are you liking the twist in this one? Do you like more of a clean texture? Do you like these pieces out? And that way you can be able to guide them in the right direction because possibly they could be showing you this photo and the only thing they like is the crown and maybe they don't want those pieces out so you want to be asking them those open ended questions. Okay, products, this is one of my favorite things. Okay, so the products that you're going to be using for your updos, I did have them listed in another post. So when it comes to your products, there's five key products that I like to use when I'm doing my buns updos. So sprays, creams, oils, powders, fiber, gums. So how to determine when your client's sitting in your chair based off of their hair length, hair type, and desired outcome result. So putting them into categories like this and having a goal for your products makes it that much easier to decide what you're going to grab. Just like how I was saying, knowing with the roots and the lengths you're treating them separately, it's going to make it a lot easier to know why you're grabbing what you're grabbing when you assign a goal to it. So the goals that I like to assign with my sprays is to control and shine when you're picking up a spray. For me, I always use a non aerosol spray. I want to control that hair. I'm pushing that hair into place and I want to control it to stay in a place. So I'm gonna use a non aerosol spray again because it dry, it takes like 30 seconds to dry and it doesn't dry instantly. So you're gonna see me grab this one a lot and that's the goal. Or if I want to add shine, that's like my shine sprays. Next one is creams. The goal of that is to hydrate the hair. So if you're looking at your client's hair and it's looking pretty dry, it does. It's looking dull, doesn't have shine to it. You're going to want to grab something that's going to hydrate the hair. My favorite thing to hydrate the hair is the oasis taking wild. You guys are probably going to be disgusted at how much of this that I use, but it really hydrates the hair. When I tell you I haven't been able to find anything similar because it's not heavy on the hair. What it is is it's an anti frizz cream, and it is the truest cream I've ever found. If my client has fine to medium hair, I'm going to use this. I do use it on coarse texture as well, but for coarser hair types, I'm going to use something more like a marble Moroccan oil to hydrate because it's going to penetrate deeper into the hair cuticle or the hair shaft. So again, if your client's hair typically I will. This is safe enough to use at the root area. After I'm layering products such as, like my powders, the hair can start to look a little bit dry. So if I want it to be shiny and I Want to activate it and hydrate it? I'm going to grab this. The next products are your oils. Again, that's to hydrate the oils I use on coarser hair types. The cream. The only cream that I really use is the Oasis. I can use this on any hair type. And then the goal for your powders is to control and add volume. Remember how I was saying your pins always need something to grip onto? I know that my powders add so much control. So wherever I I need to control hair, maybe like, if like your client has shorter layers here, when I'm bringing back the front or they have shorter layers here, I want to control that hair rather than putting a bunch of bobby pins in. That's not going to control the hair. Adding a texture powder will. My favorite texture powder is the Oasis powder Cloud. So instead of adding pins on those shorter layers, what I'm going to do is take my texture powder and then activate it by adding a little back comb underneath. That's going to really control your hair to hold it into place. Same thing with your bun. If your bun you have, you go and you do your bun and your bun's looking all super cute and pretty. And then you have these lengths here. If I want to control them, I'm going to add some texture powder to the lengths of them rather than adding 100 bobby pins. And then I can bobby pin that up because I know it's really going to control that hair to make it stay in place. My powders are also, since they're super strong, hold, if I need volume, that's going to last. It adds a lot of volume in the hair when you back comb over top of it. So when I know that goal to get that volume especially, this is really important for the front area for the face framing. Just like if you watch the glam wave class to add that volume so that it doesn't drop back comb and add a lot of texture powder. If you feel like your face frame is falling flat, go in and add that texture powder. And then the last one that I like to use, actually, I'll show you guys all of my powders that I like to use again, they're all listed. So this is a soft powder powder. I like to use this for the lengths of the hair for the bun because it's not super heavy duty. You don't need a heavy duty stronghold for the lengths. And I'll show you. This is the puff me. I really like this one for the roots of the hair. It is pretty strong hold. And then this one is also very strong hold, so I typically use it in the roots of the hair, especially the front, for the face framing. Make sure that lifts up. And these are all pumps. I like a pump at the root because I'm able to control where it's going versus something like the shaker. Like this one, I'm going to use this on a wider area where I don't need as much control. So, like, the lengths. So the lengths of my bun, I'll add. Whoa. I'll add this. And to use that to control the lengths of my bun, we just got texture powder everywhere. When you are looking for a texture powder, some things you want to keep in mind and reasons why I love all of these is because when I am spraying this pump, look how beautiful that is. Versus when I'm spraying something such as, like, the Kenra one. Here I go again. You guys are probably like, she's such a Kenra hater. You. I can't help it. Okay? I'm just trying to help you guys. If I am in an absolute pinch, I will grab this one. However, when I spray this, it flakes everywhere. It's not going to do it right now. Actually, I think I took one of these and I put it in here. I'm not gonna lie. When I do this. It's a very white color, and it. It really does leave a residue on my dark hair, ladies. But it adds little flakes, which I can't have, and looks like dandruff in the hair. I don't know what Kenra did, but it's not my favorite. I'm sorry. So sorry. So those are the powders that I use. Next. The last kind of product category that I use is, like, my fiber gums. So fiber gum. I love to use this to add control and shine. When I tell you it adds, like, the most beautiful shine you're going to see when I do it on our model. This is the fiber gum. It's got a really nice consistency like this, and then it opens up into little fibers on the hair. So I'm gonna grab this when I want to add shine and control my tame frizz, add some shine, but it doesn't have a really great control. This has more of, like, a sticky, tacky consistency. So it's going to add more control for you. That's what I'm going to want to grab this. Okay, products. Now let's go into the three layers of an updo. There's three layers of an updo that I want you to start like, kind of visualizing, you have the top, the middle, and the legs. So kind of how I was trying to show you guys here, you have that top layer, and you have an underneath layer. Those are pretty important for you to be able to visualize when you're creating your crown area. That way you can start adding the right height, the right movement, and start really being able to see that 3D texture. Okay, so next we're done with these. Okay. Moving on. I'm gonna go deeper into frizz because I feel like a lot of you guys struggle with frizz, so. Welcome to frizz prevention. One of the. Okay, so first control. Let's understand why it's happening first. So why is your first happening? Where is it happening? When is it happening? That's how we're going to really be able to dive deeper to be able to control it. So why frizz happens when hair is dehydrated and it's looking for moisture in the air. So if you live in a very humid area, like my Florida gals, and somebody's getting married on the beach, it's really hard to control that frizz. I'm sorry. So the one thing that's really going to control that frizz. Really talk to your clients about getting a keratin treatment. If your hair is dry. No. And you're putting them out into a humid condition, that hair is just going to naturally frizz up and look for moisture in the air. When it's humid, there is literally little particles of moisture hanging out in the air, and your hair is just starts to frizz up because it's looking for it. So that's just naturally going to happen. So if you. I really, really would have a deep consult with my clients if I lived in a. If they were getting married, I live kind of close to shore points. If they were getting married on a beach and they were doing photos out there, I tell them to get a keratin. Keratin is going to, like, give you all. The keratin is the protein your hair needs. So it's really gonna, like, shut down that hair shaft so. So that it doesn't start looking for moisture. It is not a relaxing treatment, but it is a chemical treatment that they need to get at a hairstylist. I don't offer it for my clients, but I would tell them to ask their stylist about it if they're super worried about frizz or if you are, such as, like a beach or something like that. So that's one thing you can tell your clients and just be open with them. Say, hey, I can't prevent the frizz. If you're going outside in a human condition, there is nothing I can really do about that. So sorry. So also, the best way that you can control frizz is thinking about when it is happening. Is it happening before you're styling? So that client sitting in your chair and you see frizz present in their hair, is it happening while you're styling? So as you're styling, you're doing the updo, you notice the frizz start to happen? Is that when you're saying it or is it happening after? So after the style and you see your client walking around and you're like, I see frizz happening in that style, really try to pinpoint where it's happening. So if it's happening before client sits in your chair and it's a frizzy mess, why that's happening is the client has damaged or dry hair. So if your client has damaged or dry hair when they sit in your chair, it's going to be frizzy. So what you're going to want to do is start applying your creams. So somebody sits in my chair and they have frizzy hair. What I'm going to do is just take a bunch of this cream and start applying it on their hair. And I want to let that sit. I really want to let it work in. And then I'm going to make sure during styling, I'm going to be using a lot of this product. I'm also going to try when I'm styling using a lot of non aerosol spray to really control that frizz and lock it down. This is going to act like a glue when I'm styling for any of those little frizzy bits. If it's happening during, the reason why it's happening is your product choices. You're not controlling that frizz when you see it. You really need to attack that frizz as soon as you see it and not move on until you've controlled that frizz. So what do I mean? So if I am creating this crown area and I see some frizz here, but I've already pinned it, let's say, and I see that frizz here, what I'm going to want to do is hit it with some wet spray. I'm going to take a fork comb and I'm going to start attacking it when I see it right there. I probably would have already put a gallon of team frizz on the hair. But this is just an example. So really start controlling it when you see it versus doing the whole style. And then it's all done. Depending on how much frizz you have. You really can't go after the frizz and tame it when you finish your style. So just be mindful. If you see it, then you're going to pull out these guys. Okay? So just be mindful. And that's probably why it's happening. Also, your product choices, if you are doing this is we're getting a little tight. If you are doing you. Your. I don't even have one. Doing your styling, and you're using an aerosol spray again from that class, that aerosol is freezing onto that spray, and we really can't control it anymore. So change your product choice to a non aerosol. Non aerosols that I love is this one, the Silhouette. I also love the Frizz freeze pump, which I know you can get this one in Canada. And then I also love this one, which is the Goldwell Perfect hold. And then the Kenra 25, which I showed in the other class just in case you guys are like, I can't find this one. You could definitely get it on Amazon. I know you can. It's on my storefront. I know you can get it on Amazon. So but these are other ones that I also love. And then the Kenra 25. So you're gonna see me using this one on today. Okay. And then the last thing for frizz control is understanding if it's happening after. So your client, you do this beautiful style. It's frizz free. It's looking luscious, gorgeous, glossy. And then you do another style and you peep up and you're like, what is happening over there? That client's hair is super frizzy. No matter if it's an upstyle down style, whatever it is, that's your client. That isn't you. It's your client. So. So this is why it's happening. Client is wearing cotton. They could be touching their hair. They're going outside. They're steaming dresses. So to help prevent that, before my clients leave my chair, I make sure to give them. It's probably really annoying for them, but I always say the same thing. I'm like, okay, you can't steam your dresses, please. If it's a hot, humid day, I say, please try not to go outside. You're definitely off your steaming duty. And don't touch Your hair, you need to make them aware of those things, otherwise they're unaware and they're gonna go and just be doing this. If their hair's down or like these front bits, they're gonna be like playing with them. So I say, please don't touch your hair or it's gonna make your hair frizzy. Your clients have oils on their hands and also the more that they're touching their hair, it's gonna make it frizz out. Sweating, Sweat. Oh, my goodness. If your client is going outside and it's hot and they start sweating if it's hot in the room, and again, if they're steaming, any sign of moisture to the hair, especially the hairline here, that's going to be your first thing to start to frizz out. Especially your naturally curly girls, they're going to frizz really easily if they start sweating because that's moisture on the hair. Hair gets wet and then it's frizzing out. So communicate that after care there and build in touch up time. Always, always, always, always build in touch up time. Because sometimes they will run out and go walking along, you know, outside somewhere or do something and they're sweating. So always building that touch up time afterwards. And always give them an aftercare consultation. Just as you have the beginning one, do that after care if they're wearing cotton or they're wearing like a flannel shirt. But what I'll like to do is I'll say, hey, your bun is going to rub on the back of that because of where it is. Do you mind unbuttoning that first one and just kind of opening it up for your shoulders? Or I'll tuck it in. Like if there's a collar, I'll tuck it in and I just kind of always will open up the neck area so that way it doesn't rub on that cotton and create even more frizz. Okay? So that's going to probably really help you with your frizz control. Understanding the hair is dehydrated and we gotta hydrate it. And the last thing that I want to go over in theory before we start our low bun demonstration is the three parts of your updo. So I kind of touched on this a bit, how there's three layers. Let me dive a little bit deeper into that. So that way you guys are starting to have these visuals in your mind to get the proportions, to have the balance, to know the face, framing, proportion, shapes. So that way when I'm doing it, I don't have to talk as much. But you guys are able to start getting those visuals in your head. So that way, when you're recreating it, it's seamless. You're like, I got this. Okay, so the three parts of your bun, we got the crown, the bun, and the face frame. The crown. The crown. I used to do my bun first and then do my crown area. No, no, no. Your Crown is like 80% of your efforts. That's where 80% of your prep is going to go. You're going to be building that structure. You're adding that visual, and it's really going to determine where your bun goes. So if I'm doing an hour for a client, 40 of those minutes are going to be on the crown area, and 20 of those minutes to are going. Going to be on the bun. That's normal. Okay, so what you want to start visualizing is this teardrop shape. So remember how I said the volume stays in line with the mohawk? You can kind of see it here. This is the visual that I'm always trying to create here. Taper your sides down to keep those nice and tapered. And then you can start to see it like it's wide here. So we got a half moon shape because that's going to go. The widest part of the head is here. So you want to work with the wide part of the head and then taper it down. So that's going to be. That's going to shape the head so beautifully, so proportionally. So that's the visual you're always going to want to see. When you're creating your crown area, start training your eye to look for a teardrop shape and then keep these. You don't need volume here. Remember, you need your volume here. You want to keep your volume at the root. If you are looking at your client from the front and you're like, why the heck is it looking so flat here? Your teasing is off. Really pay attention today when I do teasing, because if it's looking flat here, if your clients, like, if you feel like they complain something sometimes that it looks a little off or like George washing, that's because you're teasing too far away from the root. When you're teasing, you want to get really in at that root. So that way it starts at the root area and then kind of naturally falls back. So that way it creates kind of like a really nice shape to balance out the style. You don't want it to be flat. And then start your volume here. You always want to start it at the root area. So this is the shape you want to start seeing when you're looking at your client from the side. You're going to see me do a lot of checks going like this. And what my eye is looking for is that volume is right here. You can see it's flat. And then it's starting back here. It needs to start at the root area. So if I'm picking and pulling it back up, I'm trying to get that like, almost like a C curve. You want to get that nice C curve. That's the visual I'm training my eye to look for when I'm doing. So if I'm going like that and I'm looking on the side, that's what I'm training my eye to see. When you are creating the crown, you also want to be mindful of where you're pinning it, because, again, where you pin your bun is going to sit right. So if I'm looking on the side, what my eye is looking for is where that crown is pinned. I usually pin in two places for my bun to sit at. Two places. So you want to pin at around the brow bone or the cheekbone. So an easy way you can do this is if you're sectioned out from the front to back and you're creating the crown area, do a little side dip and pull this hair off your client's face. The brow is here, so draw an imaginary line to the back. That's where I'm going to put my pins. When I'm pinning my crown, or if I want my bun to sit a little bit lower on the nape, then I'm going to find her cheekbone. And actually, this is where I would pin it for the nape, and this is where I would pin it to sit a little bit higher. So she wants it to sit a little bit higher off of her neck. I'm going to pin it here. It's going to be in line with her brow bone. If she wants it to sit lower on her nape, I'm going to pin it here, and it's going to be in line with her cheekbone. Cheekbone right there. Brow bone right there. That's going to be a proportional bun tie. So that's the crown area visuals that I want you guys to start looking at. Try to try to pick out those visuals when I'm doing the demo. Okay. And then the visual proportions for the bun. The bun is 20 of your efforts, and you want to take into account the shape. Is that. Do I want a circular shape? Do I want a diagonal shape? Is it wide? Is it horizontal? Take those into account. I'm going to be doing a circular bun today. So these are the visuals I was trying to describe in the crown area. So taper the sides when you're looking at the lines in your style. And that half moon, teardrop shape the bun, keep it circular and always keep your lines in your actual bun. Going up, let's see. Going up in your style. Like that. See that going up versus flat like that. That's not going to create a nice visual in your bun. So when I'm actually creating the bun, that's why I always do twists and I'll bring it usually up to get those horrors, to get those vertical lines versus the horizontal like that. And then when you're placing your bun, placing your bun, you're going to place it at two, three different points. Your crown pinning is at two different points for your bun. Your where you're actually placing the bun. These are the proportions that you want to keep in mind. We have you want to pin it at either the brow, cheek or the lip. So I'll show you guys. So here is the brow. I'm gonna put that back here, actually right here. And then this one is the cheek. And then the lip is down here. So these are the heights that you're going to want to place that are proportional to place your bun. When you're looking for proportions, just always look at your client's face and draw a line back. So that's where I'm going to want to place my bun. If she wants a little bit of a higher bunch, as you can see, it's going to sit higher. You want it to be in line with the brow bone. If you want it to sit a little bit mid, you're going to want it to be in line with the cheek. Or she wants it low on the nape. You're probably going to pin it at the height of her lip. So at the height of her lip, what it can look like. So this is in line with the lip, cheek, brow, keep it down. I'm going to put my pony ponytail down really low for to keep it in line with that. And it's going to sit here. So this height here, I want it to be in line with the lip. Does that make sense? I swear, sometimes when I'm talking, I'm like, is that making sense? Okay, so when I'm creating the bun this height, I want it to be in line with the lip. If it's lower, going to look odd. See that, see that? Height looks a little, a little funny from the side. So if you're like, oh, why is my bun looking so funny? It's likely your proportions are a little bit off. So this height, keep it in line there. Okay, let's do another one. Say I keep it. I want it to be a little bit higher. She wants a little bit off the nape. So I'm going to put my ponytail a little bit higher. And then the heist highest point that I want it to sit at is going to be in line with her cheekbone. So when you place your height for your bun, look on the side. Where is that line stopping? Can we see that? This one with the cheekbone, that's your highest point. Also, when you start getting higher off the nape, something you want to keep in mind is the gap here. You don't ever want a gap like that. You want to close it off so that way you have a nice proportionally shaped bun. Okay, so now let's see if we want it a little bit higher, keep it in line with the brow bone. I'm going to put my ponytail up high like this. That's where my base is going to be. And then I'm going to take these lengths and the highest point is going to hit the brow bone. Let's double check that looks to be in line with the brow. Draw that line back. This is where you're going to start getting more of those gaps like that. So then you're just going to close it off. And that's a beautiful proportion shaped bun. Typically I, I do a vertical bun this way. It's not usually a circle, so we can see it's a circle now. But typically it's like my vertical buns that are like this. Okay, so that should help you. If you're feeling, feeling like your bun shapes are a little bit off, take a look to the side and see where that highest point is hitting. If it's not hitting one of those three parts of your client's face, that's likely what you need to go in and adjust on your bun shape. And also if it is looking a little bit off, again, double check to see if it's in line with your client's neckline. If it's sitting out too wide, then you're gonna say, oh, it's a little bit. The volume's not in the right spot spot, so you could tuck it in a little bit tighter to get it in line with the neckline. When it's not in line with the neckline, it makes your clients look heavier than they are, and it makes them look like a linebacker. It's not cute. Okay, next is the face frame that. Use the hairline as your guide to determine where to pull out the hair and how much. So the hair on the hairline you're going to to. The most hair you're going to want to pull out is at the part line. Then the next amount of hair you're going to want to pull out is at the high recession. So if you pull your client's hairline back like this, look where the hair recedes. That's your high recession. Typically, like, mine recedes back really far. So if the hair is receding back really far there, you're going to want to take more hair here to shade that high recession. Recession. Otherwise, you're going to have a bald spot. So I probably have a bald spot right now. So I'm going to want to take more hair to shade that high recession. And then the least amount of hair you're going to want to do is at the ear. I'm going to tell you guys right now, I don't want to see any more of this. I'm going to show you. This is what I see people do when you take a straight line and you take out their whole sideburn like that. And then you do this. Not cute. That ain't cute. Nobody likes that. Okay? So instead. So look at that versus I'm gonna be the model today, versus when I take out the most amount of hair here. And just a little baby. Baby. Yeah, just a little bit. Which one's cuter? I have no idea what I look like right now. So don't even say that this side is cuter. It's this side. Okay? So look how much more proportional that is. That just flows better. So most amount of hair at the part line. And instead of taking a straight line. Remember, we don't take straight lines. Instead of taking a straight line, do a zigzag. I can't really do a zigzag right now, but you get the point. So like that. And then if you're finding that it's a bald spot, or maybe she wants to cover more of her jawline. Like, maybe she's like, oh, I don't like my square jawline. Take some from the high recession to start shading the side of her face. Okay? And always just take a little bit here. If she's like, oh, I just want a little bit of face frame out, or I'm going to play with my hair. Then you're not going to want to take from the part line. You're going to want to take from the earth. So when you take from the ear, again, you just want it to be a little bit. We don't want a full side burnout like this is what I say. No. Okay. Also, the next thing about face framing is you want it to be the length. I always cut my clients face framing, and they appreciate it. So the length of the face frame, mine's even pretty long right now. The shortest you really want it to hit, unless it's a bang, is like the top lip and then this top part, you want it to hit, like the top lip or the bottom. And then what I do is I angle it down. And the longest point that you want it to hit is their collarbone. So my collarbone's right here. So this piece is way too long, and that's why it looks off. It looks like jellyfish tentacles. So this piece right here, I would probably cut to my collarbone. And. And I always tell my clients that. And they're usually super happy and they feel way better about their face frame. So that, my friends, is face frame 101. I'll show you better when I do it with my client, but I just wanted to give you guys that. Okay. And then with your face frame, I kind of try to draw it out there, but I just showed you guys on myself. Okay. So then with your face frame, you never want to be pushing it back off your client's face like that. You always want to take these two fingers. Take your thumb underneath the hair, your pointer finger on top like that. And we're pushing it forward like that to kind of create a nice shape on your client's face. Versus, like this. If your client. Take a look at their forehead when you're doing the face frame. If your client. I have a big forehead, so I'm going to want to shade it. The bigger the forehead, the more you want to push it forward. And then you're always going to put your curl here right at the cheekbone to open up the face versus keeping it low. It's going to elongate my face. Do we see that? Okay, so verse, if they have a shorter forehead, like their hairline comes down a little bit longer, then you can open it up a little bit more to expose more of their face. So short forehead, you can push it a little bit off, but always keep this forward and then push back here. Okay. Bigger the forehead. Keep it really pushed on their forehead. Again, you're taking these two fingers and taking that face frame and pushing it forward like that, it's going to create a really nice face shape. Okay, so that is all I have for theory. I hope that was helpful. I'm going to probably be repeating a lot of these steps when I do the bun demonstration. And we're going to start the bun demonstration in just a few minutes. So I will see you guys soon. You.
More from Marissa



7 Lessons I Wish I Knew In My First Wedding Season (I’ve Now Grossed $728,000)