Shift CRM Onboarding Pt 1 Setup & Integration
Nate Tilley walks you through setting up Shift CRM from scratch. Connect your accounts via the Launchpad, fill in company info and employee details, import your contacts, and configure payments and integrations like Google My Business and Stripe.
Chapters
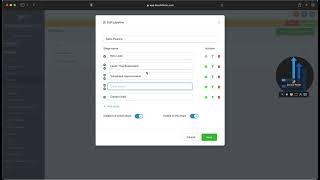
Hello and welcome to Shift CRM. My name is Nate and you probably know me by now. I am the CEO of Shift CRM partnered with this amazing company and we are here to provide you with all the tools you need to grow your business online. So I'm going to take you through the setup, the onboarding and everything that you're going to need to know in order to get set up so you can start reading really integrating all of your online marketing needs into this platform and then building from there. Alright so once we go on here, we're going to first see this is our dashboard. You guys should be familiar with kind of how this looks from the demo or if you've used this before. Whether you're a just a software subscriber of ours or somebody that's actually working with our packages, this stuff's going to be relative to you. Okay. So the first thing that I want you to do when, whenever you get here to this platform is to just go to your launch pad, alright. And just go ahead and go down this list and connect all of these things. So we want to make sure that we download the mobile app and log in. The login is going to be the same login that you use to log into the main app.the shiftcrm.com then we want to connect your Google my business. That's going to allow a lot of tracking and also for leads and reviews and conversations to all be connected. Then we're going to connect your Facebook account. This is also going to allow you to connect your Instagram account at the same time. Then we want to go through and if you have a stripe account already set up, you can connect that here. Yext, this is for listings. You can connect that if you have it. If you don't have it then contact us and we can get you set up with this. This will boost your business listing onto 150 plus different portals and websites and that really can boost your online presence. And then here at the end let's, let's add your team members. Okay. So you'll just go through one at a time and do these simple things here. The, the web chat widget is super helpful. It just puts a little box on your website down here that somebody can click and they can begin a chat with you. And it just feeds right here into Shift CRM. Alright so those are the basics. The launchpad makes it really easy. Then what we're gonna do is we're gonna go down to the Settings tab right here. Settings. Okay. And from here you'll start to see your information in here. Okay. If you don't see your information, that means you just need to fill it out. So you're gonna insert your company logo, your company name, your website. If you, if you have an API key, which we can show you a little bit about that in a future video that goes here. Address general settings that you can basically set up for your business that will apply across the board. Voicemail settings. Right here. You can upload a voicemail. That way when somebody calls into one of your text numbers, instead of going to the forwarding number voicemail, it goes to this custom voicemail here. So you can, so you can just record on your phone a voicemail and drop that in there. Then you'll want to go here and you can, you can enable missed callback text. This is really nice. So if somebody calls in and you're not there, then it will automatically send them this text and then they'll be texting you back. Perfect for weekend calls and things like that. After hours. Okay. And then these are all the different settings setting options here. So we're just going to want to scroll down here, one thing at a time. Add your employees. To add an employee, it's a simple click. You go through and set all their settings, just like you can do for yourself. Pipelines. This is where your deals essentially live. And here is how you organize it. You can edit it, and you can just create as many stages as you want, move the stages where you want, and you can adjust if you want them to show up in your pipeline and everything like that. So if your sales stages are a little bit different than this, then you can just add or subtract any sales stages to make it more according to your business flow. Calendars. This is where you can set all of your calendar preferences. You can do the generalized calendar preferences here. And then for each different calendar, you're just going to come in here. And then this is where you sync everything up. So you set the meeting location, you link the calendar with your Google Calendar, you set the color availability, when can this calendar be booked? And then confirmation. Once you have all of that set up, then this link right here, this is linked with that calendar. So you can either save this or you can add this calendar onto a booking funnel. Okay. Which we'll get into that a little bit later. This is, this first video is going to be about the setup, and then the second video is just going to be about the customization, how you can set up your own websites, funnels, things like that, landing Pages, forms, surveys, all that phone number. This is where you're going to add a number, choose an area code that you want to add and only add one number. In this section there may be an additional step to set you up with Twilio or something like that. So we'll keep you posted in that Reputation management. This is where you set up all your review settings. So go ahead and just go through this guy, this stuff guys and get comfortable with all these things. Some things you might want to know. Custom fields. This is for your survey questions, custom values. This is to program your CRM essentially. So once you have these things you want to fit them into here. So your, your discount. If you have like a, you know, $500 off discount, you do you want to just insert that in right here and this is going to be so in your automations it will automatically pull this info. Okay, that's a pretty technical piece. Domains. This is where you set up your domain. There is some, some, some setup involved with this and so you can just click to go watch this how to video and it will take you to the setup. Okay and then with that you'll be able to connect your funnels, everything like this media library. This is for when you're building websites and funnels. Email marketing. Everything's going to be in here. So you can just come and drop your company files in here, videos, pictures, everything and you'll have it across the board for anything you may need it for. Your URL redirects. This is something that you'll learn a little bit more about as we go. But it's basically where you put your domain and then the path and then where it redirects to integrations. You want to go through here and make sure all the integrations that you can have set up or set up and then to set up your Facebook forms. Mapping. After you set up your Facebook you're going to go here and that's where you're going to set up like your lead forms and everything. So those can come in. If you're running Facebook ads and Instagram ads and you're running lead forms that's where you go mail gun settings and forwarding. This is where you can forward to multiple addresses and this is also where you can set up your email provider. Okay, we'll have a base set up for you but in certain cases you may want to set up a Gmail, a Yahoo Mail or another provider and finally your tags here. So you want to tag things. This is how we organize and keep everything straight in the CRM. So a tag is how you can label different leads. So customer is a tag, client is a tag, prospect is a tag, Things like that. You can do what offer they came in 500 off offer. Anything that's going to label that person as a tag and that's going to keep your CRM organized. Okay, so that's all we got for settings. Once you guys get the settings all in place, then you're going to be ready to start actually building out more customizable types of assets for you in this CRM and start to build a foundation with your business online. So the last thing that we want to do for the setup is just go into contacts and you're going to be able to import your contacts through here. So, so right here, import contacts and you can just drag and drop a CSV file type list right here. And then you map out the details and make sure everything's correct. And you upload those. I like to upload them with a tag. That way I know where they're coming from. And then from there you'll have all your contacts in here. Super easy to do different bulk actions, manage them, send text, emails, put them in a pipeline, add them to a campaign. Super easy to do all through here. Okay. Then once you have your contacts in here, you can create opportunities out of the contacts that you have. So if you have deals that are currently pending, you can take the contacts and add them to a pipeline stage according to where they would be in the sales process. Payments. We now fully do invoicing and, and you can request just by text, you can actually send out invoices. So you're going to want to make sure that you're connected through stripe, connected through PayPal. And then in the stripe settings is where you're going to set up your products. And then you integrate your products into here and then they can be synced up and you can send invoices through text email or you can sync this all up with a landing page or a funnel. Email marketing. We've got the full email builder. You've seen this before. Nothing to do as as far as setup here. You can just go in and create a newsletter or something if you'd like and then automations and workflows. Okay, this is where, well actually this is where you're going to really start to do the customization. So we'll talk about that in the next one. Same with site and your reporting will start to populate once you connect all your accounts. So that is everything for setup, guys. I hope that really helps you as far as just getting all the basics integrated. And then from there, we're going to start to customize it so it really fits into your business. All right, Just email support or message in the Slack channel if you have any questions on that. And I will see you in the next step of the onboarding, the final step, which is the customization, making it work for you. All right, again, guys, I'm Nate Tilly with the Shift CRM Shift Social, and I am so happy that you are joining us. Let us know if you have any questions. And we are excited to make your life easier with the smart software. Talk to you soon. Bye.