Leaky Paywall - Getting Started
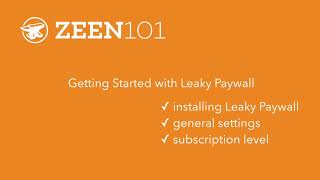
Install and configure Leaky Paywall, a WordPress paywall plugin. Set up login and subscription pages, choose your free-view limit (3 articles in the demo), cookie expiration (30 days), and subscription length. A follow-up covers Stripe integration.
Questions this video answers
30 days
About 200 (characters).
3 free views
One month
Chapters
Hey, everyone. Welcome to Zine 101. In this tutorial video, we will focus on installing leaky paywall general settings and setting up a subscription level. A few things to note. This tutorial assumes that you already have web hosting, you already have WordPress installed, and you already have a WordPress theme installed. All right, so let's jump into this. First thing I'm going to focus on here is installing leaky paywall. You can find leaky paywall in WordPress or you can install it from directly from zine101.com. Go ahead and activate that. Now that we have leaky paywall activated, I'm gonna head over to Leaky paywall and Settings. And this is the first thing that we want to focus on. We have a login page, our subscription card page, our registration form, profile page, and a confirmation page. So what we need to do is make a page for each of these shortcodes to go. So I'm going to open up this in a new tab and start with the login page. So just call this login and then I will just copy this code, paste it here, and publish. All right, the next one is the subscribe cards. Kind of the same routine here. I'm just going to call this subscribe and then paste in this. All right, publish. Very well. Okay, now we have the register form. Kind of doing the same thing here, opening a new tab. I'm just going to call this register. Paste that in, publish it. All right, moving right along, we have the profile. Just going to call this profile. All right, let's publish that. Very well. And then a confirmation page. So we need to go back, pick one more page, and we will call this page confirmation. And this is the page where people will be redirected to when they subscribe. So you just want to put a message here, thank you for subscribing to our publication. Right. You can make this as long as you want. I'm just gonna publish it. All right, so now I am going to refresh so that these pages show up here. So let's go ahead and do that. All right, so now we just need to assign these pages. So login goes to login, subscribe goes to the subscription cards, Register goes to Register, Profile goes to profile, and confirmation goes to confirmation. All right, so I'm going to go ahead and just save that. This is the subscriber login message. This will show up on articles that are behind your paywall and it's asking your users to either subscribe or log in to read the rest of this content. Now, you'll want to customize this message to better suit what you're offering people. The upgrade message. This is what users will see if perhaps they're logged in and they have a free account, but the article they're trying to read is. Is not included in their subscription. So this is asking them essentially to upgrade to a higher level. Alright. Or maybe their account has expired or their credit card was denied, so now they're not able to actually read the articles when they're logged in. So you can customize this message as well. This is the CSS style. I'm going to leave this on default. We have user account creation, so we can actually remove the username field during registration and use the email address to generate that username. So I like this option. And then we have user account deletion. So this would allow users to actually delete their account from their profile page. So this is up to you if you want to allow customers to do so. All right, so I'm just going to save this up and now I'm going to focus on subscriptions. All right, there's a number of things in here. Let's start with the limited article cookie expiration date. I'm going to set this to 30 days. And essentially what this is, it pertains to the restrictions area. We have posts and the number allowed. So if you were to give away access to three, let's say three articles, this would be three articles every 30 days or maybe make it simpler, just one month. Alright, so every 30 days, when that cookie expires in the browser, then your user can read 3 more articles. All right, so that's what I'm going to set it at. Just to. Just to start with, you can customize this based on taxonomy. All right, moving along. So we have the combined restrictions and combined restrictions total. All right, so moving along here to the combined restrictions and the combined restrictions total allowed. So essentially this is a single value for the total number allowed, regardless of content type or taxonomy. For now, I'm going to leave this blank and move on down to alternative restriction handling. This box, the alternative restrictions post container and the page container, along with the lead in. So 1, 2, 3, 4. These sections all pertain to caching. So if you're noticing that your website isn't working or the paywall isn't functioning properly, or maybe it's like half working sometimes, you might want to give this, this option a shot. Alright, so I'm going to leave this. We don't have caching enabled in this demo. So I'm just going to leave this as it is and move on down to custom excerpt. And so this is the amount of content that people can see before they see that subscription nag that we set up in the general area. So I like to do about 200. You can change this, play around with it, experiment with it, see what works best for your publication. All right, so this bypass restrictions. This is a super easy way to allow access for your editors and your authors and your contributors. Generally, you're not going to want to select subscribers because this would allow them to bypass your paywall. But if you've got editors who might not be administrators in your WordPress, it's a good, a good box to check there. All right, so moving along here we have the subscription levels and this is essentially the plans that people will sign up for on your website. So I'm going to leave this as digital access, the subscribe card description. So this will show up in the subscription card page. So I'm just going to give a little description. So unlimited access to all of our premium content. So obviously this will vary based on what you plan to offer. In this plan, the registration form. So you can also add additional information about this plan. Once they're into the checkout process, this allows you to hide the subscribe card. So maybe you don't want this plan to show up when people are on your subscribe card page. You could hide that by checking that box. All right, so subscription price. So when you're first starting out, depending on what your goal is, a good way to start out is to just offer a free subscription. And the reason for this is we're. When you're allowing people to sign up for free to access content, you're able to collect their email address, you're able to get them in your system. And so later on perhaps you could send them a newsletter, you could send them content and sort of build a long term relationship with them and over time, perhaps they'll become a paying subscriber. So that's sort of the idea behind giving away a free subscription. And you'll notice here I'm going to skip ahead really quick to the access options. This plan actually allows for unlimited access to posts. You don't have to do that. And if you're giving away free access, maybe you want to offer an additional, additional three articles for people to read. So that way if, if you had another plan, you could encourage them to upgrade to read more content. All right, so I'm going to limit this for One month. This is the subscription length. You could make this forever or you could limit this for this. For this plan, I'm just going to limit access for one month. All right. And if you wanted to create more subscription levels, you'll want to check out our our multiple levels plugin. This will allow you to make as many plans as as you wish. All right. All right. The X out of that. Let's go ahead and save this. Save the settings. Now that we've taken care of all of our settings, let's go take a look at our posts as if we were just any visitor on our website. So someone who's not not logged in and someone who is not a subscriber. So we set it for. For three free views. So we should be able to see. That's one, that's two, that's three. And so we should on that fourth. Yep. This is now asking users to either subscribe or to log in. So let's take a look at our subscribe page. There we go. Digital access. Now I am on the register page. And you'll see that we have. This is for three posts. It's for free. It's for a month. Right. And if I enter my information, I'll be able to read three additional posts each month. All right, that does it for this tutorial. In the next tutorial, we will focus on setting up Stripe with leaky paywall. Thanks for watching.
More from Pete




From Donations to Subscriptions: How KB Independent Built a Sustainable Local News Model