Build an automation workflow in Maybe by setting a trigger like form submission, adding actions like emails or SMS, and embedding trigger links in messages. The tutorial shows how to customize emails with contact data, configure link behavior, and save your workflow.
Chapters
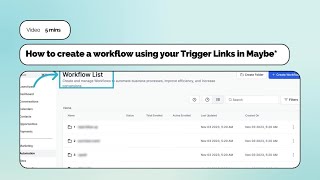
Foreign. How to create a workflow using your Trigger links in maybe Here we are going to look at how to use your trigger links to create a workflow. If you need help with creating trigger links, please view our video on how to create trigger links from our training videos. Let's get started. From the left hand nav, select Automation. Here you will see your workflow list. If you haven't created any workflows yet, this will be blank. Let's create a new workflow to get started, we are going to give our workflow a name now. Select Add New Trigger A workflow trigger is a function that activates a particular action or series of actions based on one or more predefined events. From the drop down you can select from a variety of workflow trigger options. For this workflow, we have selected form submitted. Now you can add any filters for the trigger. Filters allow you to select certain criteria you want your contacts to match. To enter the workflow, select the filter. Once you have added your first filter, you can add more. In our example here we are selecting which form the contact must have completed to enter this workflow. If we didn't select this filter, then our trigger set in the first step means that any form our contacts complete will activate them into this workflow. This could cause our workflow not to work properly as the email we add to this flow may not make sense for a different form completed. Once you are happy with your workflow trigger, select Save now to add your workflow actions. Here you are telling your workflow what actions you would like completed. Workflow actions include items such as sending emails or sms, internal notifications, adding or removing tags, updating opportunities, and more. You can also add in a wait time for your action. The wait event is a unique type of workflow action designed to pause the contact at a specific step in the workflow until a desired condition is met. This useful tool is handy when waiting for a tag, appointment, event, specific time or contact reply. You can choose from a variety of wait options from the drop down. In our example here we have selected a time delay. This action allows our contacts to wait for a certain time period before they continue through the workflow. When you are happy with your action, select Save. You can now continue to build your workflow, adding in more actions. In this example we have selected the action to send an email, but there are lots of actions to choose from. You can add as many actions to your flow as you need. We now need to customize this action. For our email action. We have two options we can select an email from our email templates. These are emails we have created in the marketing feature of maybe. Or we can create a new email. We have a variety of different format options we can use for our email. Type the email copy into the text box. We can use custom values to personalize our email. For our custom value, we are adding in our contact's first name. The custom value we selected is shown in brackets, but when the email is sent, this will be populated with our contact's first name. We can also include trigger links in our email. Choose your trigger link from the drop down. These trigger links are created within the maybe platform. Selecting a trigger link will insert the link into your email. This displays as a long link in the email. We highly recommend hyperlinking the text to add your trigger links to your emails. When you select the hyperlink icon, it will open up the edit box. You will then need to copy the trigger link into the URL box and update the text you want the link to be hyperlinked to. In the Text to display box. You can also select whether the link opens in the current window or opens a new window. Once you are happy with your action, select Save. You can continue to add in more actions to your workflow. Once you have built your workflow, select Settings from the top. Navigation. This allows you to amend the settings for the workflow, including allowing a contact to re enter the flow. When you have completed building your workflow, select Save. You have now built a workflow using your trigger links.