Beauty tips for slimmers from celebrity makeup artist
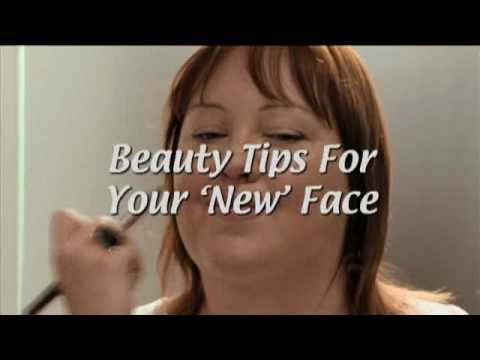
Celebrity makeup artist Una shows Michelle, who lost 2 stone 2 lb, how to apply makeup after weight loss. She uses yellow-based foundation to neutralize redness, two-tone bronzer to contour the cheekbones for a slimmer face, and soft browns on the eyes for a seamless daytime look.
Chapters
You're watching the SlimPod channel. Thinking slimmer, loving life. Hello, my name's Una. I'm a celebrity makeup artist, and I'm here today with Michelle. Hello. Hello. Now just tell us, how much weight have you lost?
2 stone and 2 pounds so far.
That is absolutely incredible. You've done such a remarkable job, and obviously you're feeling great now. You've lost the weight, but where I'm here today is to tell these ladies, show them how they should be wearing their makeup. And it's so important, by just using a few tips and techniques, how you can create such a beautiful look, and it's going to give you even more confidence as you're on your way to losing even more weight. Now, what's your main problem with your skincare and your face?
My main problem is I have a lot of redness on my face and freckles. I have problems with foundations. My skin tends to look very clumpy and—
Okay.
I try and cover them up.
So we're going to dispel that myth though, because when I saw you this morning, Michelle said to me, "I don't wear any foundation," but I always say to ladies, wear foundation. It will give you such a gorgeous, flawless look. So what we're going to do is, I've got a great foundation here. It's very light, it's sheer. We're not going to hide the freckles because freckles are beautiful, so let's not put a mask over our face, but it will hide the redness. If you've got red skin, you must choose a yellow base foundation and it will eradicate all the redness. So let's start. This is a foundation from a good high street chemist. I won't mention any names, and it's called My Mix Foundation, and I'm using a brush and I'm just applying a tiny bit. Don't overload the brush, just put a tiny amount of the product on. And you can really move it around the face, and you can tell already all that redness is going, and yet we're not hiding the gorgeous freckles. And ladies, this is an easy routine, so if you find you haven't got time in the morning, fear not, this is dead quick. So I'm just moving the product around, and by using a foundation brush as well, it means you're not getting messy fingers. There we go, I'm going all the way under the eyes, just putting some on the eye socket because this will act as a primer as well. And there we have it, as quick as that. So get yourself a foundation brush, a good foundation, and look at that, all the redness taken away. So when you've finished your base, it's time to move on to the concealer. Do you ever use a concealer?
Occasionally. Occasionally?
Yes. Okay, with the concealer, I like to put it above the foundation and just lightly tap it on areas that need a bit more covering up. So we're going to start with under the eyes, because we all get dark circles at some point in our lives. Too many late nights and partying. So I'm just putting a tiny bit on my brush, and I've gone for a light shade, and it's just going to illuminate under Michelle's eyes and also hide any dark circles. Again, less is more. I've only put a tiny bit of product on my brush, and I'm just moving it across where we need it. You can also go up under the brow. You can also use your finger just to press that product in. There we go. I'm just moving it around, mixing it back into the foundation so we don't get any panda eye going on. And there we have it. Great under eye. So thanks to SlimPod, how has your face changed?
I've lost a lot of weight around my chin and my neck area, all used to sort of come into one. Right. So I've now got a jawline which—
and you can now see your cheekbones even more. You have cheekbones appearing. Well, what I'm going to do is show you a really simple trick of how to make your cheekbones even more high and gorgeous, and it's all about simple shading. Now, you've already told me you go quite red, so if anyone goes red at home or you've got rosacea on the cheeks, then always avoid pink colored blushes, anything pink, because it's just going to make you look even pinker. So I've got here a great bronzer by Estée Lauder, and there's two tone here, so if you find that this shade is too brown for you, if you're slightly paler, then you can use the lighter one. But also, using this dark powder, we're going to shade in some cheekbones. So I'm just putting my brush in, and if you just turn, I'm just going under the cheekbone and making that darker. And it's also going to give you a bronze glow. So that's going to give you the illusion of slimmer face. There we go. And if you've got a blusher or bronzer that tends to kind of be distributing too much product, just bang it on your wrist, get rid of the excess, and then you won't have one big blob as you go to your cheekbone. Shading slightly under the chin, because this again is going to give you that shadow to really make that face look thin. And then I'm just going to go a tiny bit down the nose where the sun would naturally hit, and just across the forehead. And there we have it, a beautiful glowing face. Now, what kind of look do you want, or what would you be able to wear every day?
Uh, something fairly neutral, but still showing that I'm wearing makeup. Um, I'm mixing with a lot of people, attending a lot of meetings during the day, so just something very easy to wear.
Okay, so you want to look groomed, but you want to look like you haven't got too much on. So I'm going to just go for lovely natural soft browns, I think, with you. Okay. So, first of all, we're going to start by making that eye socket area really neutral before we start adding any color. So I'm just taking a really light shadow. This can be, if you think of a biscuit color or vanilla. I'm just going to put my brush in and put that color all over the eye socket. This acts as a really great base. You can take it all the way up under the eyebrows, and it just gets the eye looking really neutral before we start applying the brown shadow. So the eyes are the window to the soul, they all say, so let's get to work by defining them. And by that, I'm going to be using a lovely soft brown shadow. Really simple. You can get tons of eyeshadows on the market in browns. I'm just going to dip my brush. This is my makeup artist's brush. Charlotte Roycroft-Davis palette, so ignore all the other colors. I'm dipping it into the brown, and I'm just going to work at the corner of the eye socket, blending in my brown shadow. And I'm going to leave all this a lovely neutral color because just by putting the shadow on the side of the eye, it's opening the eye up, and it's not going to close it in. So leave all this lovely and fresh in the inner eye and just keep blending. Blend, blend, blend. That's the secret of a good eye makeup look. Think of a cloud, just keep blending so that you can't see any edges around that eye. So I'll match up the eyes now, do the second one. Just moving around the eye socket. And if you keep blending around with that brush, you're not going to go too far wrong. There we have it. And the final step to our look before we put on the mascara, I'm just going to use a soft Kohl and gently smoke a lovely line all the way around. And the great thing about this brush is, if you make a little mistake, it's got a tiny rubber, and it's like a blending rubber. So what you can do is just go over the top and smoke it in. And the more you smoke as well, this is going to give a lovely soft look. I always think with daytime looks, it's good to just keep blending. You want that makeup to be as soft as possible. There we go, and look how much Michelle's eyes are standing out. The green in your eye looks beautiful against the brown. So when you've finished your eye makeup, what better way to make your eyes even more open than using these eyelash curlers? And they're, they're not as scary as they look. And all you do is clamp shut for a few seconds, and you can just see the way the eyelashes, before mascara, just lifts and opens. We'll go to the next one. Wonderful. So even if you're allergic to mascaras or you don't want to wear mascara, this will be the perfect remedy to get those eyes looking gorgeous. But I'm going to put mascara on you. So here we go. Starting with the top, and I'm coating down the lash, and I'm just going to lift up from the root. You can just see if you compare two eyes, this one is just sparkling. Gorgeous. Ladies, don't neglect the eyebrows, particularly if they're really fair. You need to highlight the eyebrow, get the color out, because this is going to shape the overall look. If you finish your makeup and your eyebrows are getting lost, it's not going to look good. So I know, Michelle, you're not keen on heavy lips and bright lipstick, so I'm going to keep that in mind, and I've chosen a really gorgeous gloss, and it's got these lovely sheen particles in it, and it's going to kind of highlight your hair. Look at that, great match. And it's just going to make the lips look gorgeous, soft, and glossy, and it will really complement the eyes. So I'm just putting lots on the lips. So whilst you're listening to your SlimPod, you can pout your way through to losing another few pounds. And there we have it, the fabulous Thinking Slimmer look.