This is a YouTube video titled "City Hive Build Page Series: How to Use City Hive Elements on Your Website" created in March 2025. The video features a single presenter named Poch from Intentionally Creative, who provides a detailed tutorial on how to use various CityHive elements to build and customize pages on a CityHive-powered website, specifically targeting liquor store niche marketing.
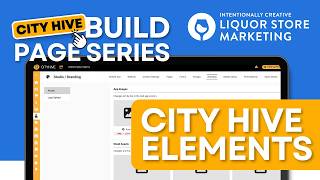
Welcome to our CityHive build page series. In this video, we're going to discuss how to use the CityHive elements when building a CityHive page. I'm Poch from Intentionally Creative, the industry's leading liquor store niche marketing agency. Now, from the CityHive dashboard, you're going to want to go here to the Studio menu. From the Studio menu, you're going to want to locate the Pages submenu. Now, here on the Pages submenu, you'll see all the pages that you have on your website. If you want to create a new page up, go up here to the top right and click the plus icon and then create page. Now you're going to want to put in your slug. The slug must be separated by dashes. So for example, we're going to use Elements Elements Dash Test page. And then we went to your City Hive Elements Test page. And then you can put this in any description you'd like. For this purpose, let's just use the same thing. Once you're done putting your description and your page title and your slug, we'll click on Open Pages Editor and then let's go. Now, as a tip, it's always good to save your progress when you're building a page on City Hive. Make sure you save your progress every two minutes or even a minute. Just, just, just to make sure that you don't lose any of your progress if anything happens. Alright, so this is where you'd start under this blank canvas. And what we're discussing today will be these City Hive elements right here. Now, first element would be the product tile. So let's drag that in here. And what the product tile does is it brings a tile that will display a product on your page. So if this is the product you like, you don't have to change it. But if you'd like to change this product to something else, you can double click and then search for the product. For example, let's go with Tito's Vodka and you'll be able to find Tito's Vodka and just double click on that and your product tile will then change to the product that you chose. Next one would be the form. So the forms are editable, you can create forms and once you put that form in, you can double click and select which form you'd like to put in. So in this case, you can put here different types of forms you'd like depending on what your purpose is. These forms can also be created within the platform. We also have a product list style. So let's bring in the product list tile. Now for the product list style. This displays like a bunch of products. We went in two there, so let's just delete one of them. Delete. So this brings in a bunch of products. Now again, if you'd like to change these product groups, if you already have a product group that you'd like to use, you can just change the product group here by clicking that group. And then on the right side you have your change product group. And then you can choose what product group you. Now another nice style is the banner slider. So for the banner slider, you just drag it in and it'll put in a banner slider. So this can also be created. And there's other videos on how to create banner sliders as well. Now for the product group slider, you can bring this in. And the product group slider is another slider as well that shows different products. So it'll show you different types of products that you can also configure on your settings on the dashboard. Next we have the event list. For the event list, this will show the different events that you have going on. This can showcase what types of events are available that your customers can be part of. For the store info, this basically will display all the store info on your website. So it'll show your opening times, closing times, and the map to your store. We also have here recipe ingredients, so drag that in. So we have a placeholder here. So you can also set these in your cityhigh dashboard and create these ingredients. And that will come out here when you put in the recipe ingredients. Now if you'd like to have a form that you can use to collect data from potential clients, you can put in the newsletter form. So let's drag that here to the bottom and you'll have the newsletter form that you can use to collect emails, name and phone numbers of your potential clients. And last two are the product section. So you can put in a product section here. Let's drag that in. So for the product section, you can display products here, you can put in a title for those products and you can also change a product group. So this is basically a product group with a title that you can use to describe this product group and a subtitle that you can use to further describe that group. And lastly, we can have a showcase deal style as well. For the showcase deal style, these are deals that you set on your website, so discounts, etc. You can also set this all on your website. So I hope that was a very quick explanation, but I hope you're able to see the power of these cityhive elements and you'll be able to use them on your next page. Build alright. For more CityHive tips and tricks, join our newsletter in the link below. If you're a liquor store looking to grow your online or in store sales quickly, Visit us@intentionallycreative.com.