Easiest Way To Trade The Volume Profile In 2026 (Full Tutorial)

Jesse Rogers teaches volume profile trading using high/low volume nodes, value areas, and point of control. He shows how to anchor profiles over five days or swing legs, then combine them with footprint data and cumulative volume delta to spot fade and continuation trades based on price action.
Chapters
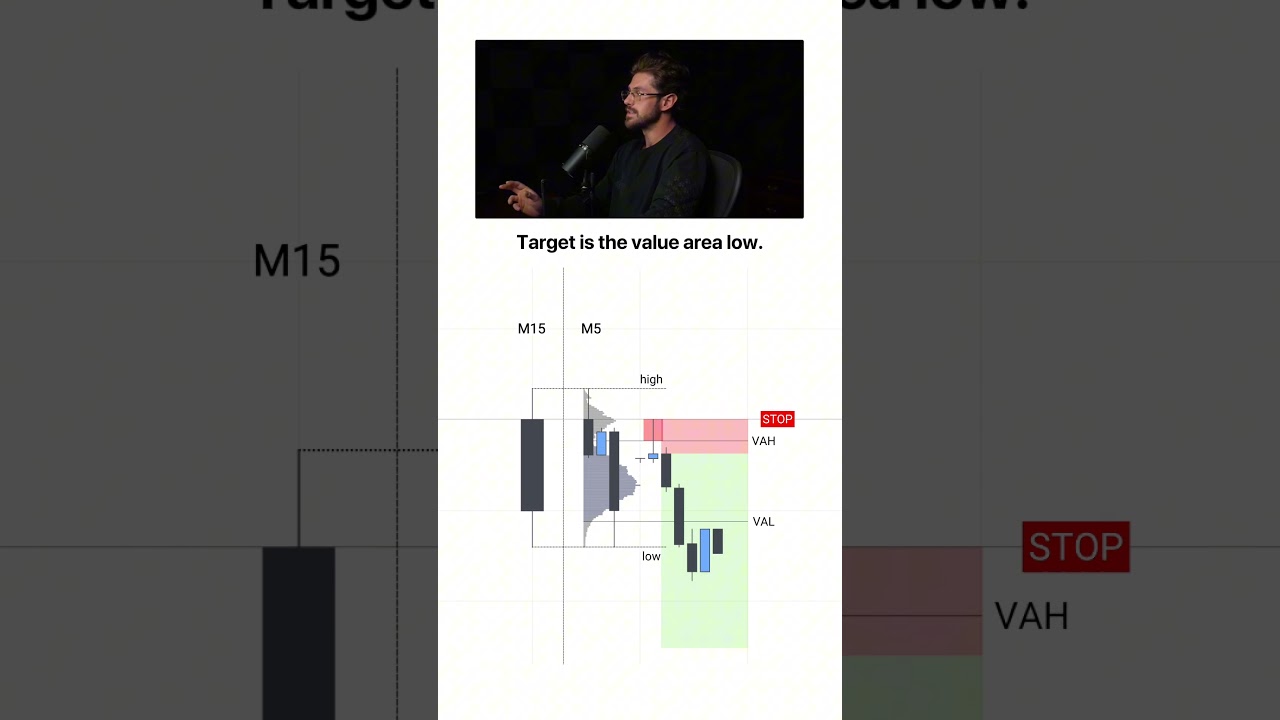
I'm going to teach you everything that there is to know about the volume profile. In the next hour, we're going to go over everything from the basics all the way to the complete strategy that I use to get profits like this, this, and this consistently. And by the end of this video, we will remove all the fluff from the volume profile and you will have a simple plan of action that you can take out to the charts tomorrow. In the last nine years that I've spent as a trader, I have tried tons of complicated strategies and, and none of them come even close to how powerful the volume profile is. And to get started, we're going to hop right into step number one, the basics of the volume profile. First and foremost, like, what is the volume profile like? Why does it matter? What is this, like, really seemingly complex tool that a lot of people have been talking about recently and you've been seeing me use? So really, simply put, volume profile shows where the market did the most business at specific price levels. And I want to be clear that everything you learned today is going to be the same data you already use with price action. You're just adding the volume layer. That's literally it. It's the same thing. So let's go ahead and take a look at this chart. We'll go on Nasdaq and just for simplicity sake, we'll, we'll use the fixed range. So to find this, you can go on trading view. You go over to where you would place a position tool. So like if you're placing a short or a long position, and then you're going to go down to either the anchored volume profile or fixed range. So bear with me. And I know this is going to look complicated, but it's really not. We're going to go over what this stuff means, how you can use it, and where the edge is inside of it. So what I just did was I drew a profile, a volume profile, from this high down to this low. Right here you can see where it's anchored. Okay, so all that, all that's doing is saying anything in this bit of the market, like during this time in this price range, where was the most volume traded? So as we can see, there is a bit of difference here. There's, there's some peaks, there's a lot of volume traded around this area. There's a lot of volume traded around this area, but you can see there's a lot of very, very low volume areas. Now the basic concepts we want to go over with the volume profile are going to be high volume nodes which we want to think of like destinations. Okay. These high volume nodes are the bigger parts in the volume profile, are just areas where a lot of volume was traded. So I want you to think of these as peaks and this is where the market kind of found agreement and big players did business. Okay, this is going to be important. Remember, this is where large players did business. Now a low volume node, on the other hand is a thin part of the profile where very little volume was traded. Now these are valleys where price moved very quickly through without any kind of agreement. So if we look at this volume profile, we could say that in this move most of the trading happened down here. Now, very little trading happened in these low volume areas. So a high volume node, think of it like a mountain, a low volume node, you want to think of it like a valley. Okay. So price is going to usually have a lot of quick movement through these low volume nodes unless they end up getting defended. And we're going to talk about how you can determine when that's likely and when it's not. Whenever we look at the volume profile, where do you guys think the largest market participants got involved? I mean, it's pretty simple, right? If they're trading with the largest volume, you're going to see it in the chart. Now if we wanted to mark out like, let's just say we marked out this whole move, it gets a little bit different. We're just marking out a little bit more. But now notice how much more volume there was up here. So one way to look at this, and I'm going to show you different ways to anchor the volume profile. That way it's a little bit more mechanical. I know you're probably thinking, oh well, how would I have known to market it here? I'm not even saying that you should market here. I'm just showing you how much this can change and what it's what it's telling you. So what this can tell you is that in this move the biggest position of who is in control was right here until we moved at least. Like obviously it's further down, but the biggest who is who started and sponsored this move was right here. So if we see a very big high volume node like this before a very big move to the downside, we can rest assured that most likely the players who were causing, so to speak, this move are positioned up in this area as the market moved very aggressively. They didn't really have a chance to get in at these low volume nodes. And it's not because it was a low volume note. It's just because these are areas where there's low volume. If there's low volume, that means that big players weren't participating. So this is where you get the idea of a fair value gap. A fair value gap. And the idea is just that there is an inefficiency in the market where there is such a big imbalance. The market moves extremely fast and leaves that fair value gap. But a lot of times there are going to be these sweet spots or little pockets within fair value gaps that are based on data. Not so some conspiracy theory, like you know, a lot of ICT stuff that can help you not only know which fair value gaps are good and bad, but also inside the good fair value gaps know where to trade. Let's get back to this outline. I want to make sure I stay on track for you guys. There is something else that we. And I'm going to go over how to put all this together. I'm just giving you guys the groundwork right now. But another thing is the value area. Okay? So the value area is based on a bell curve. Now if we look at a. Let me make this a little bit obvious. Non value area obvious. So notice how this area is not shaded now and this area is shaded. So if we're looking at like the value area, I'm going to move this around just so you can kind of see what, what area it is. Yeah, that's changing. That's the value area. Okay. The value area is just where 70 of the volume was traded during whatever range you've marked the profile on. Now we're going to go in again. We're going to go into what ranges we're going to mark the profile on. I know you guys have that question right now, but just again, bear with me here. Whenever we're looking at this, we can say that 70% of the volume was traded within this area. Now the value area high is going to be the high of this range. The value area low is going to be the low and the point of control, which I don't have the setting to mark, but I can mark it right here. The point of control is just the area where the most volume is traded. Okay, so if we look at this red line right here, this is the point where the most volume was traded. There's a couple different ways you can use this. Think of the point of control as an area where if you like, let's say if the market is teeter tottering inside of value and then it kind of goes to the Edge. The edge of any of these high volume nodes are the edge of value. And then let's say we get a reversion, meaning the market starts to trade back in to this. Now another thing I want to be very clear on is that this is going to be paired with everything that you've already learned. I'm going to show you how to do that. So don't be like, oh, this is some new thing I have to learn, yada yada. It's just understanding the concepts of how markets work. Let's just say the market moves aggressively back up from here and you're scalping from down here. Well, an easy first target is this point of control, or if you want to be a little bit more conservative, the beginning of a high volume node. Because remember these low volume nodes, the market is expected to move quickly through depending on what direction you're expecting the market to go. And the market can move towards these points of control. If we're fading outside of a value area or fading outside of high volume and then, and then we reject. Now this is what you can use market structure. You can use any confirmation entry to kind of dictate that the value area, high and low are just going to be exactly that. Like you want to think of the value area as fair value. Okay, this is where 70% of the volume was traded, meaning the market agreed that this was fair value of this range. Now this is going to change a lot. If I like mark a different area, it's always going to change quite a bit. Now I don't pay attention to this too much for the like. If I'm marking like a leg of price, this is something you'd pay attention to for like the previous day or the previous week. That's why I didn't have it marked on this tool. I'm going to go over a different tool you can use to automatically mark all the previous days and previous weeks and all that good stuff. Now let's talk about how to anchor your volume profile. So you can anchor it to any time or price range. There's not any right or wrong way. But it is important in my opinion to stay consistent with the way that you do it. And this is one of those things that you have to get out of your overthinking brain and just think very pragmatically. Okay, so like with the volume profile, what are we trying to do? We're trying to determine in a given range where the big players were positioned and where they weren't. That's pretty simple, right? So easy tricks we can do with this. And this is a tool you can use for this. It's a better tool than what I've been using because up until now I had been using this, the same tool but on the indicator side like I was using the fixed range volume profile. And then we had to remarket every couple days. I personally don't recommend doing that anymore. So let's go over a couple of things. We'll go over the beginning, which is what I have been doing with you guys up to this point. That is marking the previous five days of five full days other than the current day that's developing. When I say developing, that means the day has not closed. So a better tool to do that with than when we were using was this anchored volume profile. Before what we were doing was taking this, we would mark this day and we'd go 1, 2, 3, 4, 5. We'd mark that out. Better way to do this, in my opinion that makes it a little bit more easy on the eyes and also just less work is you would take this anchored volume profile which is going to show you the same exact thing. It's just putting in a different area. And instead of having to count each day you would just, well you stop to count them but you'd go 1, 2, 3, 4, 5. So we'll put it right there. Now what this does is it's going to place it on the side of your chart. Makes it a little bit more easy to understand and to see in my opinion. Okay, this is one way. Now this is a really effective way for day trading because over the last five days this is where you're going to get a lot of like that knee jerk reaction feedback. So if we are looking, looking at this and saying, okay, cool, well we're looking at the market from a perspective of where are the high amount of positions traded, where are the low amount of positions traded. So let's get into a little bit more about like how to actually find an edge and how to use this. So again, the high volume nodes are where big players got positioned. They're going to show where they either accumulated or distributed positions using limit orders to avoid slippage. Now we're going to come back to difference between limit orders and market orders and why they're important. Low volume nodes are where big players are going to defend their position. And if they're still wanting to move the market in one direction, they're going to defend these areas. So let me give you a practical example. Let's say right here we can be pretty confident that there is a lot of big players that are active in the market in this high volume node. Remember mountains and valleys, okay, Peaks and valleys right here in this area, if you want to be pretty precise. This. And it starts waning after this. This is where over the last five days, not just right here, but over the last five days a lot of traders, or we should say a lot of large traders were positioned. Now if the market moves very aggressively in this direction, we can say that there was an imbalance between buyers and sellers and obviously sellers were in control. So that can give us a little bit of feedback because we're using price. You say that, hey, there was a lot of selling going on in, in this area by the institutions. We don't want to just say a lot of selling in general. It's a lot of selling by the people who are in control of the market. So we want to establish. Okay, cool. The market had a very large amount of volume traded. We had a displacement away from it. Right. So we're just using basic market structure here. And you can combine this with everything else you've learned. The first candle rule failed on this day. So likely to be a sell day. And then the market made a very aggressive move to the downside, had a displacement down with a fair value gap. So we're already building that idea of like, okay, the market might be moving to the downside. If we think the market's moving to the downside and we see this retracement back into this price leg, the question becomes, okay, well which fair value gap, what level, etc. Etc. Am I going to try to use? Now if we look at this right here, notice how the market moved right up to the edge of this value right here. Very, very aggressive move away from it. So let's just mark out where this the market moved away from. It's right on the edge of this shelf. The way you want to think of this is let's say that a lot of large traders are positioned here. They didn't really get. They weren't active here in this area. Okay, they weren't active here. They weren't active here. All of these areas are low volume nodes. So we know that there's no footprint of large institutions. So what this means is when the market hits a low volume node, it's going to do one of two things. It's going to either be very reactive like we saw here, or it's going to completely disrespect it like we saw when the market moved down through this node. If the market is moving very aggressively through a low volume node, we can be confident that if we're moving down through a low volume node that sellers are in control. Now why is that? Let's explain the inverse. So, and this will, this will make a lot, a lot of sense to you. So if we are saying right here that the market is responding really aggressively from this low volume node as soon as we get out of value. So it's called, this is called fading the edge. So the edge of a high volume node, you can also do this with a val value area. But the edge of a high volume node. Think of it like if you're positioned up in this area, we know that a lot of these big traders are positioned up here. We'll just put this position, size, tool and this is their trade. Right. Let's say we don't know necessarily where they want to get out of the trade or what their total plan is. But we can use clues to kind of tell us that if they're still intending to push the market down lower. When the market comes up to this area, let's just say if you're in this trade and the market comes up to an area which is right here and right here where the market's likely going to do what, what is the market likely to do in these low volume areas? It's likely going to move very aggressive. Now let's talk about why the larger players are in the market up here and why they're not in the market right here. When the market's moving very aggressively into a low volume node, what's likely going to happen? Well, we're likely going to get displacement. What do retail traders or uneducated traders do every time they see a big move? What gets injected into the market? Liquidity. So just like we talk about with time based liquidity or fail flips or literally anything that you use with price action, you're looking at an area where if the large players are still in control here and there is available liquidity, are they going to take advantage of that? Because if they don't take advantage, if they don't defend and create some kind of limit sell right here, not a market. These uneducated traders are going to be doing market buys because they're seeing the market move fast. They're entering in buy most retail traders. And to be clear, there's nothing wrong with doing market buys. You and I have the convenience of doing market buys. If you're a whale who wants to sell hundreds of contracts, you have to do it with limits. You need to create market liquidity. You can't just say like, for example, let's say if you're over here and you're trying to trade and the order book shows that there, there's, you know, different amounts of contracts for sale at different price levels. Let's say if the order book has 10 up here, you know, 11 here, 12 here, 20 here and so forth, let's just say that has you another 10 or whatever. We're just throwing random numbers. Let's say if you wanted to enter a hundred contracts and they hit market buy right here, the market's going to jump all over the place and their position is going to be immediately down a tremendous amount of money. They're not going to do that. No professional trader is going to do that. They literally can't do that. They're looking at this and seeing where do they need to get into the market and they're structuring their trade and scaling into their trade. If we think in that logic and say, okay, cool, like they didn't really have the ability to get in here. Now if they're trying to move the market down lower and they then have the ability to not only get in and scale into their position, but also to absorb the movement against them to defend their position, you're going to see a reaction from the edge of value. Because in these low volume nodes, this is what you want to see get defended. This is what you want to see. You're going to think of these as like interesting areas of price. When the market makes a move outside of high volume into low volume, you want to watch how the market think of this as your key level. Now this is going to help you in a lot of ways that you probably don't even realize yet. But that is the main concept I want you to take away from. From what I just went over is that you want to fade the edges of value of high volume. Now you can do this in many different ways. We're going to go over a couple different ways and I'm even going to show you guys. So like for example, like right here, what is really changing here is nothing. In this example, a lot of times you might say, and this is the advantage it gives you. Let's just say you said, okay, cool, like liquidity sweep, we had a bearish move down. Also this was a London. And to tie this in and I just literally picked the last day, okay, this was the London high, if I'm not mistaken. Or was it actually. Yeah, so it was the lond London High. So we traded above the London High, had this sweep down. Now you could have also got up here and I'll show you how we'll go over that too. But I'm just using this as a basic example. But like let's say if you missed that move or maybe you wanted to scale into a second move and the market moved down, well, you might just say I'm going to mark out premium and discount. This can be limiting compared to volume profile. And that's why I'm going over with you guys. So if we mark out and not to say premium discount is bad or doesn't work, it does work. I'd be like, oh my God, I learned it for nothing. It's not the case. This just gives you a little bit of an extra edge. Now let's mark out this area. So let's say in this area, where was the edge of value? Notice right here. Literally where we went to, we went right to the edge of value. If you notice this fair value gap right here, like let's say if you marked out this, you wouldn't expect a reaction just from this level right here, right? Because it's not very low volume. And I want to be clear, you want to take this with a grain of salt, especially using lower time frames, just marking out legs, but you can find little pockets within fair value gaps that can provide a little bit better of an opportunity than just marking out a fair value gap. So it's just pairing it with something you already know to refine it. How could you have executed executed on this? Well, I'm going to show you guys one way right now and we're going to get into a little bit of order flow later. But if we go to a one minute, very simple, right? Like what are we looking for at any other time? This is where people kind of like overthink things and screw themselves up. You're literally just looking for the same stuff you always do. Because an entry model is just a confirmation of a key level. And you're finding a key level with this volume profile and it gives you a lot more data than simply relying on other key levels. So right here if we look, we had multiple different ways you could have entered. We had an inverse fair value gap. We also had this change in the state of delivery right here. Now there are some more aggressive ways you can do this that I'm going to show you with order flow. I'm also working on a little bit of a new entry confirmation that's A bit more aggressive and something you can use with first candle rule and all that. But we'll go over that another time. Essentially you are just looking at the market just like we're looking at this. This is time and price. We're looking at volume and price, just a different scope. You're looking at the market. It's not like some crazy indicator. It's the same data. It's literally the same data. Except adding volume and volume is the reason price moves. Without volume, you're not going to see price movements. Okay, now let's get back onto the outline. Just kind of recap. High volume nodes show where the larger players got into positions. And they did this because they have to use limit orders to avoid slippage. Low volume nodes are where these big players are going to defend their positions if that regime is still in control. Like let me give you a counterexample. Let's say if the market moves into a low volume node and it has no sign of reversing, that can be a very, very valuable trade. How many of you guys remember where I did this? The 35k day on NASDAQ. It was a couple weeks ago. I shorted the market and it made a huge move. I could probably find it. I don't want to get off track. Essentially the reason I did that was because I was selling into a low volume node. Let's just say we're marking out this leg in price. Do you see how in this area right here the market was very low volume? After we get out of this main high volume node right after we get out of this area and the market's just hitting into it. Like, let's just draw and show you guys what this look like. So you guys have a little bit more practicality. So let's say right here, this is where it really started tapering off. And you could be more conservative, more aggressive. I like to look at it like there's going to be like. See there's like a peak, little valley peak. I like to see where there's not any more peaks for a while. So I would. Being conservative, I'd say right here. Or I'm sorry, aggressive. I would say right here. Now you could wait until we have like the lowest volume area. Like a lot of people do this. They'll mark this like the very, very low volume area. Personally, I think that it can be a little bit overwhelming to do that for some people. So let's just say as you get down to this area, say this is a trading day. It's 9:30. This was also in my, if I remember right, I don't know if this was the day or not. But let's say you get down into this area and then you see this reaction, but then you see what a huge push to the downside through it. Then we hit into a fair value gap and start to push down the same thing you're usually doing. You're just having a little bit more confidence of the conditions. So on this day, if you're seeing the market hit into an area where we theoretically should get reactions, if the market is bullish and any bullish reaction is failing, this is the same logic as a fail flip. And the longer this happens, then that market is likely to move in that direction. And then if you see in that direction that there's very low volume areas, there's these valleys, you want to think of it like you're in a car driving downhill. You can kind of throw it neutral. And if, if you're sure you're rolling, it's going to roll to where? The next hill. And as you can see, where did it see the next bit of trouble area? Right here. Now, it's not to say you're always going to rebound from these areas, but as you can tell, the market started to move down and it didn't give any sign that it was going to really pop to the upside. Another thing you can use is that value area. Notice there's a shaded area. Okay, here's the value area high, and then there's the low. As we push out of this low, you're saying, hey, the market is now at a discount, it's moving out of value. And then what happens? It tries to get back into value and sellers say, no, we want to move prices lower. So that's, that's what you call acceptance. And acceptance is literally just displacement. It's just how you know if you hit into a point, a key level and stay there, the market's not going to keep going. Very simple. So if we see this in the market, we see an opportunity where there's low volume and we're getting entry models in that direction, then that's a day we can expect there to be more aggressive movement. Now if there's a lot of high volume, we can expect that to be a little more choppy. So let's go back to this. That's the, the, the contrast. Like if low volume nodes aren't giving you reactions, that can give you opportunity as well. Going back to the difference between market and limit orders, aggressive orders, whenever you Hear, say, say there's aggressive buying or there's aggressive selling. That means market orders. This is usually going to be retail traders, smaller market participant, more speculation, right? More people like you and I and most people like you and I in the the world of trading, like a retail traders, they make the money and they don't control the markets. Passive, which is going to be limit orders. These are going to be more professional traders, more institutions and they need these market orders who get active. Okay? So they're going to be looking where there's likely to be aggressive buying to then, you know, have quick sharp movements away from these areas. And then other than that, they're going to build their positions which you can visualize through high volume nodes. So now a lot of people will make the mistake of seeing aggressive buying and always thinking that it's going to be bullish. But often this is just retail buying into institution's limits and understanding the profile. And then also a little bit about order flow can help you tremendously see when this is happening. I don't know, I rambled into AI to help me make this. But the fail flip is what this is supposed to say. And just to recap for you guys, what the fail flip is, is let's say if we hit into a level that we should get a reaction from. So notice right here we're saying that this level right here, whether it's the level we're watching on this chart from the volume profile, whether it is the time based liquidity, whether it's a higher time from swing point, it doesn't matter. You need to understand that all levels are just levels. There's minor differences about each, but we're just looking at them as areas where the market is going to do business. That's the whole point of a level. So don't overthink it. If we hit a level and we see some kind of buying but it's quickly outweighed, we can say that, okay, cool. Here is a level right here, this, this blue line where if buyers were in control, the market should bounce and hold. Right. Did the market bounce? Yes. Did it hold? No. As soon as this happens, you could say that this level is likely to fail and we're likely to make a move down to the next level. And that's a very easy way to structure your trades around because a lot of times you'll be able to tell this and maybe the next level is right here and you don't have enough risk to reward. You don't take those trades on the days where you do have a big move or you're expecting a big move that can give you a great trade. It's very simple. Okay. Now if we are looking at aggressive buying and the market is not moving to the upside, that's going to be a situation where the market should be doing something, but it doesn't. So now let's get a little bit into order flow. I'm going to pop on to atas. I always say it weird. Atas, atas, It's a software that has order flow and I want you guys to not be overwhelmed because I'm going to simplify this. We're looking at looks like a normal chart. When I zoom it in, you're going to want to throw up because you're going to think, oh my God, numbers. Oh my gosh. Don't think like that. Okay, we're going to zoom out for a second. These green bubbles are showing something. They're called big trades. Okay, what this is showing and we can actually make it. And I'm going to be making a little bit more material on this, this software if you guys want to use it. Only thing that this shows you different than like Trading View is this level 2 data, which is like the amount of buyers versus sellers in a candle and where in each tick. Okay. You don't have. You can use that. There is this on Trading View. Okay. I want to be clear, but it's. It goes off of a different kind of data and it's totally fine. A lot of people will like hate on, you know, using volume profile and footprint. Sorry. On Trading View, but honestly it's, it is tick volume. It's not the same as regular volume, but it's showing you it's going to be pretty similar. For most traders this would be fine. But I'm going to show you guys on atas, first off, I want to go over is what to kind of bridge into what we were just talking about. If the market is seeing aggressive and these green bubbles are aggressive buying mean market orders. Okay, this is showing a lot of market orders. So you want to think about like this. For every one of these market orders that had to happen and you can see how many there were. So for every one of these we see right here, there's 522 market orders. 500, we can see that. Or 522 buys, we'll say there had to be sellers for that. Okay. There has to be sellers. So if we see a lot of buying and the market is responsive, the market is doing something. It should do. But we want to think about like this. A lot of times aggressive buying is just retail traders, right? Sometimes the retail traders are right, but a lot of times they're not. So if we see this aggressive buying. Aggressive buying, Aggressive buying, but the market is not moving. If we see aggressive buying and the market is not moving, it's not being rewarded. You want to always ask yourself what side is being rewarded? What is the market more sensitive to? Because if the market has a lot of aggressive buying and it's not moving up, well, guess what, there's some whale that's selling to them. What does that mean? Eventually these people are going to get exhausted, they're getting absorbed. It's a very important concept, it's very simple. But a lot of people overthink this. All you're doing with order flow, or all I would do, there's a million things I could over complicate this to try to make myself sound smart or try to make this sound like some cryptic way of trading. It's really, really simple. All you're doing is seeing which orders are actually being rewarded in the market. That's the outcome I'm looking for. There's a lot more you could do with it, sure. But what I'm doing is I'm looking at it from a sense of if the market is getting a lot of aggressive buying but the market isn't moving upwards and then it doesn't take much for us to sell off. You don't even really see any aggressive selling. That is an institutional move. That's the way I look at right now. If you pair this with a key level, which you always should to be, none of nothing will just work all the time unless you pair it with a key level. So we have right here we came up with these equal highs, which is also the London High. And we see a lot of buying into it. Is that buying rewarded? No, it is not. In fact, we see this buying get absorbed, meaning that aggressive buying could not push the market further. And once the market gives you entry confirmation, and there's a lot of different ways you can get confirmation. But once it gives you confirmation, you could say that this is likely an institutionally sponsored move. Now you can pair this with like everything else you've learned, with volume profiles, with whatever you want to do to frame your trade. But the concept I want you to grasp on here is the basics. Okay, on this day you're watching, how did the market react to key levels and low volume areas? Another thing to pay attention to here that we didn't go over earlier. I meant to go over this. We didn't. I skipped over it. Notice where the market reacted from up here. What is this up here? A very low volume area combined with the London high, you have multiple key levels and then we have aggressive market buyers entering the market and it's not moving. It's a prime setup to sell. Now this is you. This volume profile is anchored over the previous five full days. I'm going to show you guys some other ways you can mark them to get levels as well. If you are seeing this kind of behavior, you're looking at these low volume nodes is where you want to be interested in the market, right? This is where you want to be interested because you want to see how the market reacts to them. That can give you a lot of data. Now how can you see that? Well, you can use basic price action. You don't necessarily need order flow data. I'm just going over this because a lot of you guys have asked to go over this. Now what else can you pair this with? Well, in this area we see a lot of aggressive buying and not a lot of movement. Okay. Like there's some movement from here, but not up here. Now I'm going to give you a very, very basic crash course on the actual clusters. I want to be very clear that you do not even need to use these genuinely. You really don't. I'm actually teaching this on ATAs but there's another software I'm going to show you guys called bookmap and we'll go over it another time. But it looks really complicated but it's really not. Essentially what you're trying to determine here again is this is all I'm looking for. For is. And you, you can't just use this as once price is reaching an area I find interesting whether that's the London high, whether that's the first candle rule, higher, low, whether that is a low volume node, whether it's the previous daily high or low. It's. I'm just looking at areas where I want to be interested. Once I see that, I'm trying to determine if we're moving into an area and there's aggressive buying. Is that aggressive buying rewarded? Do we get accepted and move higher? I can frame a trade around that or is it absorbed and then we're going to get a reversal. That's. That's literally all you're doing and all you really need to know that is the big trades. That's really all you need to know. Book map what it'll do is actually show you limit orders too in the market, which is pretty cool. And it doesn't even have candles. It's just based on big trades. You'll see that there's a lot of different ways I could. This is why I've tried to like simplify this because I could go into this. There's a lot of different stuff you can do with these, a lot of different data. So right now I have it on a bid ask volume profile. Now what this means is that this ticket. So just like we look at the volume profile, notice this is a profile. Okay. I have it set on volume profile. We see right here, there's 147 buys going in. We'll say 147 people are hitting the ask. So in the market, whenever you're looking, this is a little bit under the hood of how markets actually work. So at any time when you're trading the market, if you look up here, this is not accurate right now because the market's closed. But usually you'll see that there's going to be the bid and the ask. If you are looking at the market and let's say right here is price, this is, this is where the price of the market is. Where you're going to be able to get into the market is going to be a one tick above and below that. Typically when you're buying, when you're bidding, when you're hitting that, whenever you're trying to buy, you're going to be hitting into a passive limit sell. You're hitting into an. You're taking the ask, you're taking what people are asking for the market. So if you're looking at the footprint, remember it's bidding. Ask bid, ask bid on the left, ask on the right. So this means 147 contracts were hit at the ask. That's a lot. That's to be quite a lot. As you can see, that didn't even happen really anywhere in this whole candle. Now the only thing I will say that about ATAs that I don't personally like, unless I haven't figured out a way to do this, is with exo charts. You can aggregate this data. So this right now is in every single 0.25, every single tick. What happened? Unless you are genuinely on some like, like really crazy scalping, you don't need to know this, okay? This is where a lot of people get overwhelmed and they shut down and they think, I can't do this. I'm not, don't, don't be like that. The point you're trying to make here is where was the aggressive amount of people entering the market? So as you can see, 100. There's a lot of people buying up here, but guess what? Not any price movement. In fact, the market catapulted to the downside right after this. That candle didn't even close green. This is just showing you where the aggressive trades were. That candle closed red. A more aggressive way that you can use these concepts to like enter trades is let's say that if the market has all these big trades to the upside and then that candle closes red and you're at a key level and then the market starts to move to the downside and breaks through that candle like you break below that, you could say that, well, all these buyers that are in this trade all the way up here, they're probably not in control of the market. If they were in control of the market, they wouldn't let this happen. First of all, the candle probably wouldn't close red at all. That's what you're, you're visualizing absorption. When you see absorption, if you're, if you want to see all of these traders that are getting in up here, they're getting in the market right here, you don't really know where they have their stops specifically. Let's. But do you think that if they're in control of the market, they're going to want to see the market move to the downside? They're most likely going to have their stop somewhere nearby. So you can bet that if these traders are getting absorbed and the market is going to make a move in the opposing direction, they're going to likely exit that long. And that's going to act as rocket fuel to the downside. That's where you'll get these big moves from. Because it's a lot of people misunderstand. It's not that there were so many big sellers selling in all these fair value gaps. As you can see, there is some down here. But these are most likely retail traders chasing this move. It's not necessarily a bad thing. But you know, you want to look at it like if these traders are wrong, they're going to get absorbed, they're going to get out, they're going to get trapped. These traders are trapped in a losing position which they're going to exit. So that's how you can kind of, that's, that's why reversals happen the way they do. Because you can look at it like all these guys, they bought, they bought, they Bought, they bought. They ran out of gas, right? The big dogs are in control. They bought right into a trap. So think of it like key levels and low volume nodes and all these levels. You think of that as like a tripwire. It's a trap and there's a ton of people, a group of people running through it. Now this trap is a pretty big trap. It can wipe out a lot of people at once. If enough people get into it, it might break the trap in the market and it might not work. That's where you'll get a continuation. If the trap works, these people get there, they're exhausted, and guess what happens? The floor falls out from underneath them and they capitulate. They get out of their trades. The market's going to move pretty aggressively. How else can you witness this? Because it's like as you're watching this, you've literally probably forgot this is the same you're already doing. Okay. It's literally the same thing. It's just giving you a little bit more data. How else could you have found this out? Inverse, fair value gaps, change of market structure, displacement, it's the same. This can just give you a little bit more conviction. It's not like you're learning something completely new. You're adding data and a more educated perspective onto what you already do. That's the biggest thing that you need to understand to not get overwhelmed using this stuff. Because when I learned it, a lot of this stuff that's online about this is so overly complicated that it like literally kind of makes me angry when I think back. Because truth be told, like most stuff, you only need so much. You only need the gist of it to be able to make tactical decisions. And at the end of the day, we're not learning this because we're trying to like, it's not like we're taking a college course and we need to learn a bunch of useless so we can take a test later. No, we're trying to learn it to do one thing, make money. All you need to know to make money using this stuff is where aggressive buying or aggressive selling isn't getting rewarded. Or it is because that tells you who's in control of the market. You pair that with an area, we know that large players are likely to get in. Boom. You've now got a different perspective and a different edge in the market. So that, that's absorption. Okay, Market seeing aggressive buying, but price doesn't move up. Market moving into a low volume node, but it doesn't accelerate. And these two things Especially when paired together, reveals the large players in the market and their true intentions. Now, another tool we can use for this is cumulative volume delta. And let me explain what delta is. I haven't even gone over that because I don't want to really confuse out of you guys, but Delta is the difference between the amount of buyers and sellers in a given candle. Okay. If you notice right here, it's going to say 0 and 13. The delta for this tick was going to be 13 because there were 13 more buyers and sellers. That's how you want to think of it. You can actually visualize this. You could go down here and look at a Delta profile instead and you're going to see 13. This is just the difference between those two numbers. I personally, Delta is good for beginners. I will say that bid ask gives you a little bit more because like this might say 13, but you don't know how much volume was there. You just know the difference. Which again, it can be volume, it can be valuable. But like, in my opinion, like, for example, I'll give you another example here. Like in this, if you're looking at just the delta, you can't really see that there was actually a massive set of orders, right? With that 147, wherever it was, I think it was up here, you don't see that. You just see the exact number. You're not going to see what the total. You're going to see the difference, not the total. So I like to see the total Delta is just the difference. So, and this shows you, like, who is, who is more aggressively buying or selling. So like, if you go and say, okay, I'm going to look at Delta and just look at Delta without a profile, it's going to show you like where the more aggressive buying or aggressive selling was at in these candles. Right? So you can look at. This is a cluster before. I like profiles. Clusters make it a little bit more like it's just big green, big red. Right? Like you can see there's a lot. There was more aggressive selling here, There was more aggressive selling here, more aggressive buying here. That's all it's really showing you. Okay, There's a lot of different ways you can do this. There's a lot. Again, you can make this a lot more complicated than it needs to be. Personally, I just like a bid ask volume profile. If you want to see bid and ask and Delta, you can do a bid ask delta profile. And what this will do is the only bars will be like areas where there was a lot of a Big difference in delta. Now I don't want you guys to be like oh I need to learn all this. You literally don't. Again, remember a good I'm reading a really phenomenal book right now on just general strategy. It's called On Grand Strategy. I highly recommend it to anyone. I mean even if you're not in a position to like think about strategy and business strategy. But one of the quotes that I wrote from out of this book was a master strategist has the ability to retain the objective while avoiding swamps. Now it sounds really simple but when you deconstruct that, what that really means and this is where a lot of people go wrong, not only in life but in everything they do is you literally forget the point of why you're doing something. People will start to trade because they want to learn how to make money and have more freedom. People will start to learn some new strategy because they want to make money but instead of trading for more freedom they sit there and spend 12 hours a day gambling. Or instead of using the strategy to make more money, they start getting involved in being fascinated and treating it like it's like a hobby and wanting to learn every last little bit. Don't do that. Okay? Your objective with this tool is to be able to differentiate large players and small players and see who's in control. If something you're doing or learning does not support that, it is a waste of time and energy. And waste of time and energy are swamps you move. And this is the difference between 95% of people and 5% of people is understanding how to not care about stuff that's irrelevant. And yes there is a big delta on a. On this big trades there might not be big delta on. You can actually add a table on most of these. There's like a table. I'm not going to get too off track here but you could have a table that shows down at the bottom here. I know on TradingView you can have it so I'll just show you it just so you can understand what it is. So you can see and this is not going to be correct. I actually wouldn't personally recommend using TradingView for this itself. Maybe really small to you but this is going to show you this is how a lot of these softwares will have and they'll show you like the delta between each candle, yada yada. It's not always going to be. Most of the time it will be but sometimes you'll see negative delta in an up close candle like you see here. See right Here there's negative delta, but the market wasn't rewarding it. Now this I wouldn't have been paying attention to because you weren't at a key level. You're kind of just trading randomly. But it's not always going to. There's no always. Okay, let me, let me be very clear on this. There is no always in this business. Big trades moving into a key level sometimes are going to push through and continue. The way you tell if that's likely to happen on it is is price reflecting aggressive buying. If the market keeps moving up and keeps moving up, that's a great sign that, that aggressive buying is being rewarded. I'm going to go over a way in a second can use to spot that. So let's go, let's go into a little bit of. We're going to go CVD and then we're going to talk about using profiles in general to determine like directional bias and talk about acceptance and rejection, which is something we've talked about a lot in the trading streams. So some of you guys may already know this. Ways you can use this. Let's go to es, because I think ES actually had a better day on this. I'm just going to use this as an example. So cumulative volume delta, now that you understand what delta is, cumulative volume delta is just showing you since an anchored point in time, like what's the total delta. So like for example, if it was like since the, the full day had started, the Delta 16K positive, that, that's, that's all that's showing. Because this is based on starting at, you know, 6pm that where the daily candle opened. So if you see that delta is actually making and all you really want to pay attention to with Delta when you're starting out is really the structure of it. Okay? That's what, that's why this tool is visualized the way it is. So let me give you an example here. So let's say that you are looking at this move, move right here. Does everybody understand what divergence is? I'll, I'll explain it. Just not assume anyone does. It's always better to do that. So divergence means, like with smt, it's the same thing. Let's say I have two assets. One of them is moving up and the other is not making. See, we had a higher high. We had a lower high. Let's say this is price over here and this is Delta. If price is making higher highs, but Delta is not, you want to look at that and say that the market there's not being a lot of aggressive buying. Okay, like let me give you an example on the actual chart. So look right here. So let's just say that the market is moving to the downside. We see lower lows in price, lower lows in price, but we see higher lows on the cvd. Now this is something you can use with liquidity sweeps. This is a very easy tool, probably the easiest one you're going to learn today in terms of just basic confirmation. Let's say you see a lower low right here, but you don't see a lower low in delta in the cvd. This shows that you're, you're seeing weakening sellers. So this is an example of buyers, but it's the same thing. That would be bullish. So if you see price making a new low and CVD doesn't, or price making a new high and CVD doesn't, that's a divergence, right? That means that that price move is not really being supported. Anytime there's divergence, there's going to be opportunities. As long as you're at a key level, I just want to make sure I go through it quickly. I don't think I need to spend a tremendous amount of time on it just because. So now let's talk about some different practical ways you can use volume profiles for this for the tool that I want you guys to use. Now remember we talked about different ways to anchor volume profiles. If you want a dynamic throughout the day guideline of like levels. I personally love using the trailing five days. Or if you want to do a little bit more and this, that's the, the beginner way that you could just. It's mechanical, there's no thought in it. But if you want to do it a little more aggressive or I shouldn't say maybe aggressive, but like discretionary. Aggressive is not the right word for that. If you want to do it more discretionary, you could say, well, what's the current swing leg we're trading, trading in? So like I'll give you an example. Let's say if the market has moved here, that's a swing leg. This is a swing leg. So whatever current swing leg you're moving, this is the current structure. Not structure in terms of like are we bearish most but the current leg on a daily chart or like a higher time frame. You can also anchor it like that. Get anchor from the base of the move and when you click that, like when I did that with this tool, I go to the anchor volume profile. When I click right There it's just going to mark from there today. Okay. It's all everything since then. I'm just anchoring it to. Then that's another way you can market. And those two ways, whether you're using the five days, like if you're using basically like five days, which is what we started with, or the current leg and structure that's going to give you more dynamic reads on the market of where traders are positioned recently. Okay. This is going to be where you have your day trading opportunities better for key levels. Another way you can do this for using volume profiles in a different way is you can go and there's an indicator called session volume profile hd. See right now what you see is a volume profile. Now on each day of price action, each daily candle, you can do these different ways. You could mark it and say you only want to do the session. Like you can go to a custom session and mark out just the New York session. Some people like doing that. You'll see once you understand volume profile that you can mark it in any way. You're just getting data. I prefer for this to mark it on each day. So let me give you an example of how this can be used. There's a couple different types of volume profiles. Okay. Or I guess we should like regimes. There's a couple different regimes of profiles. So the easiest way to think of these are going to be there's going to be balanced profiles where they're just like a normal nice kind of like bell curve like this one. There's going to be thin profiles where they're jagged like this one. There's going to be something called a P profile like this one. And then there are B profiles. Let me see if I can find one. There's B profiles like none of these are really a clean B profile. But just to save us time here, a B profile would be upside down of this. The differences of these. Think of this in the terms of like acceptance and rejection. If the market hits into a level, let's just say. Or if like what this volume profile is showing you. Again, the lines are the value area, 70% of where volume is traded. You can say that 70% of traders said that the value of the market should be here. That's kind of why you want to process it in your mind. Then we see what happened on the next day. The market moved to a new area of value. So if the market moves higher and the market establishes value, meaning we have a value area, or the market closes above the previous value value high. If we See a P shape profile. That means the market moved really aggressively to the upside and then found its ground up up here and did not sell off. So anytime the market makes a big move and it just hangs out for a long time or a lot of volume is traded here and the market isn't moving down, what does that tell you? That tells you the market's likely finding a new area of value. It's establishing new value. The market move like if you have price for anything else other than trade, that' people get this confused because they overthink trading. Let's just say if you had a Rolex that was worth $10,000, then the Rolex, a bunch of people priced it at $15,000 and people bought it at 15,000. That tells you the market's bullish. That tells you it's worth more. It's literally the market accepting a new value. That's what you're looking at with price because the market is really an auction. Why it's called auction market theory. What you're learning essentially is auction market theory. So the market's an auction and now people are willing to buy it for higher. How do we know they're willing to buy it? There's a lot of volume being traded at higher prices and the market's not moving away from them. So anytime that you see the market closing outside of previous value like this or extremely bullish would be closing out of current value. So like for example, let me find a example where we close outside of value. This would be an example of closing outside of value right here. This would be. Usually you'd look at this as bearish. Obviously the next day was neutral because we probably hit into some key level. But usually when you see this, this is going to be something you look at as bearish. And again, nothing is all the time time. Sometimes you're going to see a reversal. So you want to think of it like P shaped profiles are bullish. And what you could expect on days like this. If you're expecting a bullish day, what are you going to look at as an area of support? First off, you could look at this high volume node. Second off, you can look at the previous day's value area high or the point of control. If, if the market's going to keep being bullish, this is where you should see the market play from, right? It shouldn't come through those areas. Like if it does, if it goes much below that, that now it's one thing if it fades below it for a small amount of time as you can notice right here the market traded outside and stayed above these levels. So you're expecting bullish price action. If the market gets accepted higher and establishes new value higher, that's bullish. If that happened to the downside, that'd be bearish. On a day where you have balanced price action, what you're looking to do the next day is fade value. Okay? So this is a very important skill I want you guys to understand. If the previous day closed like this and you're looking at the previous day's value levels, you could say we've got this right here and this right here. If the market is what you call rotation, okay? If the market trades outside of these levels, you want to look for entry signals that the market's going to fade back into the range and you can take range bound trades. Now if you're just using the previous day's profile. Now if you have other context, like let's say if there's some target because we're using, remember you're not replacing anything you already know. You're just using this for an extra edge. So let's just say like I'll give you an example. Let's say if the market market came down here and let's just say hypothetically the next day opened up a little bit out of. Or we'll use another example. Let's say you're trading the next day and the market came under this value but popped right back into it. That's going to be a trade where you can take to the point of control and then probably move up your stops and see if it gets accepted higher. And if it does, you can trade to the next value area. Now you want to pair this with other stuff that we're doing. But that's the idea of like a balanced day. Now this is a little bit a. Of of I would say this is arguably some people would say it's not a balance. I would look at this as a balanced day. You want to see very exaggerated moves and not overthink the overall like flow of things. So if, and now let's take this one more step. Remember, what are we using on each candle? We're using profiles. So let me give you an example. Let me go back and mark out. Well, let's actually not let complicate this what I was going to show you essentially. And you can look at this on ats. It's just a little harder for you to see it. If you're seeing the market develop value in each candle, you can look at the Same thing. Like for example, let's say if you're trying to trade a continuation, let's say if you look right on this candle, for example, we're just, and the context is important, I'm just using one candle as an example or this candle. Did the market just like you're looking at a day, if we have high volume, the market moves very aggressively and closes outside of the value area. You can look at this and tell where the value area is. It's another thing I don't want you to, to overthink. You know, if I put a gun to your head and say, where's the value area? You're going to say, it's probably somewhere up here. And I said, did the market close in that value area? No. So if the market's closing outside of value, that's the market responding to the imbalance of buyers and sellers that was created in this profile. If you see the market, another way you can do this, really easy is a point of control. So the point of control, remember in this chart is going to be these red boxes of bright red. That's the point of control. So if you see the market closing below the point of control, that's bearish. If you see the market closing above it, that's bullish. Ways you can do this with the. Let me go back to the different kinds of profiles. So let's say if you're trading on a. So let's say right here, we'll use Friday as an example. Now that's where I talked about before with there was other reasons to sell here other than just the London high. If you look, we had a lot of balance days previously. There's a couple balance days and there's a lot of low volume here. A lot of low volume. Right. You can also have seen this, like I said with the trailing five day. Whenever you have different types of profiles, those days can be traded. The next day can be traded a little bit based on this. So like for example, let's say on a day where you have this kind of. This is what I would call a thin profile, meaning it was a very imbalanced day. The market moved a lot, but a lot of volume was scattered apart. What you can do is you can expect reactiveness from the low volume nodes. Now whether that's going to be a move through it or reversal, you're going to use the market's reaction to these areas to tell you that whether or not buyers or sell. Like for example, example, let's say if we move into the market up here and the market rejects away from this aggressively, you could say, okay, cool. It looks like sellers are in control. We're likely going to get some kind of sell off. Now I would say in this example you'd want to look at and this is where having the last five days or however many, you know, if you use the last five days of the current swing structure doesn't really, I mean it's going to give you a little bit different stuff, but it's going to still be pretty similar. If you go and mark out the anchored volume profile and you go 1, 1, 2, 3, 4, 5, let's say if you're looking at each day and you're saying okay, cool, well the last day was, you know, this thin profile. So you can use different. And I would recommend going on like a 30 minute to look at the profiles. It just makes a little easier like for the, the daily profiles. And you could say okay cool. Like where does the volume really start tapering off? In fact, it actually starts tapering off even before price does. So these are where you'll see days where the market might not even, I mean, I'm not saying that it won't hit into this high, but you could look for trades really starting here if you wanted to be aggressive. So like let's just say the market opens up, 9, 30 comes and you hit into this area and you see a sharp reaction from it. You could look and say okay cool. Like it's. If we start to slip outside of this value, market's likely going to make a pretty aggressive move. Because you can see right here, if you get through this volume, this high volume node and you react to this one, right, that's going to be a decent move. So like let's say if you got in here and you can frame your risk pretty aggressively, you, you can keep your stop tight because you can get in quickly. You know that if the market makes it through this, like it starts pushing through this, you're going to have a pretty nice move. I mean the market, this is now, now in price discovery. So then once the market makes moves outside of this, you can trail up your stop accordingly. That's like a practical way. You can do this with a thin profile. If you're trading based off of a P profile or a B profile. Like you see this is a P profile just be upside down. If it was B, you would want to see the market hold above this area, right? As long as the market's above that, the longer it spends above that, the more bullish you are, are so like for example, this day would have ended up coming down after the open holds above this area. Also, there's low volume here because you can look at it and say, okay, there's low volume. And in this area there was some kind of opportunities back to the point of control. Now I want to be clear as well. Sometimes you're not going to have enough space to get in. And that's another thing these volume profiles can help you do, which is when not to trade. Like if you don't see an opportunity and you see a ton of high volume everywhere you're at you probably and not distance to the next one, one you probably don't want to trade. Right. That might be a day you just look at me like, yeah, I need, I need more from the market before I really start taking opportunities. Because this tool is not something that's designed, oh, I'm going to get every single opportunity in the world. It's designed to help you find the good opportunities. Let's go over the key takeaways really quick. Volume profiles just show you where large traders did business and where they didn't. The big players are going to be positioned in the high volume nodes and they're going to defend the low volume nodes if they intend to keep pushing the market in that direction. So if you hit a high or a low volume node above you, you should see reaction from it. Otherwise the market's likely going to push through it very aggressively. Now, aggressive order flow doesn't always mean the market's going to move in that direction. Okay? In fact, you want to look for the opposite. You want to look for when aggressive order flow isn't rewarded. You can use the previous day's value area and the profile type to give you bias and key levels for the next day. Again, if you close outside of value or if you have a P shape, you could look for the value area high to be a support if the next day hits into it. Now the last and most important one is that this is all the same data you already use, just with more detail. That way you can see what institutions are doing. So anyways, guys, as always, I appreciate you and I will see you guys later. Peace out.