The MOST POWERFUL Trading Indicator (Beginner Friendly)

Jesse Rogers explains Volume Profile, a trading indicator that uses high-volume zones as price magnets and low-volume zones for quick moves. The Slingshot method spots entries on a 2-minute chart when price breaks yesterday's value area, with a 2:1 risk-to-reward target and stops at recent swing points.
Chapters
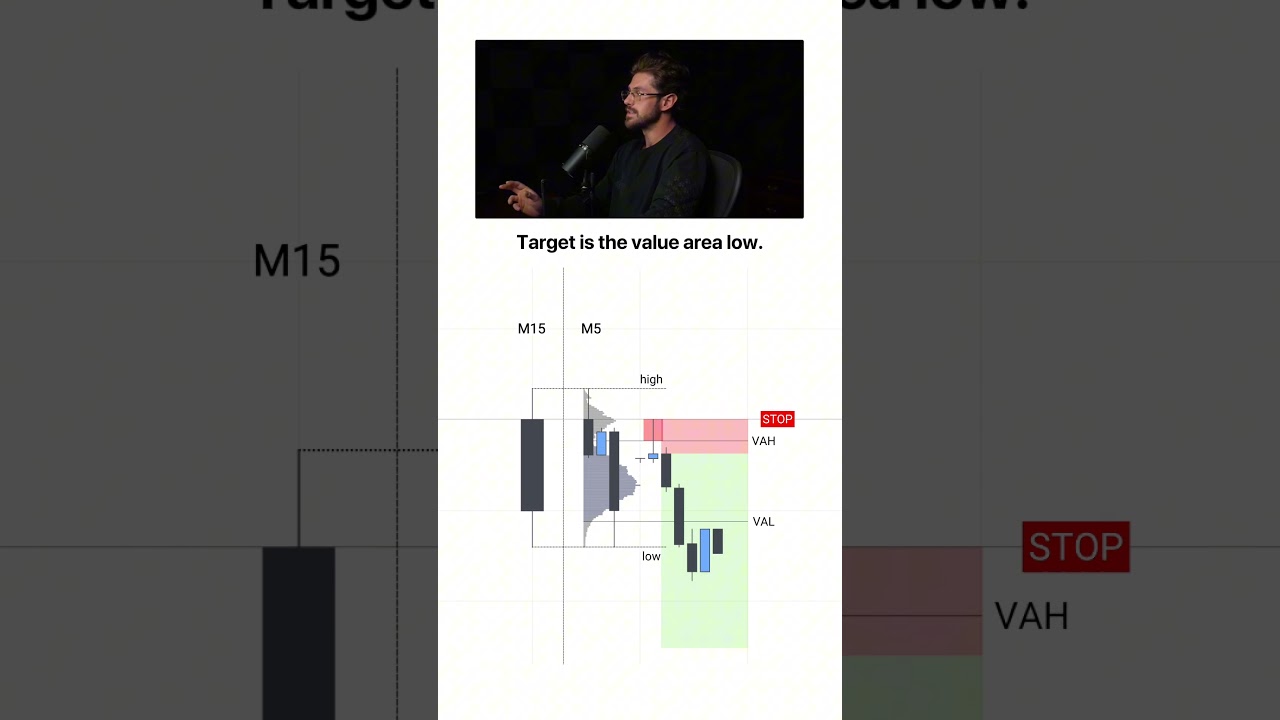
You're about to learn the most powerful trading indicator. It's easy to use, works in every single market, and it gives me trades like this, this, and this consistently. And by the end of this video, you'll know exactly how to use it in order to find trades just like these on your own. The indicator is the Volume Profile. It shows how much trading activity happened at every price, and it's extremely good at predicting where price reacts next. It's made up of 4 components. First, the Point of Control, also known as the POC. This is the single biggest bar in the profile, and it's the price where the most volume traded during the entire session. Next are the heavy areas called high volume nodes. These are price ranges where a lot of trading happened, and the more volume that traded at a price, the wider the bar. Think of these like mountains. And then we have thin areas, which are called low volume nodes. These are price ranges where barely any trading happened. Think of these like valleys in between the mountains. Last, the value area. And this is the shaded zone where 70% of all the volume traded during the entire session. Now that you know the 4 parts, here's how to actually use them. The high volume areas act like gravity. Price gets pulled in here and held because traders have positions stacked at those levels. And when price returns, they either add or exit, which creates the back and forth chop. Now the thin zones, or low volume areas, are the opposite. Think of these like low gravity. Fewer traders are positioned there, so price moves very fast once we reach these areas. The value area also predicts price movement and trade setups. This is where the most volume traded, so the market agreed that it was a fair price, which is why we call it fair value. If a session closes above fair value, that's bullish. Most trading happened inside the value area, so when price pushes above it, it shows buyers were in control during that session. And when this happens, the value area becomes support on the next session. And the same goes for a close below— sellers were in control, so during the next session, the value area becomes resistance. So if price trades above value and stays there, that's bullish because the market is accepting a higher price than it was valued at before. And the same goes for going below the value area and staying there. If this happens, that's bearish because lower prices are now accepted. So as you can see, this indicator is extremely easy to use, but the problem most traders encounter is that they use it by itself. Now let me tell you why that doesn't work. The Volume Profile gives you context, but context alone doesn't get you into winning trades. You see where price is likely to react, but if you don't have a clear rule for when to actually enter, you end up guessing or worse, overtrading. So to fix this issue, you need to combine the volume profile with a clear strategy to find winning trades. An easy but powerful entry strategy that works great for beginners is called the Slingshot. Let's hop on a chart to break down how it works. First, we're going to go over the strategy's rules and then we're going to go over some of the common mistakes beginners make. That way, you know how to avoid the losing setups. For this strategy, you're going to start out on the 5-minute chart. So on TradingView.com, go up here and select the 5-minute button. This strategy works best on ES or NQ. So ES is the S&P 500 futures. NQ is Nasdaq futures. So to find these and make sure you're on the right chart, you could go over here to the symbol search and you could just put in ES and click the S&P 500 futures, or you could click NQ and click the NQ futures. I like trading NQ because it moves faster. So we're going to go over it on NASDAQ. Now, after this, the next thing we want to do is we want to add the volume profile to our charts. So you're going to go up here and you're going to click indicators, and then you would type in session volume profile, and it's going to come up with this session volume profile HD. You're going to select this one. Then once we have this added to our charts, we are going to need to go up here and click the settings button. Because we have some stuff we need to change in order to get this looking right. What we want to do is click the sessions button and we want to go down to custom. Make sure that you have the custom session as 9:30 to 16. And one thing that's very important is making sure you have New York time selected down here at the right. So you would click this button right here and just make sure you have the New York time selected. We are going to make sure the value area volume is set to 70. You can set the volume just to total. And then once we go over here to style, what you want to do is I like to make all of my up and down volume the same color because it makes it much cleaner. So I'll just pick this color right here, then this one. And then for the value area, I like making this one solid color as well. So I like blue. I'll pick this blue right here. And you want to mark out the value area high and the value area low. That way we know where the value area is. I'm going to mark these levels as black just so they're easy to see against my white background. But a lot of this stuff is really personal preference for you guys. Now, the point of control, I like to mark red so it's nice and visible. This histogram box I turn all the way off because we don't need it. And once you have got these settings set up, we are all good to go. So we're going to click okay. And now if you set this up correctly, your volume profile should look something like this. One last tweak I like to make with the settings is I go to the style area and then click width, and I would click 70% right here. So this makes it a little bit more visible and easy to see because it makes the volume profile wider. Now, once you're all set up, you're going to have this profile that's showing the previous day's trading session. And the reason we pick 9:30 to 4 is because that's the stock market hours. So what you want to do next is we want to go over here to the left-hand side of the screen, and we can select this dropdown, and you can pick the rectangle shape. And then we're going to mark out the previous day's value area and extend it to when we're trading today. Now, for this strategy, you're going to want to start trading right at 9:30. So anything that happens after 9:30 is free game. Now once you've drawn this box, just to make it easier on the eyes, you can actually go ahead and hide the volume profile. Otherwise the current one for the day will be showing and it's just a little bit distracting. So we can click that and now we have our trading area for the day. Now we have our trading area for the day. So remember, if we're above yesterday's value area, we're going to look for longs. Now, if we were below it, we would look for shorts, meaning we would want to sell the market, which is what we're going to go over in our second example. But since today we are a— so now we want to wait for a pullback back into this value area to look to try to go long and look for our entry confirmation once we get into this zone. So at this time, you're just going to wait and kind of let the market do its thing. But once we hit into the previous day's value area, the next thing we want to do is go to the 2-minute chart. So up here you're going to click the 2-minute button, and this is going to bring us to our execution time frame where we look for the pattern that's going to confirm our trade entry. So you want to wait until we form some kind of market structure, and when I say market structure, I just mean highs and lows. So if you look right here, anytime that we form a candle like this where you see how the high was higher than either candle on side of it. So this candle's high was higher than this one and that one. So to me, that is a swing point for this strategy. Now specifically what we want to see is this candle closure, meaning the candle's body ended up above that market structure. And you can see that we got this market structure shift. Now at this time, we are good to enter the trade. So to map out our entry, stop loss, and target, we're going to go over here to the left-hand side of the screen and we're going to click the long position button since we're looking to buy and go long. And as soon as this candle closes, you're good to enter the trade. The stop loss, you're just going to place at the recent pivot point. So whatever structure formed in the opposite direction of where we're looking to trade. So we don't want the market to go back under this low if this shift is going to hold. Now for the target, it's really simple. We're just going to go for a fixed 2:1 risk to reward. This means that our winning trades will pay twice as much in profit as we lose on our losing trades. And this is important for staying profitable in the long term. Now, at this time, you can go over here to the left and click buy, and we are going to buy and put our stop loss and our entry. And once you click this, it will bring up these levels. You can just drag these down right here. And then at this time, all we need to do is sit back and let the market take its time. Now, I know that you probably see $2,100 here. What you can do if you wanted to risk less, because that's a big amount for beginners, is you could just go to MNQ. So MNQ, or if you are trading ES, MES, these just take down the risk. So basically you're trading with 1/10 of the size. So if you took this trade on MNQ, this trade would just be $213. So don't worry, you don't have to risk thousands of dollars just starting out, and you probably shouldn't. After you've set your take profit and stop loss, let the market do the heavy lifting and don't micromanage the trade. As you can see, the trade was successful and it hit its target. But let's put this to the test in a different scenario. All right. So in this example, it's just before market open and we've marked out the previous day's value area. So at this time, what we want to wait on is for the market to trade either below it or we want to see it trade above it because we need to wait until we're outside of the value area to set up a trade. As you can see, we're now below the value area. So let's go to our 2-minute timeframe to look for our execution trigger. Trigger. And what we want to wait for is the same thing. We just want to wait for some kind of structure to be broken and a candle close through it. So as you can see right here, we broke through this low. So as soon as you get that, we can go ahead and look to enter a short position. So we go over here, click short, same exact thing. You're just entering there, and then we can go ahead and put our stop loss at the most recent swing point in the opposite direction. And as you can see, we hit the target and this trade was a winner as well. But I want to be crystal clear, guys, this strategy doesn't work every single time. And if anybody tells you that a strategy has a 100% win rate, probably should run far away. So let's go over some scenarios where this strategy is likely to fail. That way you can avoid making those mistakes and those losing trades. And this is really simple. There are two easy-to-spot signs that this setup will fail. Now, the first is let's say you're trading outside the value area and you're waiting for the market to pull back to give you an entry. So what we want to happen is the market to hit into here and give us a market structure shift. So if the market just blasts through the entire zone, probably shouldn't take that trade because this shows that buyers weren't defending this level and this is not a setup that you want to take. So if price moves through the previous value area with no reaction, avoid the trade. Now for the second sign that this setup is likely to fail, let's take a look at a different example. So we've got our volume profile and value area marked out for the day., and now we just want to wait for the market to trade outside of this so we can look for a trade setup. So once the market starts to move around and it's kind of a little bit just choppy, it's failing to get outside of it. This can make you a little skeptical, but the real trick to spotting when this is likely to fail comes once you take a look at that entry timeframe. Now, if we notice right here, we try to trade outside of this area and the market is just very weak. It's not staying outside of it. And in fact, we're actually trading downwards, breaking structure down, this shows that this setup is not likely to work. And even if you end up getting some kind of shift after a long time, you don't really want to pay attention to it because there's been so many failed attempts that it shows that buyers aren't really strongly in control. So this is a day you would want to avoid. So remember, mark yesterday's value area and then wait for price to be above or below it. Wait for your pullback and then look for your 2-minute market structure shift for entry, but avoid when there is no reaction or a slow reaction. You now know the basics of how to use the most powerful trading indicator, but the volume profile can do a lot more than this. So I made a free course here on YouTube that breaks it down way more in depth. Click the video on your screen to watch that next. But thank you for watching. And if you're new here, make sure to subscribe because I post a ton of free trading education. And remember, just because trading can be made simple, that doesn't mean it's easy. So stick to the process, stay consistent, and I'll see you in the next video.