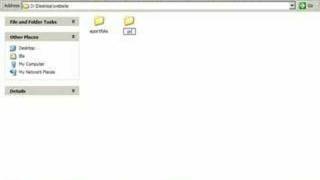
A short tutorial (YouTube video) demonstrating how to set up a local folder structure for website projects. The speaker (demonstrated on Windows) creates a root "Website" folder on the desktop, then creates per-site folders (e.g., "eportfolio", "Project") and, within a site, media subfolders such as "Images" and "Documents" to keep assets organized.
Chapters
The first video in this series centers around setting up your desktop to save your website files. So we're going to begin by creating a folder on your desktop. This could be actually saved somewhere else in your My Documents folder, for instance. But just for simplicity's sake, I'm going to save it on the desktop. So I'm going to create a new folder to do that on a PC. I will right click and go to New and Folder and I'll call this website. Alright, now that I've called it Website, I may have a number of different websites that I want to create. So inside this folder I'm going to double click, open it up and then create a new folder inside here for Ecomp, we're going to create at least an eportfolio. So I'm going to call the first one eportfolio. And I'm going to create another website called Project, because we have at least two assignments in this course. And of course, if there are other projects you wanted to create, you create a folder for all those things inside each of these folders. It's also good to organize your media. So inside ePortfolio, I'm going to go inside there as well and create other folders. I'm going to create one called Images and I'm also going to create another folder called Documents. Things like, you know, resumes and Word documents, PowerPoint presentations. And as you go along, you may find reasons to create other folders as well. So now when I open up one of these sites, I'll see that I have a website folder, first of all a website folder, and then I have ePortfolio and project. If I go inside ePortfolio, I have it well organized so that I see an Images folder and a docs folder and that's all I'll talk about at this point.