Day 18 - Rapid Prototyping
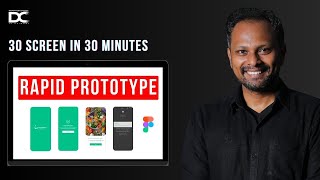
Jagadeesh P covers rapid prototyping in UX design, from paper sketches to high-fidelity mockups, explaining why you prototype to learn early and fast. The method can cut development time by 45% and catches problems before they're expensive. Common pitfalls: over-polishing before you test, picking the wrong users, and skipping iteration.
Don't design to prove, design to learn. Prototyping is your product's nervous signal. Testing how the fast really responds, how the customer really responds to an interaction, what you've designed, how a product is very well synchronizing to the human need. If you're someone who is not knowing how to make the prototypes in rapid way, let me tell you, this is a big big skill which a designer needs to learn. But the problem is over polishing early prototypes, making it very perfect, ignoring the testing part, skipping the iteration after the feedback, testing with the wrong user segment, not knowing what success metrics to really test it out. These are all the big problems designers face in this video I'm going to be telling about. What is this testing, how we can able to improve this, what are all the types of testing and how we can do it perfectly with that. Let's jump into this. Okay. What exactly is this rapid prototyping? This is a very quick, tangible version of an idea. Let's say if you're having a conception towards building a user flow journey which needs to be converted into a login page, the moment when you take your sketch, your notepad, you start sketching some concept. This exactly is a quick way of testing out whether the thought is going to work or not. Let me show some pictures for you in order to make you understand what is mean by ideas and prototypes, right? Or UI UX designers. I'm just showing you a RAW example. So this is not a full way of doing it. Maybe this is a quick way of trying it out. This is a quick way of trying it out. So this is how a prototypes can be made. Like let's say this is how the application UI can look like. This is how the prototype buttons can look like. This is how users can press. This is a kind of size which I'm able to create the card for. So when you have that conception in your mind and when you put it into an idea, this becomes a quick prototype to test it out. There are many types to do it. Hand sketching, low fidelity, medium high, let's see that. But this is what is the main concept which you need to learn. This is to build and test it out with the people not for perfection. This is how people experimented fast and converted into a concept. This saves a lot of time and confusion because a lot of people are making the perfect portfolio in perfect prototype on the day one, which is not correct. Core principle of iterative UX process is making a quick prototype. So that is what mainly it's all about. What is this concept and when does this started? See this was used in industrial design field from 1960s and 70s. More importantly during the Dieter Rams design time and some of the more Scandinavian minimalism design started. This has been in their practice a lot. Ideo applied it to all of their design thinking process. And this is a key in the Lean Startup book. You can also read this book called Lean Startup. It's one of the wonderful book I would see. Okay, you will come to know because build, measure and learn from that. It's one of the key principles which is covered over there. It's a very short book. You can read it in two to three days. Rapid prototyping tools revolutionized for the workflow okay, so this is one of the very, very faster way to actually essentialize your learning process in a very faster way. There are many people who don't understand, so the part is many people are not knowing this. So this rapid prototyping tools has revolutionized the entire workflow of the product development life cycle. So what exactly it is an impact on the product development lifecycle is because of the time and effort and the discussions and the fight which is going to be saved in the upcoming days of the product development life cycle. Because a lot of people think to make the proper prototype, to make the proper decision in design, everything has to be coming in first. No, that won't happen. It only happens over iteration phase. So rapid prototyping is the fastest way to iterate it. Okay, so what are the importance of this? So what are the importance of this? This is early testing and prototype reduces the risk real feedback before the coding and development happens. It enables a very faster decision making and encourages the learning mindset. Recruiters really value this testing prototypes when you show sketches iterations in your work. That is why I showed you in this in this website. Like let's say you can find out all these pictures is a process and the thought process evolution. While you created the sketches and idea and everything. Without doing this, you won't be able to showcase. Hey, this is what I'm thinking about. Instead of showing a final mock up screen like this, why don't you show a process? Hey, I started like this. I'm a guy who sketches. I'm a guy who evolves in the process. I'm a guy who ideates with the team, get the validation from my teammate and then I will go for the full ideation. So this helps you a lot of trust value with the recruiters. Okay, Jagdish, what are the exact types of it Paper prototyping is the most cheapest and faster way. Like let's say you just sketch it and then you cut it like what I showed. It's very simple way to do in our community program in hackathons we do it live, step by step. We make the people do the prototypes and cut it live and also make them practice by stitching it into the thread or maybe in a paper on a cardboard to make a very, very faster way of doing the prototype. What does mean by low fidelity? Low fidelity wireframes can be done in software like Miro or maybe Uizard or maybe Figma. This takes time because once you are having a clarity towards your design concept, you can go and input your inputs, you can go and input your prompts so that you can get a low fidelity wireframes. You can do it in sketches and manually also you can do it in Figma also you can do it in Miro also. This is a very faster way and more importantly this is to know that this is a flow of a product. If you want to ask me an example, this is exactly how a low, this is a low fidelity wireframes and its process and how it will work. Yeah, in fact this is itself a low fidelity wireframe process. Like you're building a sketch, you're connecting the wireframes, you're connecting the dots by saying this is an interaction, this is a possible outcome. This is a second layer of interaction. This is a possible outcome. This is a simple way of communicating the ideas. This is a low fidelity wireframe. Mid relative wireframe is something which is really close to the final solution. Like in a sense a semi real. Here you add logo, here you add placements, here you define the placeholders carefully. This is almost close to a real time prototype. High fidelity is almost close in the sense almost. It is real. It is 90% real. So why we are doing this kind of a levels of different, different methods is to finalize what exactly is going to come in my prototypes in the real time user instead of we going and checking out, hey, this is how the final button will look like. It is not a right way to do it. What if your user is not having this clarity? What if your user doesn't like this button or maybe doesn't like the way in which the interaction has been designed, or maybe your management doesn't like, or maybe your client doesn't like. Then going through this entire iteration of building the perfect screen will take huge time. That is why we are showcasing that to the top of the management in the first phase itself to understand whether this interaction is correct or not, whether the buttons can be placed here or not, whether it is in line with our competitor brand guideline requirement or SWOT analysis or not. Then if go ahead is happening, confirmation is happening, you move to mid fidelity high fidelity. So a lot of iterations and discussions will happen here. Finally this will become a real prototype. And also you can use wizard of os. This is one of the amazing book you can read to build a lot of prototypes. And also you can also fake your backend. You can also create a real user flow journey and test it out with your user. You can simulate a real time user and test it out and see how it is going to happen with a real prototype. Once you do that, you will get a far more better understanding how your prototype is behaving, what exactly is your problem and how you can able to change it. So these are all the different methods of prototype which you can able to make. More importantly, a common mistake I already covered, people ignore it or people spend over time on top of it. They are skipping it after the feedback and they test out with the wrong user segment. Sometimes they don't measure a proper success metric like let's say whether clicks is a proper metric or whether engagement is a proper metric. They miss it out or whether steps is a proper matrix. So number of steps. So user don't have the designer don't have a proper track on the users to test out these parameters. Without doing that, it will yield you no results. When you're creating a prototype and testing out with the user. See why we are ultimately doing all these things? It's to make the brain learn faster from the feedback of the user in order to put it back into the testing. Sometimes seeing and doing correctness the fasterness of the product development lifecycle. What took a lot of time like let's say three to four months for a development lifecycle in a product team will make it even more faster. When you do a prototype and a testing with wireframe with mid fidelity, low fidelity and a high fidelity rapid validation increases the dopamine of your progress designer itself will feel more happy about it. Your visual feedback will also equal to higher retention rate of your user while you're testing out in the real time feedback. This triggers a lot of failure which can happen over time. And the learning curve can also be shortened because of this, right? I've shown you an example in the online. But you can try it out by testing out three booking flows for a travel app. Because travel app has A lot of complexity. You can try it out. You can use paper methods to test the user reaction. Show the user reaction using the sketches and explain them and show it to them. Collect the feedback and discover how you can able to improve on the steps. Like let's say how it can be reduced from five steps to six steps, how it can mean five steps to four steps, how it can be reduced from three steps to one step. And once you do that automatically, you will see your product increasing, your conversion rate, metrics and engagement getting increased. Also, mainly, mainly, mainly your development time comes down for close to 45 percentage. Development time can come down when you do a proper prototype and testing in a process way. This keeps low fidelity versions till the final frames. Okay. So you can try to do this on your own for any one or two travel booking application and try to reduce the screens. You can also use this tool called Figma and Protopy. Very very super UI Z. It's a very simple AI tool which you can just input the prompt where you can able to try to get the better output out of it maze. It's also amazing tool where you can just define the flows so that the user can input the feedback and get into it. In fact, this is what we do in our mission six in our hackathon where we do properly a usability testing for the users and the students will create that to build it out with their user so that you get a real time data. And also you can use frame or visual for motion testing. Chat GPT prompt can be used for all the AI tools to test it out. And also there is another tool which is called Creative AI. There's also an amazing tool to test it out. So there are a lot of tools to test it out when it comes to real time prototype using the AI. Also what I want you to tell it is type dm type build in the chat box so that we can able to send you the prototype validation sheet. How you can build it very easily for your project. And more importantly as a homework you can create one low click like it's a low fidelity wireframe for the travel app which I asked you so that I can able to see whether if you have completed this and the chat box if you put your feedback. What did you learn by doing the test cases like let's say you take three screens for the travel app. You try to find out how it can be optimized, make a low fidelity wireframes until you're learning. Definitely I'll be able to give a live feedback for you and more importantly once you're also attending our workshop. Okay, once you're also attending our workshop, I'll be also giving you a complete free resources and a three day workbook and a ten thousand rupees worth of bonuses as well. More importantly, I'm also going to be teaching you in a detail in the upcoming day 19 and 20. But more importantly I wanted you guys to also attend my Sunday workshop where I'll be putting all this learning and making you into a 3x job search process with the formula because learning all these concepts is good but if you're not getting it into a portfolio and getting it into a job search process it will all go in waste. So I would highly recommend you to attend my workshop and also continue this learning from there and make it into a job search process. I wanted you guys to also engage in this post. What did you learn from this so that me and my team can able to send your gift as well as the link is available for the four hours design verse workshop where you can learn and also I want to see you live into the workshop. Take care. All the best. Bye bye.
More from Jagadeesh



Comment “ME” if you want to join the next upcoming hackathon — we’ll send you the registration link.

Comment “ME” if you want to join the next upcoming hackathon — we’ll send you the registration link.