Day 73- Digitalissing Paper protypes 100 Days 100 Skill Booster Sessions
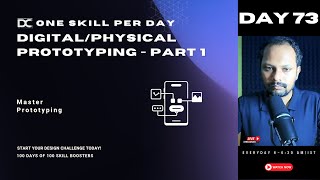
Jagdish walks Ramraj through converting paper prototypes into digital wireframes using Miro and Figma. The session covers prototyping basics, collaboration features, and how to gather user feedback for iterative design.
There is a plugin available inside. You can also export it, no problem. Okay, and what about the animation button functionality? Yeah, yeah, let's. Let's not go to this first. Let's understand. There are many beginners also here. There are people who wanted to just convert their paper into a digital screens for them. I'm explaining.
Okay.
I'm just sharing the screen. Just follow the flow. We can do it slowly, no problem. We can able to do Figma also initially. If you are comfortable with that, there is no problem. Okay, But I'm just saying how you can able to visualize your ideas quickly.
Okay.
So I'm just continuing the same option. Guys, whatever you guys are seeing, like let's say if you can also guide your user to just use this tab button. Okay, let's just press this. You can tell like, hey, just press it here. If you're. If you're having any kind of a. What you call small functionality to tell your user, hey, this is what you need to press. This is what you need to interact. And you can able to change this color to whatever you want. Like let's say if you wanted to create it like a blue color. If you want to put some icon inside it. Okay, like let's say.
Okay.
Like you can. How do I bring this? Just a second. Wait. You can also insert easily icons here. Guys, just. That's what I'm doing.
Wait. Okay.
I don't know. Maybe this is okay, I guess. Okay, instead of putting it here, you can also put it like this. So the user will know like I have. Okay, I have to press something for here. Okay, so you can also create something like this one. See now it will. It will just show the outline of it. Okay, if you want to give a highlight of it, you can give it. This is also a way in which you can able to interact. Okay, let's keep this one. This is little better. Maybe I'll change the color to black itself so it will be attractive. Or maybe I'll change it to blue as what we had. Okay, whatever you wanted to change, whatever color you want, you guys can able to do it.
Okay.
And you can able to create something like enabled or disabled. If it's disabled automatically, it will show. See, this is a basic way of showcasing to your user. Hey, this is what I have a solution. Why don't you just give a feedback? Okay, so this is for the interaction per se. You can able to show some profile picture placeholders. You can create this toggle off button. Like many options are there. Guys, you can Able to try it out, whichever works for you. Okay, you can create another duplicate screen here. You can also build.
Okay.
Like let's say if your. If your options is something like this, what is her third screen? So he's saying AI tools. Something like a. Boxes are all coming.
Okay.
Maybe I'll try to take some placeholders, use this elements, whatever you have. Guys, again.
Okay, okay.
Don't try to build something new as of now. Just. Just try to make a use of a small level of prototyping. Because prototyping you should not spend time here. We are not doing a detailed work here. Then that is not called prototyping. Imagine if your boss comes and says, hey, this is totally not understandable. Or maybe a user can tell, hey, I'm not understanding anything you're saying. Some login screen after that it is coming. First of all, what is the purpose of you bringing this login screen here? If somebody asks a question like this and if you find that the answer is not exactly what you're looking for, then you will have to re change. Then you have to reiterate and everything. That is why you need to do it very rough.
Okay.
And get some feedback. And then we have to go and change the things slowly.
Okay.
So you can also do one thing while you're clicking this option. You can also change something like. Like let's say blue option. There is an option also guys, to. To. Actually there is something called option called state here. Okay, Same like what we used to have in Figma. We can able to toggle off toggle on.
Okay.
But I don't know. It's not coming here. I think it's possible. Ah, this is the one. Fine. Guys, I just took the wrong one. You can take this one. This will automatically show that you wanted off. You can able to off it. Okay, you can just. I'm just deleting this one so that this is the actual one. Okay, you guys can able to do this. Maybe you can try to put one small text here.
Okay.
Okay, I'll just put a small text here.
Okay.
Option one AI tools. Okay, like let's say J and then he saying some tools is there. Fine. Okay. Oh no. Jagdish. I wanted to put it in the bottom. It's okay, no problem. Whatever you want, you can put it.
Okay.
You can also create a toggle off toggle on button like this so that you can able to switch on this feature whenever you want. And you can able to switch off this feature whenever you want. Okay, so you wanted to use this Application for some purpose. Okay, so you can just create one option, something like this. Okay, you can also switch this particular thing on. See. Okay, you can just guide your user also. Hey, go and click here. You can put one hand gesture or symbol. Like let's say you can put double tap if you want to switch. If you want to bring it as a safety feature, not user process it accidentally, you can just. You can put something like this. So this communicates very clearly that the user will actually put a double click. Okay, something like this. So you guys can do whatever you want by just dragging and dropping some elements here.
Okay.
Additionally, if you want to add some icons, you can go to this icon, search your keyword, whatever you want. Like let's say if you want to bring a flag, okay, you can see if something is there or not. Okay, some option will be there. You can just drag and drop. This is one basic way of doing. And now what happens is if you wanted to do some kind of a small prototype here, okay, Jagdish, if my user presses here, I need to. I need to create one small interaction. You can just put this dot here and you can create screens, something like this. Okay, so what happens is you can also draw this small arrow mark here. So here when you are presenting this idea, okay, you can just show a very simple thing. Okay, we are not doing the actual interaction here. We are just showing a small iterative way. That means if the user signs up here, or maybe if you can able to change it to get the OTP register, user will automatically go to this screen. Once this screen, the user enters the password, then this state will become enabled. You can say, you can also add one more screen and then you can tell this is enabled. Okay, you can just duplicate this by pressing Control D. Okay, you can say this will be enabled, enabled. Okay, just a basic one. And once it is clicked here, then automatically user will go to the screen. See, this is one small way of just digitalizing your solution. You can make it very perfectly, guys, but I'm just showing you how we can able to do it. Okay, so you can even in fact add certain things. Like let's say if you wanted to bring some kind of a good photos here, there is something called images and icons. Okay, you can create here like let's say what image you want to bring for your screen here. If you wanted to bring something like a tools, right? This is actually a tools she is building. So just type tools. Okay, you can put digital tools. Okay, AI tools, right? Just bring the small AI tools here Something is there some relevant is there?
Okay.
I don't know. It's not very relevant. Okay, maybe we'll try to put a icon.
Okay.
Something like this tools will be. This will be better.
Okay.
Look at this. I'm just creating a small. What you call a placeholder under icon for doing this. Okay, I can also do one more thing. I can also add a plugin called Unsplash if you want to bring some good images.
Okay.
And click here. I don't know. You have to add it. There is an option to add. You can bring a lot of things guys, you can just scroll down. In fact, lot of plugins also you can bring from here. Ramraj, you asked for Figma files, right? You can upload your Figma files here. And also in many placeholders you can create a call to action saying look at my Figma file. This is a basic wireframes. You can just go to my Google Drive or you can just go to my Figma file. You can able to embed those links here. There is no problem.
Okay.
And if you are having lot of things in the sticky notes, you can able to capture your sticky notes here. Okay, like let's say if you want to bring your sticky notes here, wait, I'll show you that option. Okay, maybe I'll save what Jain and then he has sent me in the local drive.
Okay, just wait.
Can we export this file to Figma? That option I'll tell you now. Wait, you can export into JPEG and png. Okay, you cannot export it to Figma. You can create a link to people to go and watch there. That is possible because this is a. This is an image based format, right? Figma is a very different format. You can import as an image or maybe PDF or maybe some kind of a snaps or screenshot, something like that. Okay, but wait, I will show you first of all what we have taken. Like let's say if she wants to bring this, what you call where is that? Okay, I think the option came here. This is called sticky capture, guys. Okay, you just have to click it here. The sticky notes, whatever you have. And look at this. What's happening? This is actually trying to find out something add to board. Look at this. Something came right from the text. From the. From the sticky notes. It automatically took as a text. See, see from the physical. The physical sticky notes into digital sticky notes. Imagine if you have 20 sticky notes like this. It would be much discomfort for you to copy paste into a text format or maybe type it again. You can use this feature. This Camera option will be there. No, you can just capture this. This will be very helpful. Like let's say if you' putting this screen, you can keep it like this here for reference. Okay, you can just put it like this. Hey, I'm just doing this verification screen. So you can also create one small arrow and point it here so that people will know, okay, this is what is really happening, okay, and just delete it. So this is a way to just get started. And also I'll tell you how we can able to bring the unsplash case because it's a cool feature. See, Miro has lot of options, guys. Like let's say if you put the library, you can literally bring anything here. But the point here is, I don't know like why it is not even creating this option. Because when you go to this library and marketplace, you will find lot of place, a lot of things here.
Okay.
Unsplash, it's not available, but it was actually a very good tool. Unsplash automatically it will come here and you can able to import your, what you call pictures directly from unsplash. Okay, see, there is something called Miro plugin for Figma Ramraj. So what happens is, I've not tried this before. You can connect your files, I know this. Much like the hyperlink can be created here and you can embed your file here. You can show small prototypes here. Even you can do it for YouTube. So you don't have to import the video here, you can just embed the YouTube link here automatically. The video will play. That much is definitely possible because Miro is a tool where everything can be put, even the pictures, the videos, the ppts. Ppts. You can show the slideshow figma. I don't know how much extension an option is available. Maybe we'll try it.
Wait.
Just try to run it here, but I'm not sure how it will come. Okay, this is actually a plugin. I'm just trying to connect it here. I don't know how it will behave. Open figma. Very able to still see my screen, right? Okay, See, I'm just opening the file only through Miro access. But it's not actually a change which is happening inside the Miro file. Look at this.
Okay.
It is not possible. You can run it as a plugin inside the figma. This is not ulta the other way around, okay? Because see, the interaction, what Figma and other Adobe XT tools has is much different. We can just show image representation. We can include the PDF files or anything that is possible that Much is available in the feature but you can't create interaction which will run in the figma. That is not possible. Okay, this is for representation. Please understand this is for creating some kind of a medium fidelity wireframes. A lot of people might not know what is low, medium, high. See, when you're making an idea, when you're testing out a few ideas with your user, it is first good to show as a very basic wireframes like this. Because if any changes that we can quickly iterate. That is the whole purpose of you building this. Okay, Here many options are there. You can able to try to take options. Like let's say you can bring some wireframes, you can do some kind of a small text edition. You can write whatever details you want. You can add a note to your team. And also you can also bring a lot of people here. Let's say hey Ramraj, I needed to see the screen and give me feedback. What are the beauty about this is it is not flexible like Figma. Figma also you can collaborate. But Miro is insanely easy. Like let's say even 50, 60, 100 people can able to collaborate at a time. You can just put your email, you can invite these people.
Okay.
You can change the privacy, other things also you can do it.
Okay.
And you can also embed this particular link as a private board so that other people will only see the small snaps of it.
Okay?
Whatever you want, you can able to stage it. You can create a size for it. Like let's say if you're sharing to some people over the WhatsApp or anything can just try to put the size or anything and then you can just copy this code. You can able to run it over here.
Okay.
And yeah, you can publish it whatever you want. That is fine. Let's. Let's keep it.
Okay.
And there is an option called Record Talk track. What happens is if you want to bring your other collaborators and see like let's say how you wanted to talk to these people alone, alone every visit. Let's see this.
Okay.
Like let's say I want to communicate this message to Ramraj. He's my team. Okay, I'm just creating. See my. My camera is coming here. Okay, If I want to switch my camera I can switch it off. You can just stock recording. Look at this. Hey Ramraj. Good morning. So I have built one screen from basic homepage into sign up and I also created a basic OTP for the people to enter it and then automatically it will come to the. What you call what you call enable state. Once they click the OTP automatically, it will go to their tools. And what do you suggest about this toggle option? Is it okay or can we change it into something else? This is a rough way. I thought we can able to do a small prototype with our users. Okay, let me know in your comments what you think. I'm just stopping it here. Okay, so what happens is Miro captures exactly how I zoomed, how I created this small, small option. And see, can you see? Can you see here? Talk track. So Jagdish has created some kind of a Talk track for 27 seconds to talk to Ramraj.
Okay.
I'm just creating a small arrow here so that I can. I can also tell that. Hey.
Okay.
It's not available now but it is definitely possible at your end, guys. Okay, don't worry. It's. It's. I can able to even tag to Ramraj. I can able to tag. Hey Ramraj. Good morning. So I have built one screen from basic homepage into signup and I've also created a basic OTP for the people to enter it and then automatically it will come to the what you call. What you call enable state. Once they click the OTP automatically it will go to their tools. And what do you suggest about this toggle option? Is it okay or can we change it into something else? This is a rough way. I thought we can able to do a small prototype with our users. Okay, let me know in your comments what you think. Were you able to hear me? So this is a way you can also collaborate it. Okay, we can just close it. We can just share it. We can only pin for Ramraj. Let's let others don't have to do. We can just only what you call create this option here. I don't know guys. There are many options. Hey Ramraj. Good morning. So I have built one screen from basic. Sorry, sorry, sorry. You can do this settings here.
Okay.
Subtitle. You can on play speed there is an option called privacy. Guys, you can just only pin it to Ramraj.
Okay.
You know the Ramraj email ID you can just upgrade to use talk tracker. Talk track is available but I don't know like there is one option earlier which you can able to only tag it to Ramraj name.
Okay.
Like let's say. Yeah there is a comment like let's say if Ramraj email ID is here. I can only tag it to Ramraj if email ID is available here.
Okay.
You can add some expression emoji. You can tell there is a vote available. So only he can able to access it if you privacy lock it.
Okay.
If you're working in a lot of team of 5 or 10 people. So this is how you get started into making it digitally. If you go into Figma, that's that we'll see another day. We can able to build this prototype with a proper option in scale. Like let's say guys, my camera is behaving really weird. I don't know why. Just a second guys.
Okay, okay.
Something happened. Maybe I'm just still in talktrack. Okay, I'm just closing this.
Yeah, okay.
Something else is happening. Fine guys. So now the point here is it is very vital for us to convert our screens or convert our digital way of seeing into something tangible.
Okay.
Now it is much easier for the users to understand what Jagdish is trying to say, what we are trying to say communicate to the user to test it out. You can then convert it into a medium fidelity wireframes and you can use components, auto layouts and then you can create some kind of libraries so that you can able to replicate it very faster when you're scaling up the screen. We'll see some other day because now time is up and you can add small interactions, you can add some animations and then you can show hey, if you click this option automatically, this screen will open. You can also create a small, what you call an animation to show. Hey, when you use this particular option, you will be able to see the next next screen like this. So like this we can show a small story for our user to understand. Then once it is ready, then we can build it into high fidelity. See, you can ask me, Jagdish, why can't we build this in in final now itself? Why are you saying we have to build it only at the last? Because when you do as a project initially when you're testing out with the user, lot of iterations will come. If you can't take the iterations, then in the final solution when you have any feedback, it would be much difficult for you to build. See, only five to ten minutes it will take to build a screen. I also took that much time, right? Maybe half an hour to one hour it will take to build little interactions and show to user. But it will take a lot of time to build the final prototype. Imagine if your entire call to action is not created properly and then your team or your feedback team is coming and telling or testing team is coming and telling. Hey, this is not really working. Users are feeling very discomfort and also it is getting Crashed in the software. Imagine you will have to reiterate everything. That is why it is very, very premature to go and build the final solution to waste your time. Okay, first you'll have to do a lot of rough mock ups. How we build it now? Very simple. If you're very comfortable, you can do it in paper pen also. We don't mean there is no problem in that. But you need to get feedback. Find the users, get the feedback. Find the users, get the feedback, get the feedback. Iterate, iterate. Once your team says hey, this is the most optimal way we can reach this solution, then you start building medium fairity wireframe. Then you put logo, then you put branding, then you put some placeholders. Then then you can build a final solution. This is how you can able to start doing it. Okay, so we have just shown it for you guys. You can do it really fast. But physical prototype. You can also create some kind of a cardboard models. How you guys used to do it in the paper, we can do it. You can also build in a software called Fusion360. You can use a software called Rhino. These are for the physical designers. If you are a digital designer also I would suggest you can use a tool called like let's say this blender. You can use this tool called Maya. You can able to create some kind of a quick animations to show some kind of a 3D models. Okay, this is for prototyping but it's not required to you guys. Okay, step by step. Start with the scaled sketches, material selection, build and test it. This is for physical prototyping. People. I would say if you're having any kind of a wood cardboard paper, you can able to try to build it like a small mock up. You can use this styrofoam. You can use this kind of what you call bamboo. Any all these materials are prototyping materials. You can able to try to create a small mock up around it. Okay, I'm just not going much detailing. So your activities, can you convert it into a digital workflow? Guys, everybody has completed storyboard and everybody has a sticky notes and other things, right? Can you use Miro or any software whatever is comfortable and try to build low fidelity wireframes. Don't build solutions. Now try to build more mockups and iterations. Try to create a full workflow of it.
Okay.
And now the major part is you need to test it with one user. That is what is the main purpose? Why are you creating? It's not to just fill your prototype portfolio. It is to get some Feedback from the user how it's going to be very, very helpful for them if you are able to do it. Like let's say I will tell the task two is to test it with one user, try it out. Maybe what they are saying, just get the feedback from these people.
Okay.
Your task is to show to the real time people and then get a feedback from them.
Okay.
And then you share it with me. This is the two things, guys. Oh no, no, no. Sorry. Digitize. Okay, take the screenshot. Maybe you can able to. I'm extremely sorry guys. Something happened here. Wait, you. Where is my mirror?
Okay.
Okay, fine. Yeah, you can just copy. I'll just put it in the group as well. Okay, fine. So this is what you have to do. So once if you're able to do it, why we are creating this, we need to understand the connection. Also why it's important. Digital product improves design clarity by 70% because initially we will itself be unclear what to do. We will be just seeing the OTP screens, login screens. But in practicality we will. We will never know. Sometimes even the team can say, hey, OTP is not required. Just a finger biometric is enough. What you will do sitting and building all these OTP screens is a waste of time. We have to talk to the team first of all to understand what is required. And we need to be crystal clear before we build this. That is why small, small mockups and iterations is very, very easier.
Okay.
Physical prototyping boost ideation up to 60 percentage. I told you. And Figma reduces iteration cycle by 40%. UX tool service is that because the more iterations we do, the development cycle will come down and automatically your team will be having a super clarity on what we need to do. Okay, so that is the thing. And if you needed any kind of a clarity with respect to like let's say prompts. Jagdish, I'm not sure how to build this. So you can use this prompt case. Leave the physical prototype one but just use the digital one prompts. Okay. So that you guys can able to get it really really fast. Okay, I'm just small task. Okay, try it out and I'll also paste the chat GBT prompts for you guys so that you guys can take it out and just feel I just pasted in the group as well. Please do take it guys. No problem. Okay. Yes, the call to action is people who want to listen to our podcast and other YouTube channel and other other LinkedIn blogs, please do come and subscribe there. I'll Be pasting out the link there as well. And yeah, if some of your friends is also interested in the upcoming webinar, just do pass on the link so that they can also come and take the advantage. Okay, so did you guys learn something today? Did you guys learn something today? How to convert your sketches and use some basic wireframes and you can able to do it in other softwares as well? Every software has its own time and other things to do. But Miro and Invision are very, very easy to build rough wireframes. We'll see some other day how we can able to build a detailed solution once everything is okay at your end. Okay, fine. Guys, were you able to get it type out in the chat if you have any clarifications. Type out of the chat if you have any clarifications. Okay, yes. So yes, tell me what's the clarification? Oh you. You're saying yes. Can we convert same like storyboard also into digital? You can do it, Raj. Just copy, paste, drag and drop into the Miro. You can do it.
Okay.
You insert that option called that stickies capture. I told you, right? That option you can try and then you can do it. If you have 20 sticky notes, Ramraj, in one go you can take a picture and automatically it converts. Your manual work is completely saved. Okay, try it out. It's a very cool feature. You can able to do it. Okay, fine. I'm just pasting you the link, guys. If some of your friends is interested in coming to our upcoming webinar, ask them to register over there. And podcast link I put you can able to listen to some of our podcast earlier. Okay, so thank you so much guys. And we'll see another skill on day 74. Any doubts? Quick clarification. Ramraj Jayanandani Sri Balaji Sharad Shaman Shashank. Yes. Yes. Thank you guys. Thank you guys. Come forward. Why? Switching off camera. Okay, fine. Anyway, try to switch on camera from tomorrow, okay?
More from Jagadeesh

Comment “ME” if you want to join the next upcoming hackathon — we’ll send you the registration link.
Comment “ME” if you want to join the next upcoming hackathon — we’ll send you the registration link.