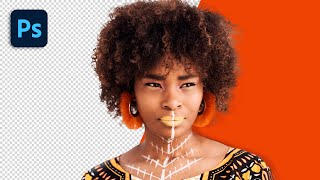
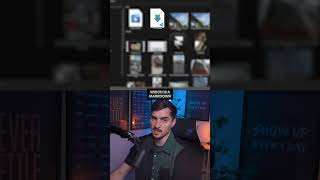
A narrated YouTube tutorial by Jeremy Mura demonstrating how to cut out hair in Photoshop (video titled "Cut out HAIR fast in Photoshop Tutorial 2023"). The presenter shows an image with an afro and walks through: using Select → Subject to auto-select the person, correcting the selection with the Lasso tool, entering Select and Mask (Alt+Ctrl+R), using view modes and High Quality Preview, enabling Decontaminate Colors, refining edges with the Edge/Refine Brush (small brush size, use [ and ] to change size), and adjusting global sliders (Radius, Smooth, Feather, Contrast, Shift Edge). The output is a layer mask and placing a colored or image background. The tutorial emphasizes small brush sizes for hair detail and conservative global slider values to avoid artifacts.
Chapters
Hey, Jeremy, here, I'm going to be showing you how to cut out this amazing hair in Photoshop. So whenever we have a nice image, sometimes you want to cut out a person from the background and sometimes you want to cut up the hair in the best possible way. So it's high quality and I want to show you how to do that. It's really cool. I found this picture online. She's got a massive awesome afro here, sort of similar to my wife's hair, very curly and thick, which is cool. And also loving this orange African patterns. They're super cool. So, firstly, what I love to do when I go to Photoshop is go to the top menu. And what I love to do first is click on Select. Make sure you have your layer selected in the Layer section. Then once you click on select, you want to go down to subject. What this will do, Photoshop will locate the main subject of the image and make a determined selection. So you can see here, it predetermined some selection here and obviously it usually does a good job. But when it comes to hair, sometimes it doesn't get all the little hair follicles and things like that. So we're gonna have to fix that up in the next masking section so you can see the selection, the marching ants all the way around like that. And obviously some of the little fibers of the hair you're gonna have to sacrifice, but that's okay. So once we're happy with that selection, I'm just going around and checking the edges. You can see here that it sort of missed some of the shirt. To fix this, I'll press L for the Lasso Tool, go to the left and right click on the Lasso tool and just select the first one. And then what I like to do is hold, Shift and left click and drag. And I'm just going to bring that shirt in and then drag in and make that selection. So you'll see now that it pushed the line backwards. So now we've got more of that shirt selected, I can do it again. Hold, shift, circle outside and do that. That's how you fix some of these selections that the computer didn't do a good job. And I'm just going around and that looks all fine. So cool. So once you have that, you can go back to select, and then you want to go down to select and mask. The shortcut for that is alt ctrl R. So once you do that, you'll get into this masking menu and what it will pretty much do is cut out anything outside that mask. So all the background is going to be cut out and everything within that is going to be selected. So now you can see how it selected the hair. But it's all gray and it looks kind of ugly, right? It's not high quality because we don't want the final image to be this. So the first thing you want to do is go to the right hand side. You see all these properties. You know, we've got all these properties up top. You can change the view. You can put on overlay, you can do onion skin, you can change it to on white, you can change it to, you know, black and white. So you can see all the little details there. You can change it on layers. But typically overlay is kind of fine for me, which is really cool. You can also take high quality preview as well. That should make it nice when you work with the edges. You can change the background as well. So I can make it red, I can do black. Whatever makes you comfortable. I kind of like doing a dark color just so I can see the contrast of the hair. And then what we want to do is we're going to go down and we want to click on this button that says decontaminate colors. Now when I click that, watch what happens to the hair so you can see what it actually did. It sort of got rid of all that gray, that off white color as you can see there. And it sort of gave it that brown look, which is kind of cool. So it gets rid of the edges because sometimes you get like weird light reflections on the edges of subjects and that sort of fixes that to a degree. The next thing we've got to do is go to the left hand side and you get these selection tools. You can see on the left. On the second tool, there's the edge tool. I'm gonna click that and now you'll get this circle pop up. I can increase the size by pressing the right square bracket. I can also decrease it by pressing the left square bracket as you can see. But the thing is, the tip here is never make it too big. What you want to do is we want to make it really fine. This just makes the a better quality selection. So then what I'll do is I'll just make it as small as I feel like is necessary. And then I'll start to left click, hold and drag on the edges where the hair is. So you can see now as I'm dragging through, it's actually getting rid of that white and gray area. So it's letting me know that it's selecting the hair in those parts and make sure you select through the gaps as well. So you just go through that about once, once you're happy with that, even like this E part here as well. The edge. Anywhere where there's an edge with hair and little details. Once you're happy, you can let go. You can see now it pretty much fixed it and got rid of that stuff. So I'm gonna do that. And what I'll do is I'll hold space bar to drag up and I can hold alt and use my mouse wheel to zoom out. And I'll start to go all along the hairline like this. So I'm gonna select the edges. It's pretty straightforward. And try and get as much of the area as you can. And if you miss a spot, that's totally fine. But typically this is how I do it. I can make the brush a little bit bigger. But remember, just don't make it too big because I've found that it doesn't really work too much when you go too big. It sort of destroys some of that detail of the hair. As you can see, there's a spot there. Remember, it doesn't have to be perfect. Obviously, if you're a full time photographer, you'll spend a lot of time on your photos, but that's totally cool if you're just doing it for like content creation. Maybe it's just for like personal use. And there we have it. That's looking amazing right now. I can always go back and zoom in. And if I feel like there's spots that are not working, I can fix it. I can even check the shirt as well. Just be careful. This method doesn't really work when you're refining the edges, because if I drag it, you can see it starts to distort the edge. So you can see here it actually smudged it. And I don't want that to happen. So be careful when you're doing like clothes or objects and things like that. But it's great for like little hairs, which is awesome. So once you've done that, you can play around with some of these settings. So I can actually increase the radius and you can see on the actual hair what's happening. It's sort of increasing the edge and how far it's going. So you can see what it did here, though, it went too far outside the bounds. So I tend to keep this pretty low. You can put it on, you know, maybe one or two pixels really light. You can also smoothen it out or feather if you feather, it's actually going to sort of blur things out, which gives you a cool effect. But I don't typically use this. The smoothen button will sort of smooth out some of the edges as well. So it sort of like blurs it. But then it doesn't look really natural. As you can see, it sort of makes the color and the blur more prominent. So I typically have that at zero. The contrast, you can play with that. You can see, you can make it more lighter or you can, you know, change the way the edges work. But if you put it too high, it's gonna mess it up. So this is typically pretty low. And then shift edge. What it does, it shifts the selection either inward or outward as you can see there. So typically we want to keep it. I typically generally just leave it as is at 0%. But you could probably, you know, make it minus a little bit. But that's totally fine. That's up to you. Just always play around with that. And then once you're happy with that, you can actually click show the original. So at the top right you can see there's three buttons. The show at the edge to show the original and High Quality preview. So I can click High quality Preview. I can click show original so I can turn it off and on so you can see what we actually did and it looks amazing. I can also click just show the edge. And this is what we did. This is the edge we refined and that is all the refinement we did. So I can turn that off by pressing J or click the button and once I'm happy with it, go to the bottom right and click ok. And then now what we have is we have our layer. It made a mask around our subject so on the right hand side can see the mask. And now I can add a color layer, maybe like a nice bluey, maybe midnight purple or something like that. And I can drag that behind and I can put it pretty much on any color I want. And I'll put any image to make it pop and look amazing. As you can see there, I can even probably do. Maybe we can do like an orange. Yeah, something like that. That's kind of cool. And pretty much there we have it. That's how you cut hair in Photoshop cc and I hope you guys enjoyed this tutorial. Hope you liked it and thanks so much for watching. Leave a comment if this was cool and helpful and remember to hit subscribe because I create amazing design content every every week to help you grow as a graphic designer in the modern age. Thanks so much for watching. Hope you have a splendid day. Talk to you soon.