Figma Draw vs Illustrator: Which is Faster?
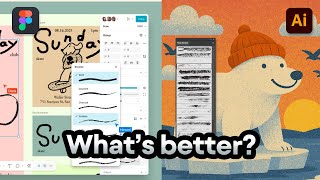
A YouTube tutorial-style comparison by Jeremy Mura (May 2025) evaluating Figma's new Draw tools (brushes, pencil, textures) against Adobe Illustrator's brush and texture workflows. The video demos Figma Draw features (brush tool, dynamic stroke settings, texture/noise effects, duotone/multi textures) and contrasts them with Illustrator's more mature brush types (art/scatter/pattern), mask support, and raster texture effects. The presenter concludes Figma is faster/easier for some textured brush effects while Illustrator retains deeper brush control and advanced options.
Chapters
So Figma got some new updates last week. They have Figma Draw and I want to compare it to Adobe Illustrator's inbuilt tools when it comes to drawing and brushes. And let's see what is better and I'll play around with some of the new tools. So let's get into it. So I'm going to jump into Figma first and let's check out the new tools that they have. So what they have is Figma Draw. So you've got the normal pen tool, right? So you can press pre and we can drag out a path. And you know, they've already had the pen tool for a while. You can edit the path and all that. But we actually want to go down to the brush tool. So if I press B, I can go down to the bar down here and increase the width and I can just left click and drag and it will start to draw out a cool brush. I can change the brush on the right hand side. They have some inbuilt ones they created. For example, we want this one. So we can actually change it like this, just really funky. And so we've just created some brushes. So I'm going to delete that and you can change the color as well. Let's go with this one. So we can see we can add some color to it and create these really cool brushes. Now we've also got the pencil tool. So if you press shift P and we can actually do some drawing just like you normally would. So you know, we can do an illustration if we want. Maybe you want to do like a burger or something, I don't know. So we can do some normal drawing, you can increase the size and we can just get rid of that. Now what we can do as well is we've got some ability to do some advanced changes. So if I select the path, I go on the right hand side, you can see this little slider. If I click these two little sliders here, if I click that icon, it will go to stroke settings. I can actually change the brush to a dynamic brush and this will allow me to have more control over the frequency, as you can see of the details of how many little rivets there are. I can make it wiggle a little bit as well. We can also smoothen. So if you want sharp or more round, we can do that as well. So you got full control there and you can actually change the endpoint. So maybe we want, say let's go, you want a diamond arrow at the bottom and then I'm going To go bring the stroke size down in the weight section, we can do that as well. So if you want to do some arrows or something, we can just make some really funky arrows or whatever we want. It's pretty cool. You can, you can also just do a basic brush. You can do a dashed line, you can do solid and you can do the end points once again. If you click custom as well, you can change the caps and the joins as well where the paths meet. So that's pretty straightforward. You've probably done that before. And so yeah, so we've got those brushes now. A cool thing we can do as well is that they've got a bunch of new effects. So I can go to effects and I can add drop shadows to it, layer blurs, background blur, texture and also noise. So, so if I go to texture now, texture adds this roughen effect. As you can see if I zoom in, it will roughen the actual shape like that. Add a bit of this textured noise feel to it and we can increase the radius and we can create this stippling brush. If you're in Illustrator, you'd have to do this with a plugin or you have to do it manually, which doesn't really work the best. So it's really easy to create stippling brushes effects just like that. We can add a shape and we can actually add noise as well. So. So instead of having a plugin now you can actually do it because it's inbuilt. So you can see if I zoom in, this is what the noise looks like. So it's not single pixels, it's actually more of a textured look. I don't know if we can change it. We might be able to change it in the future, but we can change the color of it. So let's maybe want like blue or something. We can actually go to duo and have two tones. So maybe we want like pink or something. We can do that. So you can have a Duo tone texture effect, which is really cool. Or you can have multi now multi just looks like a holographic rainbow style, as you can see. And we can change the density so the density is just how much of the texture there is in the space really. And yeah, so we can create those really cool textures. We can create some brushes now you don't have the ability to add your own brush yet. So I feel like that will add that in. But that's how you use the brushes. Now. If I go into Illustrator, I've got some pre made brushes that I have in one of my brush packs I did years ago, you can buy it on Creative Market, but we can actually go to brushes. And if I press B, I can go here, select the brush, and I can select any of these brushes that are pre made in my brush panel here. And obviously we can change the colors as well. So we've got a little bit more flexibility with this. You can actually make your own brush and drag it in and it'll add it. You can create art brushes, scatter brushes and pattern brushes. We can also put brushes inside a mask, which is cool as well. So in Illustrator. Yeah, so we can do that. It's really cool. We can add the higher stroke to it. You can also do the endpoints as well. If I go to Stroke, show more options. You've got the arrowheads, which you can do in Illustrator. So you can see the arrows on the edges. You can't really see on this brush, as you can see. So it's pretty flexible. Now we also got the width tool which Figma will be releasing. It's actually on the page that updates, but you can add the width, you can make it really small. For example, if I press Shift W, I can do this, as you can see. So if you want to have like a thick, you want it to tape off the ends, you can do that. And you can have full control over the width of the stroke, which is cool. And then you can change the brush, but I'll get rid of that. So that's an art brush. If you want to do sort of a pattern brush, you can do that in Illustrator as well. In Figma, they don't have. I don't think they have pattern brushes, but they'll probably update in the future. So you can see I've got some pattern brushes that work well with shapes, as you can see. So not the standard art brush, but you can create sort of these frames or shapes like this. And then also you can have scatter brushes. So for example, let's say I've got this circle here for me to use in the same way as we did the texture in Figma. For this one, you'd have to go to Distort, transform and roughen in Illustrator. And this is the tool you get. So you can roughen it like this, add some more detail, but you get a little bit more control, but it just has a certain effect. If you want to add those like roughened edges, as you can see, like that. And then I can expand this and let's just say I want to make a Dragon Here, I'll make a scatter brush and then we've got some brush controls so we can fully have control over this. You can change the size and all that, etc. Press. OK, now if I. Let's go make a path. So this is the path and I'm going to click on the scatter brush and you can see what it does. I'm going to double click it just so I can pull it back. I'll click preview. So if you want to have like splatters everywhere or something like that and apply it. So, yeah, so it'll look like something like this and we can manipulate the path and et cetera. So, yeah, it's a little bit different in Illustrator. If you wanted to add noise, you'd have to do this a different way. So let's just say I got this green square, I'd have to go to effect and we want to go down to texture and we can click on grain now because it's a Photoshop effect and it's connected to Illustrator, it's sort of. It's obviously a raster effect, it's not a vector. It is a little bit slow when doing these effects. So Figma is a lot faster because it's based on the web, whereas Illustrator is like using old code and it's desktop based or whatever. But you can see I've got the intensity and then we've got contrast, as you can see. I like how we've got different grain types there. We've got soft, you got sprinkles. So there's a little bit more options they have compared to Figma. You can create sort of this matrix code. But for example, let's just go soft for the intensity up press, ok? And it will add that noise texture to the square. And so now we've got noise just like that, which is pretty cool. So, yeah, you've got. You've got some other ones. You've got pixelate. Like you can do a halftone as well. So for example, if you want to do a halftone, you could do that. If you zoom in, you can see there's a halftone. So it's an old school screen printing effect. So that's how you do that. So Figma is a little bit faster with the texture stuff, but with brushes, Illustrator's got a bit more control. But I feel like Figma will update and get better as well. So, yeah, let me know which one you think is better. A lot of you probably use both Figma and Illustrator. Maybe some of you just use Illustrator? I don't know, but tools are getting better and it's good to just use the tool for the specific job that we need, right? So anyway, hope this video was useful. If you want to see more tutorials about Illustrator or Figma, let me know in the comments. And like this video really helps me out. I've got some other videos right here showing you how to create logos. If you want to watch that, check it out.