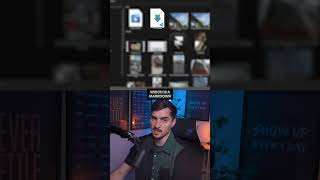
Jeremy Mura shows how to photograph acrylic paint textures made with a sponge, convert them to high-contrast bitmaps at 300-350 ppi, then import and recolor them in Illustrator using transparency modes and clipping masks.
Questions this video answers
A basic sponge and acrylic paint (Black Knight brand), cost mentioned as about $4.
Image → Mode → Grayscale.
Ctrl+L.
Around 300–350 ppi.
Diffusion dither.
Chapters
So first up, I grabbed a basic sponge from my officeworks and I got acrylic paint, just the normal Black knight version, which is just a simple black color. It was only like $4, which is really cool. And I start to do different types of textures by using different strokes, no pulling. I'm dabbing with my hands and using that sponge just to get a whole bunch of different effects. And you can see as I go along, I just experiment, I play around. And that's the fun bit about this part, is just to play around, experiment, see what type of effects you can get. I even pulled the sponge in half to see if I could create some different effects. I wanted sort of like a thinner type of space to use. And I'm just squeezing that paint and then just going through and dabbing and creating a whole bunch of cool textures that I can use to let later on put it on design work and bring it into Photoshop. I like, also like doing pulling or like dragging. That sort of gives you like these wide strokes. It looks like you've got a big paintbrush and brush it across. And typically those type of textures can work really well as well, and you just get a whole organic feel. So I encourage you to play around with this method. You know, do different types of movements with your arms and wrist and just take some time to experiment and create the textures. Once you've created, you know, maybe 20 or 30 on just basic paper, then what you want to do is take a photo with your phone or with a high quality camera. And then we're going to save it onto the computer and bring it into Photoshop. So once you've taken a photo via your camera or phone, what we're going to do is you're going to open Photoshop and I'm going to drag in one of the images into Photoshop now. So I'm going to drag it and drop it in. And the first thing we want to do is change the color mode to black and white. I'll go to image at the top left, click mode and then click gray scale. This should make sure that there's no yellows or other little colors. So it's gonna be black and white. Then I'm gonna crop the image. So I'm gonna press C for the Crop tool and you can just drag from the corners and hold alt. And alt will make sure that it's proportional on the other side as well. I don't want to cut off all the texture. I just want to get to the white area and then press Enter. When you're happy with it. Sweet looking, awesome. Then what I'm gonna do is press Ctrl L to open the levels panel. And what we wanna do here is to create a bitmap or nice TIFF texture. We wanna really have a high contrast with the blacks and get rid of any gray. So I can drag my dark slider here, which will bring up the shadows. I can bring down the mid tones to get rid of the gray, and then also the white highlights with the right slider, as you can see there. But obviously we don't want it to be too light. So I have to bring up my blacks and my mid tones a little bit. As you can see, I'm scaling that. Then I can play around with the whites. Always keep the white like very close, all the way like this. So this should be fine. And I press OK and beautifully. You can zoom in and see all the dark pixels. And then you can see there's like a little bit of gray. Right. And so what we have to do now is turn this into a bitmap image. And this means I can save it as a TIFF and I can drag it and drop it into Illustrator, which will work really well. You can save it out as a PNG if you want, but I prefer the bitmap method. I can go to image mode bitmap, and then the pixel output is fine. You can leave that on 300 or 350 and that's on pixels. And then you can play around with these effects here. You can do halftone or like a 50% threshold. I typically use it on diffusion dither, which just keeps the pixels in squares. And then what I can do now is I can go file, save as. And then what I can do is go to the drop down menu and go to tiff, which is a tif or tiff. And then I'm going to call this texture 01. And then I'll click save. And then you have these options here, but all you have to do is just click ok. And then I'm gonna open up Illustrator and I'm gonna drag that texture in there. So now I'm gonna drag and drop my texture in that I just made. And you can see here that it's automatically transparent. It's a bitmap tiff. And I can see the top left, its PPI is 350, which is good pixel density. And you can see that it's a dot tiff. If I zoom here, you can see it's just all black pixels. And the cool thing about A TIFF in Illustrator is I can literally just change the color to any color I want, which is amazing. So maybe I have, like, a background that I like using. I'll try and pick a nice color here with my color library. We got some greens, grays. So what if I had this nice gray color and I dropped the texture on top? And then I can play around with, like, transparency mode, so I can go, like, multiply and see how that looks. What if I make it the same color as the background? With the Eyedropper tool, you can see I can create these cool effects. And you can put illustrations, put on graphics. Like, there's so many cool ways you can do this. And if you start to stack up the other textures, you can make, like, really cool effects. I can scale it up if I want as well. So many cool ways you can approach how to do textures. Then I can also put these in clipping masks if I want to do it that way. And I make up just a quick box, I make it a rectangle. Then I make a clipping mask like this to keep it all in there. Then maybe, like, I want to add like a, you know, a logo or something. I can add a logo. And there we have it. We've just created a cool graphic using textures. And if you start to create all the same ones with all the other tips, then it's gonna work really good. I'll quickly go into Photoshop and I'll show you a cool trick as well. What you can do with this texture is you can actually inverse it. So if I press Ctrl I, it's gonna flip the black and the white. So instead of having a texture like this, I can have it sort of like a border like this way. And then once again, I can literally save this image. It's already in a bitmap, so I can press Ctrl Alt S to go to Save as, and I'll just say white version and then I'll press. Ok, I'll go back to Illustrator and I'll get the other version I just saved and drop this in. So now we've made two versions of the same texture, and all we did was inverse it and I can change the color again to how I want it. And that looks awesome. Maybe I want to make like a border thing like this on the edge, Which looks super cool. That's how we can create some cool, cool text textures. Thanks so much, guys, for watching. Hope you enjoyed the video. Remember to, like, subscribe and hit the notification button to make sure that you get all the updates on new content. Hope you have a splendid week. Take it easy.