You Won’t Believe These Illustrator 2026 Updates!
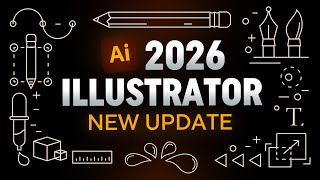
A walkthrough video demonstrating new features in Adobe Illustrator 2026 (beta). The speaker demonstrates 3D turntable/multi-angle generation, improved font management and filtering, gradient presets and banding reduction (perceptual method + dither), color-picker/eyedropper previews, pen/line snapping to round objects, artboard locking and naming, artboard fill colors, project-based file sharing, and Firefly vector generation integration. The presentation is practical and tutorial-style, focusing on workflow speedups and usability improvements.
Chapters
I'm going to show you all the brand new updates in Adobe Illustrator 2026. Let's jump in with the first one. So you need to install the Illustrator beta version. Just go to your Creative Cloud desktop, click Beta and click Illustrator to get this. Now I've got this 3D design and all you got to do is go to Properties and click this button turntable. And it will take a bit of time to load and it will load multiple directions or angles of your character or your vector or your image. So can you. So you can see I've got all these different versions. Now it's created. I don't know why, it made a teak pot at the back, but we've got some other variations. So if you scroll down, you can see you got heaps of variations, which is good. Before they only gave you a few variations, but now you can see it's created all these angles. And all I had to do was either, you know, generate an image or draw it or whatever. And we got back angles, down angles, as you can see. And then you can export all those versions of that logo. So it's a quick way to create, save you so much time. Instead of drawing all sides of your character, just do one and it will do the rest. Next, they updated the filters for the fonts. They've made it easier to organize and it's actually faster. So if I click on some type here and I go to my character up the top, you can see now they've actually cleaned up this menu, add a bit more white space and it's easier to see through. It's also a bit faster. It's especially when you click on the menu so you can see your favorites. I wouldn't recommend clicking on the little clock because that's the most recent fonts. Every time I do that, it still lags in this version. So I don't click that, I think, because I've got too many fonts or too many styles. So you can click on the filtered local fonts as well. So the desktop, little icon, we can see that, that works fine. You've also got all the fonts in the document, so we can see all these different ones. And then we've also got filtered Adobe fonts as well. Pretty cool. You can click on filters here. And now you've got font tech, so you've got svg, you can filter by clr, Varian, Open type and True type. You still got the same, you know, classification, sans serif, serif fonts. So you can search by those Filters as well. And then you also added libraries here so you can create a new font library if you want. So if we create this, maybe you call it vp. So let's say we want to add this to the library. Once we've created a library, what we can do is just go back to your fonts and if you see this little icon here, the bookmark, I'm going to click on that. And now you can see with the library there, click the little plus button and we'll add it inside that. Now if I just make some text here, go to library. You can see now it's saved that font in there with all the styles. So it's great for like client projects. They've also got a Discover More tab which just lets you search from Adobe fonts. They'll give you trending fonts, new releases. So kind of like having not to like go into Adobe Fonts on Google, this is a quick way to just browse and see, you know, if I want something really quickly and it's. It works right within Illustrator, which is really cool and it's pretty responsive. Like I haven't had any two issues with this. Then if you go to the cog at the top as well, you've got. It's easy to access sample sizes. You can change the text if you want to see quick brown fox or just put typography or the letters. So you can change that. That's really cool. And what else you can show recently used, you can show name fonts in English. So I really like what they did here. Makes it so much better and faster to work with. You know that problem where you've had banding when it comes to gradients, where you might get some sort of rectangular shapes across your colors? Right now it doesn't do that anymore when you change method. So you got classic and you got perceptual. So it basically uses the machine learning. So if I zoom in, you can see there's some banding. But if you change it, it smooths it out to make it a lot better. And you can also add dither as well, which blends it even more and you get a lot better results. And I recommend using it. It just makes it more natural when it comes to these transitions of different colors, especially when it's vibrant, bright colors. Another great thing they've added is presets when it comes to gradients. So if you go to the gradient window, you can click the little preset button and you got all these gradients. So what if I want metals you can see you got all these gradients. It's kind of hard to see the box. So you can change the preview, large preview, small thumbnails if you want, can drag that out. And let's go large list now and let's just say I make a box and I can select this. So now we get all these pre made gradients, which is sweet. Such a time saver. You got fruits and veggies, we got a pumpkin here, banana, fig, pretty nice. And you got pastels, you got heaps of stuff. Sky if you want. So yeah, it's just a nice little feature, probably something we didn't really need. But it just adds, you know, a bit of time saving when maybe you're playing gradients. So I think that's cool. The next one is updates to the color picker. Now let's just say I want to change this dark navy color to this like light blue color here. What you can do is just select your text or object, whatever it is. Press I for the Eyedropper tool. Now if you hold shift, you'll see you get this ring up. Now when I put my mouse over any color you can see it can be fine and sometimes it can be hard to select. But now it shows me the preview of the color. So I'm gonna left click and now it's out of that stroke there. Maybe I want to do the gold or the light one here and then I can shift X as you can see. So it's really easy now to do that. And you can double click on a swatch and you can see there's an icon here next to the select color text. If you click on that, you'll get the ring which makes it really easy to let colors. Now when you have a lot of colors in a fine document with objects and stuff. So I think it's really good. Next they've updated the ability for the pen tool and the line tool to connect to round objects so you have a nice mathematical tangent. So if I press P for the pen tool and if I put my mouse, you can see it shows me the endpoint. Make sure your smart guides are turned on. So go to view. Click on Smart guides and you can see we can have an end point here. And let's say I make a point here and I drag a line towards the circle and you can see it will show me the end point and it will connect that round object so you can see I can snap it to any part of that object. And then I can make something like this which is really cool. So it just makes it a bit easier to snap two round circles. Whereas before you could only really do it on straight paths and things with anchor points. Small but mighty feature, they actually added the ability to lock artboards now. So maybe I don't want anyone to touch this logo. Maybe it's the final version. You know, I don't want my team to touch it. I can just go to the artboard section and you can see now next to the text there will be a little box, empty box. Just click on that and it will lock it. So now I can lock this artboard and now I can't edit any of the designs. So instead of locking certain objects or locking layers, you can lock artboards now. So now it makes it easy, so I can't accidentally touch this. So it makes it really easy. Then you just click it again to untick it super quick. They've also added the text name of the artboard on the top left corner. So it's similar to Figma, how it's got the name, you can just double click on it and you can change it to whatever you want. So I can quickly change text here. So we can also do is just press shift O and just make sure you select the artboard first to get access to all these new updates. So you can do undo, rename, can do new artboard, duplicate, rename, delete, generate, lock artboards. As you can see, rearrange or fit. So instead of having to go to the artboard and do it here from this menu you can now just do it. As long as you can select the artboard you can right click. Just make sure you select it, right click and you get these options. So I think that's a nice little add on to make things a bit faster. Another cool thing is you can set pre made fill colors to artboard. So if you go to select an artboard you go to properties and you just want to click Edit artboards. You've got a fill here. So we can make it black or you can make it white or you can choose other. So maybe you want it like blue. Select that. So you can come in here and make your artboards a certain color. So now the artboard won't be able to change because it's not in the layers, it's not an object, it's just a actually the artboard itself. And then you'd have to go back in here and you know, go back to white or default. Now if we go back to the home screen, you can actually add projects now it's on the left. You'll see this new project feature. If I click on this, we have access to projects where we can share it to other designers or clients. So if I click Create Project, let's just call it this MSC Post Collection. Let's create this project. It's gonna go ahead and create that. And then I can invite people. So we can just add emails. So this. And then we can say they can edit or comment and then you can invite or you can just click Skip. And then so now all these files inside of here, I can click Add. I can create a folder. Maybe we'll call it posters 1. I can click the add button on the top corner. Maybe we do poster collection too as a quick example. And then I can go inside here and we can add files. So I'm going to go ahead and just test this. Let's see if I drag this file in here. Okay, so that won't work. So what we're going to do, go add, move files and let's just say any recent files, let's just go put this one in here and I'll click Move and we'll move that file into that project. So now in that project we can see we've got the two folders. Got this one. And then now this is shared. You can see it's in the cloud and someone will just come in here, it will download from the cloud and they can just start designing. So this really good when it comes to like team sharing, team design, multiplayer mode. I can tell like they're trying to be like Figma now, make it a bit easier to work with files. The share feature, I don't think they updated that. I think it's pretty much the same. But it's nice to have projects there have it all in one place. Another quick, small feature. If you're generating vectors within Adobe Illustrator Firefly model, you can in the generate vectors. So if you've got a rectangle, right click, click generate vectors. I can change the model to Firefly Full. I don't know if they have the ability to use other models inside of Adobe yet. Like for example, maybe you're using GPT or C Dream or whatever. They only use the Firefly, so you can always switch it and you know, start generating images. Anyway, thanks so much for watching. If you want to learn more about Illustrator, I have a full course where you learn all the other tips and tricks. I'll put the link in Description below. Hope you enjoyed this video. Let me know if you're loving these new updates or not. Talk to you soon.