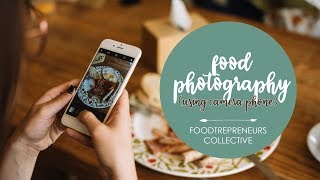
In this Taglish tutorial, Lesley Pascual‑Bartolo (Speaker A) delivers twelve actionable tips for food entrepreneurs who must create high‑quality food images using only a camera phone. She begins by stressing the importance of standing out on social media despite limited budgets, then walks through (1) selecting the correct image dimensions for each platform and planning text overlay/negative space, (2) using natural light and controlling its quality, (3) differentiating soft versus hard light and creating soft light with diffusers or bounce cards, (4) positioning light – avoiding front lighting and favoring side or occasional back‑lighting, (5) applying composition rules such as the rule of thirds and choosing camera angles (overhead, hero, 45°), (6) keeping backgrounds and surfaces simple and neutral, (7) adding narrative elements (hands, props) to tell a story, (8) using minimal, relevant props to frame the product, (9) layering foreground, subject, and background for depth, (10) guiding the viewer’s eye with leading lines, and (11) post‑processing with free mobile apps (e.g., Photoshop) to adjust exposure, contrast, sharpness, and color. Throughout, she emphasizes that these techniques require no expensive gear, only thoughtful lighting, composition, and editing, and invites viewers to ask questions or request further content.
Chapters
I know, I know na pakahira po mag-simulan ang isang nego— kahit na maliit na nego— pangigurado limited ang budget at malaman one man team ka pa lang. But this should not stop you from posting high-quality food photos to social media. Dahil yan na ang labanan ng ayo, dapa sa food photos mo pa lang bentang bentang ang iyo mga producto pero hindi mo kaylang mag-investigate sa isang DSLR or magahar ng food phot— professional food photographer. Dahil na, alam ko, sa simula talaga limited ang budget. Kailangan magstand out ng iyo mga food photos. And I'm here to help you out. I will give you 12 tips to take your food photos to the next level. And for sure, this will make a huge difference and ultimately maapecto hanito ang iyo sales. Kasi kapag maganda yung food photos mo, mo ka-establish na yung negocio mo and people will be drawn to that. Tapos, magiging katakan tahan din ang iyon producto. So they will not be able to resist and they will ask about your food. Ultimately, bibilisin na. So, dadaami ang iyon benta. Kayanaman mag-nanating patagalin. These are my top 12 tips for food photography for food entrepreneurs using only your camera phone. Number 1: Kailangan alam niyo muna magupahay magtake ng mga pictures comparasa ang iyon food photo na tinetake niyo. Kase, for different social media platforms, iba iba yung dimension na kaylangan. At hindi lang depende sa social media platform, kunde within the platform iba iba rin.
Iba yung para sa Instagram stories, iba yung para sa Instagram feed, para sa Facebook iba yung pa cover photo, iba yung pa profile, iba yung pa post.
True tapat, alam niyo na sa una pa lang. Kung para sa— para hindi niyo sha makrop ng bonggang bonga, okay lang kung makachamba ka at maganda pa rin tingnan yung photo mo, at hindi makakat yung mismo subject mo or yung product mo after ng crop. Pero as much as possible, shempre, i-avoid na natin. Another thing na tapat mo i-consider sa una palang, ay kumaglalaga ika ng text overlay dun sa photo. So tapad, kumaglalaga ika la lagam mo ng negative space whether sa taas, sa babaa, or sa gile.
Kumium text nyo, iyalabing sa taas tapad mi negative space sa taas. Kumila nang text iya sa gile, tapad mi negative space sa gile. Kumasi iyalabing naman, remandeng kilala nang narrow space to accommodate yung text na iyalabing iyo.
Kapad kese hindi mo ito na considera ka, maaring matapang ng texting subject mo or hindi mahikita ng malino text then, background shot.
Second tip, lighting.
I natural light or ilaw na nang gagaling sa araw, even professional food photographers swear by the use of natural light. Mas maganda talaga iba ang dating kapag natural light ang ginamit nyo sa inyong mga food photos. Unang apalan kayo ng bintana, napueding maguing source of light. Make sure lang na yung surrounding ng bintana nato ay hindi colorful. So best na nasa white or gray yung colors na naka-surround dun sa bintana. Pwede kayong gumamet ng puting kumot para takpan ko ano man yung nakakasurround the whole of food. Doon sa ventana na 'yon. Yeah, katulad ako nag-shoot ako sa isang quarto na ginawa namin office studio. So meron isang ventana doon tapos dahin na madalas ako mag-shoot kinailangan kung siyang i-paint ng white. Daté color red 'yung ventana na 'to and then sa labas kulay pink so naglalaga 'yan ang cast Nung color na yon, dun sa lahat ng mga pictures ko. By the way, kung lang kung sabi yan, lahat ng sample na iba pa kita hopo sa inyo, dito sa video na ito, I captured using Samsung S7. Pero di kaylangan maguing high-end yung phone niño para magamit niyo ang mga tips nang dito. Ang importante la, ay maganda yung lighting niño. Actually, kahit na high-end pa yung phone niño, kung walah kayong magandang ilaw, So important, lighting, intermediate phone, your gamut, capture photo, natural light. So, third tip, this is for the lighting, this is your gamut, soft light versus hard light. So natural light, pero ano kasi natural light? Yung soft natural light. Ang ibig sabihin nang nito, ay, diffused yung shadows mo. Ang hard light, yung niyo kapag lumabas kata, kaswalang clouds. So kita mo yung shadows, very hard yung light, very defined yung shadows. Pero kapag mero clouds, sata as, may kita mo na very soft yung shadows, halo sindimo sha, mapapansen. And iba yung glow ng skin de, mapapansen mo ya no? Iba yung glow ng skin mo padmasa soft light ka. So, umpaka, napahagandarain na nandun siya sa soft light. So, paano mo toma achieve? Simple lang, kumuhaha lang ng mani-piece na cortina ang putay or kumot na putay or ako shower curtain na putay na mabibele mo lang sa SM Hypermarket for a very low price. I think I purchased mine for ��99, the low one na atay yuni. So, ang laking difference ng soft light So hard light, very defined, the shadows are very, um, diffused, the shadows are more pleasing to the eyes. If you have a bounce card, you can fill in the shadow that you create with your source of light. Bounce card na para simple illustration board, yung color white na illustration board, or aho, gumawa aho ng bounce card ko using yung anupang tawa dito, yung nilalagis sa ano ng gumal, lalo netong isosofen ang inyong photo. Ang fourth tip, ay, to kung parang sa lighting, dahil napaka importanteng 'to, yung position ng ilaw ninyo in reference to the food product or subject. So, food photos, no, no, no front lighting. What is front lighting? Front lighting usually is what we use to take our photos. So, when you take a picture, the photographer is facing the subject. No, no, no to that in food photos because it will distort the dimension of your product or food. Okay, let's compare this side by side. This is the same lighting position. As you can see, the difference is not that big. So what do we do? There is one more lighting position that you can use for an awesome food photo. Use side lighting. When you use side lighting, the source of light is behind your subject. And you take a picture at a 90-degree angle. Source of light. So my kitan nyo yan, dito sa ating illustration. And then backlighting, although ito you should use this sparingly. Kung ayo naman po komplika dohin pa mga bagay-bagay, just stick with the sidelight. Pero ibabahali ko narin sa inyo ang tip na ito na pag gamitan backlight. Kung sa an ang ilaw ay nasali ko ra ng subject, at ikaw na como ko hanang picture, ay directly facing the source of light. So ito naman ang no-no pagdating sa pagcapture ng mga pictures natin. Dahil magdidilim yung ating mga mukha. Pero sa food photos kasi minsan maganda yung may backlighting kasi parang dramatic sha. May certain, you know, parang meron dramatic effect ulad ng mga ita ng mga ating samples. Panglima na ba kayo? Fanglimang tip, ay tumkol na man sa composition. Bakit na rinigyun nito? Gumamit kayo ng rule of thirds. Ibigsabihin lang noon, ay parang idedivide ninyo yung LCD, divide nyo sha into 3 parts, and dapa't yung subject mio falls to those lines or yung intersection ng line na yon. Bakit kaylang ayan? Kasi Ang matanatin, I trained to go and look dunsa mga points na yon. So actually, kayo mga videos ko hindi sha masado parang makasenter, hindi toko sa gilet kasi dito mas nadudro yung mata ng mga tao. Acha ka mas pleasant siyang tingnan. Ang rule of thirds, maapply mo sha wedding paganyan sha, that's paganon, or pagde shang pa slant. The rule of thirds. So, either position na man ng camera nyo in reference sa subject. Kapa camera phone nyo gamitin nyo, ang best position ay overhead. Overhead talaga. So, kung okay sa inyo lahat ng food photos nyo ay overhead. Pero kase, depende naman sa producto ninyo. Kung mas photogenic sha, kapa tinitingnan from taas, So something na walang masado height or colorful sha, maganda yung taas nya, then take it from over the head. Another angle na pwedeng gamitan, take it using hero angle. So yung subject ninyo, tapos dandito kayo right in front of it. Maganda eto for food na mero on height or maganda yung gilip ng agusin. Ipakita ng gilip ng agusin, ipakita yung loob. Product na yon, so a slice of cake, colorful, yung slice of cake niño, con burger. Another angle na pa yung gamitan, ay, 45 degrees. So meron eto, this is a 45 degrees, major trick na sha. Make sure na nasa 45 degrees kayo. If you make it here, if you take it here, or somewhere here, para nang nadoodolas. Yun yung food photo. So medyo tricky talaga sha. Ah, pedi kayo magstick mo na sa overhead at yung hasa 90 degrees. Pero if you're feeling comfortable na kayo sa yung food photography, ay, pedi yun na kayo explore itong 45-degree angle. Kasi dito, simply, you get the best of both worlds. So you get a little of the top, you get a little of the side. So kung gagamit kayo na 45-degree angle or the hero position, Maharing makita ninyo na meron tilting dun sa inyong subject or dun sa mga nakasurround na mga bagay. So nandapat din kaway ko, walang kayo na ang papel itupi tupi ninyo or nanaklay, tasgamitin ninyo to adjust yung likuran medio iang atnan conte para ma-balance yon. Diting nanyo i-check nyo lang dun sa phone ninyo para ma-adjust yun sha accordingly. Nyon, this is not a capturing position pero Agusto ko siyang isama dito sa tip na parang tip 6.5 sha. Whether 45 degrees, hero position, overhead position, and close-up nila nyo. Para makafail inya yung buhon. Space, less complicated. Tip number 7: Use a simple background and a simple surface. So as much as possible, wala masyado ng patterns, wala masyado ng mga bagay bagay sa likuran ninyo. Etto katola dito, ang daming makabagay dito sa likuran ko. This is not good. Good, but I'm planning to make a simpler background. So imagine, if you have a product, a food product, and there's so much busy background, it's not going to focus on the product. Okay, I recommend you white background, white surface, so that there's texture. Predominantly, but it's not just about food, colors, textures of food. Tip number 8: add a story to your food product. So, you can say, "I'm making this for you," or "I'm serving you," or, you know, if your product is pastillas, the person will be like, "I don't want to take pastillas." So, you can say, "I'm going to show you how to take your pastillas." Narayan, product niya, igomito yot, eskusyon ipa kita na makakainan yung impamilia, so peding magset akainan table na parang naglulunch sila, tapos maglagay naman akamay, don't indicate lang ang makiting faces, just the hands. So nakakaroon na story, parang hindi lang sha basta nakakaroon sha ng story, so mas relatable sha. Mas atmas mo sa stand out din sha. Tip number 9, very much related doon sa sinabiko kaninang tip kaninang paga adnan story, para i-highlight lalo ang iyo producto i-frame niyo sha with props. It's very simple lang, di ko lang anang mga sobrang daming props kunde, mga utensils lang na ginagamit, pende ko aning ginagamit para doon sha. Food. It's as simple as you have your plate of spaghetti, spaghetti sauce in a bottle. You have your plate of pasta, with a fork. Tip number 10, layering. So again, last 3 tips, related to this, you can use it together. Together. It's something to consider if you want to take your food photos to the next level. So, let's say you want to layer your food. In this plate of spaghetti, you can put a placemat. So, you have 2 layers. If you want to take it overhead, then you can put it in hero position or 45 degrees. Then you can put another layer. So, peding na sa harapan, meron kang foreground, meron nang yung main subject mo, and then meron pa siyang background. So, parang tatlo yung layers mo. Yung main subject mo yung nasa pinaka-harap, meron kang dito sila gurnatot, meron kang dito sila gurnatot. So, tip number 11. So, tumpol naman eto sa leading lines. Ah, ibig sabihin lang kung nas ka overhead position ka, And make sure mo na lahat ng ibang elements na nandun sa loob ng iung frame ay nililiyid yung mataanong nakikita nang tumiting pa pontado on sa iung food product, sa iung main subject. Diagonal or zigzag lines ang gagamitan ninyo to lead the eyes pa ponta doon sa main subject. Kahit dalawang bagay lang yan. Bisa pa ganito. Paganyan. Diagonal lang po po talaga sa main subject. And last but not the least, tip number 12: Edit nyo ang inyong mga food photos using free applications sa inyong phones. Ako, I highly recommend yung Photoshop. And from there, pedi nyo pang enhance ang inyong food photo, dagdagan na exposure, kumediyo kulang, sharpened by an image, contrast, clarity, and there are other filters that you can use to adjust the image. And if you are an expert in Photoshop, you can adjust it further. So that's it for today. If you have any questions or if you want me to make a post or a video, just leave a comment below. Tulad po nang sinasabi natin t-shirt, let us all live fully and lovingly. Bye! Sa ulitin!