How to Make Coffee Pastillas (Negosyo Recipe)
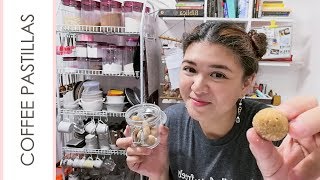
In this bilingual (Tagalog/English) tutorial, Lesley Pascual‑Bartolo demonstrates how to make coffee‑flavored pastillas, a traditional Filipino sweet, and frames the product as a low‑cost, high‑appeal business idea. She lists precise ingredients (skim milk, condensed creamer, Kopiko Brown Coffee, light brown sugar), walks through the preparation steps (mixing, microwaving, cooling, shaping), and mentions texture goals and timing. Lesley then shifts to business advice, highlighting the familiarity of pastillas, potential market demand, and hints at costing and pricing (referring viewers to a separate video for detailed cost analysis). The second half of the video delivers twelve practical food‑photography tips for entrepreneurs using only a camera phone, covering image dimensions, natural lighting, soft vs. hard light, light positioning (side, back), composition (rule of thirds, overhead, hero, 45° angles), background simplicity, negative space for text overlays, storytelling with props, layering, leading lines, and free mobile editing apps (e.g., Photoshop). Throughout, the tone is instructional, enthusiastic, and supportive, aiming to empower small‑scale food sellers to produce appealing product photos that boost sales.
Chapters
Alam nyo ba ang pastillas ay nag-originate sa Bulacan? Traditionally, itoy ginagawa gamit ang carabao's milk tapos nilalagan nila ng acid gamit yung calamondin juice tapos magbubuobosha dahin naggrane yung milk doon sa acid. Hello po, ako po si Leslie and welcome to my channel. Sanaman po na pahasarap na nego sya recipe. Ang ibabahay ko sa inyong ayon, walang iba kundi ang coffee pastillas. From a nego sya point of view, na pahagandang mag-simulan na isang maleta nego sya using this product. Dahil ang pastillas ay very familiar sa ating mga Filipino, it's One of the most beloved desserts that originated in Bulacan. But one cup has this pina-mama flavor. In this cup, if you will examine it, there are pastillas and a cup. It's very, very tasty. But if you want to make a business out of this, you have to double-check the recipe. Ingredients. I, 1 cup skim milk.
Actually, pedaling full cream milk, but condensed creamer. So it's a blue Nan Alaska.
Tapos, for the coffee flavor, ang gamitin natin ay Kopiko Brown Coffee. Favorito to ng asama ko, siya ang nagrepros nito ang gamitin. Nasa buwan ko narin gumamet na plain coffee lang, hindi 3-in-1 pero hindi siya kanoon kasarap kaya mas finili ko gamitin nito 3-in-1 na. And lastly, yung ating 3 tablespoons of light brown sugar. Again, mas mura kasi ang light brown sugar kesa sa white sugar.
Napakadalilang gumoan ang coffee pastilla, so langyan yung ating 1 cup na skim milk.
This is 125 grams.
Brown coffee. So, using a wooden spoon or Next, I have condensed creamer, 1/2 cup.
So for the last one, I used filled milk, but for this particular recipe, I'm just going to use condensed creamer.
This is the Kool-Aid Blue Alaska. However, Dahem, di naman natin agad-agad imo mo diyan. Para mas lalo pa siya mag-smooth, well-blended, suggestion ko, ay, microwave mo sha for about 30 seconds. Okay, so after 30 seconds, bale, eh, nong apala ang wood at chaka yung metal, hindi sha dapat i-microwave.
So yung metal kase, dale conductor yung heat, it's a no-no. Yung good na man masisiira sha kapag mi nitro wave niyo. So kung makita niyo lang sa video or pag pumakain ito, makita niyo na may mga parang mga coffee granules na hindi na ka-blend yon pero ayandai ini neta at tata sa yon ha-haloo yon aten.
Ma-animyan mag-be-blending talaga sha kung baga matutunaw yung kape at mag-be-blend well. So now, voilà na. Now, voilà na 'yo. Mga batik-batik na coffee. Maghalun-halun na 'sha.
Set aside 'nyo lang 'sha para mag-cool down, mag-cool completely at mag-air out. Yung pag-air out sa kanya, yun 'yo mahakatulong para maglimadali 'sha ang kimono.
Mama'yat may kita 'nya 'yan na. 'Nayon.
Para sobrang sticky 'sha indi 'nyo 'yan mamumul pero mama'yat din 'nya 'no. So mga 1 hour 'yo.
An hour or so has passed. Makita nyo, yad, di nyo siya kasi sticky kami na, tumigas nasha, nakfirm up nasha. Okay, so may or lang gagawin naman natin, ay, puhutan mo, gusto ko siya may jomada ka nino pero kung benta ito, medyo naman mas mabehet. So my certain stickiness karensha pero moldable narinsha. Yeah, for the rest of this, and you're good. So, maliban sa coffee flavor, pweding pweding pa kayong mag-exaggerate. Explore flavors like matcha pastillas. Recipe na to. Yung pastillas no, hindi sha matigas. Asin, meron ako ibang pastillas na na tipic man na matigas sha. Seguro dahan ilung gumagawa yung hindi nya kasima form, so ang tendency is tagdaganan gatas or nanharina. Yung namang polvoron, ay, ejo mabibila oka pero kung sarap na manchat iba, kung gatong aking polvoron ala Cotidax, then it's worth it. Pero itong pastillas, shayon sa ktoy. Yung costing neto, ay, ilalagay ko let's a dulo, pero hindi ko na ilalagay yung details kung pa pa no, kung no ka matun sa costing. Kung gusto yung malaman yon, please watch my Pulvoron à la Gold Deluxe na recipe doon ko tiniskas in detail yung pano pag costing and nag pricing. For this week, akapu usaban sa Foodtrepreneurs, ay tong ko sa food photography using only your camera phone. Nataha importanteng kasi na magandang food photo in this day and age ang pag market ng yung mga producto. Taka importanteng na makapag post kayo akapu ham taka na picture ng producto. It gives a sense of credibility. I won't give it away. Continue watching. 15 pesos.
I know, I know, na pagahira po maximum lang ang isang nego— kahit na maliit na nego— pa yan. Panigurado limited ang budget at malaman one man team ka pa lang. But this should not stop you from posting high quality food photos on social media. But you're still limited. You can only take food photos and sell them. But you can't invest in a DSLR or hire a professional food photographer. So you're still limited in budget. You can only stand out with your food photos. And I'm here to help you out. I will give you 12 tips to take your food photos to the next level, and for sure this will make a huge difference. And ultimately, maapekto hanito ang iyong sales, kasi kapag maganda yung food photos mo, mo hang establish na yung negocio mo, and people will be drawn to that. Tapos, magiging katakan ta kan din ang iyong producto, so they will not be able to resist and they will ask about your food. Ultimately, Bibili siya na. So, dadaami ang yung benta. Kayangan mo lang mag nanatin patagalin. These are my top 12 tips for food photography for food entrepreneurs using only your camera phone. Number 1, kaylangan, alam niyo muna, magupahay magtake ng mga pictures, kumpara sa anyong food photo na tinetake niyo. Kasi, for different social media platforms, iba iba yung dimension na kaylangan. At hindi lang depende sa social media platform, kunde, within the platform, iba iba rin.
Iba yung parasa Instagram stories, iba yung parasa Instagram feed. Facebook, iba yung pag-cover photo, iba yung pag-profile, iba yung pag-post.
So, dapat alam nyo na sa una pa lang, o para sa— para hindi nyo sha makrop ng bonggang bongga, okay? Lang kung makachamba ka at maganda pa rin tignan yung photo mo, at hindi makakat yung mismo subject mo or yung product mo after ng crop. Pero as much as possible, shempre, y avoid na natin. Another thing na dapat mo i-consider sa una pa lang, ay, kung maglalaga ka na text overlayed on the photo. So, that's why we have negative space whether it's above or below.
If we have text on top, we have negative space on top. If we have text on the side, we have negative space on the side. If we have text on the bottom, we have negative space on the bottom. So, we have to find a space to accommodate the text that we have.
Maybe we don't consider that, but we have to add a text subject or it's not that visible, the text that we have in the background. Second tip, item ko sa lighting. Ankay lang maniyo lang ay natural light or ilaw na nang gagaling sa araw. Even professional food photographers swear by the use of natural light. Mas maganda talaga iba ang dating kapag natural light Ang ginaamit nyo sa inyong mga food photos, muna naplanka yon ang bintana na pweding magging source of light. Make sure lang na yung surrounding ng bintana nato ay hindi colorful, so best na nasa white or gray yung colors na naka-surroundon sa bintana. Pwede kayong gumamit ng puting kumot para takpan ko ano man yung naka-surround the colorful don sa bintana nayo. Ya, katulad ako nag-shoot ako sa isang quarto na Ginawa namin office studio, so meron isang ventana doon. Tapos dahing ka madalasa ko mag-shoot, kinailangan kung siyang ipaint na white, darte color red etong ventana na eto, and then sa la bas kulay pink. So naglalaga isha ng cast ng color na yon dun sa lahat ng mga pictures ko. By the way, kung sabihin lahat ng sample na iba pa kita hopo sa inyo, dito sa video na eto I captured using Samsung S7. Pero, di kaylangan magin high-end yung phone niyo para magamit niyo ang mga tips nang dito. Ang importante la, ay maganda yung lighting niyo. Actually, kahit na high-end pa yung phone niyo, kung walah kayo magandang ilaw, walah ranchang magagawa. So, napaka-important talaga ng lighting kasi kahit na parang intermediate phone yung gamit niyo Maganda pareng yung makakapture ninyong photo, kumaganda yung ilaw ninyo. At free naman ng natural light, so hana plang kayo nang magandang puesto and then you prepare yung lang ang shot. Third tip ko, ito kung parang sa lighting, ito ay yung pagamit ng soft light versus hard light. So natural light pero ano kasi yung natural light? Yung soft natural light. Ang ibig sabihin namin 'to, ay diffused yung shadows mo. Ang hard light, yung yung kapag lumabaskata, paswalang clouds. So, kita kita mo yung shadows, very hard yung light, very defined yung shadows. Pero kapag mero clouds, sata as, may kita mo na very soft yung shadows, halo siyin dymo sha mapapansin. And iba yung glow na yung skin de ma papansin na yano, iba yung glow ng skin mo pa mas soft like ka. So, umpaka ay napakagandaren na nandun sha sa soft light. So, paano mo toma achieve? Simple lang, umuha lang ng Manipiece. Curtains or shower curtain, SM Hypermarket for a very low price. I think I purchased mine for ��99. The lowest one. So the difference of soft light and hard light, as you can see, right? So for hard light, very defined shadows. But for soft light, very diffused shadows, a more pleasing shot to the eyes. Bounce card, I might fill in the shadow that we create in the source of light.
Window mo, subject mo, food product mo, magalagate ka ng bounce card dito para yung shadow na ikakast ng yung product, I might fill in the reflection of light from this bounce card.
I'm not ready to go with bounce card na pa asimple illustration board. Yung color white na illustration board, or aho, gumawa ako ng bounce card ko using yung alubang tawa dito. Yung milalagis ano ng gumal. Laluniton, iso soften ang inyong photo. Ang fourth tip, ay, tumkol pa rin sa lighting, dahan lang pa ka importanteng yung position ng ilaw ninyo in reference don sa inyong food product or subject. Hindi din pwede basta basta. So sa food photos, no, no, no ang front lighting. And then front lighting, front lighting usually is what we use to take our photos. So if we have a hill, we take a picture, the photographer is here, and the subject is there. No, no, no to food photos because it will distort the dimension of your product or your food. Okay, let's do a side-by-side comparison. Lighting position, at makita nyo na malake ang difference. So ano ang dapit na gamitin natin? Meron dala wang lighting position that you can use for an awesome food photo. Use side lighting. Ang ibig sabihin lang ng side lighting, ay yung source of light mo ay nasagilit na yung subject, at ikaw na komoko hanong picture ay na ka 90-degree angle dunsa source of light. So makita nyo yan dito sa ating illustration. And then backlighting, although eto You should use this sparingly. If you don't want to complicate things, just stick with the sidelight. But I want to share with you a tip. When you use backlight, if you are too close to your subject, the subject will appear dark in the picture. If you are directly facing the source of light. So this is the no-no when you capture pictures. Mujah, pero sa food photos kasi minsan maganda yung may backlighting kasi parang dramatic sha, may certain, you know, parang meron mi dramatic effect. Tula ng mga ita nyo yan sa adding samples. Pangliman na sa pangliman na bata yo, pangliman tip, ay tumkol na man sa composition. Bakana rin igyun ay 'to, gumamit kayo. Rule of Thirds. I trained to go and look those points Nayon, so actually, kaya yung mga videos ko hindi sha mashado para makasenter, di ko ko sa gilet kase dito mas nadidraw yung mata ng mangatao, atcha ka mas pleasant siyang dignak. Ang rule of thirds, maaplay mo sha, padding paganyan sha, that's paganon, or padding pa slant na rule of thirds. So padding yung gamitin either. Yung position naman ng camera nyo in reference ay yung subject. Kapag camera phone yung gamit ninyo, ang best position ay overhead. Overhead talaga. So kung okay sa inyo, lahat ng food photos niyo ay overhead. Okay yon. Pero kase, dependent sa producto ninyo. Kung mas photogenic sha, kapag tinitingnan from taas, so something na walang masado height or colorful sha, maganda yung taas niya, then take it from over the head. Another angle, take it using a hero angle. So you have a subject, then you tapos, right in front of it. Maganda 'eto for food na mero height, or maganda yung gilid niya kasi yung ipahita ng gilid niya kasi yung ipahita ng loob ng product niyo. So a slice of cake, di ba? Kung kasi yung ipahita colorful yung slice of cake niyo.
Burger.
Another angle, 45 degrees. So this is a 45 degrees. Make sure that it's 45 degrees. If you make it here, if you take it here or somewhere here, it will be crooked. So it's tricky. So let's stick to overhead at 90 degrees. 45 degrees. But if you're feeling comfortable in food photography, I'd like to explore this 45-degree angle because you get the best of both worlds. So you get a little of the top, you get a little of the side. So if you're using a 45-degree angle or the hero position, you can tilt your subject or the things surrounding it. So it's not like you're holding a paper and you're tilting it. Or adjust the microphone, adjust the angle, to balance it. You can check your phone to adjust it accordingly. This is not a capturing position, but it's good to have it on tip 6.5, whether 45 degrees, hero position, overhead position, and close-up. Yung buhon, space, less complicated. Tip number 7: use a simple background and a simple surface. So as much as possible, wala masyado ng patterns, wala masyado ng mga bagay bagay sa likuran niyo. Etto katoladeto, ang daming mga bagay dito sa likuran ko. This is not good, pero wala pa ako. Madova sa mayol, pero I'm planning na maglagay na simpler na background. So imagine, if you have a product, a food product, and there's a busy background, it's not going to be focused on the product. Okay, that's why I recommend you white background, white surface. There's still texture, but predominantly it's white. It's for it to stand out, the food colors and textures of food. Tip number 8: Add a story to your food product. So, if you are cooking or serving, or there is a product that has pastillas, so you can put it on the table. So, if you are taking a medicine, you can put it on the pastillas. If there is a product that has gummy, so you can put it on the food of your family. So, you can put it on the table, like lunch. Tapos, maglagay ng mga hami. Don't indicate lang ang mga itin faces, just the hands. So nagkakaroon na story. Parang hindi lang sha basta nagkakaroon sha ng story. So mas relatable sha, mas at mas makastandout din sha. Tip number 9, very much related doon sa sinabiko ko ni ng tip kanina, eh, pag add ng story para i-highlight lalo. Ang iyong producto, i-frame mo sha with props. It's very simple lang, di ko lang anang sobrang dami ang props kunde, mga utensils lang na ginagamit, pende ko aning ginagamit para din sa food na binebenta niño. It's as simple as you have your plate of spaghetti, kung ano lang bebenta ka, spaghetti sauce in a bottle. You have your plate of pasta, let's say fe-frame mo sha with a fork. Tip number 10, ay, itong kulaman sa layering. So again, ito, itong last 3 tips na binigay ko, ay, mga related sila sa isa dito. You can use it together. Iti yuma, ikaw consider ninyo if you want to take your food photos to the next level pa. So aning ibisabihin ang layering, ibisabihin nito, in business, plato lang ng spaghetti, yun layers mo. Your main subject may nasa pinaka-harap, that's why ang dito sila ko na 'to, that's why ang dito sila ko na 'to. So tip number 11, so tunkol naman 'to sa leading lines. Ah, ibig sabihin lang 'no, kung nasaka overhead position ka, make sure mo na lahat ng ibang elements na 'nan sa loob ng iyun frame ay nilili-lead yun matano makiki. Nang tumiting pa pontado on sa yung food product, sa yung main subject. Diagonal or zigzag lines ang gagamitan ninyo to lead the eyes pa ponta do on sa main subject. Kahit dalawang bagay lang nyan, wag niyo sha parang, bis na pagana ito, paganyan. Diagonal line pa ponta do sa main subject. And last but not the least, Tip number 12: Edit your food photos using free applications on your phone. I highly recommend Photoshop, and from there, enhance your food photo, decrease exposure, cool it down, sharpen the image, adjust contrast, clarity. Mero narin mga prepared na filters doon, na bahamatay pa nyo, pa diyan gamitin. And ako ano pa, explore nyo lang ang Photoshop na pa kadali lang nyan gamitin. So ayan lang po muna for today. Kung mero kayo magatanong or kung nakatulong po sa inyo ang video nato, just leave a comment below. Tulad po namin, sabi namin, t-shirt: Let us all live fully and love freely. Bye! Sa'uli ten!
More from Lesley


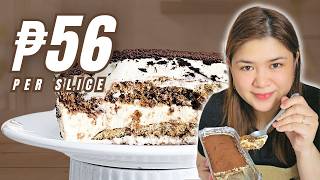
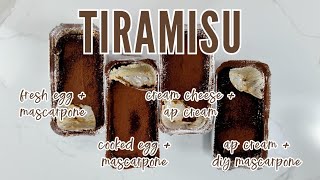
Tiramisu for Business recipe tutorial LINK in the comment section ⬇️ #tiramisu

‼️Trending Street Food in Korea‼️ Marshmallow Ice Cream 🍦 Want to try? #marshmallowicecrea
Make sure to do this every time you bake to check if your eggs are still fresh 😉 #baking
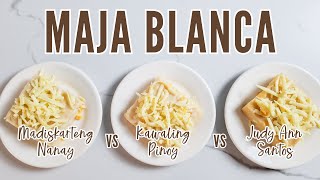
Recipe Testing Maja Blanca: Madiskarteng Nanay vs Kawaling Pinoy vs Judy Ann Santos