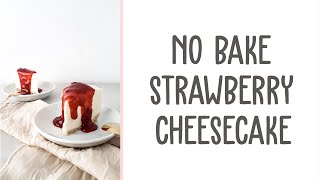
In this instructional video, the presenter demonstrates how to make a 6‑inch no‑bake strawberry cheesecake that sets in the refrigerator or freezer. The recipe uses a condensed‑milk‑and‑white‑chocolate filling, a crust made from Skyflakes (or Graham crackers) combined with cream or butter alternatives, and a simple strawberry topping. The video walks through each stage: melting condensed milk with white chocolate chips in the microwave, preparing the crust by crushing biscuits and mixing with a small amount of sugar and cream, blending cream cheese with all‑purpose cream and a splash of calamansi or lemon juice, combining the cooled filling with the crust, chilling the assembled cake, and finally spreading a strawberry‑syrup topping. Throughout, the presenter offers substitution tips (e.g., using cream instead of butter, avoiding gelatin, using a hand‑mixer or blender) and practical advice on texture, mixing time, and serving size.
Chapters
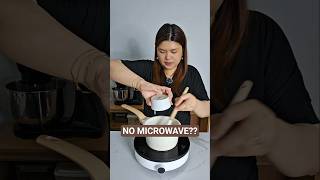
So, my own, we'll add it to the ref to chill or to make it more smooth in the freezer. After that, we'll add the strawberry topping. For this no-bake strawberry cheesecake, we'll add 1/2 cup condensed filled milk. 1/4 cup or about 43 grams of white chocolate chips. So ito ba lang yung mag-stabilize sa ating cheesecake. May mga recipe na gelatin ang ginagamit pero hindi kasi— para sa akin hindi okay yung magiging texture ng cheesecake kapag nilagay yung gelatin. I prefer yung white chocolate chips para yung yung magiging structure or yung yung tumulo ng ating cheesecake. So kayo lang nato yung microwave for about 30 seconds. Para mag-melt yung white chocolate chips. Bagunyo isalang sa microwave ang yung white chocolate chips at condensed milk. Make sure na yung condensed milk yung yung white chocolate chips kasi bahama sunuk sha. 30 seconds na, bakasalang sa microwave, kelangan lang natin haluhen para totally mag-melt. Okay, completely melted na. Set aside mo na natin to cool down a little bit. Habang kinokuldaw natin yung ating condensed milk with melted white chocolate chips, pedi natin yung crust. So usually ang kinagamit Hi, Graham. But I don't have any biscuits, just Skyflakes. So for today, let's use Skyflakes, 1 pack or about 50 grams. Then with Graham crackers, we'll use 1 pack as well. We can mix it with our hands, put it in a plastic bag, and stick it in the oven. Or we can mix it with a food processor. Break it down with the food processor. So we have our crushed sky flakes. If you don't have a food processor, you can directly put 1 tablespoon of sugar. 2 tablespoons of cream asada Alaska. So usually, we put butter, but if you don't have butter, this is an alternative, the cream asada, or you can put all-purpose cream or condensed filled milk. But since we are using cream as our filling, we will not add it. Hello, I'm going to coat the whole biscuit. Once it's moistened, we will add the biscuit crumbs. Then we will transfer it to our container. Since it's a refrigerated cake, we will put it in a microwavable plastic about 6 inches in diameter. Pero ya ni kaan, pero mas magakamuro kayo kase ikapalgetong ni nem. Y press niyo lang na ike. So para makirma peto, hilalang natin sha itil mo na tapos tuli natin yung paghalo sa ating filling. Na cooled down ating condensed milk with melted white chocolate, super dinating idagdag. 1/2 cup of all-purpose cream. I highly recommend the Nestlé all-purpose cream. Tapos, 1 cup or 8 ounces of cream cheese. Napasofren ito. Kapag hindi sofren, kapag binipnya, makaklump klump yan. Ibit nilang ito hanggang magin well blended, tapos a little more para mag-introduce na konting air para mag-lighten texture ng ating cheesecake. Unlike kapag baked, hindi pa din i-overmix. So, pa kapag well blended na sha, stop na kayo. Pag di to, encourage kayong medyo i-mix pa natin sha lang na ike. Irand lang natin yung sides. Ah, po, at this point, pa din arinatin itaglag yung ating calamansi juice pa drin kayong gumamit na. Lemon juice or diet juice. So if you don't have a hand mixer or stand mixer, you can use a blender. We'll just mix it a little bit more, but we'll just mix it a little bit. So our crust will firm up a little bit, then we'll transfer our cheesecake filling. So from here, we'll just tap it about 10 to 20 times to flatten it. So we'll just leave it in the fridge to chill, or para mas mabilis sa freezer. Tapos, sakana din dala gan na strawberry topping right before nyo siya iserve. Pre-day, okay, ayon kapag ibigay niyo na sha or ibenta niyo na sha, chakan niya lang ilagay yung inyong topping. Para sa ating strawberry topping, ginagamit ko tong gan kanheins, okay, ayon comstock. So, hindi ganyan ituran niya talaga, hindi ganyan karami yung strawberry. So, make it anyo ayon, maraming syrup tapos mero few na strawberry. So, para lang a more uniform tapping and more quickly. It's more convenient to use a strainer. But you can also use a food processor or blender or mixer, but it's easier to do it by hand. Ita as na cheesecake. I'm using a spatula or spoon for the— para imash lang to. Kailangan ko magamit ng sifter para hindi sha madulas imash kasi kapag sa direct sa bowl, medyo na doodulos dulos yung strawberries. Pagdito, komo kapit sha. Kailangan lang natin ay one fork nitto para 6-inch na strawberry cheesecake. So, let's mix it well so that the strawberries will be evenly spread out. And we're good. So, this is can, about 21 ounces. So about 6-inch no-bake strawberry cheesecake, 5.25 ounces or 148 grams. So we weigh that in for accurate. We level that in. Very generous cheesecake, about 2 inches, and that's good. And so you put that on top of your no-bake strawberry cheesecake.