CF AI EPISODE 1
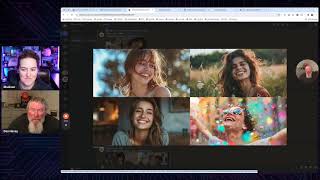
Dan Havey and Madison Doherty Tipton launch a twice-weekly AI training series for ClickFunnels members. They walk through MidJourney for image generation, covering Discord setup, /imagine prompts, upscaling, and variations. You'll learn to use it for ad creative, funnel mockups, and YouTube thumbnails.
Chapters
Sa it.
Foreign.
Hey, there we are. I didn't realize we had such a.
Long introduction in the front there.
Well, we got a little wire together, all the pieces, you know, we gotta plug in our Spockets and, and all of it and get it all connected up so.
Well, yeah, maybe every week we're gonna.
Have to have a new intro video on here, so. All right, well, hey, I am Dan Havey and this is Madison Dory tipped.
In and we're AI.
And I didn't see here what was.
The title of our thing here?
AI to create content for our funnel. So here's a new program we're trying out here in the Click Funnels group. And because everything about ClickFunnels is about marketing and content creation and of course the world is abuzz right now with AI, we just figured, hey, why not come into the group twice a week is what we're thinking about doing this at this point. Everything I'm about to say is totally subject to change. But we're going to come into the group twice a week and we're going to talk about exactly that. We're going to talk about AI. Now the way the plan is right now is on Mondays we're going to do more of a long form training and today we're going to do introductory training to mid journey, get you all set up in your account so you can create images and stuff like that. And then on Fridays we're going to talk about AI News of the week. We're gonna do Q A at that point, possibly have some guests. What else did I have written down here? Short demos on softwares that, you know, basically we can show the entirety of how to use it in 10 minutes. And then of course as clickfunnels is rolling out their AI, we're going to be talking about that as well, most likely on Fridays. But like I said, this is about marketing and content creation. So Madison, I'll throw back over to you. What are some ways that people can use or are using AI today for content creation and marketing that we can go over in the next coming months?
So I think that there's, there's a lot, right? I think we talk a lot about as solopreneurs, like how do we buy back our time? And it really is in utilizing software like ChatGPT and making bots and using automation. If you've noticed, everything now includes some aspect of AI. You go to Zapier and you're like, I need to do this type of automation. And they're like, well you Plug it into our little AI widget or genie and whatever, you know. Right. So what we want to help people do is so you don't have to go deep dive down the rabbit hole that Dan and I've gone down to figure out this AI stuff. But you can take little pieces, little nuggets, and kind of see instant wins with, with them inside your business. Everything from creating images for your funnels to your copy to buy your buyer Persona, funnel, hacking other websites, creating AI bots that write your newsletter from one line of like one topic or one idea. That's how I run multiple newsletters. And we all know how important that is in the attractive character flywheel.
Yeah, and other things that I was thinking of. So even think of something like ads.
So you're running a bunch of creatives, a bunch of ads on Facebook or wherever you're running them.
You start off with an image, you turn that into an animated video. You then use some sort of AI in order to create the headlines and the description and call to action and all that. You put it all together. And that is one of the things that over the weeks we are going to end up going towards is exactly that. Showing you how to take images that you created, how, how to animate them, how to do all the text, and then how to turn them into hundreds of creatives instantaneously, all of them. You put it all together, run a couple of pieces of software. Most of them are relatively cheap, 10, 20 bucks a month on most of these things, and you could be banging out hundreds of ads in a matter of maybe an hour's worth of work. And that's part of what's really cool here. But as far as, like building funnels themselves, what can you use that for is you can use things like mocking up your page. I was just the other day, I was just looking at some stuff where they were like, oh, hey, give me a page on selling, you know, for a coffee shop, let's say. And boom, it gives you some, some ideas. And you don't like those, you just hit the reroll button, gives you four more ideas. You don't like those, you just keep hitting the button. You can go in, you can modify it, you can change a bunch of things on it, but it'll give you.
A mock up of the whole page.
But then you can, you know, modify that, use that as a background, you can create other backgrounds, you can create images for your pages.
And then like I said as well.
Madison will be teaching a lot about this, is how to then take Those images and animate them, including making talking head videos and even making videos where it sounds like you, where you record your voice and it then gives it back to you in your voice. And then as far as like YouTube, what would you use it for on YouTube? Madison.
Oh, so like we'll take this video right here, we'll put it into the software and it's gonna spit out, you know, 16 to 30 clips. Just depends on. So like there's all your short form content for your flywheel. And then you could also go through. We could pull the transcript from this, put into an AI bot that writes a blog post article, uses SEO. We could then put that on a funnel page. I mean, the opportunities are endless to harness the software. And like I like to say, the example is in 2020, I was in this online business group and this lady was talking about TikTok and I said, I am not a dancer. I'm not going to get on TikTok and be a dancer. Right. So I just sat on the sidelines of it and I could have been that person talking about business or talking about funnels and I watched that wave pass me by. Don't be that person with this AI wave.
Yeah.
And to continue on with YouTube stuff is you're. She's absolutely right. There is a tool that you can use, take any long form video and it'll chop it up and turn it into all your other platforms for you, Instagram, whatever. But then also you have the ability inside of YouTube itself to run a bot inside of YouTube that will give you all the headlines that you want. It'll give you the description because it'll, it'll read the transcript, it'll give you a description, give you headlines, it'll give you the tags, and it will give.
You one other thing that I'm drawing a blank on right now.
What else does it do? Oh, thumbnails. You can actually create thumbnails then as well. You can create logos for your sites. And I'm. Okay, maybe I was looking, I was looking on the Facebook over here for a second.
And we are live in there. I thought we were.
Julie's with us, Chico's with us.
Okay. Oh, I see when I click over here on this side, it stops the video from playing. That's interesting. So either way, there's so many things you can do.
And one other thing I had written.
Down on my list of things we can do here is research. So you, you want to find out information on your avatar on a new market. You want to go into you can go in and use tools like OpenAI or even one I love myself personally is Perplexity. Use Perplexity to go in there and research your market. And the nice thing about Perplexity is it gives you all of the reference material that it used. It'll give you up to 20 links of where it pulled in that information from. So not only can you give get the summary of what is telling you, you could go out and do further research because it hands it right there to you on a platter. So that is another super cool AI tool. And so was there anything else we want to talk about before we start getting into the subject for today?
So I think, and I can't remember if you hit on it already, but you know, Mondays are going to kind of be more long form training. Fridays is going to be more Q and A ideas, just short form things. But if you know something about AI or you know somebody who is an expert in AI, then definitely shoot us a message because we're going to eventually have some guests on on Friday to talk about some of the cool things that are coming up.
Yep, that's definitely, definitely the plan. But like I said, it's all subject to change. So hopefully we'll get some viewership here. And I do ask for one thing in the video because what we're going to do is we're going to play a video now. So I did some training on how to use Mid Journey and Mid Journey is something that you would use if an example that Madison had earlier is you want to create a share funnel and, but you don't necessarily want to give them your images. Maybe you created this, you created this really cool funnel for one of your clients and you don't want to use their images that are in there. So you can go into AI and say, you know, give me an image similar to this one that I have here. It'll give you a different image. You can then punk that into your share funnel and you can give that out to people. Same thing with the background images. Everything else on there, same thing with the video can also be created with AI. But so, but speakings is purely of Mid Journey. You can also again use this one for creating mockups of your page. It's an excellent place for that. And I already said background images. And one thing you'll see here in this video, just a little bit of I'll show in later videos is how to actually create a color palette inside of Mid Journey. So you know that your page has these three different colors that are predominant on it. You want to be able to have your images reflect the that color palette. You can actually build that color palette into Mid Journey and then use that as what they refer to as a style reference. And then those colors will be reflected throughout the images that you create with it.
So that's what we're talking about here today.
The video is going to run about 47 minutes. I apologize for it being kind of long, but this is the intro video. So if you've never set up Mid Journey before, you don't know what it looks like, you don't know what Discord does. This is going to be a great place for you. If you already have those things set.
Up, you're going to probably want to.
Miss like the first 10 minutes of the video where I do the setup and then we start getting into some basic training and then as the weeks go on, the next, next week I'm going to talk about in much more depth the parameters in there. Then I'll probably get into prompting will be like the third week's video and.
Then after that we're going to get.
Into stuff like using the image references, the style references, the character references, all that stuff, all moving to the point, culminating to the point where you can actually create images of people that are virtually lifelike that you can then use to. Our next step after that will be then to take those images, put them into a video and create a talking head video of vsl, sales letter, whatever you want it to look like. And that's why what we're going to be doing is we're going to be tag teaming here. So this week we're going to be talking about Mid Journey. Next week Madison is going to be talking about, I forget the name of the software.
11 labs.
Yeah, 11 labs where she's going to teach you how to do the talking head videos, the narration, the audio, all that. And then probably about, you know, it's going to be, you know, a month.
Or so from now, we're going to.
Merge it all together and be able to show you how to create ad creatives that with videos in them, combining everything together.
I will say one last point about this is we know that one of the best ways to promote Clickfunnels as an affiliate is through share funnel templates. So a great way is to change out the photo. So if you have a dentist or a chiropractor or Realtor, simply go through and you're gonna change out some of those photos using Mid Journey where you don't have to go through and look even through thousands of pages of stock photos, trying to find one, you simply just change the prompt and now you have a whole new funnel that you can send to somebody.
Yeah, definitely.
One of the techniques that Russell talks.
About and a lot of other guys talk about is you're working with mom.
And pops, brick and mortar, and you're going, okay, so today I got some insurance companies I want to go to. So you change all your images on there, you change your text to insurance companies and you give it to them. You say, do you want to buy this from me?
Now? You tell them at the time, hey.
This thing isn't perfect yet.
We're going to have to work on.
It, clean it up a little bit. But I can bang this out for you for X number of dollars. Well, the next day you're going to go after dentists. So you change it out that night, put dentist stuff in there, you show it to 10 dentists, and you see how many people you can get that want to jump on it. But with the use of AI now, you could very easily swap out out all the content, the images and the words very quickly. And again, some of this is built in and or will be built into clickfunnels directly at some point as well.
Yes. So without further ado, we're gonna play Dan's video.
Cross your fingers, and I'm sorry if the beginning is a little boring, but cross your fingers that this works.
Hey, V. And welcome to our Mid Journey training. Unless you've been living in a cave for the last couple of years, you know what's going on in the world of AI, you know all the cool stuff that we're able to do now, be able to create word documents, headlines, everything that you would use in your marketing, including images like you see here that can be created in Mid Journey. We can create videos, we can talk, create voices. I mean, everything is being created by AI these days. So. So what we're going to do here in the next couple of weeks worth of videos, just specifically on Mid Journey, is to walk through exactly what you can do. And as time goes on, there will be updated videos and other things coming because AI is changing at such an incredibly fast rate. So I'm not one much for fluff in my training. So we want to just jump into this thing and just get going. But I landed here first on the Midjourney Alpha page. A lot of people don't have access to this yet, so we won't be spending a whole lot of time in here. Especially in the first week or two of this course. But I just wanted to come through here and let you see some of the images that can be created with Mid Journey now. And it's only getting better. And again, these are images that you can create that you can use on your websites. You can use them in your videos, you can use them for ad creatives, you can use them for virtually anything you want. That's why, you know, the whole marketing world is abuzz right now as far as the stuff that you can do in here. Now, for Mid Journey itself, there are three different ways that you can get into your Mid Journey account or to create a Mid Journey account to be more accurate. And this is one of the ways. Right here is the midjourney.com webpage. Now, as of the recording of this In March of 24, most people, unless they've generated at least 1,000 images in the Discord version of Midjourney, they will not get access to the website version of it yet. And as you can see up here, it is Midjourney Alpha. But you can try going to midjourney.com and see what you come up with. Because with the old version of Mid Journey, when it was run exclusively on Discord, you could go to midjourney.com I think it was/, library, or slash, maybe my library, my dash library, and you could see all of the images that you had created. So just try going there midjourney.com you may get access to the alpha version here or you may not. If you do come in here, you can see a lot of different images in here. And so it's good idea to come in here and check these out anyway. And they got different ones. Top day of the week or top for this week, top this month. You know, all this kind of stuff. You can scroll through them. If you go back over here to Random, you can click on Randomize. It'll randomize them even further. But the really good part about this is you can see a cool image and you can say, okay, how'd they do that? What was the prompt that they used to create that? And you can click on it here and right up over here, it will give you the prompt. And so all you would have to do to do something similar, you just copy this, and if you're working in Discord, just go and copy it into Discord. Or if you're working in the Alpha version here, you just click down here in the bottom of prompt and it will feed it right into the prompt bar for you. You can Also go through here, and we'll find some here where they have an image. So right here they use this image prompt and we'll click on this. So here's an actual photograph, I think. Maybe not. Maybe that's an AI generator generation generated image as well that they used as a prompt to create this image here. And I'm just scrolling down right now, and as you see that, we're moving down this left sidebar here. So we got a couple of bunny rabbits here. Oh, we got a bird with bunny ears. But I'm looking for. So here's some more with some image prompts. So we click on here. This is the inspiration that they were using to create this image as well as this one right here. So the Midjourney website is a good place to come just to get some ideas. You click on Archive here. Actually, archive is where all of my images are that I have created over time. And there are a couple thousand of them in here. And again, we'll go through a lot of the techniques I use to create some of these down here. I was working with creating color palettes. And so again, you're building a website or something like that. You got a specific color palette you want. You can actually feed the color palette into Mid Journey and it will give you images and backgrounds and whatever else you want, logos that match your color palette. So I use this color palette right here to take this woman, and this woman I took from a different picture. So here I generated this woman right here. Then I generated these color palettes, and then I said, take that woman's face, take her picture, put it into the image and give it this color palette. So it took this person here and made her into these up here. So it's pretty cool what you can do in here. So here, here's one way to get into Mid Journey. A second way is to go into the. We're going to go over here to Discord and you can download it. I'm on a Mac, so it says download for a Mac. You click on that, you download it, and then it will come up and it will look like this right here, which is exactly what it will look like when we're working with it online in your browser. So we're going to just close this one out because we don't need that. And then we can say over here, if we want to work with it in our browser, which I think most of the time is easiest, because if you're working with it in the desktop app, every time you say, okay, I want to save an image or I want to view an image in the browser, it still has to go over to the browser anyway to open it up. So it's probably just easier just to be working with it directly in the browser. So you come over here and you say open Discord and it will open up your Discord right here. Now, if you don't have an account, that's where you're going to have to go and set one up. And so because I already have a Discord account set up and I already have a Mid Journey account set up, I can't fully show you exactly how to do it. So I got a couple of documents for you. The first one here is just go to discord.com right where we were here before when I clicked on the Download for a Mac or the Open button. And you're going to go here to Support and click on Support and you're going to come down here to getting started and you can just go through the whole thing here. You can click on where was it here? Discord Basics, you can click on that Getting started. You can whatever, you get the idea here, go through here and it will tell you exactly what you have to do do to set up an account. And you got to put in your account name, username and all that kind of stuff just like any other account you would have anywhere else. Then you can get it set up in here. Then the next thing we need to do once we get our Discord turned on and set up, what we need to do is we need to add the Mid Journey bot to it. And so let me pull this out of the way over here. We need to add the Mid Journey bottom. That's quite simple as well because you won't be seeing it like this. Yours will look like what we had over here before when I clicked on Open. So let's just go back to that for a second. So if you've never used Discord before, it's going to look pretty blank and you probably won't have most any of these circles over here. This bot right here is the actual Mid Journey bot. So we have Discord and then inside of Discord we need to run these bots in order to make the Mid Journey work. So in order to turn on Mid Journey, you go here and we say add a server, we would say join a server and then we would say don't have an invite. And then you go through here, you can search up here. But Mid Journey always seems to be this very first one here. Click on that let's see what happens. Yes, it took me right inside because I already had an account. So in your case, again, you would have to go through and set up an account. But if you have any questions on how to set up or run Mid Journey, you can. You're going to come here to docs.midjourney.com you're going to go to the Quick Start guide. And right here in the Quick Start guide it gives you all the instructions. So it says log into Discord, subscribe to a Mid Journey plan. Mid Journey is not free anymore. It used to be free, but you can get a basic plan for $10 per month. I forget if I'm on the basic plan or the standard. I think I'm on the basic, but I think we'll see that when we look at my information on the inside of my screen settings. And so then we're going to join the Mid Journey server on Discord. So again, shows you exactly how I just, well, didn't. Kind of different than what I just did it because I did the don't have an invite and clicked right there and then go to any channel and this starts walking you through some of the basics of how to start using Mid Journey. And this here is an absolute fantastic doc. And we're going to go through this a little bit more in detail today. Well, today again we're just doing intros, we're getting you signed up, we're giving you a walk around on this thing, we're giving you the docs. In the later weeks we're going to get into some of the in depth prompting stuff and different ways you can do things. Today I just want to teach you how you can run it so that you can spend some time in here, play around with it, learn some stuff, run everything and be able to generate a couple of images. And then in the coming lessons we're going to go much deeper into this. So now that we got Discord and Mid Journey set up, we're going to come back in here and we're going to come up to the top in case you're somewhere other than this. And we're going to click on not direct messages. I want to click on the Mid Journey bot is where I really wanted to click. And then we're going to go here to Channels and Roles and we're going to open this up and we're going to come over here to browse channels. Now these channels are what is going to show in your left side sidebar over here. And you're going to see there is just a ton of stuff that can be shown over here. Not necessarily everything is turned on to begin with. Some things are, some things are not. But just to know that you can turn these on and off over here based upon what you check in here. If you want building support to be turned on, you turn that on. If you want the rules, whatever you want. Right now we are going to go to getting started, which is our turned on. So we're going to go to getting started right here. And then again it just walks you through again some of the basics, some of the kind of the same stuff that we had on this page right there. Now if we go back to the channels and roles and we go to browse channels, as you scroll down here to the bottom, you're going to see certain things in here. Let me see if I can find the ones I am looking for. So like right here, the SREF showcase. SREF stands for a style reference. And so once we teach style references, you can go in there, you can talk to people about issues they're having problems, ideas that they have. And the same thing if you're into niji and you want to be making basically cartoon characters, that would be a place to go in there and talk to people. If you're, if you're building a tile format on your images, you could go in here and talk to people, people in there as well. Because whether you've used Discord or not is basically was built originally, I do believe, I don't know, is built for chat so people could talk to each other, have a community of some sort. And then they've overlaid these bots into here over the time. And so like I said, mid journey you can use that to build the images in here. So now one of the things they tell you to do next is go and find a newbies channel. Now I will tell you right now that all, all of the images that you create in here are public. You got to pay extra to have it be in, I think it's called stealth mode. Now we can, we're going to set up here in a minute our own personal server so that we're not having our images mixed in with everybody else's. But even at that I do believe that all of your images are public and everybody will be able to see them. So you can come in here and you can just start clicking around on these newbie channels and you can start seeing what other people are doing. So like over here, these are where were we under explore up here. These are all ones that were essentially upvoted by people and said, hey, let's put them, put them here. Because these are some of the best. These are also quite interesting. And you can come in here and you can see, okay, what are people's prompts. So here you have a very long prompt and a funny mood, blah, blah, blah, blah, blah. So we got a prompt right here. Here we got a prompt that's using an image as well. So we can click on that image. We can see this image here looks like the rock in that image right there. And so there's a lot of different ways you can prompt these things. Let me see if I got anything else in here. But for each one of these, you're going to see it's going to create four images for us. So we'll just keep scrolling through a few more. So you can click on all these different newbie things here and just keep going through. So now the one thing we want to do right away, and that's pretty interesting picture there, one of these things we want to do is we want to create our own server now. So let's do that right away. I have a couple of my own servers up here. They'll all be stacked up right up here at the top. And so what I'm going to say is we're going to come over here and we're going to add a server. Server and then we're going to say create my own for me and my friends. And then it'll always populate like your name and then the word server here I'm going to change this to something else. I'm just going to change this to click funnels and it should pick up now the C and the F and put that over here on the left hand side. So let's just see if it does that. And it did. It created, created a C and an F. And now I have a completely blank server with absolutely no images in it at all. So now we can create our very first image. And if we go back over here to the Mid Journey docs, it tells you right here to use at the bottom down there, we're going to use slash. Imagine everything in. Not everything, but a lot of things in Mid Journey inside of Discord are triggered by a slash. So, so let's just put in a slash to begin with and you're going to see a whole bunch of them here. Now, over time, as you type in a bunch of stuff, it will sort them to the ones that you use most often. In our case here we're going to be using slash Imagine a lot of the time. So we just do that slash and then we can put in an I. And so I started to type in imagine and nothing is happening. And that's because I created a server, but I have not put the Mid Journey bot into that server. So what we need to do is come over here and make sure we're clicked on the new server we just created. We're going to click this drop down right here and we are going to go to App directory and we're just going to start typing in Mid journey and then hit Enter. Need an M in there? So we'll go to Mid Journey, hit Enter and then we're going to click on Mid Journey bot and we're going to add that to our server. We are going to say, yes, this is the right one and continue and authorize and wait, are you human? Sometimes. And we'll see what we get here. And then we go to click funnels right there. Now it says down here at the bottom, Mid Journey Bot has joined the party. So now when we start typing in Imagine, there we go. Now we got our prompt. So we can come up here and click on it or we can just at this point here hit Enter and it will. Well, I should have put the Mid Journey or the Imagine in there. I thought it should have. There we go. And now we can put in a prompt. And as you saw with some of these others over here, let's just say we want to come in here and we're just going to steal this prompt from these bunnies here. And I shouldn't say steal because this is all publicly available information. We're going to copy out that prompt right there and we are just going to paste this in and we are going to hit Enter. Now you're going to see at this point that for some reason the beeping starts when I do this sometimes. So I'll try to minimize that as much as possible. So we have our prompt right here and then we have my account name. And then we're saying here it's at 32%. So 32% of the image has already been created and we are creating it in fast mode. So you're going to see the images coming in here. I'll cut out most of the rendering time going forward. But just in case you had not seen this before, we can now see what this looks. And now if we want to make this bigger, we just click on it anywhere and it will make it bigger. If we want to open this up in a browser, we can do that as well. So you can get a much better image of it here or much better look at it. And then so this is just in a browser window. So at this point here we can save this as a type or, you know, anything we want. But the problem is right now we got all four images that has been rendered and it will always render four images for you. So we'll come back out here and close everything. Now what if we want to work with one of these pictures individually? What we then have to do is we have to upscale one of these images and that's what the U's down here stand for. The V's below it that means to vary. So we're going to upscale or we are going to vary the images. And so how it works is this one in the top left is 1 and then to the right is 2, then the bottom left is 3 and the bottom right is 4. So let's say we're going to go with the first one here and we click on the U and we're going to get a new screen. And so we can upscale now subtle, we can upscale creative, we can vary, vary it subtly or vary it strong. And again, you got to kind of play around with these. I've had limited use with this and very rarely do I click on any of these here because I'm usually varying a region or something like that. You can zoom out 2 times or zoom out 1.5 times, or do a custom zoom. You can pan left, right, up or down. And you can also go, I guess you can give it a heart if you want. But you can also see this on the web. So we can look at this on the web. And again, what this did is it opened up in Mid Journey alpha for myself, it may not open it up there for you. And then once it opens it up in the alpha then you can start doing all kinds of stuff, stuff over here with that image as well, including if I move myself down a little bit. We can also download this image by clicking right there.
You can also.
Let's see what happens when we click on here. We can copy again, I'm in the way. We can copy the prompt, the job ID. The seed. Seed is like a 12, 15, 20 digit number that applies specifically to this for, for image project that we're working on. You can copy the image or the image URL and do a couple of other things in here as well. But again, we're not going to be talking about this version of Mid Journey So much today. So we're going to jump back over here into Discord. And so what I'm going to do is I'm going to click on a couple of these here, let them render and show you what happens as you click on different ones. So let's just start on. We're going to do upscale creative. Let's do. And that beeping noise started again. So I paused everything. But what I clicked on here is upscale, creative, very strong zoom out to X and pan left. So as we come down here it'll always tell you what it did here. So in this case here we got the zoom out so that we zoom out 2x that we did right there, there and we can. So we right here we got the bunnies close up. If we click on this, it's going to be much further away and you're going to notice then it fills in the remaining part around here of this room and gives you different variations of what the rest of the room is going to look like. And so then here we got variations strong and you can see here kind of rearranges the bunnies, the background, the furniture, the images, everything in the back are totally different. Here we got five bunnies, here we got four. Here we got five again, who knows how many there in that picture. So then we'll come down here. This is upscaled. So we took the image that we started with, was right here and it up resed it. So it's going to clean it up, make it a lot sharper, finish the rendering on the project basically and make it look a lot better. And that's a good looking image there. And then here we had pan left. So again we started with basically this image. And so it's going to add part over here onto the left hand side which is a cool way to finish out an image. I had one of, I told it to prompt me a Marilyn Monroe. Somebody looks very similar to her, but it gave me just basically her face. And so I said okay, well what's the rest of this room look like like? And I just built it out slowly. So I just said, okay, let's go up first because I wanted to finish up the top of her hair head, put some hair on there. And so then I get a couple variations on what I want the hair to look like. And then I go, oh, that's the version I wanted. And then you know, pan to the left a little bit. Okay, now this is the one I want. And if anytime you don't like anything that you just created, all you have to do is hit this picture, this little button right here, and it will re roll it for you. So you can do these over and over and over again. And also modify the prompts as you go along. I have not shown you that yet, but you can modify the prompts as well. So let's just do this. And now you can see on all of them over here we got a lot more to the left. And again, this one has a big window here, this one has a headboard, this one has a different headboard. And another big bunny rabbit got added in here. So it's just crazy the stuff that it will decide to put into these images. But now what you can do is so, okay. Oh, I like this one here where they put the mama bunny in here too. So we're going to take that one out and then we're going to start doing stuff with that one and maybe start building out more of the room. And again, a lot of this stuff you can use and it's pretty cool because what you can do is you can start like a close up of something and then you can zoom out. So let's say you zoom out 1.5, because you saw on here up at the top, we could do a zoom out 1.5. So you start like a close up of somebody's eye and then you zoom out a little bit, it gives you a little bit more of the face and you pick one of the four that you really like or you re roll it a couple times, you find when you like and then you zoom out again and you keep zooming out and zooming out and zooming out. Because what you can do then is you put those together in a movie reel and you do them backwards. And so then you start, start with a big out picture and you go zooming right in onto the person's eye or whatever else you want to zoom in on. And it's a pretty cool effect. And you can do it basically with this and then putting it into. I forget what the Adobe product is that I can't remember the name of that. You can put that in and do that with. And then you see here, with all these, in this case here, we can go take a look at that on the web we can redo the upscale scale. We can do all that. Gives you all kinds of flexibility on what you can do here. And then in the bottom we had our V1, 2, 3 and 4. So let's just say we like this one here. So we got our version number four. We're going to click on that. And what it did is it popped up this little dialog box here. Now on the ones I did earlier, it popped up that dialog box and most of them as well is just. It's just that you didn't see it because I had to pause it because the thing was beeping like crazy for some reason. But it's kind of intermittent when it does that beeping. But either way, we can now come in here, we can modify what this is. So this is going to be varying the image. And so we're going to say here instead of we got an AR. An aspect ratio is what this is of 3, 2. Let's just say we want to change that aspect ratio to 2, 1, just. Just for the heck of it. And let me see here, let me see. Five bunnies, selfies in the style of Wes Anderson in a film set. Let me see here. All wearing hats. Don't know if this is going to work out or not, but let's give it a shot. So now this is what we have. But you're going to notice here, when we use the V's down here at the bottom, what it did is it. It pretty much disregarded the images we had before. Whereas up here when we were going under the use, it will maintain that image and then just vary that image. It'll zoom in, zoom out, upscale, you know, vary the subtle and strong. But what you do down here is it pretty much disregards the picture altogether. So everything in the background here is completely different than the one that we used, which was right here to begin with. So if we had just done an upscale on it or something, they would have done that. But if you also notice here, it did put in the hats. So we got at least a couple of the bunnies here where this one has the hat in between the two of them for some reason. But otherwise they did a pretty good job of putting the hats on some of these. But now let's say we want to put a hat on this bunny right here. Let's just take a look at that. And. And so what we're going to do here is we're going to say upscale one.
We got.
We have hats on all the rest of them. So we're going to upscale this one. But now we're going to vary the region. So we're going to click on here and we're going to say vary the region. And let's get that to open. And what we're going to do is we're going to grab you can we got a square tool and you just make a square box like that if you want. And you can always undo it by clicking there. Or we can do this and we can put a hat. We can put an area right here where we want to put our hat. And so all wearing. Let's just put in here top hats and let's see if it puts a hat on this bunny. You know, let's blow this up and see what we have. And we got a top hat on this singular bunny right here. So got one out of the four correct. But you're going to see the rest of the image should have stayed exactly the same. Just change this here. The hat is a bit small, so maybe I needed to make my carve out a little bit bigger. So what I want to do here instead, and I'm going to test this because actually I've never done this before. So I'm going to do it live right here. We're going to say vary the region. And what I'm going to do is we're going to undo that and I'm going to actually do the same thing again. I'm just going to make it a bigger area. So let's just kind of go little bit bigger here. Just kind of match the size of the other ones. And then I want to just put in here. I'm going to take out everything else because I'm not sure about this here. What I'm thinking might happen is because we're now saying just put in a top hat, that what it'll do is it'll take the area that was masked out and just put a top hat in that area. So we're going to see here what it does. And I'll pause for a second. And it does not appear to have worked. None of these bunnies have anything. Kind of modified his ears here a little bit. But it did not pick up that we wanted a top hat where that area was cropped out. So that's. That's good to know. This cropping thing or what do they call it? Varying the region or infilling, they also call it. It's hit or miss. Sometimes I've tried to do things like I go in and say, okay, put in a red band on this hat that somebody's wearing. And I've never been able to get it to do some of that fine micro detail. But what you can also do is you can just come in and we're going to say vary the region. And what we could do is on all of these is we're going to vary the region. And so what we're going to do is just kind of. You have to kind of loosely cut it out. You don't have to be that crazy and close on it. But let's just see if it will take out the hats all together. And we lost our. We lost our. I'm going to pause here for a second. We had lost our prompt, so I'm going to put that prompt back in there that we had, and then I'm going to do these hats again. And let's see what we got here. Like I said, you don't have to be exact. I shot a different video one time showing that actually, in some cases, you're better off going a lot bigger. In other cases, you don't have to go that big at all. So we're going to just click on this, and we're going to see what it does with the top hat. So let's just. In fact, we're going to change this here. Instead of wearing top hats, we're going to change it to wearing cowboy hats. So let's see what we have. Okay, we'll click on that and we will pause. And that does not appear to have done anything at all. May have changed the hats a little bit. In fact, it did change. This one here has got a band on it. Now. I don't think it did before, but for the most part it did not do that.
Okay, I want to jump back in here real quick and show you how.
We can remove these hats completely. I didn't have much success turning them into cowboy hats, but we can remove them completely. If you recall, the bunnies had no hats. We put on the hats. Now we're going to remove them. So what I did is I painted around here, but I went pretty wide of the hats themselves because I wanted to really get everything. And I found in a lot of cases, you want to go extra wide. You don't want to cut it really close because it.
It won't do it.
Well, you just have to go bigger because then I think it picks up more. The background is what it really needs to do it. And so I took out here than it said before in a film set wearing top hats. And so I took that part out and then I put in a negative prompt. So it's a parameter of no dash, dash, no hats. And so we said no hats. And like I said, I cropped it out. I mean, I'm over the bunny's face here even at this point. And so then I ran that and we'll scroll all the way down to the bottom to show you what I came up with. So I came up with this. It did a pretty good job. But you can see, see there's still some garbage in between here and here and behind his left ear right there as well. So what I did is I came back in, I guess let me go into the very the region here. And what I did is I just went in, I left the prompt alone, but I just then masked those areas where those brown bits of the hat were sticking out. And this is the result right here is all of the bunnies got cleaned, cleaned up and we got all of the hats out of there. So that works great to remove objects from something. I actually found better results removing stuff than changing stuff. But you can also completely change somebody's face. You can do a face swap on it. You can change out their hair, you.
Can change out their clothing, the type.
Of clothing they're wearing, the color of the clothing they're wearing, the car that they're driving. Anything like that can be done. It just takes a little bit of practice and a little bit of luck. So let's keep moving on here. There's a couple more things I need to show you. And one of them is come down here to the prompt bar again. And we're going to put in slash settings and we're just putting se. We'll hit Enter. Hit Enter again. And this is where we can change what our settings are. Now one of the things I think normally it will come as well. In fact, let me just reset the settings to see what it comes as. So this probably is what it normally comes as. So we have here version 6, there are different versions of Mid Journey and we had I guess version 6 Alpha of the Niji version, model, version 6 of Alpha. And so then this must be the default now must be the beta version of v6. So alpha version came out I think in December, so. So it's only been four months. And in general, you start off with Stylize of Medium, it will be in Public mode and Remix mode. That's what gives us the ability to be able to do the vary the region and also to be able to, when we click on any of the V's down here that we can also make changes there and a couple other places. So you can change what the prompt is as you're going along. You need Remix mode turned on. You want fast mode. If you use Turbo mode, it uses up your credits really quickly. So you probably want to stay away from that. And as we go along, we can change all of our prompts using what are known as parameters. And I will show you those in a few seconds here. And one other thing you definitely want to know how to do in here. And again, this is just beginner stuff to Here's a lot more stuff to teach you. We're going to put in slash info and we're going to hit enter on that and it will show you some information about your account, including the number of images you have generated. I'm just a little hair under 2000 images myself. And the number of hours you have left. I just renewed, I think yesterday. So I still have 15 hours. So I used 0.25 hours in the last day, and I've generated quite a few images in the last day. I don't know how many images it takes to use up an entire hour of time. Now, if you have a dialog box that popped up like this, you can get rid of it simply by clicking on Dismiss message. And so we'll dismiss both of those. And then if you want to delete something, there's a couple ways to do it. You can come over here to these three dots, come down and delete the message. Or you can right click here and delete the message. Or you can also just hold down the shift shift key and come over and you see this little red garbage can pops up. You can just click on that to delete it as well. If you want to reroll a prompt that you had already done recently, you can use Command Z. So we click on Command Z, we got info and we got settings. And then if I keep going, apparently it doesn't want to go back, so it only let me go back to is what it appeared there. So let's do this. Let's. We haven't done this one yet here. So we can click on this and we can re roll this image and we can see what it looks like when we create another one. And now if I click down here at the bottom, we can hit Command Z and it still isn't working right. So that's hit or miss as well. And I was also told you could like click the up arrow and that might bring you somewhere, but it doesn't seem to work half the time either. Now the other thing we can do is so a lot of times you'll be using an image and you'll be, you know, 57 variations away from it, and you don't want to have to be scrolling up to try to find it. So you can just come up here and click on this and it will take you to the image that this came from. Well, that was just this image here, but we can click on this and it took us up a little ways to another image and this will take us up and we're just going to have to keep going up slowly, apparently in this case. But sometimes it also goes up much quicker. So that's a way to again, scroll back up to see basically the parents, the parent images of the ones that you are currently working on. So one last thing I want to talk about today is the prompts themselves, because that's really the huge thing that's going to take weeks and weeks to go through of all the different things you can do to prompt, especially if you want realistic, lifelike looking human faces and images and stuff like that. And again, as the models get better, Midjourney seven, supposed to probably be coming out sometime later this year, as they keep moving along, the quality of the images is always going to continue to increase. But you're going to see here what we had for this prompt that we put in is right here. And in fact, I could reroll it again, but we don't need to. You've seen this. So here we got a long prompt and then at the end it says dash, dash, now the dash, dash, anything at the end is known as a parameter. So let me go into the Mid Journey docs here because again, you want to go to docs.midjourney.com and go through this document. So that's why I gave it to you. It's your assignment this week is to go through this document, learn as much as you possibly can, start prompting yourself. Also come over here to the Mid Journey website. Go through some of these prompts in here. Come into Mid Journey itself. I'm sorry, come into Discord itself. Click on the Mid Journey icon. Go into some of these newbie rooms, check out some stuff there. Go down here. And the same thing with these general rooms here. Any of these general rooms have all kinds of stuff that people are generating in there. And then as well, like I said, some of the other rooms where they're talking about specific, specific things. I'm looking for the one called sref, like the SREF Showcase right here or the Tile Showcase. Go through these rooms, look at what people are doing, how they're doing it, and then start generating some images and just playing around with it. I mean, that's all I want you to do this week is just play around with this here and then when you come up with some really cool images, what I want you to do is drop those images into the group as a comment for this video right here. And then also what I want you to do is put in the prompt. Always put in the prompt when you're doing this so that all the rest of us can then go, okay, that was great. I'm going to go here and grab the prompt that you were using, put it into my mid journey and see what I can come up with, what I can play around with. Because again, that's what they're doing over here is they give you all the prompts, they give you even the images that they were using to help with these prompt. But so if we come back into the mid journey right here, it goes through what is the basic prompts. So again, it says a basic prompt here as you do your slash. Imagine, of course, don't forget to do that. I forget to do it all the time. And then you put in your prompt, it says description of what to imagine. Well, you start getting more advanced stuff down here. You can put in an image prompt. We had seen that earlier where they were using on the Mid Journey site right here. Let's see if we can scroll down again and find one. Oop, there was one right here. Using five different images in different ways to prompt this. So you can use it as an image prompt, but you can also use it as a style reference and you can also use it as a character reference. So if you want consistent characters from one image to the next to the next, you can actually put in the character references and it will make the images look very similar. You saw the one I did earlier with the woman with the blue background is I did several versions of that and every single one of them looked just like her because I used that character prompt that I had generated inside of midjourney. So we come back in here. So you got your image prompts. So you can put in here you have your text prompts. And then we have our parameters. Got a bunch of notes on prompting here. Again, we're going to go in depth in later, later episodes here of exactly what we want this to look like. But here we got like on the medium here we got a photo, painting, illustration, sculpture, doodle, tapestry. So what is the medium you want this, this image to be put on? Do you want it to be a painting or do you want it to be an image like you would see on Instagram? You got your subject, your person, animal, character, location, object. All those things go into your prompt the environment, indoor, outdoors, on the moon, lighting, soft ambient. You see it all right here. So again, get into this doc and start looking at things. We got explore the prompting here. And again, here we go. Pick a medium. So we got different mediums that you can have.
And.
And the sky is the limit. Realistically on this. You can put in just about any English word and it will figure it out. It may even be able to do words from other languages. I don't know. And so then we got, you know, different time travel emotes. So let's just, let's just put in the word sleepy. Let's just come over here and come in here and do nothing else except just put in the singular word sleepy. Let me go back up here, get into the right server. I could have been in any one, but I think I was in one of the newbie channels. And so we're just going to paste in the word sleepy and we're going to see what this gives us. So this is the result here for sleepy. And let me blow that up a little bit. So that looks like somebody who's sleepy, but it also looks like basically a watercolor image at this point, because we did not specify anything here is just the word happy. Again, it looks like some sort of a painting of some sort. But now let us change this one here for sleepy. And I'm going to say Instagram model Sleepy, because that will definitely indicate that we want an actual real image and we'll see what that looks like. So because I want to reroll all of everything, I don't want just one specific image. I just hit the circular icon right there. And so we're going to say, now here, Instagram model Sleepy, and we'll click on submit. So here is the result for Instagram model Sleepy. Obviously totally different than the watercolor images we got earlier. And so now if we click out of here now, let's say we want to add some parameters to this and we're going to reroll this. And so anytime you put in a parameter, we just put in dash, dash. And let's just say one of our simple parameters is aspect ratio of 2, colon 1. And instead of sleepy, let's just make this, let's wake this poor little girl up here and we're going to say happy instead. And we will click on submit. So here is our result for Instagram or Instagram model Happy. Now, we didn't tell it to pick a woman. So apparently Mid Journey thinks that all, all Instagram models are women. So I guess why don't we test to see if we can get it to come up with a man? And now we have a male Instagram model, Happy. So you see every time you change a word. Now if we were to re roll this, we're going to get four totally new guys. So let's just do that real quick. And I've got to click out of here and we will reroll it. And now we got four totally new men than we had in the other. And then let's just go back up to our gals up here and let's just say we're going to take number one here. We're going to say we're going to click on the V1 and we're going to. Then it should. Let me see here. Do I got a. Okay, click on V1. Here we go. Lets us make any changes in here that we want. And another one that we could put in. As far as a. As far as a parameter. Let's just say here we want to do stylize. So we just do S and then a space and we're going to say we want stylize of 500. So it's going to really give Mid Journey a whole lot of latitude on what it's going to do. And again, we'll go through what all these parameters are in later stuff and they're also all in the guide as well. And we will click on submit there and we'll see what this gets. Because it should give us that same woman, variations of that same woman, but they will be very highly stylized if they look like her at all. So we'll have to see what that looks like. So here is what she looked like to begin with. Let's see what we came up with. For images down here at the bottom, I would say they don't really quite look like her. And again, because I was messing around with the stylized that might have had to do with it, maybe if I put in Style Raw instead, it would have gotten it closer to the original. But again. So your assignment for this week is to get your discord set up, get your Mid Journey set up. Set up your own private server and then also go through the Mid Journey images and get some inspiration there. Go through the newbie channels, get inspiration there, the general channels to get inspiration in there as well.
Maybe meet a few people, talk to.
Somebody if you want in here. And then go to docs midjourney.com and start going through here. Because again, it gives you all kinds of different ideas. Right? We come down here to the prompts, it gives you more ideas on prompting again, different commands you can give it again, this walks through upscaling and vary the region and stuff like that. You can go through here and learn that here we're going to do something with this crown on the chipmunk right there. And then as you get deeper in here, it will talk about how to do style references and image references and character references and stuff like that. And then as we get into the later weeks, five, six weeks into this here, we're going to be going into some really high level stuff. How to be taking different images and matching them with certain prompts that will give you photorealistic, I mean really realistic pictures of people. Even though some of the stuff we just generated here, wherever we were here, starts to get pretty realistic looking at least some of these, but even, even better. And then we'll also go into things of where so you got this person here. How can we take and say, okay, this is great, I like this, but I want this exact same picture, but I want to have it at sunset with a lot of yellow in the image. So we'll show you how to use color palettes and how to use images to set up the style for existing images that you already have created as well. So that is it for today. If you have any questions, let us know. And again, as you find some great images as you're creating them, put those images into the group along with as a comment with this video along with the prompt that you use to create it. And that way we can all learn from your experience. So. So again, if you have any questions, just let us know.
Hey, I learned something. I learned quite a few things watching it actually.
I figured you were such an expert you would know all this stuff already.
No, I think like that's a good point about like how fast things change, right? Like how much like and that's the whole point of like why we're doing this is because like you can't go out and learn ads and funnels and AI and marketing and copywriting all at the same time, Right. So if US Ambassadors can bring you these little nuggets, that's like Cliff Notes, right? Too long, didn't listen. If we can bring you these nuggets that you can help to implement get faster in your business, that that's really what I feel like we're here to do in this group.
Yeah.
And for me personally, I learn mostly by watching videos.
That's really my best way of learning.
Reading is not it? But so for me and actually, be honest with you, the best way for me to learn is to have to shoot a video. Because, you know, Steve Larsen, talk about learn for two. You got to learn it to the point where you can actually teach it to somebody else. And so it. It helps us by creating these videos. And hopefully it'll also help out the community to see what the possibilities are. And also just to, you know, some people, I'm sure, are just afraid to go, oh, man, I don't.
I don't know.
I mean, I'll tell you, up until realistically, December, November, December, I was just.
Like, you know, I'm not really going.
To worry about this AI stuff. And then Madison showed me some stuff, and I just like, maybe it's time for me to learn this AI stuff. And so I've really dove into it headlong ever since. And so that's why, hopefully we're going to keep doing this series and just keep giving you as much as we can twice a week about AI and how you can use it in your content creation and your marketing and your funnel building to hopefully get yourself to that2 comma club.
Yeah. And in credit where credit is due, I was in that same spot with Danny Walsh. So Danny was the one that really pushed me into diving into chat gbt, and then, you know, down the rabbit hole we all went.
Yeah, yeah, that's, you know, so I, you know, the funny thing is, part of the reason why Madison knows Danny.
Is because I had.
Was interviewing Danny on my show talking about basically, what was it, Shopify kind of stuff. And so it's kind of come full circle now that, you know, I. I was basically taught AI by Madison, and now. Now we're teaching it to the group. So it's all a virtuous circle, I think. Virtuous word. I think that's a good word. So.
So Tara's saying she's loving it. She loves all of this stuff. And so I think today was a hit. If you enjoyed today, come back on Friday. We're going to go over some news, some AI things, some things that you maybe are not aware of. Full alert. SORA did not release today. That is an April Fool's joke. I showed it to Dan. He got all excited, and I'm like, It's April 1st, Dan. We can't show it on the show.
I've never been a fan of April 1st.
You know, you got to have your guard up all day long.
Yes, 100%.
Yeah. So.
All right, well, that's all I've got for today. Unless you got something else.
Madison, we can probably get out of here.
Monday, Fridays. 12 Pacific, 1 Mountain, 3 Central, 4. No, 2 Central, 3 Eastern, 3 Eastern.
Yes. Yes. Okay.
So that is it. We are out of here.
We will see you all on Friday then.
Yes, we will.
Take care. Bye.
Bye.
More from Madison

STOP Selling Like This! Do This Instead 🔥 (Marketing Secrets) #digitalmarketing #contentmarketing
The #1 Reason Your Funnel Is Failing (Fix This!) #digitalmarketing #clickfunnels
Hook-Story-Offer: Simplify Your Funnels Today! #FunnelsMadeSimple #DigitalMarketing #RussellBrunson
Funnels 101: Stop Selling, Start Building Relationships! 🚀 #ClickFunnels #FunnelsThatConvert