How to Set Up Your YouTube Mic, Camera, Lights & Workflow (Full Guide)
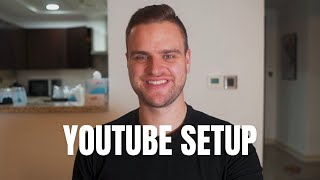
Matt walks through a complete YouTube setup for B2B creators: Sony ZV-E10 camera, Sigma 16mm lens, podcast-quality USB mic, OBS for recording, CapCut for editing, and Auphonic for AI audio processing. He covers camera settings, lighting, and an automated workflow using Dropbox to cut editing time.
Questions this video answers
Sony ZV-E10 — US$698
Sigma 16mm (fast aperture down to f/1.4) — US$405
14k subscribers; over $2 million in revenue; 546,000 views (≈$4 per view)
Boom arm placing the mic about 3–6 inches from the mouth
4K file format; record setting 24p 100M; shutter speed 1/50; ISO 100; aperture as low as lens allows (e.g., f/1.4)
Chapters
Hey everybody, it's Matt. And in this video, I'm gonna go over exactly how I would set up your lighting, your camera, your workflow, all of that kind of stuff so you can make B2B YouTube videos like me. And the reason that you should make B2B videos if you aren't already is because they are probably the number one source of leads in 2024 and 2025 as well. So about the video I'm gonna make here, it's going to be divided into a few parts. And what you'll be able to do after you've watched this video is you're going to know what equipment to buy to make your videos look professional. You're going to know how to set up and use all of the software that you need to use. You're going to set up your video, your camera, your lighting, all that kind of stuff to make you look as good as possible. You'll be able to set up your sound and audio to make it sound like a podcast without having to spend 50k for a podcast studio. And then to wrap that up, you're gonna save one to two hours per video, downloading, uploading and optimizing. So this is what worked for me, and this is what I've been doing in 2024. And this is the exact setup and workflow that I've used to go from 0 to 14k subscribers. And 14k subscribers is not a lot when you Compare that to MrBeast or any of the entertainment videos. But I've done over $2 million in revenue directly through YouTube by selling my services, products and other offerings in. So you shouldn't really think that you need to get a ton of views if you're going to do this for B2B. The goal is not to generate a ton of ad revenue. As you can see, I've done over 2 million this year and done like 6,000 in ad revenue. That's basically nothing in comparison. And the interesting thing is 2 million divided by 546,000 views is nearly $4 per view. So if I was to get a video for, to get a thousand views, for example, we could almost say that's worth $3,500 to me. And it's just very interesting to break it down like that when you're trying to do it for yourself. This is going to be what I would say, classroom style content. So get a pen and take notes. There's not going to be any editing or scripts or any nonsense like that. I'm going to try to make it as engaging for you as possible. But I'm going to prioritize getting you the information you need rather than, you know, being entertaining. I'm going to go over the equipment you need, the softwares, you need the how to set up the softwares, how to set up the audio, how to set up the video, and then how to go over your production workflow, if that is what you want to call it. So let's start off with the equipment. And I've gone through quite a bit of different equipment and asked around and asked my friends and fellow YouTube makers what they do. And we've kind of all settled around like, this is the best kind of starter equipment, but not really starter equipment, but, you know, the best bang for your buck in terms of value. So this is what I would think is the optimal setup for someone who's gonna make YouTube videos like you're watching right now, where it's just me on the screen, you know, reading an asset, you know, decent lighting over there, decent camera quality, decent sound quality, but it's by no means the one you would use if you're doing action videos or vlogging. You can whine about this being expensive, you know, but if you're committed, you might as well buy it now. One of the mistakes that I made when I was doing this was I would end up basically getting, you know, not the best quality stuff, and then I would have a little bit success and then try to upgrade it. And then when all is said and done, you know, buying 10 different cameras, buying 10 different mics, and all of that kind of stuff really just made it more expensive. So all in all, this should only cost a few thousand dollars. It's not like it's going to cost 50,000, but if you truly can afford it, it's going to be up to you to figure out what you're going to buy. I'm going to only give the options that I recommend here that strike a nice balance between affordability and performance. But there are some good budget options, and you can just Google it. What you're going to get, like 90% of the value is going to come from the actual content anyway, not the production value. So the first thing that I recommend is this Sony ZV E10 camera. You can get it on Amazon. This is going to be US$698, and that's the one I use. Like, you can't see the camera, of course, because I'm looking at it, but that's exactly what I have on my tripod, looking at the camera. The next thing that I recommend is this is attached to it is the Sigma 16 millimeter lens. So if you kind of go here, for example, you can see it's kind of like a little bit blurry in the background. Not crazy blurry, but just enough to give, like, myself most of the focus, so to speak. And that is what the Sigma lens does. So you can get it to the 1.4 down to here, as opposed to probably a 3 natural. If that doesn't make any sense to you, you don't know what that means. You don't really need to just follow this guide. It's just to do with the blur background that makes you kind of the subject of the shot. So this is gonna be $405. So basically we're at about 1100 dollars for the setup right now. Honestly, if you're going to cheap out anywhere or get a budget option, the tripod's probably where you want to do it. Again, like, you can't see this, but my camera, that lens are on the tripod right, you know, right here. And this is just a nice, good tripod that I like to use in order to, you know, hold my camera still at the right eye height and all that kind of stuff. When we're doing it, we want to try to set up our camera at eye level as good as possible. You know, if you have a very, you know, how would you say big kitchen table, like you might have to. Or big desk. You might have to get a different one because this one has kind of a minimum height. But it's very good, very cheap, and it's very durable and sturdy as well. The next is lights. And lights, I think, are even more important than the camera because the lights, even if you have the best camera in the dark, if there's not an ample enough amount of light, you're not really gonna see anything. So the three things that I think maybe four that you should get in terms of lights are you get a softbox diffuser like this. Get a continuous light that will basically is right here in this situation. Get a stand for it to be on. And then even better, like a bonus, and it's cheap. Get a remote control outlet so you can turn it off and on when you with just from your phone app, instead of having to climb up there, because it's going to be, you know, these controls are right where my mouse are at the end. And you're gonna, you know, you don't want to climb up there, especially if you're a Shorter person and try to turn it off. So this is one of the biggest hacks, but these are really what you want. So 100 bucks here, 200 bucks here, another 125. So maybe 400 or 350 bucks maybe with tax and this. So this whole setup's going to cost maybe 1500 US and maybe if you're just starting your business, that might be a lot. But if you're in business for a while and you're going to take this seriously, you might as well do it right from the start. This stuff is not that expensive, especially if you have any sort of revenue. And it's gonna make your videos look so much more professional, which really matters when you're making content in terms of, you know, how good you look. The next is the microphone. And the sound quality, in my opinion is more important than the actual, you know, camera lighting setup. And this is by far the best microphone for its value. It's a perfect podcast quality mic. But you can also use a USB C. And if you want to buy an XLR only mic, just make sure you know what you're going to do or know what you're doing and have the sound box and the mixing box before you buy it. It's going to be slightly better audio quality, but you're going to need the mixing board, more cables. You need to know how to set it up properly. And for the purposes of making business YouTube videos, for example, I would not say the juice is worth the squeeze on that. The final thing I would always recommend is a microphone arm. Like you can see it. If I pull up my stuff here, my microphone's right here and that's the one I talked about in the previous one. But we also really want to have the microphone arm because we need to have our microphone like our voice, speaking directly into it. Because if we don't have that and it's far away, you're gonna get a lot more background noise. You're not gonna sound as crisp or as sharp. And the boom arm, the adjustable stick or the adjustable stand is just something that's going to be able to hold it exactly where you need to and get the best quality sound possible. Now that we're done with that, we're going to go into the software and there's a few different softwares that we're going to need. We're going to need obs. This stands for Open Broadcast Studio and that is a free recording software that you can use. You can use it for Windows, Macs, Linux, whatever you want. And it's on the other screen here. But this is what I'm recording this video in right now. You can see all of my stuff here and I'll show you that in a later part of this video. The second one that you want to get is going to be Cap Cut. And capcut is just a very beginner friendly free video editor. It's made by the same company that made TikTok. You can use any sort of Adobe product or something like that, but this is free. It's a lower learning curve and it's just very, very good. You might want to pay the $10 per month for the premium version because you're going to get better audio and tools and stuff. But it is free. And then if we go further into our workflow, we want to get something called a phonic. And this basically is an AI powered sound engineering app. So when I'm done recording this video in obs, the file will go into that and it will make my already good sounding audio even better. And that's effectively all you need to know. I don't think you're interested in the ins and outs of AI powered sound engineering and I'm not an expert to tell you, but this is going to really be the basis of your workflow and it costs $12 per month and it's so much better. Even if you don't have a great mic or acoustics in your room, it's just going to make your audio sound that much better. So what I do is I film the video like you're saying here, and then I have it run it through a phonic and then I upload it to YouTube and it's just probably two to three times as good of sound quality as if you didn't do it at all. Sometimes if you have a really bad mic might even be better than two to three times. The next one is Canva and you could either do this yourself or hire someone. I think it's a good idea to go through YouTube videos like training ones at the beginning and learn how to make good thumbnails and learn how to take good thumbnail photos. I really haven't done that. So it's kind of do as I say, not as I do here. But you can either do that or you can hire someone. And Canva is just a very easy place to do that. Next we're going to talk about setting up the scenes. And this is very important part of it because you have a lot more flexibility with your videos when you have the scene set up correctly. And this is going to be inside obs. So if we go and do that here, we want to do this before we really configure our microphone and our camera. And I'm going to show you how to do this on the screen, don't worry. And we want to do that because here is the example of the scenes down here. And you see if I click the talking head scene, if you can really see what I'm doing there, that's going to go here. If I click my bottom right scene, that's going to have my face at the bottom of the right. Or if I want to do screen only, it's going to be something like that. So if you don't do this before you set up your camera and your mic, you're going to have to redo it. So you better as well do this first. So what we want to do is I've already done this of course, but we're going to want to make, you know, talking head example. The mic. And we want to select our shure mic. We want to take our video capture device and we want to select our camera. See basically and we want to probably drag it all the way. So I've basically just done that, right? So you can see that on the screen hopefully. And basically what you'd be doing is hopefully it's not screwing up the audio, but basically with that is, you know, you just have your talking head, you have this one in the bottom of the right and then you have the screen only. And what you can do here is basically let's go back to my face there, kind of screwing up around here. And what you want to also do is make sure this here where my thing is is set to cut instead of fade. So the scene number one is the talking head. And that purpose is just to have you on camera. Correct. So if I want to do that one, I will just have me like that and that's going to be my face. If you want to do number two, which is the screen plus the talking head at the bottom, we have it like that. And that just shows that I'm here. But it's really a screen share if the situation arises where maybe you might hear at the bottom of the right and it's cutting it off or you're basically, how are you saying? You just need to zoom in. You might do this where you just have the screen only just like that. So it's up to you. There's many different options and it's kind of, you know, what fits the criteria at the time. So what we need to do here is we want to set up the hotkeys so this is when we're actually recording in real time. We want to be able to transition between the scenes and we do that. And you can kind of click right here if you wanted to. But we more likely or more reasonably want to do that by setting up. So we have our scene here. Bottom right is my command two. On my Mac screen only is command three. And then talking hit is command one. So if I put these through there, you can see I'm just clicking the buttons on my screen and it's going between all of them. So that's just very nice. So the next thing that we want to do is the audio setup. And this is of course, a very important part of the video. The first thing is we want to speak into our mic correctly. And we. If you get the microphone that I've recommended, you speak into the mic kind of right at the top, kind of intuitively. But there are microphones where. Let's just have my phone out. You kind of speak to them like this, where you'd have the microphone like this. It all depends on what kind of mic you have. And this is very, very important to understand. So take five minutes to read the instruction manual or search it on YouTube, because if you're not speaking into your mic correctly, you're kind of screwing up 50 to 70% of the sound quality. Very, very important. The next is going to set up your boom arm and you want to have it at a height that's about three to six inches from your mouth. And almost all boom arms will be able to put at that height. Another thing to consider that not the end of the world, but I would say a bonus is put your boom arm at the opposite side of your mouse. So if you're right handed, put it on the left side. If you're left handed, put it on the right side. And that's just because sometimes I've found that you can kind of just bump it with your hand. Not a huge deal or situation, but it's very important that you don't do that. The next is setting up the audio in obs properly. So you're going to need it connected here, which is why I said to do that first. And if you don't, you're going to have to do it again. So what we want to do here is we want to go to our mic and it's important that between all of our scenes, we have the same mic. See how mine's Mic do not delete, mic do not delete and mic do not delete. To set it up individually for all. You can set it up 1 and then copy and paste it in between. So that's an option, but just make sure you do it properly. So the first thing we want to do is, and we want to have these in the exact order that they're presented, because if we don't, then, for example, like, this is the priority. So it's going to noise, it's going to suppress the noise first in this order and then it's going to add gain and then it's going to do an equalizer and then it's going to add the expanding, etc. If we did noise suppression at the end, for example, it's going to basically noise suppress after everything. So it's kind of, it's not going to suppress the noise properly. So let's turn these off for a minute. So to give you an idea of what this might do, this is my audio with them off and this is with them on. I can't hear it in real time, so I don't know what the difference is, but I've tested this quite a bit and it's just going to give you a much more crisp and clear output. And it might not sound like a lot. It might sound like a lot, you could be the judge of that. But this is with the ideal microphone setup. If you have a poor quality mic or something else, this is going to be even more important. So if we go back here, we need to understand what the green, the yellow and the red zones are. This is a very important thing. So you see here, if we want talking normally into the microphone to be, you know, at the beginning or maybe even in the middle of the yellow zone. So if it's not, it's kind of not. You don't have enough gain. And we'll go that later. And if it's going into the red, that's just an example of you're going to hit, you know, too much, it's too loud and that kind of stuff. So we always want to be in the middle of the yellow, give or take. When talking normally into the mic, Very, very important thing to do, understand and do. So set up your mic, set up your boom arm right here so that, you know, that's a good basis for what you're doing. Because if you, you know, all of a sudden your arm's set up incorrectly and your mic's not working and all that kind of stuff, the settings that you're going to put. The filters you're going to put will have to be redone just because the situation and the circumstances have changed. So the first is noise suppression. So if we go back and I put this back on my screen, not properties filters, we're going to have an RN noise. So this is good quality, requires more CPU usage. If you have a Nvidia background card, there's going to be different options, but this is going to be good enough. And this does not require any fine tuning or anything. So you just kind of turn this on and that's that. The next thing to talk about is we want to go into the property and filters again and we want to basically do the noise suppression and then we want to go to gain. So what we want to do here is we see the green and the yellow and the red here. We want to either increase the gain or decrease the gain to kind of change that. So if I increase the gain quite a bit, I'm talking the same basically volume here and you can see how much louder that is versus if I change the gain down, I'm still talking the same amount of volume. I'm talking at the same voice level, but you can see how much quieter that is. So what we want to do is basically change our gain with this toggle here to make it so our audio goes into the yellow zone when we're talking normally. So mine is usually going to be set at about 2.5 decibels. You might have to talk or you might have to set it louder if you talk quieter or softer and maybe even go negative if you speak softer. But it's just a matter of finding what is right for you. So this is one where you will have to do some experimentation and figure it out which one you're going to do yourself there. And the next one is the three band equalizer. So basically there's different frequencies in everybody's voice. There's low, there's mid and there's high. So you can basically screw with these a little bit and add some more pitch to your voice, add some more bass to your voice, all of that kind of stuff. So if I'm just talking normally here, you can see how the audio changes and you can do it high, low, whatever you want. I usually set mine at about 2.5. I found that's pretty good for my particular voice. For the mid, I usually set it at minus 2.5 and you can see how it's going up or down. And my voice sounds different if I do different stuff. In here. And then for the low, I don't really change it. I usually leave that at zero. It can start to sound a lot weirder when you do at different levels. So just do it. At least start at the settings that I have, I think, and then kind of fine tune this one yourself. So it's very important that you just kind of record it and see and record it and see and spend maybe 10, 15 minutes doing that. The next is the expander. So basically what the expander does is. How would I explain this? You have different stuff, right? So let's just say my voice is what I want to be captured. But if I was gonna clap, if I was gonna bump my boom arm like, or tap on the desk or whatever, you use the expander. So that stuff below a certain volume threshold just doesn't get picked up by the microphone. So background noise, keyboard typing, like if you have a fan on in the background or there's a hum, don't get picked up in your audio. But your louder signals, your voice, you know, an exaggerated big clap like that will. And this does require fine tuning as well. So what I usually do with my original settings is I'm going to put it at a 3 to 1 ratio. I'm going to put the threshold all the way down. I'm going to set the attack at 1 millisecond, the release at 100 milliseconds. And then if you want to change the gain, you can. If you're going to change the gain like that, normally you would do that at the gain level. But there are some situations where you do this in here. Not many in terms of this kind of YouTube video, but if you're doing like action shots, like, or something like that, you might get into that or vlogging or something like that. Not really. For our purposes here, the compressor is basically kind of what it does is it's going to reduce loud sounds that go above that threshold. Like, and that threshold is like, we're talking the green, the yellow and the red zone. So it. If something is overly loud, it's going to tone that down a bit to get it back into the yellow zone. So really, like, no matter how loud I talk, because I'm talking louder than I was before, you see how it was kind of the same volume and that's the work of the compressor. And you are going to have to screw around with this a little. But we're gonna start with that 3 to 1 ratio. I have a negative 20 decibel threshold 1 millisecond. Attack 100 millisecond release and then a zero output gain and you're just kind of gonna play with that a little bit. The final thing is the limiter. And we're gonna set this at 0.1 decibels all the time. Because if you see this, if you scroll in and you. I don't know if you can scroll in, but basically if I'm going to talk in the loud part there, that maxes out at zero. So we want to just do. It's never going to get higher than 0 point negative 0.1 decibels. So it's just always going to cap out the audio if to avoid it going overboard type thing. That's really, I would say all you need to know for audio. Get the good quality mic, but have those filters and obs to make it sound even better. So the next thing is the camera setup. And this is going to go over the camera setup that I told you to buy. So this is the one you're seeing on the screen as I'm talking right now. And I'm gonna have images for all of these, but I stole these from someone else's YouTube video and some from Google. These are not my original images, but they're gonna do what. What it is that we need to do. Again, that before I start here, that these are what you'd use for like a very talking head style, instructional style YouTube video like the one you're watching right now. You wouldn't really want to use these for like vlogging or action or stuff. There'd be different settings and even if you're not using the same camera as I recommended, the process and the settings are going to be the same, but you're going to have to go to Google or YouTube to figure out how to do that. So the first thing we want to do is make sure it's in video mode. Sounds obvious, but at least when I first started it wasn't in video mode and some of the settings weren't working. And I was wondering like, what the hell? All right, so the next thing we want to do is we want to go to the menu, scroll to the second quarter of or second section of the options on the first page and make sure the shoot mode is manual. So we do that and we go to manual exposure. Next step, we want to make sure it's in 4K, which is just the best quality. So we would go to the menu, go to the second set again on the first page, go to File Format and choose 4K instead of HD. The next thing we want to do is set our FPS. Sorry, same page again, record setting. And we want to go to 24p 100m. It's just the best for this kind of video, in my opinion. The next thing we want to do is if you see the camera, you're going to see this wheel on the top and we're going to change the shutter speed. So we want the shutter speed to be 1 over 50. And a good rule of thumb is we want our shutter speed to be twice what our FPS is. So our FPS was 24. So 50 is going to be the closest shutter speed because it doesn't. Can't set it to exactly 48. The next thing we want to do is bring the aperture as low as possible. So we want to click on either the menu here or the fn. And we want to turn our F aperture as low as possible. And if you have the same lens that I recommended, it'll go down to 1.4. If not, it'll be probably a 3 to 4. And that just deals with the background blurriness that makes you the nice crisp, you know, focus of the shot kind of thing. The next thing we want to do is turn our ISO to 100. So we want to go into the menu and the FN again and we're going to find the ISO and we want to make sure we're in video mode for this or it won't let you go down that far. That's kind of a very specific example where if you're not in video mode, it's probably going to only let you go to 250 or something. So if it doesn't let you go to 100, you're probably not in video mode. So we get to, we got to go to ISO and then we change this button over here until it goes to 100. Then we want to change our exposure to plus 0.3 or 0 if it lets you. So it's usually called exposure, but it sometimes goes by different names. But we want to go in fn here the same thing we did before. And we want to get this number down here to 0.03 or 0 if possible. The final thing we want to do is we want to turn off automatic white balance because we want to do it manually. And then we want to change our color temperature to 4,500. That's kind of a nice daytime hour temperature. And we want to go in the same settings. We wanna change the focus area to wide. And then we want to Change the focus mode to continuous af, continuous autofocus, not continuous as fuck for, you know, people who like slang. The next thing we wanna do is change the face and eye level settings. And we wanna change that to human and on and auto and just everything on there. And then we want to set up our lights. So if we have three lights, we're going to set them up one at a 45 degree angle on 100% intensity, one on a 45 degree angle, the other side on a 50% intensity and then a backlight up here. For this video I only have one light, but that is what you do with a three point lighting. And if you're kind of like me in this video, you would just put it kind of like this at a 45 degree angle light up half of your face. As you can kind of see, mine is half lit. So my lighting is obviously over here and then just gives. So it looks better if you have one here, one here and then one lighting your hair to give you, you know, depth, I guess. But it is what it is. I'm on the road, I'm traveling and I don't have three lights in my suitcase. The next thing is to put your tripod at eye level. I might want to go even like up in chair a little bit or put it a bit smaller. But you don't want it to be looking down on you too much. It's just not good to be doing it like that. And if you want to see some of pictures like this, you know, we have our key light, we have our fill light, our backlight and our camera. And then we have our thing right there. And the next thing we want to do is we want to have LUTs. So a LUT is a lookup table, that's what it stands for. And basically it's a tool used to map one set of colors to another. So have you ever heard of people saying they gotta change the colors in post? You know, if you have a LUT in obs, you can kind of do that while you're filming. So I have a folder here of about 20 different luts. I might link this in the description, I might not. So you can look for it. And we want to download these. And what to do there in obs is we want to go to our camera. Kind of like how we set up the filters for the mic but in our camera. And we want to go here and apply a lut and then we go in here and we can basically browse for that file that we had. So if we have our downloads here. We might change this one here and you can see how the color changed. And then we can change the intensity because that is a bit much, I would say. If you know, I'm being honest, it kind of looks like I'm weird sunburned. But you see, this is with nothing. This is with no LUT at all. So if we go to maybe let's say 33, we can see like the difference if I turn it on and off what I look like. So that's. If people use. People look different in their videos and you don't know why. Like that is why they have a LUT or some. You can also do this manually with color correction. Like I could change the contrast way up or way down. You can do a lot of different things. So I would recommend trying a bunch of different luts before because you can see how different they are. And basically a LUT is basically a pre made configuration of these color corrections. So you know, each LUT would be some variation of these that someone has made and change into a preset. So you can just kind of go through them and see which ones that you like the best. And you can just change it this way. So let's go to. Let's try maybe 50% here. Let's go through a bunch of different ones. So you can kind of see what I look like. It's not too much of a difference between them. But that one's kind of a big difference. But I usually use number seven or number eight of these. No, it must be number eight. And I usually use it on 0.33 just to give myself a little bit of warmth because you can see the difference when I click this button turning it on and off. So let's go back to that. So that would be a lut. Set up the luts, color correction. The next thing is the final thing of this video. It's going to be our workflow setup. And this is very, very important. So we have to make a decision. And maybe this is a situation where I might go screen only there because it's just cutting off some of it, you know, use cases in real time here. So if we need to make a decision, if we're going to edit and make a bunch of clips or do it in one long take. Because our workflow is going to be slightly different, you know, based on what we choose. If we are going to just do one long take, the trigger for this workflow is going to be when you stop recording. But if we want to edit it the trigger for this workflow is going to be when you export your edit. So it's just two different things. We got to go to a phonic and get that sign up here from earlier. So if you do it monthly, it's 13 bucks a month. This is going to be the start and the basis of our entire workflow. So it's kind of important. The next thing we got to do is Dropbox. So we're going to sign up for, I think it's going to be a US$12 per month. And I have signed it up here. This is my Dropbox for this workflow and more on that in a sec. And then we're going to get started in a phonic. So I have done all this, but you're gonna follow the exact steps that I do. So if I go to Myophonic here, you're gonna see productions, you're gonna see presets, you're gonna see services, you're gonna see watches and you're gonna see pricing. We're gonna start with watches. So we're gonna create a new watch and we're going to call it YouTube for example and we're gonna choose the, the Dropbox in it here or sorry, we're going to go to services first we're going to add an external service and we're going to add Dropbox. So if we click on that there, you're going to see the Dropbox. You're going to set up the file. I'm not going to do that in this video. It's very self explanatory and very easy because I already have it and I don't want to ruin mine. And then you're going to Also add your YouTube channel to the external services. So you should see something exactly like I have here. When you're doing this, the next thing you're going to want to do is you're going to want to set up the watcher. So I kind of put these backwards here, but you're going to want to set up the watcher. So basically what this does is it watches your Dropbox for new files and when the new file is added it starts the production. So let's go here. The next thing we want to do is a service or we want to make a preset rather. So this is the longest step. And do exactly what I have on the screen. I don't have my camera there for a reason. It's because I need you to follow exactly what I have. So I'm going to edit mine because I already have it. We want to put YouTube video or whatever you want to call it does not matter. We want to have our default description in here, just copy and paste it. So whatever your default is, just put it in there. Output file. We want to have video, we want to have speech, we want to have subtitle transcript and speech again and we want to have all of that in there. We want to basically put a example of how we want a phonic to make show notes and chapters for us. So this is the style that I want in mine and it's going to just make chapters for us using OpenAI based on that. The next thing is we want to go to publishing. We want to publish it to YouTube as the service, not Dropbox. We want to change it to private and we want to select whatever category you want. The next thing we want to do is adaptive leveler. We want to have it at 100% and auto. The next thing for filtering we want to have adaptive high pass filtering here. For loudness normalization we want to put minus 16 lufs which is for podcasts we want to have auto here and program loudness. And for noise reduction we want to have dynamic keep speech and music and remove everything else. We don't want to have remove breathings on here because that in my experience has really screwed up a lot of the stuff and I just turned it off. We want to have 100 decibels for noise and 100 decibels for remove reverb and then we'll save. So basically what happens now if we go back here is when I I have my a phonic folder in here. So I have apps here and then it says a phonic right here. So basically what happens is that when I click stop recording in obs if I go to settings and I go to output and I go to recording, this is where it will be saved. So Dropbox apps a phonics. So that's that exact thing here. So that's where it's going to be saved and then the watcher is going to see that and then the production is going to start. So the bad part about this is if you screw up a little and you have multiple clips, it's going to do it to all of them. It's not a big deal. You can manually delete them, but it saves so much time doing it this way. So that is option number one. Option number two is if you have to edit it and you're going to have a bunch of different clips, you would not set your thing in obs there because then it's just gonna start the stuff on a bunch of different clips. But instead you would upload all those clips into capcut and edit them together. And then when you click export, let me go to a different one where there's actually clips quickly you would go to export and then you would choose that folder here. So I've done the same thing here. And then it would start. So basically if we. Let's just do something here. Let's see if we can duplicate this. Just to show you how it actually works. Let's hopefully see if it works in there. Let's upload a different one. So I'm uploading this and this would be saved automatically if like in the actual thing when you're actually doing it. But let's just show you how it works there. So let's put that up there. Let's see if it's doing it right. See, so now it just did that right there. So it didn't know it did the workflow there. And if I go into my YouTube, it's going to be right there. See, it's already uploaded like that. So that was quick because Obviously it's an 8 second file so it would be faster than normal. But you see all these ones that, you know, I kind of screwed up with the clips, but you just delete them after. But that really saves you so much extra time as opposed to manually downloading and then uploading to a phonic and then downloading again and then uploading manually. It's just so much better to do it like that than any other way. And after that you basically notify your thumbnail creator. I recommend going on fiverr and finding 3 people who are gonna make thumbnails at $10 each. And then a B test those using the thumbnail tool and see which kind of which creator or which thumbnail designer gets the most watch time percentage, go with that. And then you can pay them $30 each and then turn on monetization and then double check and schedule and that is really the end of this video. So I hope this video is valuable to you and make your YouTube videos better. And if you like subscribe, comment and I will see you in the next one.
More from Matthew



Everything I Would Change About This Ecom Email Marketing Agency (3 HOUR LIVE AUDIT)

Everything I Would Change About This Meta Ads Training Business (3 HOUR LIVE AUDIT)