In this DIY engineering video, Matthew Yuan builds a homemade airgun from plumbing components and explores the core challenge of creating a reliable firing valve. He begins with a demonstration of a T‑shaped pipe where blowing into one side inflates a balloon on the other, illustrating a pressure‑driven pilot valve that can open without direct contact. He then outlines the three essential functions of a firing valve—airtight seal, rapid release, and automatic reseal—and documents multiple failed prototypes, ranging from a black rubber washer on a spring‑loaded pin to flexible red rubber sheets and balloon‑derived seals. A breakthrough occurs when a loosely attached seal, held only with tape, allows the seal to flex and rotate, eliminating hissing leaks. Building on this insight, he designs a pilot‑volume system that uses a secondary external button to vent a small chamber, creating a pressure differential that moves the main seal and closes the valve after firing. However, precise tolerances prove difficult, leading to inconsistent performance. He revises the concept by inserting a 3D‑printed air turnaround with a pin that mechanically pushes the valve open, adding extra sealing faces that can tolerate minor leaks. After refining the mechanism into a fully functional prototype with a stock, spring‑loaded trigger, and tilting breech, he measures projectile velocities with a chronograph, noting variability due to manual sealing. Finally, he tests custom‑weighted projectiles—3D‑printed shells and hex‑nut‑augmented darts—against soda cans, demonstrating significant destructive power and documenting failure modes of the darts. Throughout, he emphasizes iterative experimentation, material selection, and the physics of pressure differentials in valve operation.
Chapters
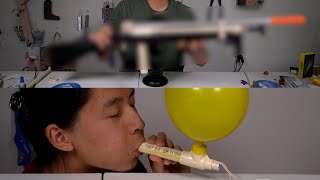
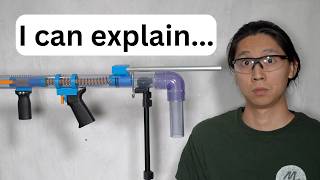
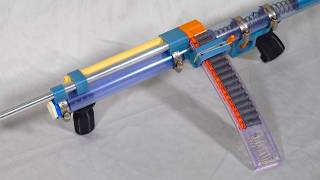
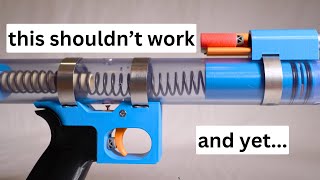
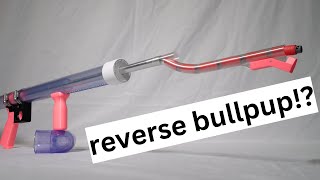
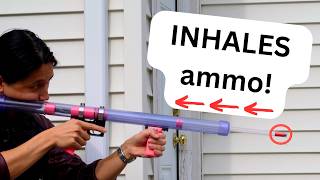
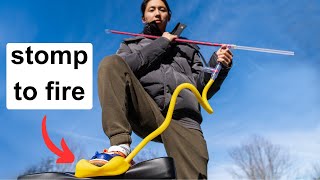
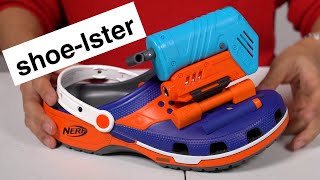
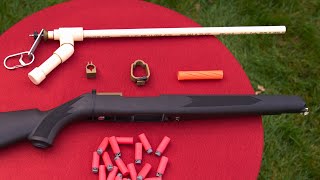
When I blow into the left side of this T-shaped pipe, the balloon on top inflates. When I let go, the balloon deflates, but the air escapes from the right side. So what's going on here, and what does it have to do with this homemade air gun that I made? Keep watching and all will be explained, and at the same time, I'll test my air gun with a bunch of different projectiles and targets. Every air gun operates using the same basic parts: a pump to build air pressure, a tank to store that pressure, a firing valve to release that pressure, and a barrel to channel that pressure into moving a projectile. I wanted to build an air gun from plumbing pipes that could fire these Nerf darts. Since I've done similar things in the past, I figured this project would be pretty straightforward. It was not straightforward. These are just some of the prototypes I made that ended up not working, and all of them failed at the same place: the firing valve. The firing valve is the hardest of the basic parts to get right because it needs to perform 3 important jobs. Number 1, it needs to be fully airtight when closed. Number 2, it needs to release air quickly when you open it. And number 3, it needs to automatically close when when you pressurize the tank for the next shot. My first design for a firing valve was this black rubber washer on a spring-loaded pin placed inside an air tank. The valve sealed against the back end of this pipe, which eventually led to the barrel, and a secondary sliding seal was required so that the back of the pin could stick out of the tank. In theory, this would keep pressurized air inside the tank until I pull on the pin to release it. In practice, I never got a 100% seal, Whenever I pressurized the tank, I always heard a little air hissing past the valve. I thought that the black rubber washer was perhaps too rigid to properly mold to the tiny imperfections of the sealing face, so I replaced it with this much more flexible red rubber sheet that I glued to a piston connected to that same spring-loaded pin. This made literally no difference. I even tried covering the sealing face with the thin rubber from a balloon, but that didn't help either. I was about to give up when I discovered something curious. On a whim, I placed this half-broken prototype piston into a makeshift air tank. It didn't have a spring or a stem, and the rubber seal was only loosely attached with double-sided tape instead of glue. Since there was no spring, I manually pushed the valve into the sealing position, and when I pressurized the tank No hiss! It didn't make sense to me at first. What was so special about this setup compared to the setups that I had tried before? After further experimentation, I figured it out. The lack of a spring-loaded stem allowed the seal to rotate a tiny amount in this direction, which better aligned it to what I realized was a slightly slanted sealing face. And the use of tape instead of glue meant that the seal could flex even more than it did before. I thought that the seal only needed to flex at the points where it contacted the sealing face, but what I noticed in my working setup is that the seal actually bowed outwards like a crescent moon, which could only happen since the tape unstuck and let the seal move off of the rigid piston underneath. So as long as I used a red rubber seal that's not attached to anything rigid, I could make a valve which does job number 1. But if it's not attached to anything, doesn't that make jobs 2 and 3 even harder? With no physical connection to the seal, the only way to open it is to push it from the front, but there's no room for that because the front is where the barrel will go. And once the valve is open, there's no way to move it back into the sealing position. Or is there? It turns out that this kind of valve, when placed into a suitably constrained space, can close pretty reliably just with a puff of air from behind it. This is what happens when I blow into the left side of that T-shaped pipe in the beginning. Inside, a red rubber seal gets pushed by the air I'm blowing into a sealing face on the right, thereby closing off the right side and forcing the balloon to inflate. Now we get to the surprising part of my beginning demonstration. What happens when I let go of the tea? Then the pressure inside the tea begins to drop, but it doesn't go to atmospheric pressure immediately everywhere all at once. Due to the internal shape of the rubber seal and the tea, this area drops in pressure a tiny bit earlier than this area. So for a moment, there is a difference in pressure, which causes the seal to be flung to the left, thereby allowing air to rush out on the right. The result is we are able to open this valve without physically touching it. The problem is that air still leaks out the left side, so I'll still need to make some modifications to make this work for my air gun. In this setup, I've sectioned the air tank into a main volume and this much smaller pilot volume. The pilot volume has a secondary valve on it that I can open from the outside simply by pushing on this button. If the tank is pressurized and I push the button, the air in the pilot volume gets vented, which creates a pressure differential that moves the main seal backwards. It then slams into this rear sealing face, closing off the pilot volume and preventing additional air from venting. So the majority of the air in the main volume flows out of the barrel. This was my plan for my air gun, and it fulfills all 3 jobs, and it doesn't work. The big problem with this design is that it requires just the right amount of slop between moving parts, and I just couldn't make the thing as precisely as the concept demanded. Oh my goodness, that's kind of gross. Still gonna eat it though. So I went back to my editing station and pored over the footage I put into the video so far, looking for conceptual errors or unexamined assumptions. And I found this: "There's no room for that because the front is where the barrel will go." This statement assumes that I'm putting the barrel directly after the firing valve. But who says I can't design some extra space in there for some kind of valve opening mechanism? Eventually I came up with this. You've got your pump here, your air tank here, your valve here, and your barrel up here. But in between, I placed this 3D-printed air turnaround. And inside the turnaround is a pin, which directly pushes the valve open. This design necessitates some additional sealing faces, but unlike the firing valve, it's okay for these seals to leak a little bit because they're not responsible for keeping the air tank pressurized indefinitely. Now that I have my first fully functioning airgun prototype, let's measure its firing velocity with these Nerf darts using my chronograph. That hit the camera. A major flaw of this prototype is that I have to manually hold that turnaround shut to keep it sealed, and failure to do this is probably why I saw those inconsistent firing velocity results. So I went back, I did a little bit more work, and I came up with this. Now we've got a normal stock, a spring-loaded trigger, a tilting breech, and I don't have to hold anything shut. You've already seen what it can do with Nerf darts, so next up I think we should try some more interesting projectiles. I really want to be able to punch through that soda can, so I came up with these two new projectiles. This one is made out of a shell of 3D-printed plastic, and inside it's weighted using a normal dart head. So this is about the same weight as a foam dart, it's just harder. And if this one doesn't work, I also made another one in orange, same design, but this one has a hex nut just glued onto the front. So this has a lot more weight to it, and if this doesn't punch through the can, I don't know what will. So let's try it. If you've made it this far in the video, make sure to like and subscribe. If you want to support the channel an extra amount, consider becoming a channel member. You'll get early access to videos and shoutouts just like this in every single video. That went straight through, even the cardboard behind it. Wow, you can see how it punched in kind of on the upper right and just peeled the metal off. The back of the can punched out this perfect circle that then peeled out and is sticking out of the cardboard on the back. For this test, we're gonna shoot through the bottom of a can, the strongest part, to see what happens. Something's inside there. You can kind of see the hexagon shape. It didn't go all the way through, but it was really close. This is like— it was so close to making it all the way through. Oh my gosh, the dart is completely destroyed! This is what we see if we cut open the can, just complete destruction. That's the hex nut. It's still in there, but it looks like the whole dart just completely shattered on impact, which explains why it didn't make it all the way through.