This Nerf gun defies physics
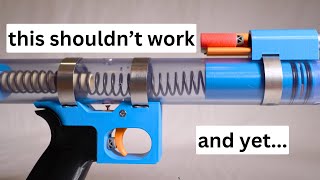
Matthew Yuan builds a custom Nerf blaster with a two-dart breech system where the rear dart seals the chamber while a rotating flapper prevents it from ejecting backward. The result looks like a single dart traveling through an open barrel, creating an optical illusion he explores with pressure-based theories.
Chapters
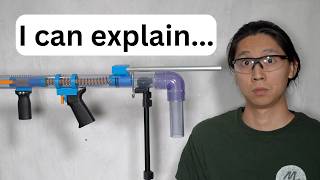
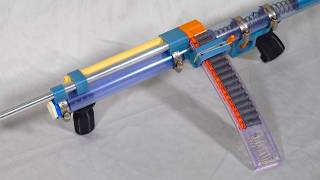
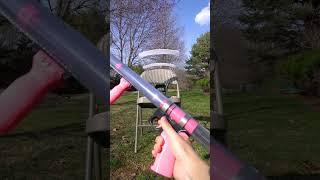
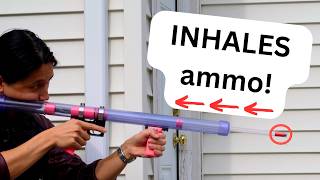
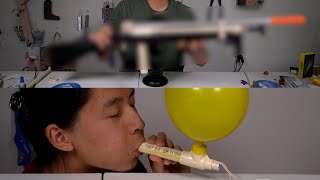
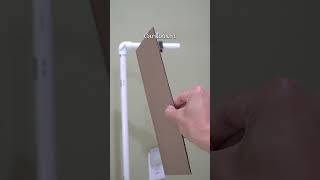
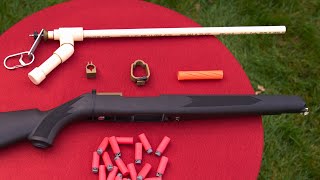
Many Nerf blasters work the same way. They have a spring which pushes a plunger, which pushes air through a barrel, which fires a dart. This blaster that I made has all of these parts, but I seem to have made a glaring mistake. The barrel is open on both ends. This means that if I load up a dart, the back of the dart is simply exposed to the outside air, so there's no way for the plunger to build up pressure behind the dart to Okay, never mind then. Clearly this blaster is more than meets the eye. Let me show you how I built it and how it actually works. It all started with this piece of clear PVC. I laid down some tape in preparation to scribe a line with this pen holder I made. The holder is made of the same size PVC, so when I flipped it over and scribed again on the other side, the result was two straight lines pretty much 180 degrees apart. They represented the top and bottom axes of this blaster. Next, I took this PVC bushing and wrapped some tape around it until it fit snugly into the pipe. I marked 4 screw holes roughly 90 degrees apart, plus an additional hole for alignment. It wasn't important for these screws to be precisely aligned, so eyeballing was good enough. It wouldn't be good enough for this next step, however, so I made this template to help me out. These marks show where I should drill to form the slot that the blaster's pump grip rides in. Then it was time to set up the drill press. To prevent the pipe from rolling around, I mounted this V-block onto my drill press table, and then laid a long piece of angle aluminum on top. By shifting the aluminum left and right, I could counterbalance the pipe when drilling near its end. To make the drill square to the pipe surface, I held a flat bar between the pipe and the drill bit and tapped the table until the bar was held perpendicularly. Then I could finally start drilling. Each screw hole is actually a combination of 3 holes: a snug hole in the bushing, a clearance hole in the pipe, and a countersink so that the screws sit flush. This bushing will serve as a front stop, preventing the guts of the blaster from flying out under spring pressure. Onto the slot holes. Since they have a lot of overlap, they need to be drilled in a special order to prevent the material from misbehaving. I did a first pass drilling every other hole. Then I plugged these holes with sacrificial dowels so that the drill bit would be fully supported and not wander when drilling the remaining holes. Some of the dowels were a bit loose, so I added a bit of water to make them expand. After a second pass and removing the dowels, I wasn't quite done yet. By drilling out all of that material, I released some of the inherent stresses inside the pipe, causing it to bow inwards. The result is that these holes shrunk a little bit, so I took a final pass through all of the holes to bring them back to the right size. Then I moved on to the parts which ride in the slot. This pump grip I 3D printed attaches to this smaller diameter piece of PVC, so I marked and drilled holes in it for screws. On the other end of that pipe, I fitted this sealing piece and drilled some holes for some tiny set screws to lock it in. I marked some more hole locations based on the pump's limits of travel. At the front, I marked a hole on the top axis for air to flow through during firing, and in the back, I marked a hole on the bottom axis for the catch, or trigger mechanism. I actually drilled the hole for the catch through both sides, for reasons which will become clear later. The final hole I drilled was back here, and that was to accept this retaining pin. I took everything apart, peeled off the remaining tape, and gave the inside of the main tube a good clean to remove any plastic chips. Then it was time to bring in the rest of the 3D-printed parts and begin the full assembly. In went the bushing, and in went the pump, this time with an O-ring around the sealing piece. Then came the plunger, which also had an O-ring, as well as this spring-loaded steel ball. Then came this grip assembly. The grip screws into this trigger housing, and the trigger pivots in its housing around a pivot screw. At the tip of the trigger is yet another screw, which allows for fine-tuning the trigger pull. Behind the trigger is the rubber head of a dart, which acts as a dampener. I clamped the grip assembly onto the main body so that the trigger screw aligns with the catch hole. As the plunger reaches the hole, the ball pops out and engages with the trigger, locking the plunger in place until the trigger is pulled. Behind the plunger, I slid in a spring and a spring rest, and lastly, the retaining pin. I felt that the trigger pull was too heavy. I could hang 10 pounds on the trigger without it moving. So I backed out the trigger screw a tiny amount to reduce the travel of the steel ball, and this did the trick nicely. Finally, it was time to install the breech assembly, where all the magic happens. Here I used a cross-section to help explain how it works. If you're enjoying the video, make sure to subscribe so you don't miss out on future content. And if you want to support me directly, you can become a channel member, and in return you'll get early video access and you'll see your name in member shoutouts just like this one. Thank you so much for watching, and now let's finish out the video. First, I clamped the breech over the air port with an O-ring inside to make a seal. Then I press fit this rotating flapper piece into the back. A rubber band hooks into the flapper to keep it biased upwards. Lastly, I installed the barrel into the front of the breech, holding it steady with an additional support at the front. When you load a dart, it sits back here in the breech, behind the air port. So when firing, you'd think that air would flow through the port and out the barrel without causing the dart to move at all. But actually, you'd be right. Nothing would happen. However, I may have been a little unforthcoming at the beginning of this video. You see, I actually loaded two darts into the breech. The dart in the front is fired, and the dart in the back acts as a plug to seal the breech. And the flapper prevents the rear dart from being blown out backwards. But Matt, I hear you cry, I clearly remember the dart at the back of the breech flying out of the barrel at the beginning of the video. Good observation. Let me bring you around to the shooter's point of view to get a closer look at the action. That dart is still in there, just hiding. For reasons unknown to me, it seems like that rear dart likes to scoot up just enough so that if I film at the right angle, I can get the illusion of one dart going all the way through the barrel. Now, I can think of two possible reasons for this. One is that air pressure in the barrel at some point is lower than outside air pressure, so it gets sucked in. It could also be that during firing, it squishes a little bit against the flopper and then rebounds forward. But comment down below if you think you know what's actually going on. Now, I hope you thought this project was pretty cool, even though I didn't technically violate the laws of physics. And you should definitely keep your eyes peeled for a future video, because I've got an even cooler upgrade in the works. Let's go!