I made a Nerf Sten gun
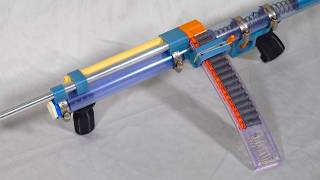
Matthew Yuan 3D-prints and assembles a custom Nerf Sten blaster from scratch, designing the trigger mechanism, magazine well, barrel assembly, and a fork-shaped pump that primes the spring and feeds darts in one motion. Live tests show it fires consistently and rapidly.
Chapters
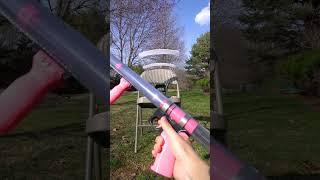
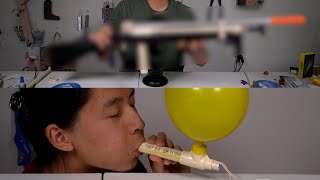
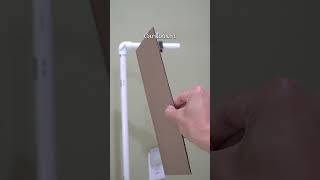
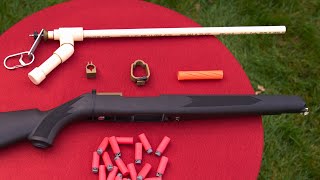
It's made of tubes, its magazine sticks out the side, and it flings foam like nobody's business. This is my Nerf Sten gun. Ah, it fell over. So this project is going to have a bunch of moving parts, but luckily I don't have to start from scratch. The previous blaster that I made in my previous video has a lot of the components that I'll need for this, so I'm just going to head over to my printer and scan and copy some of those parts. The color's not right. I'm probably low on ink or something. Now that I have all the copied parts, let me assemble it for you, show you how it works, and then we can talk about the additional stuff that I need to build to make this work. So the first thing to do will be to assemble the grip. It has these two parts and they slot into place, and there's a bunch of screws that go in here. Now we can take this trigger and slot it in here, and that gets that in place with another screw like that. So the trigger pivots about that screw, and this screw up here pushes up into the main tube of the blaster. So let's get these two guys clamped together. Next, we've got this inner tube which slides inside the front area here. There is an O-ring that goes on it, and this can be slid in from the back. That inner tube connects to this pump grip. Which will ride in this slot. So that goes in there, and 3 more screws hold that in place. So now the pump also moves that inner piece. Next up, we have this piece. Which also gets an O-ring on it. And this is a plunger that will fly forward when we fire and push air out of the blaster. A couple things we're going to add to the plunger before pushing it in are this spring, and on top of that this steel ball. I'm not finding that spring ever again. Hold on, let me get a new one. Okay, as I was saying, spring goes in, and I will be much more careful when I compress it this time with the ball on top. Okay, there you go. You can see that in there. Now when I pump this back, it's pushing the plunger back as well, and at the rearmost point, that ball pops out into a hole in this main tube, and the trigger pushes it back in. So in this position, the plunger can't move forward because the ball is blocking it, but then when I pull the trigger, it is free to push forward again. Behind there goes a spring and a spring rest, and all of that is held in place by this retaining pin. And then we can put on a stock. So this is the foundation on which we're going to build our blaster. When you pull the pump back, it catches the plunger with that little hole, and then when you pull the trigger, the plunger shoots forward again. And there's a hole up here that the air comes out of. So what What I need to figure out now is how to get a barrel to sit on top of this, how to hold a magazine, and how to actually get darts from that magazine into the barrel. First, let's look at how to hold the magazine. Here's one of them, and they all have this notch right here designed to hook into some part of a magazine well to keep it in place. So to interface with this, I made this little orange piece that's the same size as this gap, and I also made this little housing which the magazine fits inside quite nicely. In the back, there's a slot that this orange piece— oops— fits into like so, and it has a couple nubs here which hook into this rubber band, something like that. So this rubber band holds this guy in place but also allows it to move outwards if I pull on it. And with that in place, this magazine can fit in there quite nicely, and I can push it in freely because The top edge of this magazine is rounded off, but once the orange piece catches in the slot, it's not going anywhere. At the same time, it's really easy to remove the magazine because all I need to do is come in with my left hand and press the top of this orange piece just a little bit, and it pops right out. Next up, we have how to mount the barrel. I've made this other 3D-printed piece that has 2 holes in it. This hole is the perfect size for a friction fit to the barrel, and on the bottom there is a port with an O-ring there that's going to interface with the port on the top of the blaster and allow air to come in and through the barrel. On the other side, there is another hole, and this one is the perfect size to fit fit a Nerf dart. So it can go right in like that. That's how darts will be loaded into the blaster, and then I'll have some mechanism to seal this off so that when I fire, all the air can only go out, and it pushes the dart out instead of maybe pushing it out backwards, which would be very bad. This second hole here has nothing to do with airflow. It's just a support piece for for something that you'll see later. So here I have the barrel all mounted up. You can see how the darts will be feeding in from behind, and the port underneath lines up with the port in this main tube. I also added this extra piece in the front, uh, just to keep the barrel a bit more supported. The magazine is going to live right around here, and that'll happen right after I clamp on the magazine well. Right on to the side. So now we have a way to hold the barrel, a way to hold a magazine, and an idea of how to get darts from the magazine into the barrel, namely pushing them through kind of like that. But I don't want to be using my finger for that, of course, so we got to add a couple more components. So to do the actual feeding of the darts, I made this piece. Uh, you could call this a pusher, and on the end there is an O-ring to seal off the back of the barrel when it's fully pushed in. And this piece of pipe is just to keep it aligned and it goes through this second hole that I talked about, just like that. Up at the front of that extra tube, I added another collar. This just slides back and forth along with the pusher, um, using the barrel itself for alignment, and this just helps keep it more aligned with the barrel as it moves. So with a pusher in place, I can insert the magazine just the same as before, and you'll notice that I've made the profile thin enough so that I can put the magazine in and it doesn't hit anything. The feed lips just go around the pusher. When it goes backwards, it allows the next dart to pop up in the magazine And then when it goes forwards, it pushes that into the barrel and then seals off the end of the barrel. Now there's a dart that's loaded, and I can now prime the spring, and we are ready to fire. Now, it would be pretty annoying to use this blaster if you had to pump it and move this pusher back and forth every time you wanted to fire. So that's why the final step of the process is to replace this pump grip from the previous blaster with a new one that has a bunch of extra material on this side. You can see it's sort of like a fork shape, and these two bits interface with this brace that's connected to the pusher. And so that means that when I pump to prime the spring I'm also moving the pusher at the same time. Now the blaster can be operated with just one motion that both primes the spring and loads the barrel. If you're enjoying the video, make sure to subscribe so you don't miss out on future content. And if you want to support me directly, you can become a channel member. And in return you'll get early video access and you'll see your name and member shoutouts just like this one. Thank you so much for watching, and now let's finish out the video. So I tried to aim for the middle of most of the targets a couple times. I think I did a pretty good job. And then at the end I got bored, so I just tried to blast out as much of the middle target as possible. That's fun! Let's reset and do that again. I was trying to shoot the cups off of the backdrop, but the tape was too strong. I did puncture a bunch of cups though. I think there are some darts that are also caught in the cups. I'm not shooting from very far, so I was still able to hit them pretty accurately. Nice. 5 shots, 5 hits. No!