Teaching my friend how to build a Nerf gun except I don’t teach him at all
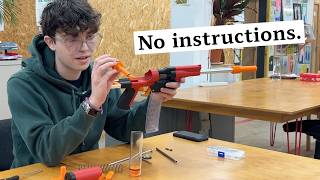
Ethan assembles a 3D-printed Nerf blaster called the Skewer from a pile of unmarked parts with zero instructions. They figure out trigger mechanisms, O-rings, and pneumatic sealing through trial and error, then test it in the backyard to see if it actually fires.
Chapters
Oh, okay, yeah, this is much more powerful than anything else. This actually just like fires straight.
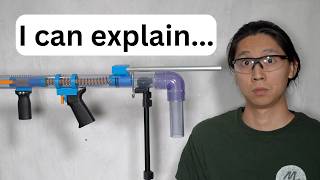
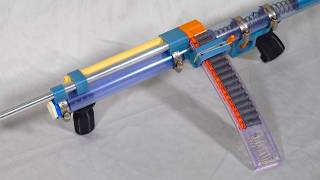
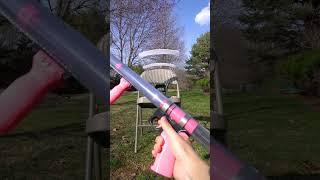
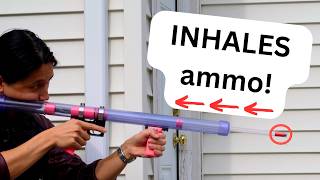
This is a 3D-printed Nerf blaster created by Caramel Designs called the Skewer, and this is my friend Ethan who doesn't know anything about 3D-printed Nerf blasters. He's about to shoot the Skewer at a bunch of things in my yard and tell us what he thinks of it, but before I let him do that, I made him build the Skewer from scratch, with no instructions. Go!
Go?
No instruction. Stick around to watch Ethan hone his blaster building skills, learn about how blasters work, and maybe also get tagged a few times. If I accidentally hit your face, I'm very sorry.
That's okay.
Does it make sense? Do you feel like you know the job of all these parts?
Not really.
What's your game plan? How are you thinking about this?
Well, I was going to try to set up all the pieces like where they would probably go.
Yeah.
But I've abandoned this because I don't know what half of them do. And now I'm going to just try the screws in random places.
What do you think that is? What you're holding now?
This is the pump action thing, but I don't know what this part does. Wait. Oh, maybe that's it. Would you look at that? Okay, nice.
Stuff is fitting together.
Stuff fits together.
Stuff is fitting together.
Okay, we need some screws for this now.
How many screw types are there?
3, 4, 4. 1, 2, 3, 4.
If memory serves me, there's 4 types.
Do you have instructions on how to put this together? So this is actually like the trigger mechanism, I'm going to assume. So these actually go in here then. Somehow.
Nice.
One would assume. We'll set that there.
Oh, I should give you another thing. This.
Oh yeah, the mag would be important. Okay, so this is the magwell.
Yeah, there you go.
There we go. Okay, so this goes somewhere over here, I would assume. This goes over here. Where's the— there. Okay, that's probably fine. Ah, okay. Okay.
What are your thoughts?
My thoughts is that I put it on backwards. Maybe this goes this way, like it's behind. Okay, so we need this. We need something to keep this in place. Uh, does this fit together? I feel like this is important. Well, all the pieces are important, but I feel like this is important.
What do you think the orange piece does? What do you think its job is?
I think it gets clipped into by the trigger mechanism, but I don't really understand how that works. Oh, we have a trigger. That's good. Are these nails supposed to be here?
They are supposed to be there. They are part of the blaster. I was supposed to get pins, but I didn't want to order them from like the supplier, so I just went to the hardware store and I was like, this nail, this nail looks like it'll do the job.
Okay, the nail looks like it will.
The pin that doesn't look like a nail is also a nail. It's just one where I cut off the head of the nail.
Yeah, yeah. So we have this. Oh, is this supposed to like—
Hmm.
Oh, I see. Okay. Uh, but those are in the way. Okay. I'll take this out. Let's do this properly the first time. Yeah, it goes in like this. Nice.
Nice.
Okay.
Would you like to— Show us a little bit how the trigger is pivoting.
So it pivots off of the pin that, well, is between these bars.
Nice.
That's a very nice design. Oh, and then it— okay. Yeah. So it doesn't— so it pulls down on this, which kind of implies that this is here somewhere. Yeah. So I guess this is in front.
Now let me ask you this. If that goes in front, then where is the barrel going to go?
Yeah. Okay, so maybe this is on the other way. You can see I've really never taken a Nerf gun apart. Maybe that would have aided me in this, this journey of self-discovery.
I feel like these other orange pieces need some more love. They've been, they've been on the table for a while. I think they're feeling a bit neglected.
We'll give them some love, we'll give them some love. Let's just take this off because I don't know where it goes.
Ooh, nice.
Surprisingly fit together very nicely.
Yeah, it takes a lot of work to make threads that 3D print well.
Yeah, yeah, I was surprised given that we're 3D printing this that it fits together so nice.
Yeah.
Okay, so this also goes over— I feel like all these things go over the rails, but the rails are not this long.
Well, you could do something to figure out whether or not the rails are that long.
Like, if we do this, and then we have this there, this there.
Is the math mathing? Is it adding up?
Well, the math indeed maths. What is this for? Okay, so this goes— does it go all the way through? It does not go all the way through. And there's gaskets in there. Okay, I guess the barrel is something like this, which I feel like implies that Is this held in place by something? Because there's screw holes here. I feel like usually the magazine is in front of the trigger.
True.
So we'll do something like this. Ah, that might be something. We'll put these in here. Okay, we'll take that. That's a win. Okay, this is for the, the reloading port. This is the catch release for the magazine, I think. Maybe, but it's also— wait, aha, there we go, that is the correct orientation. Getting this through is a bit tricky though. Okay, we have that, although it kind of hits the trigger. There's supposed to be a trigger guard somewhere. Putting the magazine the correct way would also probably help. True. Look at me struggling. Okay, we'll put this in when we have everything actually together.
How close do you think you are to figuring it all out? Are you like— would you say you're 50% there?
I would say I'm 50% of the way there because I feel like once I understand what's going on, it'll go faster.
True. But the O-rings are key. Understanding where they go is pretty key because if you think about the way this works, right, it's a piston that's pushing air. So these O-rings have got to seal something so that it can push the air, right?
Yeah, yeah, something goes back in there, probably with a gasket, like on this thing right here. That seems promising. I think this probably goes somewhere like here. Yeah, this is going to go there. Okay, so that goes there, this goes here. The trigger lies flat, but when I put that piece in, it doesn't lie flat. Could also just be putting it down upside down, which I am. Look at that. Okay, so now this is not down upside down. Trigger works properly. Nice. Okay, so that goes in, then this will go back on. Ah, now we screw it back together, and that should be most of the pieces.
You really just don't like the orange pieces?
No, the orange pieces are my least favorite. Okay, Orange pieces feel like they might go into things.
So it's at this point where you should be thinking about how the air is actually gonna get into the barrel.
Okay, so barrel can't go through this piece anymore. So we're shooting air out from this through this part here.
True.
Into the barrel.
So what's going to bridge the gap? How are you going to bridge that gap?
Okay, so this part can actually bridge this gap, which is nice.
Nice, nice, nice. Cool.
Which—
how does that make you feel?
Does this help us? I mean, I feel like this helps us, but also I feel like there should be a dart Well, I didn't give you any darts. Right, right. But like, okay, so this must go back and— oh, okay. So this should go back here somehow. And then there's a question as to what is this for. Can this even go inside the spring? It cannot, which means it probably doesn't go inside the spring. Like this also feels like it should go here-ish. Can't— or no, maybe this is just like the back plate because that's like a sling harness. Maybe. Hmm. Maybe this is the back plate.
It actually is a sling harness. That's true.
Okay. We'll say this is the back plate because it looks like— yeah. Okay. This goes here. Let's assemble this.
You do also need to— ah, never mind, I won't say it. Oh no, it's okay, you're doing great, Ethan. Oh no, I don't think I would be able to do this good if I was just given a pile of parts.
I feel like context— I'm about to have to disassemble this entire thing. No, no, no, no, no, I'm gonna, I'm gonna come to the last step and I'm gonna be like, oh no. No. And then have to disassemble the entire thing again. Okay, there's a hole through this. Does this go through the hole? It does. Great. Oh, okay, so this— these fit the inner diameter here. Okay. So what if we— hmm. We'll put this on the outside of this. Oh, and then there's like— you would assume that the little crevice here is for another one of those.
The engineering technical term for the crevice, it's actually a funny word. You should guess what it is.
Uh, the pit?
It's called the gland.
The gland? Yeah. Mm, the gland. All right.
And in this case, it's a male gland because the O-ring goes around the object.
Right.
Whereas if the O-ring was installed in a hole, that would be a female gland.
Okay, I see, I see.
Yeah.
So, okay, this must go in here. The question now is, can I actually do that? Right? This definitely— it's like I can put it around here.
This last O-ring is the most bamboozling one, unfortunately.
Yeah, this seems tough to do because like this is—
because there's no gland on this piece, right?
Right.
Unlike the other piece.
I'm gonna say that there's literally no way that this piece and the, the O-ring can actually go in that, and I'll say that this is correct.
Okay.
Now this—
there's more O-rings, by the way. There's all these.
Oh shoot. Maybe, maybe just like put some O-rings on some things and like it'll work out.
Good plan, good plan.
This is how we want to assemble, like, we want people to assemble all of our goods, you know, they just kind of vibes-based approach it. Are all of these things one O-ring, or are some places allowed to have multiple O-rings?
There's no place with double stacked O-rings. Oh, this is so sad.
It's like I can put 3 O-rings here. That's a lot of parts down.
I can knock them all out of the way in one go.
So while I do find this very fun, I have no idea why there's like— why we— oh wait, okay, the dart goes through this. It's rifled. Yeah, okay, the dart goes through this part. It must. But okay, you take this off so this can go into the back of this. Which— okay.
Did that work?
Well, it goes in here.
Is it going to stay on there?
Definitely not. Perhaps an O-ring would help us with this. O-ring goes around this. Is my, my guess. If I could get it around there. Okay, we'll try this. Didn't really help us.
Um, it's got to contact the barrel somehow.
Yeah, yeah. Yeah, it does. How are we going to contact the barrel? So we need something around, like between them, that touches the barrel.
Whoa, advanced techniques.
This is definitely not it. This is perhaps my worst idea so far.
Please explain how the spring is going to work.
Okay, so basically instead of launching a dart, we launch the barrel. Oh, are you ready for this? Instead of flinging foam, we can instead fling aluminum. No! Oh Lord, okay.
Hi YouTube moderators, to be clear, we do not—
we're not endorsing anything. We're not endorsing anything.
Don't demonetize this video, please.
Oh my gosh. There's 3 screws here for something. Like, no, no, no, this is the end cap.
What other thing has 3 screw holes that looks like it might mate with that red cone-shaped thing?
This doesn't have 3 screw holes. This does. This has 3 screw holes. I mean, this also has 3 screw holes. Indeed. But that would be crazy, right? Except it does seem to fit quite well. But that's also crazy because like this is the end.
What do you mean?
I feel like this is, this is the furthest the blaster goes. Like this is the output.
You don't think the barrel can stick out farther than that?
Well, I mean, I'm sure the barrel can, but like to me To me, this should be the end. This looks like the end.
Oh, like aesthetically speaking, it should be the end?
Yeah, aesthetically speaking, this should be the end. I guess you're right. Okay, so if we assume this and then we do this instead. Okay, perhaps things make more sense now.
Perhaps, maybe, maybe, maybe.
But I still feel like this should be the end.
Okay, take it up with the designer. Write them an angrily worded email.
I will, I will. Okay. So let's screw this in with some things. If I can somehow— Oh, this is— What an angle to screw things in at. But it works. But it works. I don't have to— Well, is it working?
Are you grabbing the threads? Do you feel any thread engagement?
I feel no threads. Are there threads? Maybe we need longer, longer ones, like the 3. Would you look at that, we have 3 of these. Amazing, amazing.
Imagine having the right number of screws for the job.
For the job, yeah. You would think that a designer would think about this, and they have. You would think that I would have found that these two pieces fit together like really well, like 20 minutes ago. But instead, instead we have our first problem.
You were too informed by your aesthetic sensibilities.
Exactly. We can all take, you know, some lessons about preformed judgments about things.
True.
I'm not sure how I'm just going to screw this one in. Maybe this way?
What are you doing? Well, you're going through there.
I'm trying to screw it together without taking it apart.
That doesn't look like it's very in line.
No, no, no. This is definitely working.
Okay. Do you think this is what the designer intended?
Absolutely. Okay. So they're basically screwed in now.
Nice.
Which now begs the question of what goes on the end. It's probably these things. Like that? Nice. Um, maybe there should be something between them. Definitely not. None of these things have holes large enough, and this goes on the end. So the answer is no, nothing goes between them.
What if you took that O-ring that you put on that gland area and you in fact just put it on the barrel?
Mm, that would do it. Well, kind of. Ah, yeah, that did do it.
Another easy win that you might have is just putting the magazine in, just to feel like you've, uh—
I think I might fail at this. Oh wow, I also now realize that I, uh, put the dart in the wrong way. Let's, let's remedy this situation.
There we go, there we go. I feel like the magazine might have an arrow on it that points forward. Does it?
No comment.
Okay, this actually helps cuz now you can see like where the dart is and like That's true.
That's true. And I feel like this also goes here, perhaps.
Okay. So somehow this dart, right, it's got to go into a fully—
Yeah, no, no, no. Please keep going. It has to go into a fully—
Somehow this dart has to go from being out in the open air to going into a sealed system, right? It needs to be— So right now it's just out in the open. If you were to say blow at it, just the air wouldn't do anything. So it has to get into a fully sealed system. How is it going to do that?
Does this shoot the dart by pushing compressed air into the dart or by hitting it with something? Like, are we using the compressed air to hit something into the dart or to move the dart?
The compressed air is moving the dart.
The compressed air moves the dart. Okay.
Yes.
So this, I feel like loads the dart. The fact that there's a hole through this is promising. Given that there's holes in the side of this, right? Uh-huh.
Show the camera the holes in the side.
These are the holes in the side.
Yeah, yeah.
And there's two holes here, on the back and front.
Right.
Because there's holes in the side, we can actually just screw the piece in. That's fine then.
Say that again?
Well, because there's holes in the side, like, we don't need air to go through this back hole. Right. So we're fine to, like, screw stuff into it. So this goes on here. I understand more things now.
Nice.
This goes in here. This hopefully goes into here.
Yeah, that— the nut is quite fiddly.
Hopefully this is the last time I have to take this nut out.
I should really super glue that nut in. But then it would be—
then it'd be too easy.
Yeah, didn't want to make it too easy.
Yeah. Okay. The amount of cylinders within cylinders right now is quite a lot.
I just love like the setup that's going on right now.
Did I get it? No. Oh, this is annoying.
The recess is hex-shaped for a reason.
Yeah.
If it was like a circle, then this would be really annoying.
Okay, here we go.
Okay.
So now we've got some things going.
Nice, nice, nice.
So now we have this. We have this, this kind of Uh-huh.
Set up.
And this goes back into this.
Right. What goes in this gap?
So this. Oh, please no. No, no, no, no, no. Don't do this to me.
Oh no. What's wrong? What's wrong, Ethan?
I gotta take it out again. No. Oh, this hex nut is the bane of my existence. Out of, out of every part of this blaster, this part right here, enemy number one.
Used to be the orange parts, but now it's this.
Used to be the orange parts, it's just this one bit. Okay, I feel like in this gap perhaps goes this.
Mm-hmm, nice.
Would you look at that? Like they fit together and there's the holes are in the right spots.
It's really a crazy coincidence that that happened.
How I— Yeah, I'm going to be watching this back and I will be yelling at the TV. So I know I can put this nut on now. I'm not going to because I feel like I've got a lot of parts left to figure out what they do.
Think about like the—
Oh, wait. Okay, so you—
Oh, the gears are turning. I can see it.
Okay, so you prime this by pulling this back. Okay, that's, that's wild.
And so what does that imply?
So that, I mean, that implies that this is either against this or this is with this pushing against the spring. But there's 3 holes here. Are there 3 holes anywhere else? Oh, oh, interesting.
What did you discover?
I discovered 3 holes.
Whoa.
Okay, so let's put these together, perhaps. Like this. Hopefully—
Can I jump in to save you some time?
Yes.
Look at this. You see how there's a— You see how there's a—
Which overring?
Yeah, very nice.
Okay, that's the correct overring. Is there another one? Nope. Okay.
That's the only reason why that had to be printed in two parts to get that O-ring in there.
Oh, to get it. Yeah. To get a seal there. Yep. Makes sense. Cause you're pulling the whole thing back and forth. Yeah. You need there to be a seal. Okay. Okay. That's all the screws. So we've made lots of progress. The only question is where the last four ones went. Yes.
Have you figured out where you want to put the spring?
Mm-hmm. Okay, so this goes in here. I'm assuming the spring goes back here, actually. This should be like half out, I guess, for this. But then, oh, okay, okay, okay. There we are.
Nice.
Okay. So I know where everything goes now, except, well, except for this thing. Where does it go? Where do you go?
What do you think the purpose of the little pin is? Like, what's its purpose? And then maybe from then you can figure out where it goes.
Honestly, no idea. Maybe, maybe—
Like in general, what are pins used for?
Well, they're used to secure things.
Okay. Now if you secure something with a pin, have you constrained all of its degrees of freedom? Is it now like completely immobile if you just put in one pin?
No. It's not completely immobile. Trying to think how it can move though. Maybe I should work with pins more.
True. Take Pins 101.
Pins 101. It's my elective for next semester.
You can put a pin in the task that is finding where the pin goes.
That's also true. But then, I mean, okay, I know where this goes. I know where this goes. Let's put this back in here. We now know where the spring goes, and we know where these go, which means that we need to figure out where 4 of these go. Uh, where do the 4 gaskets go? Maybe this goes on one of the ends of this, but also like, I mean, like, gaskets are for making things airtight or adding friction. But we don't really need that.
They could be used for other purposes too.
What would be another such purpose?
It could be used as a shock absorber. Uh, what are the pieces or piece that move really fast after you pull the trigger? What are the things that like—
it's gonna be this.
Okay.
Does this go on the inside here? Yeah.
And so what does that thing like impact maybe when it stops moving?
Oh, is that why there's a bevel here perhaps?
The bevel is just there for aesthetic reasons.
Oh.
It probably makes it worse as a shock absorber, but it'll still work, I think. Aha. I just make like, you know, questioning.
Is that actually what this is for?
Yeah, that's where it goes.
I don't like this. I understand why it's there, but this, this hurts me.
It's supposed to be a full like flat silicone shock pad, but I didn't want to buy one, so I have tons of these O-rings, so I just threw another O-ring in.
Ah, okay, okay. Yeah, makes sense, makes sense.
Yeah, I did think like—
this is, this is your fault, this is not the designer's fault.
It's my fault.
That this hurts me.
Yeah, it's my fault. I apologize.
Okay, so we do this, um, and then we can like— okay, so now we need to find some things that these things go on, uh, Now from careful investigation, we see two lines here.
Ooh, great context clues.
One, two. Uh, I'm not really sure how this helps us, but I guess it could help us at some point.
Something relevant for the placement of those O-rings is that, um, The like the black piece on the end, the end cap.
Are they supposed to go between this thing?
Maybe.
Yeah. Oh, that's very sad. Taking more things apart. Aha. Okay.
What's there?
There's a little metal piece that looks like an O-ring would perhaps go in there. One of the smaller O-rings.
Nice.
Now you said earlier that we never double up O-rings.
True.
I'm gonna assume that that holds true. There's also not really space for a second O-ring.
True.
So there's one. We found a singular— so we still have 2 O-rings left.
Yeah. These are also not in the original design, so I'm telling you that. You might hate me even more when you discover what the purpose of these are.
So you added these?
I did.
Okay, I need to get inside your head. How, how do you think— what do we need O-rings for? Which, which category of O-ring are these? Are these real O-rings? Are these shock absorbent O-rings?
None of the above.
Secret, like, fifth purpose?
They have a purpose, not one that you just described.
Oh no.
It's really coming together though.
It is, it is.
How does it feel to like aim it at something?
Very nice. The ergonomics of the, the blaster are very good, I think.
Yeah, I agree.
I've also never seen this design, I don't think. Okay, I take that back. I've seen this design in like the little, like the one-shot blasters, but never in like a full, a full one, which is why it took me so long to figure out what was going on.
So there's actually something you haven't yet figured out about that. Think about like those single-shot blasters, right?
Yeah.
Can you describe to me how the loading and firing of the single-shot blaster works?
You just pull it back and then you pull the trigger.
Okay, what happens when you pull the trigger?
And then it springs forward. Hmm. Which means that— so yeah, I pull this back. Uh-huh. Wait, wait, wait.
The T-handle, it has to do two jobs. It has to prime the spring, and it has to load the next dart. That's what separates this from, like, the single-shot blasters, right?
Also, to load the next dart, I thought the spring just loads the next dart.
Show me the position when you think the blaster is ready to fire.
This position.
Okay, tell me where the air volume is that is gonna get like pushed.
That was gonna be my second question.
Oh really?
Right, so, so the air volume is if we— so you know, this has the most air volume, right?
Okay.
Oh wait, so is this back piece literally just never moving? Oh, weird. I would have thought this back piece would have moved.
Well, right now it's caught because the—
oh, because there's no spring.
So it's not moving right now because the sear, which is the thing that the trigger pushes, is engaged with it. That's why it's not moving.
Oh yeah, you're right.
Okay, the key thing is the ready-to-fire position The handle is forward. It's pushed all the way forward, and now it's ready to fire.
Interesting. Oh yeah, let's actually put the spring in. Is it safe if I just put the spring in right now? I feel like yes.
Uh, yes. Well, yeah, it should be fine.
It should be fine.
I mean, this pin still doesn't— it's still outside, but—
Yeah, yeah.
But, uh, the pin is not critical to the safety of it.
Oh, now we get to do my second most— my second favorite part of this whole thing, unscrewing this nut again.
Okay, so now that there's a spring inside, we're gonna go over safety rules. If there's no darts in this. Wait, are there darts in the barrel right now? Yeah, you should, you should yank those out. Just poke them out somehow. Is there a pokey thing? Oh, we need to get a pokey thing. How about you use this stick? Just— yeah, there you go.
Yay!
There were a lot in there.
There were 4? Yeah.
Are we clear?
Yes. Okay, so now there's no darts. We're safe to do all of these things.
So you want to avoid firing it when it's not loaded, or dry firing, because when you do that, there's no pressure building up that slows down the piston. So if you want to dry fire, make sure to plug the end of the barrel with your finger, and then you can dry fire, and then it'll be safe that way. So you are free to yank the T-handle back until it clicks.
There is no click.
You gotta yank it further back. Yep. And now push it all the way forward again. Oh, were you holding the trigger?
No.
Oh, you gotta yank it back. There you go. Aha!
Okay, so, so there's perhaps something here that we need.
There's perhaps something here that we might need. So what's the piece that holds the piston back, or that holds the plunger back?
This part.
Uh-huh.
There's no holes here. Um, there's a hole somewhere else that I should be seeing using. So I pull this. No, no, no. So it must be on this. Is there any holes in this? Oh, there's a hole here. Yeah.
Do you remember that hole being there?
No.
That explains why.
Yeah, I put this in every single other one. Okay, so this, this goes in here.
Indeed. And the black piece has some— has like an internal slot, which maybe you can see if you pull it off. It also might be on backwards right now.
It might be. So, okay, so we can put that in. Let's— yep, there's the slot.
Nice.
So you should be able to— you up, right? No, we want you down.
I think you need to pull the grip off too. I think the grip and the black piece go on at the same time, if I remember correctly.
This part?
Yeah, they go on to the bars at the same time. I mean, like, I need to pull this entire part off, which means you need to pull the mag release out because it's currently pinned onto the front.
Yep, yep, yep, yep.
But you're an expert by now. You've done this 5 times already.
Okay, we're going to set all of these other parts elsewhere so we only have a subset of the parts to put back together. Actually, I can just take— okay, what's that pin?
Was that the trigger pin?
Oh, that's the trigger pin. Shoot. Oh, cuz the trigger pin's held in by the rails.
Yes. Okay, so, so actually, I think this piece needs to go on this way. Yeah, and to avoid having to deal with the orange pin and that pin, you could like partially seat this with a pin inside just so that you're like, yeah, now that's out of the way.
Let's do this. Yeah. All right, so that goes in.
And the pin's in there, yeah?
Yeah.
Nice.
Right, so we can do— yep, that now. Okay, and now this is in.
Does it feel more constrained now?
Yeah, it does. Cool. Much more constrained. Okay, nice. So this goes back together. Now this can go on. Nice, nice. Now this should—
if you yank that all the way back, it should stay back. Okay, cool. And wow, cover the end with your fingers and then you can pull the trigger.
That sounded like it could fire a dart.
Indeed, indeed. And so now, so now we just have two mystery gaskets. There are two mystery gaskets.
That's right, that you made up, you made up in your brain where to put them.
Uh, I think it might be best for me to just demonstrate where these O-rings go.
Okay, I'm okay.
Why don't you grab this and we'll switch spots?
Yeah, yeah.
One thing that you can see when it's put together now is the, the bars are a little bit longer than the length of all the pieces put together. Like, this can move a little bit. Mm-hmm. And so these O-rings are actually just shims. So I'll show you where they go. I'll show you where they go. This comes out. This comes out. All of this comes out. Oh, I forgot. All this comes out, and the O-rings go on the bars.
I'd like the record to state that, uh, I'm not a fan of this.
They go on like this, and they take up a little bit of extra space so that it all stays nice and tight. You can put it back together now and just see the difference.
It makes sense though. It makes sense. Here we are. And then push it back a little bit. Ooh, okay.
So you can feel there's a bit more.
Yeah, there's a lot more that you have to squish there.
Yeah.
But yeah, if you just squish it, it works properly. Put the last pin in. And now it's good to go.
Indeed. Now it's all done.
And now it's all done.
Do you feel accomplished?
Do you learn something? I do feel very accomplished.
Nice.
We need to—
let's find, uh—
finish assembly.
Finish assembly, yes. Feel free to hit my chair that I'm not sitting in. Like that chair.
Oh wait, we need to— oh, interestingly, you actually have to— you have to caulk it to put the— Mag in. And then you can—
Oh, you just kind of smack it in and the magazine just opens up a little bit around it.
Oh, okay, okay, I see. And then you push forward again. That's pretty powerful.
Isn't it?
Yeah, that's quite good.
Yeah.
Wow.
Oh, you hit it already.
Yeah. That was surprising.
Two shots. You didn't, uh—
oh yeah, yeah. This is actually much more powerful than I would expect, but also I'm terrible at aiming.
I love the sound the darts make when they go through I really do.
Yeah, it's such a solid like thwack. Yeah, it also really does fly straight. This is much more fun than like a regular effort translates into success. Yeah, instead of trying to like, instead of it being a gamble. Yeah, have some parabolic, very inconsistent trajectory.
So the plan is we've set up a little, a little shooting range here, and just so that you guys get the, the real immersive experience, I will be hiding behind this. Okay, here we go. Yeah, I'm, I'm probably safe, right? The glass makes it so much louder.
You okay?
I'm good. Ah, I feel like you were more accurate before.
I know. Okay, that hit at least.
You hit the bell.
Let's shoot so I don't hit Matt.
Nice!
Oh, that was so close. Hey, this last target is too hard. Oh, last one. Too close.
This last one's tricky.
Indeed.
Can I get this last bowl?
Got the bell.
Oh, that was right underneath it. There we go.
Wow. If we know how far it is from where we shoot to a place, then we should be able to back out the velocity by just measuring how long—
by counting frames?
Yeah.
Okay, should I hold this end and then you go to wherever?
I actually don't know how— oh, it's 5 meters. Uh, what are we at? Oh, that's it. Okay, so something tells me— put it down and then we can measure again.
Wait, wait, wait, you don't move, I will rotate around you.
Okay.
We're going to do the calculation and it'll be like twice the speed of sound because we got the—
Oh, definitely. Okay, now you don't move. What are we going to measure to? Uh, it should be the wall, I guess.
Probably the, the glass, right? Because it'll be a big target and in post we'll hear it, so we can—
Oh, that's true, that's true. Oh, okay, we're gonna need another rotation. Oh wait, so that was 15. So that was 15 plus maybe a meter or so to this glass. A meter or two.
What's that?
Uh, 105. So 16 meters? 16 meters.
Okay.
This will be a very, very rough— and it won't even be feet per second, it's going to be meters per frame. Yeah, yeah, meters per frame is a, you know, perfectly good, acceptable measure of velocity.
We should have marked where we started from.
We started from here.
From here? Okay.
So if I stand about here—
also you can I keep forgetting.
Yeah.
Is it going to make enough sound when it starts?
I think so. All right, you should hear a shot.
Yeah.
Okay, but I need to actually hit the glass.
That is key, yeah.
That is key.
Please hit it.
I think you could hear that.
We're gonna do bets. What is your bet for the calculated speed? Not the actual speed. When I look at this in post, what will the calculated speed be?
We'll say 120 feet per second. I think you need to buy one of those like high-speed— High-speed cameras? Yeah. Yeah, yeah. That's like a couple thousand dollars and then we can do it from there.
Everyone subscribe so I can get enough money from ads to buy a high-speed camera.
That's how much better— Everyone should subscribe. Everyone should subscribe so we can get a high-speed camera. Good, good, good, good, good.
Okay, do you want me to shoot you with this now?
Oh yeah.
3, 2, 1.
Oh, oh yeah, that actually does sting a little. Yeah, I think it's about like getting hit by a paintball.
Okay, yeah, and there's no paint, so it's—
yeah, and there's no paint, so it's much better.
Do you want more?
Yeah.
3, 2, 1.
Oh, okay, that one hurt like way less.
Oh, really?
I think it varies. Okay, perhaps also where you get shot, which would make sense. Yeah. Okay, one more for science.
One more for science. For science. 3, 2, 1.
Yeah, I think that one hurt the least.
Interesting.
Okay, so it's definitely where it gets— where you get shot. Yeah, but there might also be some like feet per second variations.
What are your thoughts?
I would rate this very highly. It also feels really nice to use. It does, honestly. Like, yeah, you can tell there's layer lines from 3D printing, but I kind of like the feel of them. Yeah, they're just very smooth. Yeah, I think the texturing is really nice, and it also just like feels quite nice, um, to use. And you can actually aim, which is always a bonus.
And now you know how it works and how to put it together.
Indeed.