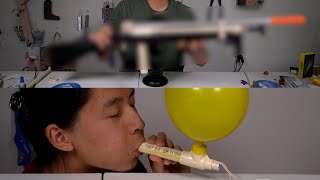
I put a Nerf gun inside a real gun
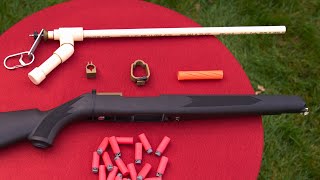
Matthew Yuan built a foam-dart blaster inside a real gun's plastic housing using 3D-printed parts and an air-tank pump system. It fires darts at 276 feet per second and penetrates through paper and cardboard. The barrel itself pumps air into the tank via a ramrod with an O-ring.
Chapters
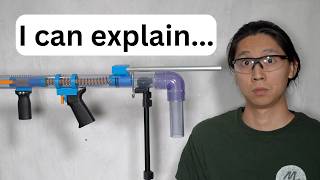
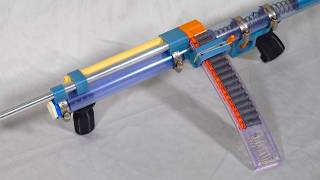
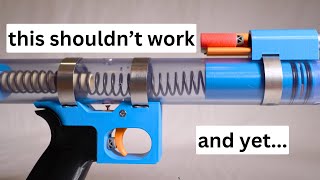
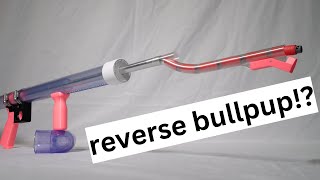
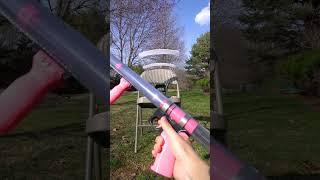
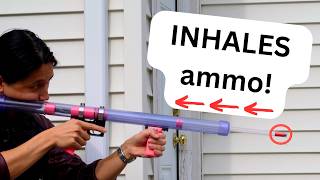
Ooh! I want to be absolutely clear to all the YouTube moderators watching out there that this video contains no guns. While this black piece of plastic is intended to house the guts of a real steel firearm, what I've put inside of it today just uses air pressure to shoot foam darts. So let's bring the camera around, I'll show you how it works, I'll take it apart, and then I'll show you it firing. Let's start with an external overview. Starting up at the front, we've got a rifled barrel attachment that helps with accuracy. Then we've got the barrel. Attaching the barrel to the stock is the front barrel band, and that also serves as the front sight. Then there's a foregrip, which is checkered. Then there is the rear barrel band, which is also the rear sights. And then this stuff right here forms the air tank. This is where air pressure is built up when you're ready to fire. A little bit further back, we've got the trigger, and you'll notice that when I pull the trigger, the air tank and the barrel move forward at the same time. Further back, we have the grip, which is also checkered, and finally the stock. There's really nothing much else to it from the outside, so to get a better understanding of how this works, let's take it apart. So first, there's the muzzle attachment, which just slides off. This is a single 3D-printed piece. Further back, the front barrel band also just slides off. This is also a 3D-printed piece with some tension from a zip tie. Finally, there is a screw down in the bottom here, and we can unscrew that with a carefully shaped clothespin. Once that has been unscrewed enough, the rest of the insides just slide right out, and we're left with this block which does not come out. We can pull off the rear barrel band. You can see how there's a nut in there that the screw engages with. We can pull out the barrel just like this. If we take a look inside here, we can see that there is a metal pin with a rubber seal that's held in place by this shaft collar, which is preventing this thing from sliding all the way out. Then we have a trigger bar and this carabiner, which serves as the trigger. So after loosening these two screws, this shaft collar just pulls out, and that allows the pin to fully come out of the front like that. So here's the pin. It's just a piece of metal with a wider bit at the end, which keeps this rubber seal from slipping out, but it's also glued in there. This seal interacts with the back of the barrel to form an airtight seal when the air tank is pressurized. When the trigger is pulled, these two surfaces move apart, which then allows air to rush out of the air tank and through the barrel and propel the dart. Inside the air tank, there's another stationary seal which seals against the back part of the pin, and that allows it to slide back and forth without leaking anything out the back. With the barrel, air tank, and valve pin all put back together again, I can demonstrate how this thing actually pressurizes. There aren't any noticeable pumps to build pressure, and that's because the barrel itself is also a pump. If we use a ramrod with an O-ring on the end, we can pump through the barrel and build up pressure. Now, if I just try pumping, then nothing's going to happen because this valve is free to move back and forth. So what I need to do is while I'm pumping, I need to keep the pin pushed forward. And I found in my testing that I could use like a spring or something to keep it pushed forward, or a rubber band, but an even easier way of keeping it pushed forward is just to push it against some object. And if I do this, the force of me pumping actually pushes the air tank into the pin, and somehow that's enough to keep it sealed. And now there's a little bit of pressure in the tank, which means if I put a dart in the barrel and then pull this pin back, the dart shoots out because there was pressurized air behind it. Quick side note, you might be used to seeing Nerf darts that look more like this, but I'm using these darts instead for two reasons. First of all, the head of the dart is narrower than the foam, which allows me to shoot them through longer barrels. And second of all, they are shorter, which actually makes them more accurate. The connection between the barrel and the air tank is just a friction fit between two plumbing fittings. And you might say to yourself, "Matt, isn't that kind of bad? Like, if you over-pressurize this, isn't it going to blow out the front and be kind of dangerous?". And my response to you is, at the pressures that I use it at, that hasn't happened yet. And I do know that if I over-pressurize it, instead of breaking into shards or something, it'll just kind of pop out at one expected failure point. So not gluing that is by design. However, all of these other fitting connections are cemented together using today's sponsor, Bloateez Magic Pipe Cement. Normal pipe primer and cement must be manually applied, and that leaves a mess. With Bloateez Magic Pipe Cement, simply throw your parts into a dirty bucket, follow that up with some Bloateez Magic Purple Primer, then some Bloateez Magic Pipe Cement, then give everything a stir, and just like that, your parts will be cemented together. Find Bloateez Magic Pipe Cement at your local grocery store today. Now available in lemon-lime flavor. Here I've reassembled just the valve pin, the shaft collar, and the trigger parts. To show you how that fits into the stock. Here there's a nice groove which is shaped perfectly for the shaft collar, so that just slots into place like so. And then on the bottom of this block, there's a magnet which this carabiner just snaps onto. So this is what is holding our trigger in place and allowing it to slide back and forth. Now that we have everything reassembled, we can see how all of these parts work together. The barrel and the air tank can slide between the two barrel bands, and the valve pin here pushes up against another metal pin that's in this block. That way, when I slide everything back, the valve pin is pushing against this fixed pin, which goes straight into the stock. This means that as I am pumping The valve pin gets pushed into the sealing face, and everything seals as I'm adding pressure. And then when I pull the trigger, this trigger bar levers, uh, the air tank and the barrel forwards, causing the air to be released. Here it is with 3 pumps of pressure. That's the operating pressure of this thing. And now you can see what the trigger pull is actually like. As you can see, it's pretty crisp, and it feels quite nice. Now we're going to shoot a couple times through my chronograph, which will measure our blaster's firing velocity in feet per second. That's an average of 276 feet per second, or 84 meters per second for those of you who live in a country where units make sense.
So to do our accuracy tests, I've set up a foil target on this can, and the red spot is where I will be aiming. And about 10 yards that way is is where all my stuff is, and that's where I'll be shooting from. Ah, it's very close. Nice, that was really close.
Yeah.
Wow, it's very close too. It's a ball.
I think I hit it.
You hit it?
I went slightly under.
Oh, it's way off.
Is that low?
Much low.
Okay, last one.
Okay, pretty good. Okay, so the foil leaves some really nice indents. I'm really happy the second shot actually hit the, uh, the paper square, so the little indent is right there. But our 5-shot grouping has 3 really close together and then 2 kind of further out. Um, given how accurate normal Nerf blasters are, I'm very happy with this.
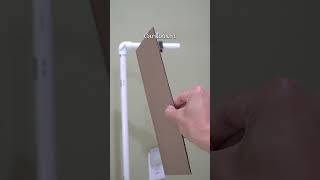
Here I've set up 4 different targets that get increasingly stronger to see if we can shoot through them. You've already seen it shoot through the regular printer paper, so next we're going to try brown bag paper, and then cardstock, and then cardboard.
Did it go through? Oh, it did!
Another one easily straight through. You're so excited.
Should I stop?
Yeah. This one made a nice little smiley face as it went straight through once again. Boop.
No, it made a dent.
Yeah, it made a significant dent. Wow, the energy made this clip flip up. This dent is pretty significant. It's not all the way through, but the other side of this cardboard is definitely bulging out just a little bit there.
We might as well shoot the cardboard from point-blank range just to give this the best chance of working.
3, 2, 1.
Oh, it worked!
Oh, it went through?
Yeah, the dirt's over there. That point-blank shot went straight through. Oops. There you can see the hole.
Dang. If you've made it this far in the video, feel free to punch a hole in that subscribe button, and while you're at it, punch a hole to get all the notifications. If you really want to support the channel, consider becoming a member. Members will get shoutouts in every video just like this, and you'll be able to watch my new videos 3 days early. I have an extra can of bloaty cement, so for our final test, I'm going to put it right behind our chronograph and see if I can shoot through that and hit the can from way over there. It didn't go through it.
It hit the stand. I hit the— I hit the thing again. It did not go through. Oh, it went— wait, did it? No, it didn't.
I think that last shot grazed over the top of the chronograph instead of going through it, but also one of the previous shots, um, broke my screen. Like, it's on and it's not giving me any numbers, so I can't get the, the chronograph reading and the final result that I want.
So this is gonna be the end of the video. So thanks for watching and, uh, stay tuned for the next video.
Bye!