Making the Nerf blaster I dreamed about when I was twelve
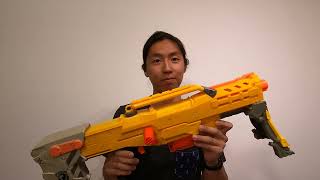
A creator modifies a Nerf Longshot from childhood dreams, upgrading the spring from stock to 8 kg and reinforcing the bolt sled with sheet metal. After 3D-printing a new barrel and breech, the blaster shoots 85 fps instead of the original 38, finally delivering the power he wanted as a kid.
Chapters
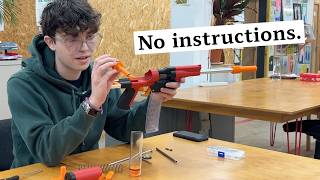
When I was a kid, I loved to modify Nerf blasters to make them shoot harder. And at the time, the best blaster to modify was this: the Nerf Longshot. And when I finally got one, I wasted no time and started taking it apart to modify it and make it really cool. But at the time, I didn't really have the skills to do the stuff that I saw online, so I ended up kind of messing it up, and eventually it broke and got thrown away, and I never saw one again. But all of that changes today. I picked up this completely unmodified Longshot off of eBay, and today we are going to use the skills and the knowledge that I have today to finally fulfill the dreams that I had as a kid and make the ultimate modified Longshot. So let's do it. Oh, oh shit! First, let's get a sense of how hard the unmodified Longshot shoots. All right, 38p per second. That's pretty bad. Yeah, we can make that a lot better. The first mod that we have to do, of course, is getting rid of these silly DG initials, because those aren't my initials. Who's that? Yeah, there we go. Those initials look much better. All right, now it's time to take it apart. First thing is we have to get this bolt handle out, and it's not really designed to be taken off, so we'll need to use a bit of force. Now we got to unscrew all these screws. This screw will not move. Okay, I definitely stripped it. The screw head is stuck on the drill! Alright, now that all of the screws are either unscrewed or otherwise removed, we can open up the two main halves of the shell. Oh, there it is, the internals! Wow, I haven't seen this in like 10 years. Brings back so many memories. This is the bolt and the plunger tube. This is the heart of the Nerf Longshot, and the way it works is that the dart gets pushed into the bolt and Back here in the plunger, there is an air seal and a spring. So when you pull the trigger, it releases this spring, and it uses the air to push out the dart. Okay, well, I'm very weak. Let's try that again a bit faster. There we go! That's approximately what's happening when you pull the trigger. If you look down through the bolt, you'll see that there's this blockage here. It's not a clear path. That thing is an air restrictor, and it's a safety mechanism, but we don't care about it. We want to remove it so that we get better airflow. All right, so I drilled for a while. It didn't actually work that well. What works better was just these little snips, and with them I was able to get out this back piece and this spring and this main moving part of the air restrictor. You can really see how all this gets in the way of the airflow, and now that it's out, we have a much clearer pathway for the air, so that alone should make somewhat of a difference in performance. Let's see how much of a difference taking out the air restrictor made. Hey, 50! That's much better. The next thing we're going to do to increase the power is to replace the original spring with this guy. This is a much heftier 8-kilogram aftermarket spring, and I think it'll make a big difference. But before we do that, we're going to need to make some reinforcements to this bolt sled here so that I'm not breaking this thing every time I prime it. So let's head on over to the garage. So I've got this piece of sheet metal, and I'm going to cut out two L-shaped brackets that are going to reinforce that bolt sled. I have to figure out— I should probably just wear gloves. This is going to take a long time. That Dremel was not working, so I got some tin snips. Is this right? How do I even use these? Today we have a tech tip for you on how to use tin snips properly. So now this is going to go on the inner surface of the bolt sled to reinforce it. So I mixed up some JB Weld and slathered it onto the metal brackets. And I just absolutely threw my whole family of clamps on this while it cures. Like, we got the Papa Clamp, the Mama Clamp, the Papa Clamp's mistress, the kids, the whole gang is here. And, um, I'll come back the next day, and by then, uh, this should be strong enough to hold the new spring that we're going to put in. So I'm super excited to see what kind of power increase we'll get from that. So it's been a couple of days, and the JB Weld has now fully cured on both sides of this bolt sled, which means we should be ready to go to handle the increased spring load of this new spring. So that's on here. I also added some padding on the top of the plunger head. So we're going to reassemble this now and, uh, see if it can shoot, see if it can handle this kind of power. I'm a bit scared because even though we did reinforce the bolt sled, we didn't reinforce anything else like the trigger or the catch. So I'm gonna try and prime it, see if it even catches. Hopefully this works. Okay, it catches. That's a good sign. Let's put our dart in. I'm glad it hasn't exploded yet. That's like an achievement in and of itself. All right, let's see what happens when we fire this thing. In 3, 2, 1. 85 feet per second. Well, that's definitely improvement. This Nerf gun that I have that's way smaller already shoots at 97 feet per second, and it's got a much smaller spring and plunger. So there's got to be something else that we can improve. If we look at the barrels on the smaller Nerf blaster, we'll see that they're pretty much the whole length of the dart, and the dart fits snugly all the way down. That means when you fire, there is a lot of time for the air to push against the dart and make it faster. By comparison, the, uh, setup on our Longshot— remember, this is the bolt— it is actually shorter than the barrel on that one. You'll see this is as far as the dart goes in. There's still a bunch sticking up, and there is a barrel of sorts that follows this, uh, but this is nowhere airtight. The fit in this barrel is more like a hot dog in a hallway, so that's not really helping. And what that means is, even though there's this huge plunger volume of air that we're pushing out every time we fire, it's not being put to work because the dart leaves this tiny section of barrel, and then the rest of the air is just wasted. So we got to fix that. So with these two new 3D-printed pieces, we're going to make a couple modifications. This old loose barrel is going to be replaced, and this little nub which, uh, seats in here hopefully with an airtight seal will be put into the bolt right here just so that it sticks out a little bit. And hopefully what we'll be able to do is now when you, uh, close the bolt like this With a dart in there, we will actually be shoving that dart into the barrel, and at the very end, sealing it up like that. Testing my 3D-printed long-shot barrel in 3, 2, 1. Ah, well, that was very anticlimactic. All right, it has been a long time since the last clip in this video. Uh, you can tell it's warmer now, I've got my summery shirt on. But the more important thing is I figured out what the problem was with the previous breech. And I fixed it. There are two problems. One is that— this is the old breech— because the end of this was just a flat squared-off end, the dart, because there's magazine pressure pushing the dart upwards, when the next dart came up, it would often overshoot the bolt and kind of land like here, and then when the bolt tries to close, it would just jam up or crunch the dart, and little foam bits were spraying everywhere after further testing, and it was not good. So I needed to make an over-travel stop. And the second thing is that this kind of dart that I was using has a green tip that is almost the same width as the dart itself, and what that meant was, uh, it would During firing, the rubber tip would actually scrape against the side of the barrel and cause a lot of friction, and that would cause the dart to get jammed up in the barrel more often than not. So to fix this, I designed a new breech. Here's the old one, here's the new one, and there's some other structural differences, but the main difference is the addition of this thin over-travel stop tab. So now when the dart comes up through the magazine, it is guaranteed to be at the perfect height. It will not be too high, and that will help it seat into the barrel. But besides that, I also just switched to a different kind of dart. I went with these darts mainly because the head of the dart is a lot narrower, so it is less likely to snag against the barrel, and it's also a lot shorter. And this is something that I've learned generally helps with accuracy and performance. All of the super high-powered Nerf blasters these days are using something more like this instead of something like this. So with those two changes, I think we're going to put this back in the blaster and see if we can get more consistent feeding and firing. Here's what the new system looks like installed in the shell. You can see that the over-travel tab is poking out here. And when the magazine holding the short dart is installed— hard to do this from behind— yeah, it'll go in there like that, and the over-travel stop prevents the dart from being too high. So that's what it's going to look like. The bolt will go back here. In the next cut, I'll have it fully assembled and we'll get to see it firing. You thought I was going to shoot the camera again, didn't you? Not this time, I learned my lesson. Let's go shoot some cups. Oh, first try! That was literally the first one, I'm not even kidding. So there we have it. The 3D-printed barrel finally works, and it's been shooting really hard. I know other people can make these shoot even harder, but I'm pretty satisfied with where it is now. I really think that if the kid version of me had seen this, if I could give it to them, they would be amazed at the ability that I have now. And that's all thanks to things like my 3D printer, being able to make barrels of any size I want, and also some of the knowledge and skills that I have now. I didn't get to do everything I wanted to do, so you might see another follow-up video on that. But that's it for now. I hope you enjoyed. I hope you thought this was interesting. I'm going to try and make more of these on a more regular schedule. It won't all be about Nerf, but some of it will. And if you like it, please subscribe, comment, do all that stuff, make the algorithm think that I'm good at this, and see you next time.