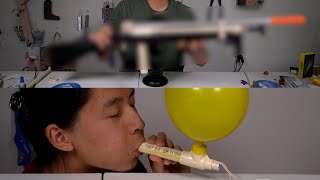
Model rocket to insane Nerf blaster
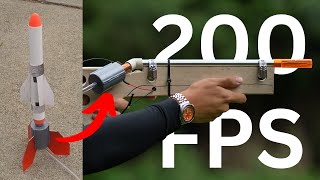
A builder converts a model rocket air tank into a pneumatic Nerf blaster across two prototypes. The second version uses a rifled barrel, solenoid valve trigger, and dual-action pump to hit over 200 fps and puncture cardboard, but the tank develops stress fractures during testing, forcing a halt to the project.
Chapters
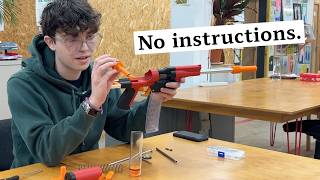
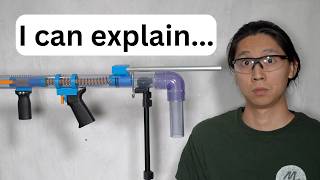
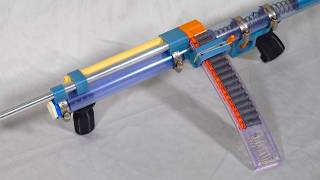
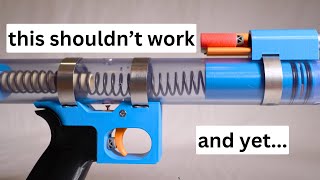
If you're obsessed with something, whether that be watches, coffee, cars, or anything else, then you probably notice stuff about that thing that normal people don't. That's a 997.2 911 Carrera GTS. For me, one of those obsessions is Nerf, and my Nerf senses were tingling when I was at the store and I found this thing. Ooh, what do we have here? This is not a Nerf blaster at all. It's a model rocket. Based on what I can tell from the back of the box, I think this thing is powered by an air tank. Because the rocket is such a big mass, this air tank has got to be pretty beefy in order to launch it. So my Nerf senses tell me that if we modify this thing to shoot tiny little Nerf darts instead of this big rocket, we'll get something really powerful. So that's what we're going to do today. So here's everything that comes in the box. The stuff on the left is the materials to build the rocket itself. That's not really that interesting to me. We can handle that with an ASMR montage later. The stuff that actually matters is the stuff that actually launches the rocket. The box calls this a detonator, but it's really just an air tank and a release valve. To operate the air tank, you attach a bike pump, which is sadly not included. You pump it up a couple times, and then when you press the big red button, air shoots out of the tank. You're supposed to attach this post to the air tank, which fits inside the rocket, but this is just a tube, which means I can already put a Nerf dart inside here and without any modification launch darts from this. Oh, okay, but I'm getting ahead of myself. ASMR, let's go. You versus the guy she tells you not to worry about. Testing the rocket at 10 pumps in 3, 2, 1. Oh, it broke. So this thing is pretty bad for its intended purpose, but that's okay because we don't use things for their intended purpose here. It's time to modify this. The first step is to replace this post for the rocket with a coupler that we can use to attach a barrel for darts. Very nice. Now I want to change this blast button into more of a trigger-type thing, and I found that with just a little bit of twisting, you can pretty much completely take this apart. And you get this little guy. I found some scrap piping to make this little handle sort of thing, and I believe that the little release valve can just go right in here like so. And now it's sort of more of a trigger type thing. Next, our air tank can fit into here. And we can reroute our tubing here to here. And finally, we can attach our barrel at the front. There we go, prototype number 1 complete. 10 pumps in 3, 2, 1. That left a welt, but it's not all the way through. Sometimes during my test firing, darts would just kind of fart out the barrel. I think it's leaking somewhere. So this prototype is a great first start, but there are a couple problems with it. First of all, as you saw in the previous clip, it's pretty inconsistent. I think that's due to these fittings sometimes leaking, especially here where it attaches to the pump. And also the trigger mechanism, or release valve, is a bit inconsistent too. If I'm not careful to push the release valve really quickly, then the air doesn't release all in one big burst, and that really weakens the power of this thing. Also, it's just kind of awkward to use. Like, I have to hold it like this while I pump, and, you know, trigger is kind of not in the best position, and it doesn't really look that cool. So we're going to fix all that by making a second version. Hopefully with the next version, we'll be able to break 200 FPS and get a dart to stick in cardboard. The reason why this video took so long to make is because I moved and I got a whole new studio, so I've been setting it up and I hope you guys like it. I've got the front-facing camera, I've got the above camera, and I want to show you all of the cool little bits that I got now to build our new and improved version of this Nerf gun. So first up, we've got this new aluminum barrel that's super smooth, and on it there is a rifled attachment for extra accuracy. We've also got a new pump that actually pumps both ways. And the key to fixing our problems from before is this guy. This is an electronically actuated valve, and the way it works is normally it doesn't let anything pass through, but as soon as you apply a voltage to these two wires, it'll instantaneously open., and that will cause whatever air or water to go through super, super fast. So this is going to be our new trigger mechanism, and we're going to put it all together using these various bits and bobs on the table right now. So this is what the general setup is going to look like. Pump here, tank there, and the release valve will come off of this little piece on the side. So what I need for this is back here. Okay, it's all assembled. Let's try and pump it up. All right, looks like it holds pressure. Let's load up a dart. Now if everything goes according to plan, what I should be able to do is stick this battery on the two wires, and when the connection closes, it will fire. Let's see. Doesn't work. Oh, it worked! Okay, so the polarity matters. The box for the valve said that doesn't matter which way you do It does matter. Okay, now I know. The 9-volt battery that I initially used was very inconsistent. That's when I realized that this valve is rated for 12 volts. So I went out and got this tiny 12-volt battery, but that one performed even worse, which is when I realized I need 12 volts and more current than either battery could provide. So I found this power brick which had both enough voltage and enough current, and I tried that out. This is very sketch because it feels like I'm sticking my fingers directly into the outlet. But, uh, you know, don't try this at home. Now that I've verified that all of the pneumatics work, it's time to get this into a more manageable package. So that's why I brought this big board. I think the plan is going to be to make some cutouts in this board and kind of arrange the barrel like this and make some kind of handle here. And put the pump down here so I can pump easily, all while holding this kind of as a blaster. I don't really have a particular set of plans or measurements, so I'm just going to kind of eyeball it and figure it out as I go. Hopefully I get something that's nice and ergonomic, something like this. Yeah, that looks really nice. It may not look like much now, but it's time to start cutting and drilling. Thanks to my masterful woodworking, I now have a channel cut in the top of this plank which fits the barrel. So now I'm going to take these hose clamps and just clamp it on here and here. I tighten the clamps all the way down. And it's still loose. Eventually, I did make the hose clamps work by adding in some plastic spacers so that they could fit tightly. In the same way I attached the barrel, I attached the valve. And with that in place, all these tubes connect to it, and then the tank slides onto the barrel like that. All right, now this thing is really shaping up to be a Nerf blaster. With that piece cut out, I think it holds pretty well, and I also installed what will be the trigger button right here. One thing that I don't like right now is the balance point. So if I'm holding it here, it's very back heavy, so I think I might try lightening up the stock area a bit. All right, that should be a lot lighter. This thing looks like a cheese grater now, but the balance is a lot better. And I also put on the pump as well, so the only thing that's left to do now is route some wiring from this button through the valve and to this little plug so that this can plug into the wall. I've actually never done this before, so hopefully nothing bad happens. Oof, smoky. I'm sure I'm gonna get a lot of comments about what I'm doing wrong. You know, sometimes I think about intentionally doing stuff wrong just so that the mansplainers in the comments give me more engagement. Oh, it's so smoky. Can I shrink heat shrink with the soldering iron? I guess we're about to find out. Wow, I'm very bad at this. Eventually I was able to solder all the wires and the trigger actually worked. With 10 pumps I could break 200 feet per second. I was even able to puncture cardboard, and I made a community post about it, but I did not take a video. What I wanted to do was go outside, set up a cardboard target downrange, and get a slow-motion shot of this Nerf gun puncturing cardboard. After all this work, I felt like I was finally ready. Wait, wait, come over here. What? Uh, there might be a problem. I was pumping this and there were some stress fractures. Like, like, look at this. Watch when I pump. Oh, I see it, I see it. Yeah, yeah, that's, that's really bad. And then when I, when I fire, they all go away. Yeah, yeah. Uh, I don't really want to use this anymore. If I pump it more, I'm— this might blow out and like hit me in the face. This thing kind of scares the shit out of me, and I don't want to use it anymore. But that doesn't mean I'm giving up. While this tank probably can't handle the pressures that I need to get what I want, I already have supplies and a plan to redeem myself. So look out for that in a future video, and leave your suggestions down in the comments. But for now, bye-bye!