Turning this Nerf "shotgun" into an actual shotgun
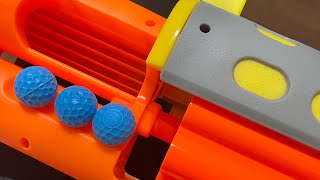
Matthew Yuan modifies a Nerf Fortnite Legendary Tac to fire multiple projectiles at once by hollowing the barrels, removing the air restrictor, and swapping in a stronger spring. The upgraded version reliably shoots two Rival foam balls simultaneously, though three-ball shots won't work due to barrel size limits.
Chapters
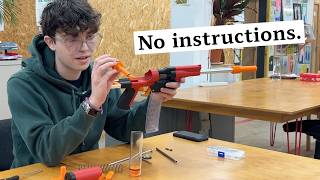
This is the Nerf Fortnite Legendary Tac, and out of the box, it's kind of disappointing because despite the obvious styling cues, this thing only shoots one dart at a time. So today we're going to change that. We're going to upgrade its power, we're going to make it rear-loading, and we are also going to turn it into an actual shotgun so that it shoots a bunch of things at once. Let's do it! First, I got the blaster to open up by taking it to therapy. Now tell me, when Sarah rejected your promposal, how did that make you feel? So this is what we've got going on inside of here. We've got a 6-round turret, and a plunger tube, and a spring, which is powering this whole thing. Here are the internal workings without the rest of the shell. This is the plunger tube, and inside we've got the plunger and a spring. You'll notice that the plunger head is already nice and padded with this rubbery stuff, which is nice. And the way that this works is that your dart goes in the barrel like this, and when the plunger is shot forward with the spring, hopefully— ah, come on! When the plunger head flies forward, the dart comes out. Obviously much faster than that. Oh, I keep dropping stuff, hold on. This thing here is the cylinder rotation mech, so every time you prime, that rotates the cylinder. The plan to make this shoot as an actual shotgun is gonna be to hollow out these barrels. Right now there's some stuff in there, and I think the inner diameter of this is already the perfect size for a different kind of ammunition, which I'm gonna try and fire, and you'll see that later. Here I've got the cylinder just by itself. Hopefully you can see how there are obstructions in the back of each one of these. I am just going to use my snips to cut them out. Now each one of the cylinders is pretty much clear. There might be some sanding I need to do later, but for now I'm going to move on to the plunger. So the plunger has this little tooth on the front, and its purpose is to block off the air unless a dart is perfectly positioned to push it in. Now the ammo we're going to be using for this is not going to do that, so it's time to remove this thingy as well. It took a bit of hacking, but now the air restrictor is in shambles. With that out of the way, we should have a much more free flow of air through this, regardless of whether or not the initially correct type of ammo is loaded up. Now we should be ready for a preliminary test to see if the ammo I have in mind even works. So we'll put this thing back together, and I'll show you what happens next. So instead of shooting these Nerf Mega Darts, which are kind of big and bulky, we are going to be shooting Rival Balls. This is what they look like. This is what they look like, and I'm pretty sure that the diameter of one of these balls is almost the same as the dart. It's occurring to me now that I'm going to be saying balls a lot. Not only that, but they're blue balls. Okay. Now that I have this back together and I'm looking at the fit in the original barrels, these Rival balls seem a bit too tight. I really have to, like, push to get them in there. So I'm not, I'm not particularly optimistic about this first test. In fact, I don't even think it's going to come out. Of the barrel at all. And I'm so sure of it that I will aim at the camera and nothing will happen because I'm going to be right. Oh, wait, that actually worked! Somehow I keep accidentally hitting the camera in these videos. Anyway, now we have to load this thing full of balls to see if we can With just the minimal modification that I had done so far, it looks like the blaster was firing single shots beautifully. Alas, my celebration was premature, because the moment that I tried loading 2 balls at once, the blaster failed spectacularly. It's clear to me now that The stock spring in this blaster is just not strong enough to where we want to go, if it can barely even shoot out the first of 2 balls loaded into one barrel. So it's time to replace this scrawny little guy with this big beefy boy. Now I actually already did the spring replacement, and I completely forgot to record it. So instead of giving you footage that doesn't exist, please enjoy this dramatic reenactment. And now let's try and test the new spring. I've got 2 balls already loaded up, and— what the— it won't prime! Hold on, we gotta open her up again. I had my suspicions about what was going on, but to confirm, I opened things up and started measuring the spring. I found that the uncompressed length of the spring was 102mm, and each coil was about 2mm thick, and there are 16 coils. That means that the maximum compression of the spring is 70mm. However, the travel of the pump grip is 73mm, and therein lies the problem. When I tried to prime the blaster, I would go back 70mm, and then I could not pull back any further because at that point the spring was fully compressed, but the catch was still 3mm further back. So therein lies the problem, and now I have to figure out how to fix it. I've looked at all the parts of the shell and all the places where I can cut things in order to decrease the compression of the spring. And I think the best way to do it is going to be to attack this lip on the top of the plunger head. So right now, this is where the front of the spring is resting against, but you'll see that there is space here, and I think I can remove that space a little bit, shorten that space so that the spring is resting a little bit higher up. What I'm going to do is just cut off this existing lip, and that'll give me a couple more millimeters of travel so that the spring is not completely cramped on the very back part of the prime stroke. That ledge is now snipped off, and that should give the spring more room to rest further down. It seems I will need to do some sanding. So I sanded down the plunger head so that the spring now fits over that part that it was getting stuck on before, and I also added a little spacer because I don't want to loosen it up too much because then we're not getting all the power out of the spring. I think this should be a happy medium where the spring will compress pretty much fully, but it won't be, uh, overcrowded and not catch. So I'll put this back in and hopefully it'll catch. Here we are all assembled again. Now if my changes work, then I should be able to pump this back and it should stay back. Oh, beautiful, it catches! All right, now we gotta fire it. That's so cool! That footage was admittedly a bit hard to see, so let's take this outside and see if we can't get some better shots. So there we have it. The spring upgrade ended up being a big success because now this thing can reliably shoot 2 balls at once. I really wanted it to shoot 3 at once, but no matter how hard I tried, it just doesn't seem like it wants to. I think the barrels are still a little bit too skinny for Rival balls, and so even with the upgraded spring, 3 balls just wasn't going to work. But that's okay. I also made this stock. I don't know if I mentioned it already or not, but now it fits really well in my hands. So I'm overall very happy with this. There might be a future video, I do have some ideas for how it could shoot 3 things, not rival balls, but a different kind of ball. So if you're interested in seeing that, let me know, drop a like or something. But for now, I will say thank you very much for watching, and I hope you have a great day. If you want to see a different video where I build something else, why not check out this one? Shoving my balls in there.