
BAKERY WEBSITE
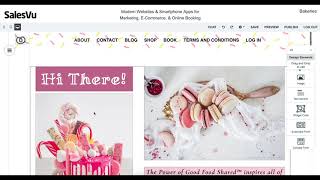
Sam walks through building a bakery website with the Bakerist template, covering logo edits, product pages with modifiers, Instagram integration, and publishing with a custom domain.
Hi. Today I'm going to show you how to create a website using our Bakerist template. So select Bakeries and as you can see here, we have a template ready made for you. But if you have specific requirements, just click this, provide your name, email address and their requirements, click Submit and we will get back to you as soon as we can. Let's start our edit. So, as you can see, here is our bakery template. The first thing I'm gonna do is minimize the logo and drag it to the upper left corner. You can also edit the image if you have your own logo. No need to stick with the one we provided for the template. Then what I'm gonna do is I'm gonna edit the text and I'm gonna just drag it to the middle apart. And here I'm gonna put my business name and editing the text. You can also edit the font, the font size, the alignment and everything, even the colors. So I'm just gonna choose the font that I want. We have a good selection over. Then once you're happy, you can change the font size, change the font color, do whatever you like. After that, I'm going to go ahead and click Edit Banner to change the banner images. So here I'm just uploading a bunch of images that I have that I want to be seen when my customers go onto my website. You can add multiple images. You can also even delete the other one or drag it around. So as you can see, I'm just clicking and dragging the photo to however placement I want it. Then you could change the slider time at the bottom, click Save when you're happy. Then I can edit the text at the bottom right here. So what I'm gonna do is I'm just gonna add text that, you know, welcome the customers into the website. Since I'm using this website as an example, I'm gonna copy the coat that she has and just paste it on here. And once you're happy with that, I'm gonna go ahead and put a background color. So you can do that by clicking on Settings. You can also add a background image if you wish. Then I'm gonna change the font color and the font size. Then I'm just going to adjust the background here. I'm just gonna adjust the background color as well to match the one up there. Then I'm gonna change the font color. Remind you, if you want to change the background color or add an image, just click on Settings, choose the color, or choose Background Image. And we also have a feature where you can link your Instagram. So it will have a widget on your website. So click on this link here and it will take you to a page. I'm just gonna copy the Instagram site of the website I'm using as an example. I'm going to go back to that page and copy paste the username here, click on Preview and it will look like this once your website is done. So copy the code, go back to the website builder, then paste the code here, and then click Save. You'll be able to see a preview when you click either Preview or when you publish. So here at the bottom is your footer. So I'm just gonna change the business name. The text you can see here will be fully customizable. Let's go ahead and edit our about page. Let's click about and the first thing I'm going to do is edit the text. So click on the text, click Edit Text and then type your text. So what you're going to do, you can also change the font style, the font size, the alignment, the font color. It's all given in the choices above there. What I'm going to do is I'm going to change the font color and I'm also going to change the background color. So click on settings for that, choose the color, and you can also upload an image if you want. You will also be able to upload your own image. Click the edit image, add new image, and then upload the file from your computer. I'm also going to edit this image right here. Again, click on the image, edit image and then add your own image here. I'm just going to edit the text. So I'm going to click Edit text, Put in the text that I want to put in. I can change the font size, the font color and the font style. And in your about page, you can put anything you want your customers to know about your business. Again, you can add a background image or a background color by clicking on Settings. So once you're happy with that, you can move on to the next page on sitemap. We're going to edit the contact page now. So on the contact page, it is crucial for you to put your information like an email that they can contact your company in and your phone number so that your customers can reach you if they need any assistance. Here you can edit the text. What I'm going to do is I'm going to change the alignment, make it centered, and I'm going to change the font style. So again you click on the text, Edit text and the Options will come up. So I'm also going to add an image. So under design elements, drag the image and place it where you want it to appear and then open the image on your computer. Once you select your image, it will upload automatically onto your website. The image uploads, you can just click it and drag it to place. Or, or you can add another image if you like. I'm just going to use this one image at first top. You can see we all have links. So if you want to put links at the bottom of your website, just click on the two dots and click Put in footer. So I'm just going to put a couple in the footer down below. What put in footer means is you have links on the bottom of your website, as you can see right here. Now, if you're planning to sell online, let's go ahead and edit the shop pa. So click on Product. Add product. I'm going to first upload an image. This is optional. You don't have to upload an image, but it would be better for your customers to visualize. So I'm going to choose my product to upload, then just click close once it's uploaded. All the fields with the red asterisk are required fields. So you have to enter a name, a selling price and the price Type the category. Just add a category. I'm going to name this category here as Fruitcakes. Then I'm going to click Add so that it's automatically selected as a category. Then I'm going to save and add new because I'm going to add a couple more products for this product. I'm going to teach you how to add a modifier. So click on add group and I'm going to name the group as box of. Since these products are going to come in different boxes pieces. So I'm gonna add an item. So I'm gonna put box of six. Then as you can see here, we have extra cost. So for example, this product has a modifier that has an extra cost. We can actually accommodate that. So when the customer clicks on boxes 6 or boxes 12, the extra cost for that item will add on to when they check out. Save and add new if you have more products to add. So for this item, we have a lot of different modifiers that the customer can choose from. So modifiers are unlimited. You can add as many as you want. Then again, once you're done adding the modifier group, you can click customize and add the items for that specific modifier. It once you're done adding all your products, you can just click on Save. You're happy with the website that you created? Click on the gear icon, click on Website Settings and switch to own domain. If you have your own domain purchased, so click on the instructions and read it carefully. Then I'm going to go ahead and go to my domain. So I'm using bluehost for this one. I'm going to click on the three dots, click on DNS Zone editor. Then I'm going to put add DNS record so the host would be the sign and remember the instructions on the website. Copy paste the IP address and it would show point 2 and then add the record. Make sure there are no spaces. Once you've added the record it will show up. Then back onto the website. I'm gonna put my domain name click on Save. Then I'm gonna click Publish. Then I'm going to copy paste my domain at the bottom then publish again. So once you've gone ahead and published your own domain, when you open another tab and type in your domain name, it will point you to the website that we just created. Thanks for watching. Please let us know if you have further questions. Sam.










