
Car Wash Website
Learn to build a car wash website from a template. The tutorial covers editing pages, setting up service pricing with add-ons, configuring employee schedules and booking slots, and handling payments and cancellations before publishing to your domain.
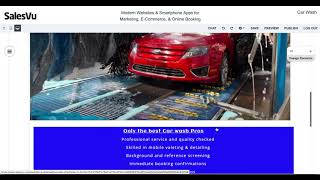
Hi. Today I'm going to show you how to create a car wash website using our car wash template. Let's create a site and here is our template. You can edit that, but if you need more specific requirements, we can also do that for you. You can submit your name, email, and your requirements and we'll get back to you as soon as possible. Let's edit the template. So here is our car wash template. So what I'm going to do is I'm going to edit the text. So I'm going to click the text, click Edit Text and put the text that I want to put there. You have the option to change the font and the font size. You can even play around with putting a background color in it. When you click on Settings, it will show you the background color options as I'm doing right here. So I'm just clicking and dragging it in place. Now let's move on to the rest of the homepage. So what I'm going to do is I'm going to use this website as an example and try to replicate it in our sales view website template. So the first thing I'm going to do is edit an image. So click Edit Image and then upload your own image. To edit the text parts, we're going to click on the text, edit text, and you can put any text that you want to put it. And as for the rest of the homepage, I'm also going to edit some of the text the same way I did as previously sa. At the bottom of the homepage, you can choose to have your pricing. As you can see, it's already made up. You can edit that, but I'm gonna leave it be. I'm gonna edit this one and put my logo in it. So edit image and upload your own logo. Once we're done with that, I'm going to edit the about page by clicking about and editing the text there as well. I'm going to go back to the website that we're using as a reference and go ahead and copy what they put on their about page. So as you can see here, to change the text, just click on the text, edit text and put the text that you want to put there. You can also add these markers by clicking on that icon right there. The same as always. You can change the font style, the font size, the alignment of the text. You can edit this however you want to. From here, we're just going to click Edit image and upload my own logo. I'm also going to use my own banner Image. So click on Edit Image, Add Image, and then select the file from your computer. Then I'm just gonna drag this and align it the way I want it to. Then I'm gonna add the background image by clicking, by clicking Settings and I'm gonna choose my own background color. You can also upload an image, the text on top of the page. I'm just going to do the same thing, Settings. Then I'm going to choose a background color for the text. And for the Contact us page, I'm going to click on Contact and I have nothing to edit, but I am going to do a background color on this so it's more seeable for my customers. Now I'm going to show you how to put footer links. So when you click these two buttons, click Put in Footer. Then I'm just going to click that one as well. Put in Footer. Then we're going to click on Terms and Conditions and edit the page. So basically what I'm going to do is I'm going to put there the frequently asked questions of my customers. So as you can see, I'm just referencing back to the site that we're copying, copy pasting in their FAQ page. So again, to edit the text, click on Edit Text and then put whatever text that you want to put there. You can also customize the font style, the font size, alignment and other things. Go to the booking page where your customers can book an appointment for your car wash website. The first thing we're going to do is add services or products. Basically, we're going to add a product. So we're not adding a product, we're adding a service. So we can put the name of the service here, enter the selling price. Then at the description you can put what your service is going to be. So basically I'm copying this one and it includes all the things that you're going to do for that package. And after we're done, we're going to put in a category. So I'm going to put services as a category. Then I'm going to click Add Select. Then at the bottom I'm going to teach you how to add modifiers. Basically these are options. So add group. So that group name would be additional services. Then I'm going to save it, customize, add item. So basically, for example, this one I'm gonna copy Bird dropping, removal. Then I'm gonna add an extra cost to that. Not mandatory to add the extra cost, but if you do have options that cost extra, you can put it there and it will be calculated upon checkout. I'm just going to add a few more extras right here and add extra cost for each one. Once I'm done with that, I'm going to click on Save Save and add new because I'm going to add more services. So standard procedure. Again, all the ones with the asterisk are the required fields. So I'm just going to add the name, the selling price, the description and enter it into a category. Now if the same package has the same extra, you can select group and click on Additional services. That's the modifier we created so it will automatically be there. No need to create the modifier again. Then I'm just going to save the product and add new products. Now that you've added all your services, we can now go ahead and create the booking appointments. We're going to start off with employee selection first. So click on employee selection and basically what we're going to do is we're going to create time slots for your employees. So by clicking and dragging on the time as I'm doing right here, you can also adjust it when the pop up comes up. And after that we're going to select the employee. The employee you can select the color of their time slot. I'm going to click repeat and if he or she works every week I'm just going to choose the day he or she works and I'm adding the end by date. I'm just clicking 2024. Then create and publish. So this is how the time slot look like now if he or she your employee is working different shift on Saturday and Sunday you can also do that. Then I'm just gonna do the color code so it's not confusing. Then Saturday, Sunday, end by date, create and publish and it will look like that. So once you're happy with your employees time, we can go ahead and proceed to the other step. Next we're going to create an appointment. So basically we're adding time slots. This means is we're adding the time that your customer can book your service. I have to choose recurring and choose the days that this time slot will be available. Then I'm just changing the times and adding a capacity. So I'm going to add availability and I'm changing the end by date. Then I'm going to click save. Then I'm going to add another time slot. Once that's done. What we're going to do now is we're going to do the payment settings. So here you can click no advance payment before booking. But I'm going to do the partial payment at the time of reservation. So I'm going to put $10. Then the cancellation policy. You can put a refund policy right there. How much you would refund. You can choose to allow loyalty points to be paid into your business and you can have refund will perform if the customer cancels before said amount of hours. Once you're happy with that, you can click on Save. Now I'm just refreshing the site so we can go ahead and look at book. So this is how it would look like. So after they select the time, as you can see they fill out their information. Once you're happy with the website you created, you can click the gear icon, click Website Settings, Switch to Own Domain. If you have your own domain then you can follow the instructions provided. I'm going to copy that IP address. Click on Manage DNS on my domain. I'm going to delete this first to avoid any confusion. I'm going to click Add and do my custom domain, type a host at and point to the IP address that we copied. Then I'm going back to the Salesvu website publish. Then I'm going to put my own domain. So now you've published your own website. When you go ahead and open a new tab and type your domain, it will direct you to the website that you just created. I hope this tutorial helps you and if you have any questions, please let us know. Thanks for watching Sa.










