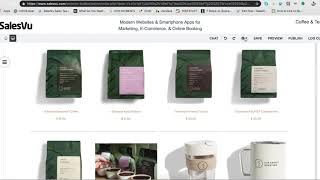
A SalesVu technical-support tutorial demonstrating how to customize a coffee & tea website template: editing text (slogan, address, fonts), adding products to the shop, configuring payment and notification settings (including partial payment for reservations and discount codes), placing links in the footer, previewing the site, editing the menu and reservation features, creating and publishing employee shifts, and connecting a custom domain via DNS to make the site live. The speaker walks through the UI actions (clicks, form fields, save/publish) and shows both merchant and customer views (appointment booking flow).
Hi. Today I'm going to show you a tutorial on coffee and tea template. So here's our template. But if you want a customized template, you can click this and then you can enter your name, your email address and the requirements for the template. Once we receive your inquiry, we will be sure to get back with you via email. So let's start. So I'm going to edit this template and I'm going to do what I normally begin with is to edit the slogan. So if you have your own slogan, you can put it here. You just have to click the edit text and you can start on changing the text. You can also choose to manipulate other things like the font or the font size. So as you can see, I'm editing the font size because it's too big for my liking. I just want one sentence in one line. So I am editing the font size right here. You can do that by clicking on edit text and you can choose a font font size. You can either make it bold, underlined or italicized. And I'm just fixing it here. Not gonna change much with the initial look of the template since I like it that way. You can do it as you like. But I'm just going to edit the few text here to display my address. So now we're going to add a product. So under the shop page, just click on the product, add product and here you can add the name and I'm just going to copy the products that they have on the page that I'm trying to replicate. Sa, as you can see here, these are all our finished products and it looks really nice once you're done and everything's set to order. Now let's talk about the payment settings. So I'm just going to click on payment and here are all the different options. So with the website you have full payment upon delivery or pick up and then you could opt to have a discount code on the website. So if you're planning on having discount codes and when you're happy with the settings, just click on save and to edit the other settings, we're just gonna go click out of this window and click on settings. And then here the general settings so you can have a notification email address. So for example, if you want notification every time somebody orders on a specific address or multiple email addresses, you can put that here and then you could just save it and you're done. Here I'm going to show you how to link a footer. So for example, you want your blog to be in the footer. So Click on the three dots and click Put in footer. And I'm also going to put a couple of links down there, like, let's say the terms and conditions I want to put in the footer. This is how it would look like once you put the links in the footer. So it will be on the bottom of the page, as you can see. Blog and terms and conditions as we've seen as previously. I'm just looking at the preview of the website to check if everything I like is there, everything's not out of place, and when I'm happy, I'm gonna work on the website. So now we can edit the menu. So here you can put what you offer, how much it is, and a picture of what is on your menu. If you're the type of coffee shop which can accommodate reservations, we also have that feature for you as well. So right now what I'm going to do is create employee shifts. I'm just going to click and drag on the time that I want my employee to work and this will pop up so you can change the time, choose the employee, add a color to his shift so they can easily recognize it. So when you click on repeat. So does he work every week or every two weeks? And you just put an end date, put the days of the shift that your employee work and create and publish. So this is how it would look like when you create your employee shift. So for example, you want to change your employee Saturday, Sunday, like your weekend shift, you can do that as well. I'm just going to add a different time for my employee during the weekends here. Now we're going to configure the payment settings. So I just click on payment. You can either choose no advance payment, but for this one I'll choose partial payment at the time of reservation. So they pay you a deposit before they actually get to reserve. So when I'm done, I just click on save. Now when I look for an appointment, I look up the date and the available time slots will be there. This is how it would look like from a customer's perspective. So they find the date, find the table available, click on the time slot and enter their details here. Then when they're done, they just click Book Appointment. So now we're going to connect your domain to salesvu website. So click on domains. This is assuming you already have your own domain and click on DNS then add record. Now then I will type the instructions given here under the SalesVU website. So I'm going to copy the IP address for the value. Then I'm going to add the record. Then we're going to go back to the Salesvu website. Enter your Then we're going to enter your domain name onto the website URL. Then we're going to save that. Click ok. Then we're going to publish. After publishing, your sales view website will now be live, so you will be able to see the website under the domain name that you have. Thanks for watching. Please let us know if you have further questions.
 eCommerce, point-of-sale (POS), ERP and Data Analytics platform for retail and restaurant businesses