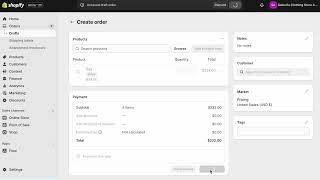
SalesVu Technical Support’s video demonstrates a Shopify-integrated inventory management tool that imports product lists, costs, and vendor data and keeps inventory synchronized across sales channels. Key features shown: setting per-product threshold notifications; creating and automating purchase orders (rules by storage capacity, max days on hand, schedule); creating draft/open POs and partially receiving shipments (vendor invoice, received qty creates line for missing items); inventory transfers between locations; logging inventory adjustments (received, damaged, expired); vendor management and linking products to vendors; and customizable profitability and inventory reports (fields include profit %, total cost, net sales, last cost, avg retail, start/end qty, total asset/retail value) with scheduling and export/print options. The walkthrough emphasizes performing changes through the tool so margins and reports remain accurate and live-syncing with Shopify sales reduces on-hand counts automatically.
In this video I will be walking you through the sales view and Shopify integration for the inventory management tool. Now this is a feature that it's created especially for helping the Shopify sellers to match their inventory, vendors, purchase orders, review profitability information and more. Now when you have a Shopify account, basically what you can do is install this inventory management tool and all your information will be imported automatically for you. And then you can take advantage of all of our features like inventory transfers, adjustments, vendors reports and all of that that I will be walking you through in this video. So basically under manage inventory, like I said, everything will be imported. Your product list, last cost price, final retail price, and even the all the vendor information. Now let me show you some of the things that you can do with this tool. So basically here we have first threshold level. So you can set up threshold level notifications that are sending to your email automatically. Every time you reach that threshold that will be set for every product differently. And you can set up those levels based on for example the inventory cycle that is being calculated automatically based on your reports, based on your best selling items and all of that. So then from there you can do multiple things. You can create a purchase order directly from here you can set up purchase order automation. So basically here you can set up the rules of maybe having it by the storage capacity of products based on the max days on hat of products. And you can set it up for a weekly basis, daily basis at the day and the time of your preference. Or those purchase orders are created for you automatically. Now from here if you're loan stock on a product, what you can do is simply make a purchase order directly. So what I mean by that is going into this unit cost, this quantity to order column. So here we're a little bit low on this item, so we're going to restock 100 products on it. We have the vendor and we can set up the unit cost. Basically let's say it's going to be 2.3 and simply create the PO. Now we can save it as a draft PO, or we can save it as an open PO. So that's completely up to you. Now under the purchase order section you can see all of those orders that are open in this example. That's the first screen that you'll see. You can see the payment status. You can view an order for example here and you can delete it, edit it, clone it, do multiple things. Here we can change the payment status as well. So maybe this is unpaid, right? You can add any other comments and what you can do from here as well is partially receive a product. That's something that it's very common to happen. So you know, you can simply the product you actually received with the vendor invoice number. And what will happen is that a new line item will be added at the very end with the products that are missing. Right here we have 40 missing. And these 60 products were added into your inventory automatically. You have here the received date and time as well for tracking purposes. Now you can go into draft orders, right? Everything that has been saved for later. Maybe someone else needs to review this before creating the po. And if you go into received orders, you can check all the historical data for any purchase orders throughout the year, throughout the month. You can go into that date range and kind of like check those information, that information as well. So if we go back here, we can see specifically, you know, that 72 items are now added into your inventory count. Now let's make an order. So any orders done through any of your sales channels, it could be E commerce, pos, app, whatever, all of all of them will be synchronized into this inventory management tool. And whenever those sales are made, your inventory will be automatically discounted. So I'm going to create an order right here from the backend just to make this example very quick. I'm going to add a black, the black bag into an item into the order. We're going to have four items here and we're going to finalize this payment in this order to see how this is being reflected on your inventory management. So I'm going to go back here into the app of the inventory management tool. I'm going to go again into manage inventory. And we see here that we have now 74 items, right? So everything is live information. And then what you can do here as well is do another few things like transferring inventory. So this is just another feature that you can take advantage with with this sales view management tool. So if you have the same inventory products onto onto different locations, for example, you can transfer inventory just to, you know, go through the month before the next purchase order comes in. Just kind of like a last minute resource or something like that. So you can see the source available quantity, destination available quantity, and based on this, maybe just transfer some items from one place to another, right? So in this case, maybe for this iPhone case, we're going to Simply transfer maybe 20 of them and then we'll see that the inventory count was updated automatically and we can see that reflected on the inventory management section of each one of these locations. Or you can also see it on the adjustment section here. This is basically a report of seeing any changes, positive or negative. In this case, we have, you know, the negative change of inventory being transferred. Here we see, you know, inventory that was received, but there could be many, many different reasons. So let me go into year to date and we can see, for example, there is an inventory adjust for this specific product. Maybe this was a positive, positive change, right, from 0 to 12. That was the inventory adjust. It could be a purchase order that was received. Negative changes like product damaged or if it's in a restaurant side of things. It could be, you know, expired products, missing products, whatever it is. You can create those notes yourself and keep track of everything that is happening through your store. Now you can set up vendors and add products to the vendors through create or also purchase orders. Easier to see that information also reflected in your reports. And I'm going to go into the only one report here just to show you how you can view this information. Now it's very important to note that all the changes that you will be making from now on should be done through this inventory management tool. Just because this is where everything will be managed. And not only for purchase orders and vendors, but also to keep track of all the data for for example, your margins. So that's what we're taking a look at here in this report. So I'm going to pin this column to the left and I'm going to walk you through this report. So this report shows you all the profitability information for all your products throughout all your locations. You actually break it down by different locations, employees, events. You can break it down by categories, subcategories. You can select the specific products. You can see the modifiers like colors or sizes or components, if it's like a recipe level, things like that. So we see here if the products are, you know, meeting your margins. So for example, you can find the products that are less than and just quicker see and identify the products that may be need to get out of your inventory system throughout a promotion or something like that because they're not really meeting those goals. Your products are your best selling items. You can check, you know, what is the percentage of profit. You can check, you know, what is the total cost as well. If it's too high, maybe thinking about changing the vendor. You can see the percentage of sales, any discounts, net sales as well the percentage of cost, total cost, right? And then here we see the inventory information with the last cost, price, average retail price, start and end quantity, and then we see the total asset value, total retail value. Right? So this is our report that you can customize even more. So you can add SKUs and barcodes, you can add tax information, and you can even have this report sent to your email here. You can schedule this report to be sent to your email on any kind of, like, frequently basis, daily, monthly. So maybe if you need this report to be seen by your team at the end of the month, you can have that set on a start date and the hour that you want to have these on your emails. So that way it will save you some time from going back here and going through all the filters that we went through. If you know this is something that you're going to be using on a frequent basis, you can always print the report and export the report.
 eCommerce, point-of-sale (POS), ERP and Data Analytics platform for retail and restaurant businesses