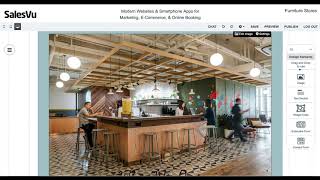
SalesVu walks through building a furniture store website from a template, including editing pages, adding products with modifiers like color and size, and pointing a custom domain to your site with a DNS A record.
Questions this video answers
$10
$230
Hi. Today I'm going to show you how to create a website using our furniture store template. Let's go ahead and click Create a site. And here is our template. If you want something more customized, we could definitely do that for you. Just put your name, email and your requirements submit and we'll get back to you as soon as we can. Now let's go edit this template. So here is our template. As you can see, we are viewing it on desktop mode, but we made it easy for you if you want to configure it on a tablet mode or a phone mode. So as you can see upper left, the tablet and the cell phone icon, just click that and you can easily style the website that would fit the configuration for the tablet or the iPhone or an Android. Now we're going to edit the desktop version. So the first thing I'm going to do is I'm going to edit the logo. So I'm going to edit the image and insert my own logo. You can insert any file from your computer, so I'm gonna save Skipper cropping. Then again you could just adjust however way you want it. Now I'm gonna adjust the text. So I'm going to click on the text that I want to replace, click on edit text and enter the text that I want to put. So again you could choose your own font style, font size, font color and alignment. Same as we did before. I'm just going to edit the text and put in my own information or put in anything that I want to say. I'm also going to edit this text at the bottom and put a furniture code that I'm going to put or our mantra for the store so that when my customers see my website they can see what I convey. Sa now we're gonna do the about page. So I'm just gonna refer to this website that we're using as an example and copy the about page and replicate it on the SalesVU website. I'm just going to align it and replace the text. Now we're going to replace the images. So click Edit image and I'm going to upload my own image. Then as you can see, the whole we are is a little bit non seeable. So I'm just going to put the background over the text and edit that as well. Now what we're going to do is we're going to edit the shop page. So basically we're going to add products to your website. So I clicked on Shop, then I'm going to scroll down and I'm going to Click on product, then add product. Then from here you will just have to fill out the necessary information. So the name of the product photos. For this one, I'm going to copy the ones that I'm replicating. Then I'm going to upload an image. Then it's important that you have a category. So for this one we're going to do bedroom furniture category. And then I'm just going to add that. Click Select. Then I'm gonna show you what modifiers are. So modifiers are basically what they are is options. So first step is click add group. Then I'm gonna go with colors. So for example, for this bedroom set, there's a lot of different colors. Then I'm gonna click on customize and I'm gonna add an item. So here I'm gonna put different colors that my product comes in. So basically gray and extra cost would be. If there's an extra cost to having that option, I'm just gonna put $10. Then I'm gonna add a few more options. So when your customer sees it on the website, they can view the option and it will show the additional cost. So if they opt to have that additional cost like so, for example, this one, the white is extra cost, so it will automatically be applied at checkout. I'll show you that later on. For now, we're just going to copy the product details because you can put descriptions on each item as well. And I'm going to add several more products after this. So I'm going to show you how it looks like in a preview. So we're going to go to shop and then here are all the products that we've added. So for example, this one. Then you scroll down, you see the description and as you can see, we have a modifier called bed size and it has two options. So I'm going to choose the queen size, which has an extra cost. So as you can see, the total is 230 with the extra cost. So it actually added the extra cost upon checkout. Now, if you're happy with your website, let's go again and go to Website settings, switch to own domain, click Instructions. Then I'm gonna copy paste the website URL that I already have and copy paste this IP address. Then I'm gonna go to my domain, click on DNS. Then I'm gonna click on add, select type A and the IP address that we copied, click Save. Then I'm gonna delete this one to avoid confusion. Then when I open a new tab, then I'm gonna click on save. Ok. And then we're gonna publish it. Then we're gonna copy the domain name. Publish. So now when I open a new tab and type my domain name, as I'm going to do right now, it's going to show the website that we just created. So here it is. Then look at the shop, see all the products that we have on sale. Then let's look at the about page. And this is our furniture template. Thanks for watching. Please let us know if you have further questions.
 eCommerce, point-of-sale (POS), ERP and Data Analytics platform for retail and restaurant businesses