SalesVu technical support walks through building a restaurant website from a template. You'll customize the design, add locations and products with modifiers, embed Instagram, set up payments and notifications, and connect a custom domain via DNS.
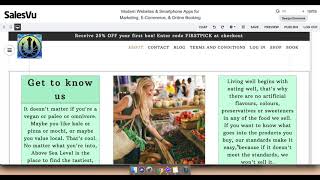
Today I'm going to show you how to create a website using our general restaurants template. So let's go ahead and click Create a site. As you can see we have two different types of templates. But if you require more specific requirements, we can totally customize a template for you. Your name, email address and put the requirements and we'll get back to you as soon as we can. For this one, we're going to edit this template. It's sort of a marketplace feel. So that's what we're gonna go for. It easy for users to configure your website to different platforms. So as you can see we're on the tablet platform here. You can readjust to see how it would look like in your tablet. And this one is for mobile. Now we're gonna edit the also have features for multiple locations. So under sitemap you can add new location, fill in all the required information. Then at the bottom enable online ordering and website. Then you can just click new location and it will appear above as so. So let's edit our website. I'm not gonna touch much, but I'm gonna put a background color by clicking on settings and choosing a color. And here is our banner. So you can actually add multiple images so that when people are looking through your website it will change the picture. So I'm just going to add a couple of items. Save, skipping and cropping and I'm going to add a couple more. So now as you can see here, you will see all the photos that you've uploaded. So here I'm going to display our social media. I'm just going to click Edit text and put my own social media account specifically for Instagram. You can actually have your Instagram widget displayed as well. So under design elements, drag the widget code and click on Instagram Widget. Then click this link to open a pop up. Enter your Instagram handle here, scroll down, click Preview and get the code. Go back and paste the code here and click Save. Just drag that into place. So here whenever your website is live, you'll actually be able to see a live widget of your Instagram handle at the bottom of the page you can also add your social media links. So I'm going to add my social media like Facebook and Instagram as well so that when people click on that link they will be automatically taken to your Facebook profile or Instagram profile. Next thing we're going to do is change our logo. So click Edit image. Add your own image from your computer. Now that that's Done. I'm going to go and edit our about page. On our about page, I'm going to edit the text by clicking on the text that's written. And I'm going to click Edit Text and put my own text right there. I'm also going to add a background color by clicking Settings. Choosing a color. You can also add a background image if you want to make the text stand out and move on to our contact page. This page, I'm just going to add a text. Under Design Elements, click Text section and then drag it, put it in place and edit the text box. And again, I'm adding a background color. So click Settings and choose a background color. You can also opt for a background image. Now we're going to edit the terms and conditions. So I'm just going to edit the text by clicking Edit Text. Now you can change the font style, the font size and the alignment, the color and the background color. Let's go in and edit the Shop page. So by clicking Shop, it takes you to the Shop page and as you can see, there is no product. So we're going to add products by clicking Product. Add Product. Then you have to fill out the necessary information, like the name, the selling price. But first I'm going to upload the image of my product. You can opt without an image as well. You can also add a description to your product. Then we're gonna add a category. So I'm gonna put this under ice cream. And then I'm gonna add. Click Select. Then modifiers are basically additional options. So add Group. So I'm gonna add flavors. Click on the diskette icon. Customize. Then I'm going to add an item. So basically the options that I have for this specific item, you can also have additional costs that will be added upon checkout. You're done adding the options, you can save. Then if you're going to add more products, just click Save and add new and add your products. I'm going to add a few more. For example, once you're done adding all your products, it will look like this. So now we're gonna do other settings. So we're gonna do the payment settings. So here you can have a discount code. You can enable. Tip. When you're happy, just click Save, then opt out of it. Then we're gonna go to Settings. So email notification. For online orders, you can add multiple emails. So basically, when somebody orders from your website, it will notify the email. Once you're happy with the website, click on the gear icon Website settings. Then switch to your own domain, if you have your own domain. And then under the instructions, you can see how to connect your domain to the SalesV website. So here's my domain. I'm going to click Manage DNS. I'm going to click on add. So type a host is and then the IP address that was under the instructions. So we've already saved one of these. So now when you open your website on another browser, it will show the SalesVU website that we just did. If you have any questions, please let us know. Thanks for watching.
 eCommerce, point-of-sale (POS), ERP and Data Analytics platform for retail and restaurant businesses