Learn how to set up and manage appointments in SalesVu's iPad app and cloud portal. Configure staff and resources, create appointments at the POS, enable online booking on your website, and set up notifications for your team.
Questions this video answers
888-9005
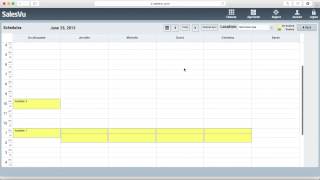
Hi. In this video I'm going to show you how to use SalesVU's appointment management feature. You can find appointment management under Features and Appointments. The first thing you need to look at is your layout management. This is where you can set up your different resources. In our case, the different resources are different massage tables with massages name on them. If you want to add a new resource, you simply need to click on add, put in the name, maximum capacity, or even change the shape if you need to. So let's see how this works on the pos. Let's say a customer walks in and they want a massage. So the first thing you would do is go to your layout management and assign them to a massagist. Now you can put products or services in this order. This can stay open for however long. So if you need to renew another customer in the meantime, you can simply start a new order under orders or even start a new order under another massagist. You can go back to the original order anytime. With SalesVU's appointment management feature, you can also accept Online Reservations if you want to accept online reservations for appointments between, for example 10am and 2pm with each appointment lasting an hour, you're looking at four different time slots. You need to set up each individual time slot. Under time slots, the first one would start at 10 and finish at 11. Your maximum capacity shows how many people can make a reservation for that specific time. This can also be recurring. After your customers create reservations online, you will be able to find them under Schedules. You can also check this from your pos. Under Payment options, you can select whether you want to ask for an advance payment at the time of online reservation. You can disable this as well. Under setup Widget, you can create the widget that will later appear on your website and that will allow people to create online reservations. You can decide whether you want to show the search results by resource or by time slot. In this case, we want to leave this as resource so that your customers have a choice between your different massagists. You can also create a login option to simplify future reservations for any of your customers. You can use either email and password or Facebook or both. It is important that the widget width matches the page width of your website. When you're ready to publish, simply hit publish and this will appear on your website. If you need your widget to be translated into a different language, you can do so under string translations. Under General settings, you can select what payment devices will have the layout management and what devices will receive reservations. Notifications you can change the minimum time required prior to making reservations to restrict people from making reservations too close to the reservation time. You can also enable or disable reservation notifications. These are emails sent to both the account owner, whose email you can put in here, and the reservation creator. These will be sent a number of hours before the appointment takes place. Now let's see how all of this comes together from the customer point of view. This is the widget we created earlier in our account. Now the customer can select the time of their appointment as well as the massages. After the customer puts in their information, they can confirm their appointment as discussed before. They will receive an email notification into their email account. Now let's see what happens when the customer actually comes in. We can go to our layout management and find their appointment there. So when they walk in we can simply go to this place. Hit Receive and now we see that the system originally assigned this customer to the massage table that they originally requested. You can also put in new appointments through the POS Hit Add appointment. Now you will be prompted to pick a customer from your existing customers or you can also add a new customer. In this case, we're just going to select one of our existing customers. So I hope this video helped. If you have any questions, do not hesitate to call us at 888-9005.
 eCommerce, point-of-sale (POS), ERP and Data Analytics platform for retail and restaurant businesses