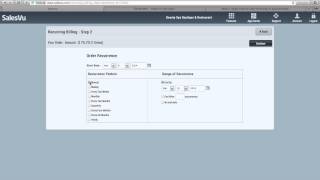
SalesVu's recurring billing lets you set up automatic charges for customers on a schedule. Create billings for individuals or groups, choose how customers approve their card, and manage everything from one dashboard. The tutorial walks through a monthly yoga subscription for Marcus and a wine club billing.
Questions this video answers
March 2014
support@salesview.com
888-900-5819
April 1 (example), and specifically referenced as April 1, 2014 when filtering
Hi. In this video, I'm going to show you how to use SalesVu's recurring billing feature. To get to the recurring billing feature, you're going to go to Features and click Recurring Billing. If you do not see it under Features, you're going to have to go to the App Store and enable it. Recurring billing can be used for such things as gym memberships, wine clubs, and other recurring billing functions for your customers. To set up a single recurring billing, we're going to click on Recurring billings and click Add Recurring billing. So we'll just show all our customers and we'll say we're going to set up a recurring billing for Marcus. We'll check next to his name and click Continue. Now we'll say that Marcus is set up for a monthly yoga and so we'll find that product and add it to the order and we'll check out. And so if we wanted this to start on April 1st and be a monthly with no end date, that's how you'd set it up. Basically you put in the start date here, recurrence pattern here, and then the range of recurrence here. So you can have an end by and after a certain number of occurrences or no end date. Click Continue and it'll show you the order detail for some reason needed to remove the tax. You can do that here and see the customer detail here. Now there's two options for getting the credit card number. The first one is you can click Enter credit card info and it'll take you a page where you can manually enter the credit card information. Or if you click Continue, it'll send an email to Marcus and he can approve the credit card details. So let's click Continue. Now we'll take a look at what that email looks like. So if we open up a new tab in our browser and go to icloud, we'll go to Marcus email here. You can see that he has a new one and it shows where it's from when it came in and basically what he's being charged for. It shows the billing agreement and if he clicks Accept, it will take him to a payment page where it shows the details here and you can click Proceed to Payment and put in his credit card information. Next we'll go back to salesview.com and show you how to set up a recurring billing based on customer group. So go to Features and go to Customers can use the filters on the left hand side to search for specific customers, or you can just click Submit to show all customers. Imagine we want to Set up a few of these customers for a red wine club. Simply check the box next to their name and click here and click Add to group. Since we don't have a red wine club, can add one by typing it here and clicking Add it will automatically select it for us and we can click Continue. Now those customers have been added to that group, we go back up. Go to features, go to recurring billing. Click recurring billings. Now we can set up a recurring billing based on group. We'll click Add recurring billing and select. Our group automatically selects all the customers that are in that group and we can click Continue. Imagine we're going to start out with a Silverado Cabernet as the first bottle in the club. We'd add that to the order and click Add to order and check out. Now you can set this up again to bill on a recurrent pattern. We also have an option for manual. So basically it just stores all the data for billing them, but you actually manually execute it. I know a lot of our wine club customers like this for billing on the day that they actually ship the product. So in this case you don't need to worry about the dates. Click Continue and when you're doing it by group, it automatically sends it to the customer for approval. So we click Continue and all those are set up. Next, if we go back to recurring billing and click on recurring billings, we can see all our recurring billings that are set up or the ones in the past. So you can use the various filters if you want to look for one specifically in this case, let's pull up the one that we created from Marcus at the beginning. So here you can see the recurring billing that we set up for him. You can see the customer name, the last date it was executed, the next date it's going to be executed. If it's a manual or automatic recurring billing, how often it's done, the order, amount, total, how many times it's been executed, total amount scheduled for the next billing, total succeeded amount, products or services. There's a credit card on file or not and the business location. So if we go back and click on the green plus to expand the order, you can also see the customer detail further. You can see the product again. You can print this out, you can edit it if you want to add additional products or services or change the ones that are on there. Now, if Mark has got the email and instead of filling it out through his email, he decided to call and give you the card, you could click change card and enter it here. You can suspend it if he canceled. Or maybe he leaves for a few months and you want to put his billing on hold. Or you can click Send Agreement and resend him the email for filling out the credit card information. Next, I'll show you how to use some of the bulk actions in this page. So if we want to pull up all the recurring billings for April 1, 2014, pull that date up, delete Marcus there and we can see all the recurring billings that are set to go. Some of them are manual as you can see at the top. Some are automatic. So if you wanted to do the bulk action items, you'd simply select which customers you wanted to do it to or click this to select all. And the actions that we have currently are the ability to add a comment and the ability to check card validity. Basically what this does is checks the cards that are on file to make sure that they haven't been cancelled or the expiration date hasn't gone past. If you click Check Validity it will show you exactly which ones are so you can contact those customers before you execute it, if it's manual or before it's scheduled. And the execute will execute your manual recurring billings that you've selected. So if you have a wine club and you ship out at the beginning of the month, sometimes it's the third, sometimes it's the fifth. On the day you actually ship, you can click Execute and it'll show you which ones went through and which ones didn't. Next, if we go back, I'll show you how to use the historical data report. So we'll click here and let's just show from the first recurring billing date to the future one and click Submit. It's going to show you in a bar chart exactly how much was billed on each date. And if you look at the different colors you can see the different products that were billed on those dates. You can see your recurring billing climb which products are becoming more popular. We hope this video helped you set up your recurring billings. If you have further questions about this feature or any feedback, please feel free to to shoot us an email at support@salesview.com or give us a call at 888-900-5819.
 eCommerce, point-of-sale (POS), ERP and Data Analytics platform for retail and restaurant businesses