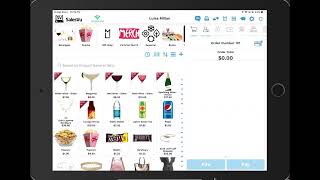
A short tutorial video (SalesVu Technical Support) demonstrating how to create and run a Cash Event in the SalesVu platform. It covers creating an event (time slot), setting event-specific inventory, switching an iPad/POS to Event Mode, processing sales during the event (cash and other enabled methods), calculating used inventory after the event, and closing the event.
Welcome. In today's video I will be walking you through Event Mode Cache Event this is part of the event management features that SalesV has to help manage your events in three different kind of ways in which today will be specifically for Cache events. Now the first thing you need to do is go to your portal and create the event. Now in order to do this all you need to do is go to time slots, which is under Appointments and create the event in here. Make sure that you are in the correct location. Events will be created according to the location you are on and then all you need to do is click on Add time slot. Now under Event type there is going to be the multiple event mode features that we have. So for this case we're going to do Cache Event. Then you're simply going to add the start time with the date and the hour and then the end time. After that. You have the option to set this as a recurring event in which you can set it up for specific days. Or it could be weekly and whatnot. In this case we're not going to leave it as recurring. Finally, you need to add the event name. In this example, we're going to do a wedding. After all your information is added, all you need to do is click on Save. Now you can see the event under time slots and all the other different events that you have created. Now the next step is setting up the inventory for the event. This is just simply telling the system what is going to be available during this event. For sale now when you go to inventory management you will be able to see a tab called Event Inventory. This will only show up when you have events going on. Now in here you can select the event and simply click on Set Inventory. This will bring you to a page that shows all the different inventory products that you already have and you can just simply select the ones that you want to add and change the Start quantity. You can utilize the first drop down menu and use it as a filter to find any categories and products in an easier way such as beverages and premium drinks and simply add the Start quantity. This will help you add the inventory in a quicker and faster way. You can also make use of the search bar that's on the top to find an SPL product or by SKU as well. Once you're done, simply click on Save all and it will save all your changes from the pos. What you can do is simply change the iPad to Event mode. This is to simply take all the orders that will be happening during the event and the way to tell this to a system is by changing this to Event mode, the first thing you're going to do is tap on the Gear icon and go to switch to Event mode. Once you click in here, you will be able to see the different events that you have created on the backend only for the cache events. Now all you need to do is simply tap on the event and then it will change to Event mode. As you can see on the top, it would also tell you the name of the event. Once you're here, you can simply see what are the products that will be available for sale under this event. Now in here we can see the different type of wine, we can see any other beverages that will be available. In here. Your cashiers and any staff members can simply go through the menu and offer the different products that are available for the event to the people who are attending. Then the way to close the order is the exact same flow, just simply tapping on pay. Select the payment method they would like to use. For this case we can do cash, but any other payment event will be available according to the different devices that you have enabled for the event and that's it. At the end you can either send the copy via email or sms. If that's the case, when the event is done, all you need to do is go to a gear icon and simply tap on Exit Event mode. This will bring the iPad to its normal products and categories and take the orders back again As a normal day after you close your event on the pos, you can come back to the portal and check the use quantity of the event inventory. In order to do this, just simply go to the event that you have created. Go to Set inventory and on this screen all you need to do is simply click on Calculate Used Inventory. It would automatically tell you how much was the used quantity. Since in this case we used the categories for beverages, we're going to this category and click on Calculate Used Inventory. Now we can see how much has been used, the star quantity, the available quantity, and at the end we can see the remaining quantity. Finally, you can simply close the event by simply clicking on here. Click yes and then the event will close automatically. Now you can see that the event Wedding for Cash event has been closed. After your event is closed, you can come here to Event Inventory and simply use this drop down menu to view the inventory. If you would like to go back and and check how much was the used quantity and the remaining quantity of the products that were sold during the cash event. Thank you for watching and let us know if you have any questions.
 eCommerce, point-of-sale (POS), ERP and Data Analytics platform for retail and restaurant businesses