
SalesVu - Cashier Training Generic
This is a step-by-step cashier training transcript for the SalesVu POS app, narrated as a restaurant server walkthrough. It covers logging in, clocking in/out, managing initial cash bank, taking and modifying orders, applying discounts and coupons, splitting payments, closing shifts/deposits, checking printers, and several UI/tool features (catalog, barcode scanner, product rearrange, add product, device identification).
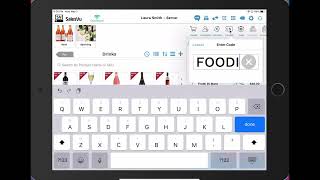
In today's video, I will be walking you through the cashier training for the POS app of SalesV. For this example, I'm gonna be playing the role of a server for a restaurant. The first thing I'm gonna do is login in to the app. So I'm gonna look for my name and then I'm gonna tap my pin code. Once I log in, I'm gonna be able to see the product category screen. The first thing I like to do every single morning is clock it in. So for this, I'm going to use the clock icon and I'm going to look for my name. Tap on, clock in, and I'm going to tap again my pin code. Once this is done, an alert will show me that I have successfully clocked in with the day and the hour. Another thing I like to do every single morning is managing the initial bank. For this, I'm going to use the piggy bank icon. And in here I'm going to be able to see all the details of the sales. In here, everything is on zeros because it's the first shift in the morning. But later on I'm going to be able to see all the sales by cash, credit card, gift cards, and many more details. Another thing I can do here is managing the cash. For example, if I want to have any cash to buy supplies or to give change, in this example, I'm just going to Tap on the plus icon and add the amount of $200 for the day. And if there's any reason for change, I can simply add it here. This is optional. Once I'm done, I'm gonna tap on save and the change is gonna be added successfully. Once I'm ready to start taking orders, all I need to do is tap on the arrow on the left side. This will take me back to the screen product category, and I'm gonna be ready to take all the orders from the customers of today. So the categories are gonna be on the top. You can scroll through it and see all of the categories. And if there is any subcategories, you can tap on the category and check the subcategories. For this example is going to be drinks. Now, the products are gonna be down here in which you can scroll with your finger and look to all the products that you have. Or you can utilize the bar on the right side and tap on a letter. For example, the B. We're going to be able to find all the products that start with a B. Or to make it even quicker, you can use the Search bar and tap any keywords. For example, we're going to tap rose and the products that match with these keywords are going to show. Once I'm ready to start taking orders, I can simply tap on the product that the customer is asking for and this product is going to be added to the order on the right side. For example, let's say the customer wants some pasta. We'll just go to the category of pasta. We'll tap on the product, we select the seed number and then we keep adding all the products. This way we can add the wines and we can scroll through other categories and add other products. Now if for some reason I made a mistake or if the customer changed their mind, I can simply delete a product by sliding with my finger on the product and tap on delete. If the customer decides to leave or something goes wrong, you can simply trash the order with the trash icon. We also have different types of discounts. We have time based discounts. For example happy hours on the drinks, they're going to be shown with the red budget on the top and it's going to show you the discount off from the price and you can see it right here on the order as well. We have also non time based discounts such as anniversary, birthday, employee, military. This can all be be created from the backend and we also have coupon codes. All you have to do is tap on the code and then tap on done and this code will be successfully applied. Last but not least, we also have on the spot discounts. This is according to the permissions that a server can have. And for example, let's say that the customer received their plate a little bit cold and we would like to reward them or give them a little bit of discount. So we can tap on it and select the amount. This will be shown right here. Once the customer is ready to checkout, all you need to do is tap on pay. We can see here all the different payment methods available or we can simply split the payment. If the customer would like to do this, we have different type of splitting payment. We have by amount, by products or by seat number. For this example we're going to go by amount and in here the system can actually split it equally. With the different number of orders, each person can decide how they want to finish their transaction. So the first person was cash and let's say that the second person would like to pay with a different payment method. Let's go with a gift card. For this example we'll just tap the number of the gift card now it's going to show us the tip screen. This can be selected from the pack and or you can actually customize the tip amount according to the customer. Then the receipt can be sent by email or by phone. Once this is done, it will take us back to the product category screen. Now let's say that we're ready to close our shift. So the first thing we're gonna do is go to the piggy bank icon and check all the details from the sales of the day. Once we check everything, we can deposit to save by just tapping on the icon of deposit to save. And then in here we're just gonna be able to add the amount. Once we're ready, we'll just tap on save. The alert will show us that everything has been successfully deposited. And now we're going to close out the shift. Once we close out, we're going to be able to see that everything is back on zeros and ready to start the next shift. If for some reason we want to go back to the previous shift to check some details, or if there is a printer connected and we would like to print this information, we can just tap on the arrow, go back to the previous shift. Now once we're ready to close and clock out, we're just gonna tap on the arrow and go back to the clock in here again. We're gonna look for our name and tap on clock out. It will ask us for our pin number and the alert will show us that we have successfully clocked out. Perfect. Now I'm gonna show you some of the best practices of the PoS. The first thing is understanding the orders page. You can tap on the car icon to gather every single transaction that has been placed, either if it's open or closed. We recommend using the second or the third filter to narrow down the information. We have six different filters. The first filter is for the tracking status. The second one is for the order status. The third one is the sources or devices. The fourth one is for the employees. The fifth one is for the shipping status. And the last one is a search bar where you can tap the cart information of a customer. We also have merge, cancel and new order buttons in case of opening closed transactions in which you cannot tap on any products and the screen looks blocked. What we recommend is going back to the orders menu with the car icon and clicking on new order which is going to be on the upper right corner in here. Once you tap on it, it's going to bring you back to the first screen where you can tag the loyalty number. Of the customer and start taking the orders. As usual, you can tap on the products and now you're gonna be able to continue with the orders. Now I'm gonna show you how to verify if the printer is connected. To verify if the printer is connected, go to the settings icon and then type on printer options in here. If the printer is connected, you're gonna be able to search for the printer and then tap on it. And finally you'll be able to test this print. Finally, I'm going to show you five different icons and its functions. The first one is the dynamic catalog in which you can activate to show any specific menu for any different hours. The second one is a barcode scanner with the camera. The third one is to rearrange the product. You can drag and drop the products to put them in a specific position. Then we have the menu in a list format. And finally, with the plus icon, you can add a new product in which you can select the name, the category, add an image, and everything else. Last but not least, I'm going to show you how to identify the name of the iPad or positive. For this, you have to go to a gear icon, scroll down and select About Cells view, which is the last option. In here you're gonna be able to see the payment device name, which in this case is POS1. Thank you for watching.










