
SalesVu & Clover POS
SalesVu Technical Support walks through the SalesVu POS app on a Clover Station, covering clocking in, creating orders, applying discounts like DRINK10, processing payments including gift cards and loyalty, capturing tips, and closing shifts. The demo includes table layouts, the Kitchen Display System, and handling out-of-stock items.
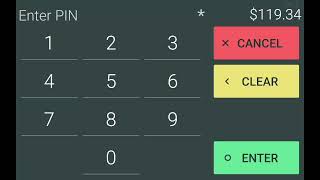
Welcome. In this video, I will be walking you through the POS and Clover Station. The first thing I'm going to do as a server is open the POS app by SalesView on the Clover device. Now in here I can do multiple things. I can log in to the main screen with my name or I can also clock in and out with the clock at the top. If I press here, I can see the different hours and I can also clock in for under my name. Now I'm going to simply add my PIN code so I can register the hour and the time I successfully clocked in. The next thing is going back and logging in with my pinko to take orders. I can find my name here and add the pin. Now, from this screen, what we're going to do first is take a new order. With the icon on the right, we can either enter the phone number for customers who want to use their loyalty program or we can skip this as well. I'm going to add a customer's phone number and assign them to an order immediately. Once I verify the phone number, I tap on continue and I can have his information right there on the order. We can see his name, phone number and email since he's already a loyal customer. Now on the left side we can see the different categories and the products and subcategories. If we go to a category of Italian, we can see the subcategories of pizza, pasta, rice and we can simply start adding products to the order. Now I'm showing you some examples of out of stock products. We can see here the lasagna or the zucchini that have the out of stock in red. Now I'm going to add a product that has some modifiers. Now this product will be added onto the right side. On the right side we have the number of the order and the customer. I will tap on the product and we can see the description. We can see the different modifiers. Some of them have an extra cost, others cannot have an extra cost. All we need to do is simply add on the modifiers, tap them on and add the product to the order. We can see the product, the different modifiers and the extra cost on each one of them. Now I'm going to add some other products. Here I'm adding some rice as well. And we can see that this discount has been applied. This specific rice had some discount and it was applied automatically. Some of other discounts that we have as well are time based. In this case we have the pizza that is showing the 20% off for a Certain time during the day that we will show automatically. Now talking about discounts, I will also show coupon codes. So you can create coupon codes for a certain category products. In this case I will be showing a coupon code for the drinks. So I'm gonna go right here to the drinks category, add some products and now I'm gonna insert a coupon code. This could be any number or any alphanumeric coupon code. In this case drink 10 and I'll simply apply to it and it will apply directly to the products offerings. We can see this displayed on the order with the amount and the discount. Now I'm just simply adding some other products to the order. And now I'm going to show a non time based discount. So this could be for employees, anniversaries and more. We also have runtime discount. So if the dish is cold or we want to kind of like reward the customers in some way, we can give them a runtime discount on any currency value or percentage amount as well according to the permission of the employee. In this case, if the employee doesn't have the permission, they will have to add a PIN code to it. Now we are coming here to pay and we see the different options. We see cash gift card checks. We also see the loyalty cash that is available and external credit card gift card. Now I'm going to proceed with the credit card. I can see the tip percentage amount. From here I can select any and then proceed to take the card type swipe, insert the card. Now once we read the card, the customer will enter their PIN code and we can finish up the transaction. After this has been processed we will be taken back to the POS screen in which we can select if we want to send the receipt via email, SMS or print it. This is an example of the receipt that with the next day coupon code at the end. Now I'm going to show you some other features on the pos. The first one is capturing or doing a tip adjustment. So here we see the transactions that have been processed with the amount and we also see the tip amount. If we tap on the tip amount we can see the full amount and we can do things like capture the tip or we can open do some adjustment as well. So here we see both of them and now we're going to simply capture it. You can see that the capture has been successful and we see the other amount that is remaining. Now another feature that we have here is cashback product. So we can add cash back product of any amount, add it to the Order and process this. Some other features that we have here on the POS is going into the shift information. So we see here the shift length. We also see the date, all the details, the totals of cash, credit card, gift card tips and more. We can see the information of the previous shift or we can also manage the current shift. We can deposit to save, we can manage cash or close the shift. In manage cash, we can add or deduct any amount. In this case, we're going to deduct $50 and save it. Any adjustments or changes will be shown on the screen. As we can see here. And now we're going to close the shift accordingly. Once we do this, everything will go back to zeros. Another functionality that we have here on the POS is the table layout. So if there is some table layout, we can recreate this and view this directly from the pos. We can see here some tables, red and green, which tells you what is available and what's not. We can tap on a table and start taking customers directly. We can add some products to the order like I'm doing right here and we can fire this to the kitchen. If we come back to the table layout, we can see that the Table 54 is now being taken and that's why it's showing on red. If we want to reopen this, we can go to a table and proceed to take the payment and close out the transaction. Once we do this, we can go back and to table layout and we'll see that the table is now free. Another functionality is switching to event mode. You can have certain events that have a specific inventory or products that will be displayed for only for sale during that event. We can see here some Italian dishes and beverages that would only be available during this party. We can process the transfer transaction directly for this event right here and return to the POS once the event is finished. Another functionality that we have is under settings, we can go to the KDS mode. This will turn the POS into a kitchen display in which you can see all of the orders that have been fired to the kitchen and do different things. So here we see the first column of the customer. Then we have the tracking status, delivery or pickup, the amount, card information, date and time. If I open one of the orders, I can see the dishes that have been placed. I can also print the kitchen receipt, the order receipt, send an invoice, change the delivery, the pickup status, or delete. Now I can also set the different status for each one of the dishes. I can say they are in process already accordingly and I can also see the orders by color coding. Now. I can also change the status for all of the products at once or one by one. Once I say the status that it's ready, the customer will get this message saying that they can pick it up. If that's the case with the notification, I can go back to the POS just disabling the kitchen display and I can return to taking orders normally. Thank you for watching and let us know if you have any questions.










