
SalesVu Customer Relationship Management (CRM) Demo
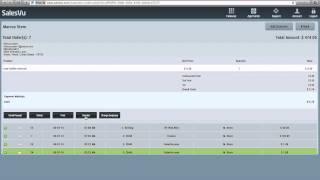
SalesVu Technical Support walks through the CRM features on web and iPad. Filter customers by name, email, location, or purchase history. Create custom fields like birthday, add notes to customer profiles, and reorder past purchases.
Hi. In this video I'm going to show you how to use SalesVU's customer relationship management feature. So here we are logged into salesv.com to access it, we'll go to features and then click on Customers. Next, you can see we have all these different filters for searching customers on the left hand side. But if you just click submit, it'll show all your customers. So the top you can show all customers or my customers. My customers will pertain to whatever employee is logged in. You can search by customer name, email, what city, country, state or zip code they're in. You can also search by order types. If you just want to see customers that have open orders, closed orders, delete orders, you can do that. And below we have some advanced filters. First one is purchases. So you can put in an amount range of how much they've spent. You can also add a period of time that they spent that money and also a frequency of how many orders they've processed. So if you want to see all your customers that had five orders, you could simply add that here. Now, recency will show you customers that have not been in in a recent period of time. So if you want to see which customers have not been in one week or in one month, two months, it'll show you that list. Very powerful. You can use both of these together. You could say which customers spent a certain amount of money in the past or which customers had purchased frequently over a period of time but have not been in the last month or two months. You can pull up that list of customers and you can reach out to them with maybe a discount to get them back in. Very powerful tool for making sure your former frequent customers continue to be frequent customers. You can also search by discount name, so whatever customers redeem certain discounts. Next, you can search by customer group. So if you set up groups, which I'll show you in a minute, you can search all the customers that are in that group. And then lastly, you can search by products so you can see which customers have purchased certain products, which is great. If you want to target customers that bought shampoo, you can target them to get conditioner or any other combination of things based on which products they purchased. Now at the top, you can add new customers. Here you can import a list of customers from a CSV file here, export your customers to CSV. Here you can manage groups. So if you want to create additional groups or edit any additional groups, you can do that here. Here you can create custom fields. So for example, if you wanted to create a birthday Field, you can search customers that are having a birthday at a certain time. You can put a date. Default value would be what date would automatically be set. Since birthday is different for everybody, we'll leave that one blank. You can create other groups such as gender. So if you wanted to see which customers are male, so you could send them certain male oriented promotions, maybe for shaving cream that's geared for men, something like that, you can do multiple and you could put in female, male and you'd have that again. We probably don't want to do default for gender. And once you've created these custom fields, if we go back, you'll have filters for them. So every time you create a custom field, you'll have a new filter. So if you wanted to see who had a birthday from May 1 to May 31, you could put that in and send them out a promotion for their birthday. Or just find your male female customers and anytime you want to set these values, you can pull up your customers. Click Edit and you can change it here. Next we'll go back and that information will be saved if we pull up our customer information again. Show you how to look at past purchases for a customer. So you click Purchases next to their name. It'll show you all the transactions they have for any location that you have in your account. So in this location we have two. You can pull up that transaction, see what they bought, what day time, the employee that rang it up, customer name, etc. If they need to reorder something, you can click Reorder and you can process a transaction for the same thing. If you want to process a new transaction, you can simply click delete, remove it, add something new, check out, click Pay Now. If they've paid with a credit card in the past, you'll have this on file and you can simply use that credit card or a new credit card, or you can use a different payment method. So if we go back to our customers feature and we'll pull those customers up again. Show you how to add comments. If you want to add it for a single customer, you can click Add Comment next to their name and put the comment in. If you want it to be for multiple customers, you can do checkboxes next to several. Click here and click Add Comment and a box will come up and it will get added to all customers. If you need to view comments, you can click the Green plus button and it will show comments. If there are some, click View and it will show the employee that made it and a whole list. This is pretty important so you can see your customer interaction history over a period of time and glean some powerful information that will help you make some sales. So next we'll show you the CRM on the iPad app. So here if we touch the customers button you can see all your customers. The top you can touch my customers and see which ones are assigned to you. If you touch the plus button it will allow you to create a new customer. If you touch the lines right next to a customer it will show you information about them. You can see their favorite orders, you can see the last time they ordered any other contact info. If you need to edit something you can choose to edit it. You can see the custom fields populated here so you can see the favorites in the last order populated by sales view. It will show you any open orders and you can select or invoice them. From here it will show you past closed orders to refresh. You can touch that button and it will also show you the comments. So you can see here we have Aaron commenting about him wanting to order some wine and I've commented that he's going to set up the order. You can add additional comments at any time and it'll show that log both on the iPad app and salesvu.com if you need to add a customer to an order you can simply just touch their name. You can see it'll simply add it to the order. You can add some products, check them out, it'll automatically populate their email address and that order will be assigned to that customer. We hope this video helps. We hope it'll help you track your customers more effectively and make more sales to them based on their needs. If you have further questions, please feel free to send us an email to supportalesv.com or give us a call at 888-900-5819 anytime from 8am to 10pm Central Time, seven days a week.










