SalesVu tutorial on setting up pre-order events with time slots, syncing them to your POS, and tagging orders by event phase. Learn how Event Mode works on the register and how the Sales and Profitability Master Report captures event sales with filters for products, categories, SKU, and vendor.
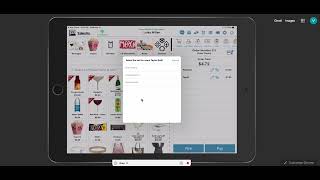
Welcome. In this video I will be walking you through how to create events and how to see the reports after the events. Now for this specific video we will be creating pre order events which have the option to create time slots for pre event intermission and post event for making orders or creating pickup orders as well. Now for this case the first thing we need to do is go to the left menu and go to either appointments or time slots. Typically you will be able to see here appointments and then go to time slots. But I already have saved these timeslots in my menu. Now in here if you just went to appointments directly, all you need to do is click on time slots and then simply create a new time slot in here. From here you can add all of the information relevant to the event. Just make sure that the event type here is under pre order for event. This is very important. Then all the other fields will be according to the event you're creating. So start time and end time can be whatever you need. In this case I'm going to leave it for the full day for example purposes. You can also have an event that's recurring for all day some days and then select the end date. Here you can add the event name. In this case I'm going to do a Taylor Swift concert and after that you can do select the pre order pickup availability. So this could be for the pre event intermission and post event in this case and then we click on save. After this is set up you will be able to see this on the POS that is enabled for that location. So from the POS what you can do first is go to the gear icon and sync with cells. This will help you make sure that everything you created or changed on the backend will be shown on the positive such as the event we just created. Now the second step is going to the Gear icon and click on Switch to event mode. Here you will be able to see every single event you have created. In this case we have Taylor Swift and then we can see that on the top it says Event mode Taylor Swift. All we need to do is simply add some products to the order and then once we're going to close it and tap on pay, the system is going to ask if this is going to be for the pre event for intermission and post event. Now this is going to be relevant for reports and also for the prepping time for the items. So in this case I'm going to add this for pre event and then finalize the whole transaction with cash credit card. So splitting the Payment, gift card, anything that you have enabled in here and that's it. Now from the back end, I'm going to show you an example of how the reports will look on the back end. All you need to do is go to reports and then under all reports go to the only one Sales and Profitability Master Report. And from here you have the option to go to Advanced Options, Filter by products categories or subcategories. And then you can also break down the report by the events. In this case, I selected the very last event, which is the one we just created, and I'm going to see the sales. Now, this report allows you to see multiple events at the same time or just one. See all the products information. Here we have the location, the name of the event. We also have the product information. We have the date as well the profitability information for all the products. If we keep scrolling, we can see the quantity sold and then we see the sales performance as well. Now this report can also be customized a little bit in a way that you can add more columns to it. For example, if you're selling merch and you want to see the SKU barcode, or if you have vendor information, you can also add it into this report and so on. This is a report that can be exported or printed. Thank you for watching and let us know if you have any questions.
 eCommerce, point-of-sale (POS), ERP and Data Analytics platform for retail and restaurant businesses