
SalesVu Lite Admin Training
SalesVu Technical Support walks through the admin portal to set up your account, locations, products, employees, inventory, and payment methods. Learn how to configure settings per location, manage staff access with roles and PINs, and handle billing before going live.
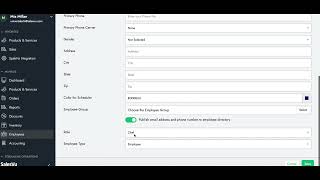
Welcome. In this video I will be walking you through a live admin training in which I'll show you how to manage the most basic things, general settings and how to view the information that has been updated by our data team. Now, after you log in from any device, it could be your computer, iPad or iPhone. You can see this screen which is what you already know from other videos and what I teach about how to organize this first dashboard where you can see some information of the day and how you can also rearrange your favorite parts of the left side menu so you can access them quickly. Now the first thing I want to walk you through is how to set up the basic account settings. So for that you're going to go to this drop down menu next to the name and then go to Account settings. Now in here is where you can add the basic information of the owner, such as first name, last name, the email address and then you can change your password. Now sometimes customers prefer to have the name of the business for the account for the admin account and then have a specific email address to manage this account. Other people prefer to have the actual name of the person who will be managing primarily the account. That is completely up to you. Just make sure that all of these fields are filled and that you have the password. Now when we set it up for you, we typically have a password. We'll give you it and then you can change it. And the way to change it is coming here and adding the old password and putting the new one. So that's how you can manage this. The next thing is currency. If you're located in a different country you can select the currency symbol. Here we have many pounds, euros and so on. So you can select the one you need and also select the currency symbol position to the left or to the right. Finally here you can set up the date and time. So we have the date format. Here you can select which one you prefer in this drop down menu. Also the date separator if it's by a dash or not, and then the time format in which you can also select from this drop down menu. How you would like to see the hour. So that's all you can set up from here. Now I'm going to go to the same menu and from here I'm going to go to Location settings. Now location settings is already explained a little bit in the other admin training video in which you can set up first the payment methods and we talk about house accounts and we talk about tip settings as well. Now from here I Just want to walk mainly through the other parts such as general settings. Here is where you can enable in this disable some specific things that you want that you can customize for your own account. Always remember that majority of the parts of each section have this drop down menu to select the location. That is because each location can have its own preferences so you can set that up that way. So always make sure you're in the correct location and then you can set up the POS settings and if you keep scrolling down you have the order up settings. Now this is very general such as displaying the employee list after selecting products and services require customer for cash payments, having a back button or changing the color of the text in the product and category on the pos and the same thing goes for order up. Now majority of these settings are very self explanatory but if you have any questions of course you can contact us and we can let you know what will be the main ones. We typically like to leave it with with the generic ones but there is always option for you to customize it according to what you need. So if you keep scrolling down you have the order up settings where you can hide some things or you can allow gift card sales and so on. Now here we have cash nominations which is like tip denominations too in which you can simply enable more or disable the ones you don't need in here anymore. Cross Device Sync is basically telling the iPads to communicate with each other, so one order can be seen on two iPads at the same time or more you can enable this feature and disable or enable the iPads this way. Then we have email notifications in which in here you'll see again a list of notifications that can be enabled or disabled and you have the space to add as many email addresses as you need. Just make sure when you separate them, you separate them by tab and then in here you can see what are the options to receive email notifications for. And last but not least we have received settings and the logo which is just adding your logo and having some sort of again options to have the receipt settings again for your business. Now the other thing I want to explain in this video is this drop down menu which will allow you to go to printer settings and tips which is discussed on the admin training video. But again this is where you can set them up as well and also any integration. So if you have Square, PayPal, Charlie, Testatura, Spectrix, all of these sort of integrations can be managed from here. So if there is any Information you need for the installation, the integration and information that was given to you that needs to be applied on the system. You can always contact us majority of the time. This is something that we do during the onboarding process. But just for you to know where this information lives and to check it out, you can come here to drop to this drop down menu and select the integration that corresponds to your business. Perfect. Now let's go to products and services and other sections in which are important for whenever our team is importing data into your account. So, products and services. Again this is where you can add all the products, all the details, the categories, enable the locations. But if you just want to have like a quick view of how things are looking, my recommendation is downloading the iPad with the same login information. Check out how the images are looking, how the color coding is set up by the team, how the products and the prices are looking. I think that's more visual way to review the menu. However, you can come here and also use these drop down menus to simplify the menu and view it in a more detailed way. So for example, in here you can come to edit in this little drop down menu if you want to see the specifics of the product and check that everything's correct. So if it's product that is enabled in all locations or in only some of them, you can check it out. In here you can check out the color coding. By simply putting the the hand in here and selecting the color, you can see the image as well. The name type, the selling price and everything else can be seen from here. Obviously you have the modifier groups and the components in which we help you out how to set them up too. But if you want to see them also in a more specific way, there could be seen by the Manage modifier section in which you can see the modifiers only. In this case we have the color and the size and the same thing. If you want to edit them, assign products to this specific modifier, delete it or set the position. It can be done from here. So when we open up the modifier group, we see what products have been added to these specific groups group. Same thing goes for managing the categories. Here you can see only the categories information for them. And then you can do the same thing for tax management, unit conversion, color management and tax rules. So this is kind of like the high overview of the products, how you can see them and how you can also look at the specifics of each one of them. Now with this drop down menu you can export A basic structure, import basic structure and then do other sort of things like sorting the product list and override. Export the override structure too. Perfect. The next thing also is looking at discounts. So if you have discounts that you want to be added by the team for you, here's where you can see the discounts. The main screen as well. There is other videos that explain how to create coupon codes, discounts and all of the other options we have. But if you just want to take a quick look, this is how you can see them. And any specifics again is by this drop down menu and going to edit and you can see which is the discount that has been created, what products apply or what categories apply for it. So you can review the information that has been set up for for the team. Perfect. Now another very important part is employees. Under employees is where you can see who has been added. Typically we tend to add the employees that are doing the onboarding sessions and we tend to give them access to everything. Obviously it depends on how the meeting goes and what your specifics are. But here is where you can see the list of all the employees that have been added. Now, if you want to manage their access levels, it could be by person or by roles. Roles and all of it is explained in the larger admin training video. But if you just want to quickly check for the part of the onboarding who has access to to what parts of the portal and of the pos, here is where you can see it and manage it. So if it's just by one person, you can come to drop down menu and edit any information that has been added. We add the information that has been given to us. But if there's anything else that want to be added, like the primary phone number, the city address state and so on, it can be added from here. And then if this person has a different role, you can come here and select another role. Another thing is the access level. So in here you can see again the roles that have been created. You can edit the access of each role or by each person so each one can have its unique access level too. Again, we tend to add all the managers first, so they can all see all of the information and access everything. But then you can come here and edit each one of the people that have been added. Specifically password and pins. Just a quick reminder that anyone who needs access to the portal, they need a password and anyone who needs access to the pos, they need a PIN code. So this is the way you can enable them. We typically give everyone A password when we add them to the system. And if anyone wants to change the password, here is where it can be done. Just click on the drop down menu and reset the password or the pin. And last but not least, very crucial to have locations enabled. Even if it's just one location that's on the system. It's very important to always have the location selected, just because this is the way the system will recognize the employee. So you can see it on the list on the POS and also on the backend. So just come here and make sure if it's just one, that that one is enabled. And this way you can also manage it. If there is many locations as well, you can go to the drop down menu and select different employees, or go back here and simply look for each one of them and have all the locations. Now for the owner, whoever is set up as the owner of the account, that person will be the person that can see all of the employees, doesn't need to have allocation added. It's already like on every single one of them and will be able to access the portal for everything. Then the other things are hours, labor, report, scheduler timeout request, shift trace request. That would depend on you if you'd like to have those capabilities on your portal. But up to locations is one of like the most crucial things for managing the employees. And then from here you can set up things your way or chain things after the onboarding process is done as well. Now inventory tends to happen at the very end of onboarding. What happened is that we just add the products and we start doing some test transactions. But the day right before going live, we typically delete all of the information here and add the current inventory account that you have currently on your business. So everything starts fresh and everything starts making sense for all the reports. So basically here what you can do is export the report and then add all the information or the the team will also be able to help you with this and then simply have all the information ready to go before you go live. And here you can see the quantity and the units. Everything before we do that will be already set. Like the units for each one of the products, the threshold, the deduct inventory quantity and then the products and so on. For last cost, price and final retail price, we typically do purchase orders. So if you have vendors and you want to add the vendor information in such a way that everything makes more sense and that all your reports are correct and up to date, we can add the inventory count as a purchase order and have these already set up ready to go before you go live as well. That's something that is discussed during the onboarding process. But here is where you can actually see the list of all your products and make sure that everything makes sense in the way of the units, the product and any sort of like threshold level that you want to have set up and then the deduct inventory quantity. Now locations, this is where we when we create your account we set up the location name and all the address and all the information of the phone and the information for the location. But if there's anything you'd like to change, like the contact information, here is where you can edit it and simply change or add any other information that you think it's important to have it listed. You can also describe the business and add any other information that you consider is important as well. Here you can add more locations if your business starts to grow and you can manage them separately, have different inventory count, different settings and different customizations for each one of them. And also last but not least, at the very end is where you can manage your own subscriptions. So here is where the invoices are sent for if you want to add any other app licenses, any other employee licenses, or have another bundle for a new location, or if you want to upgrade so you can have access to more features, you can always come here and view the cloud solution features, learn what's on each one of the bundles and then if you decide to purchase, always come here to purchase and you can see the information of each one of the locations. In this case we see which one is active, which one is paused, which one needs to be purchased and then continue with the whole process. You can click here for guidance and also here too you always have contact with us. Under here. Under support there is knowledge based articles, videos you can support. You can request support access or support tickets as well. You also have the ability to chat with us. This is the quickest way to get in touch with us. Or also in here you can go to contact support. Thank you for watching and let us know if you have any questions.










