
SalesVu Management Portal Update 3/1/14
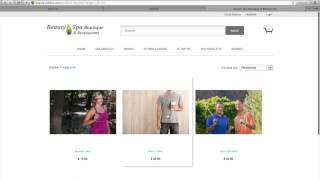
A SalesVu Technical Support walkthrough (video) demonstrating a redesigned SalesVu web portal and new paid/optional features. Key updates shown include: orders (partial product-level refunds, reorder, employee reassignment, bulk reconciliation flags), reports (Z-report breakdown), customers (assign employees, custom fields, advanced filters), settings (closeout email routing), discounts (coupon generation and downloads), inventory (adjustments, inter-location transfers, transfer logs/CSV export), and a paid profitability module (margins, COGS, historical inventory cost and charts).
Hi. In this video, I'm going to walk you through the new features and layout in the salesvu.com web portal. First thing, you probably noticed that we completely changed the portal. We've added this latest news section where we'll periodically post videos and walkthroughs of new features. We used to have tabs across the top. We've moved all those tabs underneath the features section. So everything that you used to always have on the tabs, you'll find here. We've also added an app center where we'll periodically release advanced features for purchase. The first thing I'm going to show you that we updated is on the orders tab. So we've added partial refunds for credit card transactions based on product. We come to this credit card transaction, we see that there's a women's tank and a kid's sweatshirt on here. So if we wanted to refund or exchange just the kids sweatshirt, click on Refund Exchange and you can click Refund next to the kids sweatshirt. If you want to return to inventory, you check here. If you're going to exchange it for another product, you can click Exchange and it'll pull up your product list. If you want to just do a refund, you'd click Continue. It'll show you the credit card, it's going back to the refund amount, total paid amount, and you'd simply click Next and it would refund your customer. In this case, we'll just leave it. We offered a reorder option. So for businesses that have frequent customers where they're buying the same thing, such as maybe a hair salon, getting a haircut, water delivery, something like that, you can come down, find their order, click reorder and it will take you right into this order. You can click Pay now and it will use their existing payment information. If you want to delete products from here, you can also do that. If you delete both, it will ask you to add new products. So we've also added the ability for you to change an employee on an order. So here you can see the employee on this order is Aaron Child. And if you want to change the employee assigned to it can come and click and change it to Jared Sterling. And now you can see it's changed and that'll change across the board. As well as in the sales reports, we've also offered several bulk actions. So you can click on say you want to change these, status of these. And we've added reconciled and not reconciled for accounting purposes. Make sure that you've reconciled it with your accounting. And on the bottom we've we've set up various shipping options for e commerce or telephone orders. Lastly, we've offered some new search filters for these different statuses. So if you want to have the reconciled yes and no and all your shipping statuses, the next thing I'm going to show you is under the reports section. If we go to reports and we go to zreport choose our location we'll do today you can see your different gross and net sales, cash transactions, credit card, external internal tips, refunds. Basically gives you an entire breakdown of what you sold throughout the day and the various ways people have paid for them. The next thing I'm going to show you is the upgrades we've made to the customers feature. So go to features and customers you can see if you want to load all customers you just click submit. You can see if I click edit next to a customer name. You can now assign an employee to a customer. So we leave Erin, you can use that assigned customer to sort for just your customers. Since I'm signed in as Erin, it shows all her customers. Next thing we've added is the ability to add custom fields. So if you want to add you know company, you can put a default value for that one. You probably don't. You could make a drop down menu if you wanted to track your customer's gender and you just put multiple and you could put female mail, you can add more values if you want. Now if we go back all of these will be a field available for each of the customers go down. You can select this you can put in their company name and it'll allow you to track that information. Lastly we've added some additional filters. We've got order type, you can do purchases by amount spent, date spent frequency, you can do recency discount search by product if you want to so you can see what customers buy which product. And then anytime you add a field it will also create a filter for that field. So you want to see all your female clients in case you have marketing that would only go to them or all your male clients. Next I'm going to scroll up and show you a new setting that we've added. We come to the settings menu and in this case we'll choose a location and go down to email notifications. We've now added the closeout email setup from salesvu.com so you can set up as many emails as you want and then every closeout from all the payment devices for that location will go to those emails. We've removed the ability from the app once you set this up. So basically if you set it up on the app and then set it up here, it'll automatically override what you have set up on the app. The next thing we're going to do is show you a new discount that we added for E commerce. So we go to discounts and we'll choose our location and say we add discount and if we wanted to add 20% off apparel discount, a coupon code for 20%, we'll choose a category in this case and do apparel and you can put in how many products. It's going to go to a limited or unlimited number, number of codes, number of times each code can be used, and an expiration date. So let's say it was good through the end of the month and then we save it. And at this point we can click here to download the codes. If you need to come back and get them later, you can click download here as well. So we'll download those codes and you can open them in Excel, you can open these in Excel or any other spreadsheet program such as OpenOffice or numbers. And if we go to our website and I'm buying this T shirt and we go to this checkout and at the bottom you now have a discount code option. If you have it turned on in E commerce and you click apply and it takes off our 20% and we can go from there. All the discount codes will show up in the discount report in terms of how much is taken off. Next thing I'm going to show you is the changes we've made to the inventory page. Come down and click on inventory. And first off, we remove the first time setup option. If you want to add products to inventory now you just go to view, adjust inventory and for example, we wanted to add 10 more T shirts, maybe two more of these T shirts. We'd add them in. Click save. It's going to pre populate the cost of the last time we entered this product. It's a new product, it'll just say zero. So if we want the new 10 cost another 25 cents. We can put that in. These are the same. Click save and it automatically adds those in and inputs the cost for that quantity, removing the first time setup. You can do this anytime. You can do as many as you want, just one at a time if you want. We've also moved the profitability report here for unpaid inventory for current users. Profitability report looks exactly the same. If we go to the app center and enable the new Inventory, there are some additional options. So once we've enabled it, we go back to inventory and you can see we now have inventory transfer. So if you have multiple locations, you can transfer inventory. If we wanted to go from our boutique to our wine distillery, just the T shirts are available for transfer. Basically, it uses any product that has the exact same name. If we wanted to transfer two of these, two of these and five of these, input that in and click Transfer. If you want to see a log of your transfers, you can go to the transfer log, choose your source store and destination store, enter a start date. I'll go back to February and choose tomorrow and show the log and it'll show exactly what's been transferred and what data was transferred and at what cost. You can also export this data to a CSV which you can open in Excel or other spreadsheet program. Next, if we go back to inventory and choose a location, the next thing that changes when you upgrade is if you go to the View adjust inventory page. You'll now see that all those statuses I showed you on the orders tab to be delivered, to be shipped, to be picked up will be shown here. You can see how many outstanding you have. So you can see, okay, we have three to ship and only two available. Lastly, I'm going to show you the profitability report and the updates we made to it in the paid version. So as always, we have the margin percentage. So if we look at this for the last seven days, see your profitability, you can also see how much money you've made. And if we look at this category, I will just do level two, for example, you can see the profit for each category. We can also plot this on a bar chart and we can say, okay, our most profitable thing in the last week are golf outings. The next thing is that our facials department is doing very well and our nail products, it's a very powerful tool to see where the bulk of your profits are coming from. Next thing is, we've also added the cost of goods sold information. Here you can plot both of these figures. Average cost on po, average cogs on selling price. You can do it by product. And again, you can put in the date range. We also have most recent metrics, so you can see last selling price, last PO cost for your products. Say we just want to do this one location. And just our men's apparel. You can see, okay, these are our average costs, last PO cost, again, you can put that in a table and see how that goes. Then lastly, we have our total cost of inventory. And you can see this. Let's say for yesterday, you can see, okay, so now we're tracking this. We used to only show total cost of inventory for current, but you can now go back. As soon as you pay for this, we'll start tracking it in our servers and you can see historical cost of inventory. So if you need to see a specific day, the end of a month, something like that, you can absolutely pull that up. You can also pull it up by product and see it. You can also plot this over a period of time. So if you want to change it to a line chart and see what your daily total cost of inventory is, go back to, say, Wednesday through today and submit. And you can see how your total cost of inventory changes over time. So we hope these features are going to help you with your business. If you have any questions or feedback, please feel free to send us an email to supportalesv.com or give us a call at 888-900-5819. From 8am to 10pm Central Time, seven days a week.










