
SalesVu POS: How to Setup Your Printers and Cash Drawer
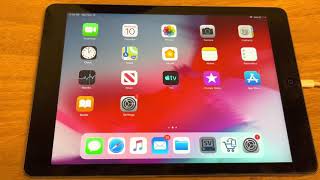
Juan walks through connecting receipt and kitchen printers and a cash drawer to SalesVu POS. You'll power up the hardware, pair devices via Bluetooth or USB, enable them in the app, and assign printer roles through the SalesVu portal.
Hello, my name is Juan from Solsvue, and in this video I'm gonna walk you through the process on how to add your printers from the POS app. Here's what you need to have to get you started. So in this case, what we're gonna use is the SalesView app. POS and also we're gonna need the drawer, going to need the received printer. That is going to be the main one. And in case that you're going to use one on your kitchen, you have to get another printer. In this case, we're going to use a USB printer and also we're going to use a Bluetooth printer. So the first thing that we need to check is the power cords from the printers are connected to the power source. Now that the printers are connected to a power source, what we need to do is just turn on the power and we're going to just like turn on them right here. You're gonna hear a sound that means that the printer is connected to the power. Also we're gonna repeat the same action with this one. The USB printer that is, this one is going to be connected to the I through the USB cable. So the only thing that you need to do is look for the USB port that is behind of the printer. You're going to connect the cable and after that you're going to connect the other side of the cable to the iPad port. That way this is going to be connected. And right now we're going to set the Bluetooth printer in the settings of the iPad. Now what we're going to do is go to the settings on the iPad and we're going to make sure that the Bluetooth is on. In this case, it's off. So the only thing that you need to do is just turn enable the Bluetooth and it's going to be automatically looking for your devices. So right here you're going to see the printer. So the only thing that you need to do is pair if this message pops up on your screen. Otherwise you have to tap on the name of the printer. Right now you see that it's connected. But in case that you already have it connected and you're having any issue with that, what you need to do is go to the information icon right here. You're gonna forget this device, tap ok and redo the whole process all over again. Remember, only if you're having any issue with the Bluetooth printer. So that one has been forgotten. And the only thing that you need to do is tap on there to re add that Device to your Bluetooth devices. So it's connected now. So now that the bluetooth printer is set up, we're gonna go back to the SalesView POS app and we're gonna log in with your user. So now that we're logged in, we're gonna tap on the gear icon right here and we're going to go to printer options. After you go to printer options, you're going to tap in search for printers or test print. That way we're going to find out which printers do we have right there. And also we can identify which printer is the one connected to the pos. So once you start, you're gonna see that these two are right here, but they are not activated. So another step that you need to follow is tap on the check and do the same with the second printer. And after that, we're gonna do test printer. So as you heard when I tapped on text print, you heard the sound. So we're gonna do that again so you can see it on real time. What's happening when I hit this button. As you can see, this printer just like printed the paper. And we're gonna do that with the second one. That way you're going to be able to identify which is the printer that you have right here on the pos. You can change the name right here, but if you want to change the functionality of the printers, you have to go to the sales view portal and set that up. Something very important that we need to remind you after you search and test your printers is that this cord that comes out from the drawer has to be connected to the racip printer. Where are you going to connect it? In this port that is similar to a phone jack. Please keep in mind that there are going to be some ethernet connection printers. So you have to be sure that you're connecting this cable in the right spot. So you don't have any issues with that. Why is it important? Because this cable is going to be connected to the drawer, and that's the one allowing you to open the drawer. We can test that out on the pos. We're going to do a quick test regarding the drawer. And as you can see, you can see the drawer icon right here on the top part of the positive. So the only thing that we need to do is tap on this icon and you're gonna see that the drawer is going to be open automatically going back to the printer settings. Remember when I said that you can change the functionalities of the printers through the sales view portal? So we're going to go to salesview.com and you're going to log into your account and after that you're going to go to settings. Left sided bar. So we're going to click here and after that we're going to click on the three dots that we see right here and we're going to look for printer settings. So right now as you can see, you can check the names of the printers that we have on the pos. Start printer one and start printing number two. The number one is for the kitchen bar and the second one is set for the receipt printer. In this case this is correct since the start printer number two is the one connected to the iPad and that's going to be our receipt printer. So what we're going to do is change the name right here and we're going to change the name right here. After that we're going to click on save and that's all what you need to do in the Self view portal regarding the printers. And in case that your printers were set up in the other way, what you can do by changing the functionality of that is just like click on this bar. So this one is going to be the reciprinter and this one is going to be the kitchen printer. It's pretty simple. The only thing that you need to know is test the printers before changing the name so you can see which functionality do you want them to have just with one click. After configuring that app on the portal, what we need to do is go back to the POS application and we're going to tap the gear icon. After that we're gonna tap on sync with cells view. That way when we go to printer settings we're gonna see the names that you put on the portal showing right here. So as you set them up as kitchen and receive, this is how the printers are going to be named. So let's try to do an order. For example, let's say that I'm gonna order a smoked grapey and also I'm gonna order the bakla. Once I do this, I'm gonna hit on save. So this is gonna go to the kitchen one. As you saw, you can see the name of the items right here. And this is going to be for your kitchen. Once you do that you can go to orders right here in the application and you're gonna see the order that we just placed. So we're gonna go to printers and we're gonna print the receipt. That way you're gonna have the receipt that you can deliver to your customer before he's going to pay and after that you can just like pay. Let's say that we're gonna pay in cash and that he paid with the fifty dollar bill. So let's just stop that. You're gonna see that the drawer is open and we can also print the receipt right here. Just tap this print receipt button and you're gonna have this right here. So as in total, we will have three different receipts. This is the first one that goes to the kitchen so the meal is prepared. We also have this one that is going to be the grand total. This is the one that we're going to give to the customer before he pays. And also we're going to have the grand total, including the transaction of the final receipt. As a heads up, since you know that there are a different kind of printers that can't work in the Sales View app. If you're working with the wireless printer, it's pretty important for you to be connected to the same WI FI network that you have for the POS and for the other printers that you're going to use at that time in case that you're working with some people from it. And you need to find out which IP is your printer using. What you have to do is this. Let me show you how you can do that. First of all, you're gonna turn off in this side of the printer, this button. So you're gonna wait until this light disappears. That way you're gonna know that the printer is turned off. So you're gonna turn it on the same way that you turn it off. And at the moment you hear the sound, you're gonna press this button. Then you have to release and press again. That way you're gonna see the IP address that your printer is working with right now. And it's gonna be super simple. Also, another pro tip that we have for you is in case that you don't know the type of printer that you have, you can just turn it upside down. And right here you can see the letter that it finishes with. So in this case, this is a U. This stands for usb. And let me show you this one. As you can see, it finishes with the V. So that's going to stand for Bluetooth. That was all for today. And in case that you do have more questions about how to set up a printer from the pos, just let us know by sending a message to support at slosgeo. Com. Thank you for your time. Hope you enjoyed the video.










